As we all know that our mobile phones are generating data all the time when we are using them. Too much data will slow down our device and even cause other problem to make our iOS devices perform improperly. As an iOS user, you may have the habit to delete useless data from iPhone/iPad/iPod frequently to save space, but does it mean you have deleted the data from your device permanently?
As we all know, there is a recycling feature in computer or Mac to hold items we have deleted. For Windows PCs, it's called Recycle Bin. For Mac, it's called Trash.

There is also a similar feature in some apps in iOS device, which is a folder called Recently Deleted in iPhone Photos, Notes and Mail app. In this article we will show you how to empty trash on iPhone/iPad/iPod permanently.
- Part 1: How to Empty Trash on iPhone/iPad/iPod Photos
- Part 2: How to Empty Trash on iPhone/iPad/iPod Mail
- Part 3: How to Empty Trash on iPhone/iPad/iPod Notes
- Part 4. How to Permanently Empty the Trash on iPhone/iPad/iPod
- Part 5. FAQs of Emptying Trash on iPhone
Part 1. How to Empty Trash on iPhone/iPad/iPod Photos
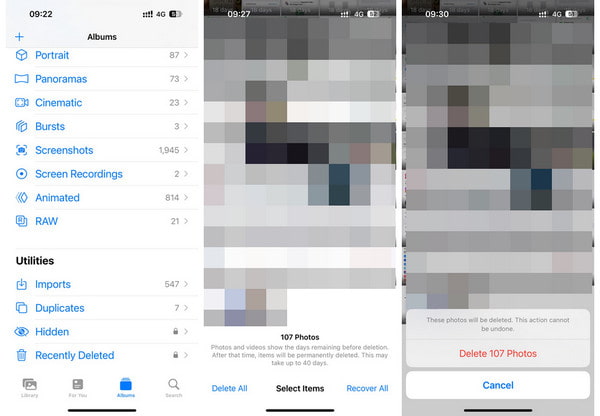
There is a folder named Recently Deleted inside the Photos app.
When you delete some photos or videos from your album, the deleted photos or videos will not be deleted directly from your iOS device. They will firstly go to the Recently Deleted folder and iOS will keep them for 30 days. In the 30 days, if you want to find the deleted photos or videos back, you can recover them from this Recently Deleted folder.
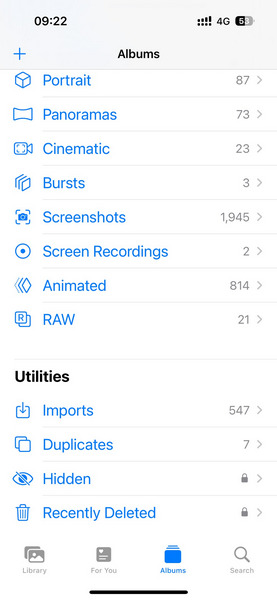
However, if you make up your mind to delete the photos or videos from Photos app, it's nonsense to keep them in the Recently Deleted folder for 30 days, cause it will take up the space in your device. Tap on "Recently Deleted", you will see the photos and videos you have deleted, together with remaining days the iOS will keep them for. If you cannot find pictures and videos you removed in this folder, it means that they have passed the 30-day grace period and been erased by iOS permanently already.
To delete the Photos trash, please follow steps as below.
Step 1 Open Photos > Albums, scroll down until you see a trashcan icon square named Recently Deleted.
Step 2 Use Face ID to access this utility. Click Select > Delete All > Delete X Photos to confirm the operation to empty trash on iPhone/iPad/iPod Photos.
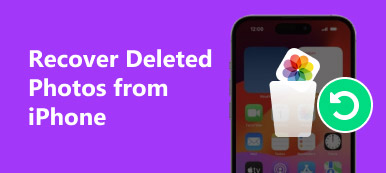
What if we delete photos from iPhone/iPad/iPod mistakenly? Don't worry, you can recover deleted photos from your iPhone to find back your precious photos.
Part 2. How to Empty Trash on iPhone/iPad/iPod Mail
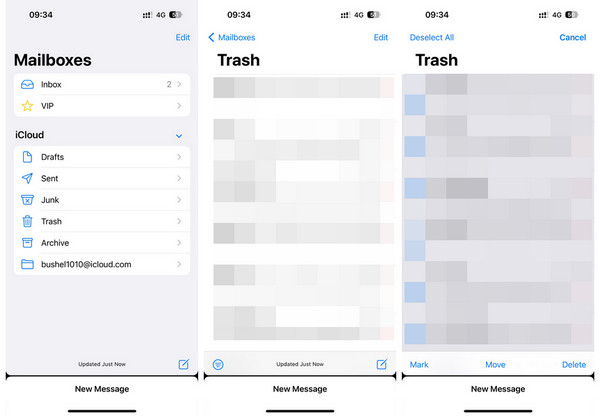
If you have more than one email accounts associated with the Mail app in your iOS device, the deleted mails and spam will occupy more and more space in the trash folder.
In order to empty trash on iPhone/iPad/iPod Mail, the method is similar to the one of emptying Photos trash:
Step 1 Open Mail app and tap the Trash option to enter the trash interface.
Step 2 Tap the Edit option at the upper right corner of the screen. Then tap Select All to proceed.
Step 3 Then, you can tap the Delete option to remove all the mails in the trash folder. You can also empty the Junk folder with the same method.
Unable to delete email messages on iPhone in Trash? Find the solutions here.
Don't miss Retrieve Deleted Emails on iPhone if you delete useful mails by mistake.
Part 3. How to Empty Trash on iPhone/iPad/iPod Notes
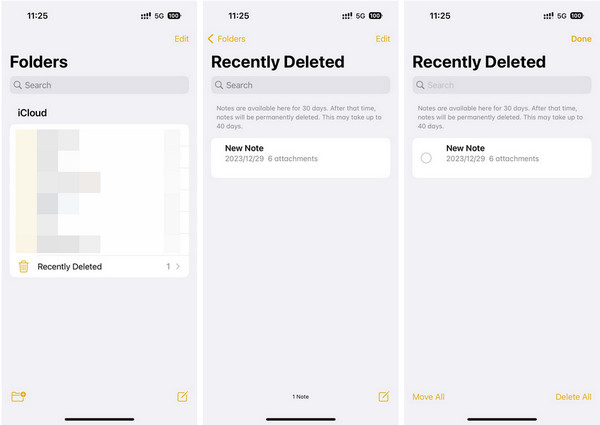
The method to empty trash on iOS devices Notes app is similar to that of Photos and Mail app. There is also a "Recently Deleted" folder in the Note app if you have deleted some notes. The deleted notes will also stay in the "Recently Deleted" folder for 30 days before they are erased from your iPhone permanently.
Step 1 To empty the trash in Notes app, open Notes > Recently Deleted to find all your deleted notes.
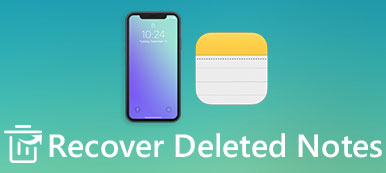
Step 2 Tap on Edit > Delete All to delete the trash on Mail app permanently. If you delete notes on your iPhone by accident, don't worry, learn how to recover deleted notes on iPhone here.
Part 4. How to Permanently Empty the Trash on iPhone/iPad/iPod
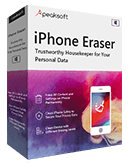
The above operations will simply delete files from the trash, but the data still exists somewhere in your iPhone. If you want to completely empty the trash in your iPhone, you'd better get help from a professional phone space-releasing tool. Apeaksoft iPhone Eraser is one of the best choices for you. It offers a 100% promise to securely and quickly free up space from iOS devices. Besides, the all-in-one tool can also help you permanently delete bookmarks on iOS devices to release more space.
4,000,000+ Downloads
It can help you delete everything on iPhone and erase iPhone to protect your privacy.
It allows you to free up space from multiple devices simultaneously to save your time.
Moreover, it can help you erase all data from iOS devices safely and clearly.
It supports various iOS devices, including the latest iPhone 17 series.
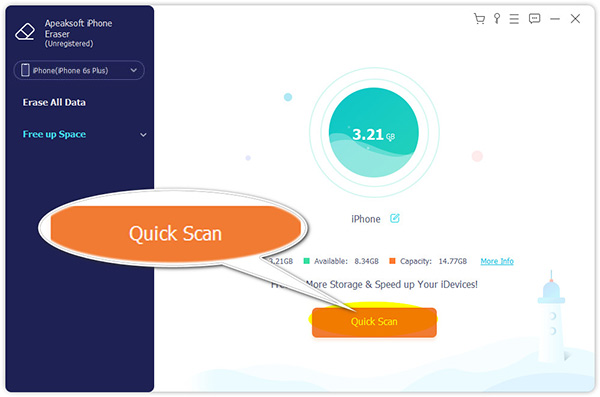
How to use Apeaksoft iPhone Eraser
Step 1 Download and run the iPhone Eraser on your computer. Connect your iPhone to your computer via a USB cable. Unlock your iPhone and tap Trust option when the message appears on your iPhone.
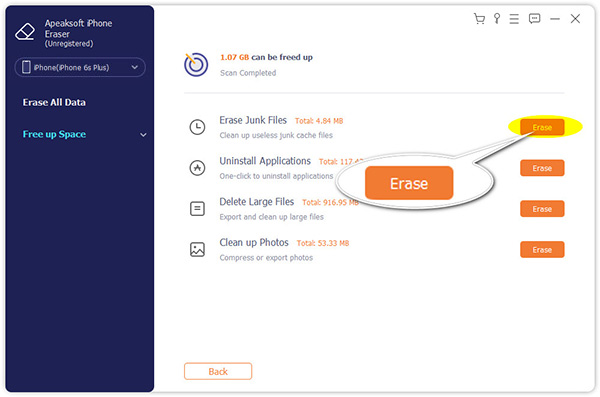
Step 2 Back to the software and click the Free up Space feature from the left sidebar. Then, you can click the Quick Scan button to scan all the junk/large files, useless applications, and photos.
Step 3 You can select the data type you want to delete and click the Erase button next to it.
Part 5. FAQs of Emptying Trash on iPhone
Is there a recycle bin in iPhone?
In fact, there is no recycle bin on iPhone. If you deleted or lost important files on your iPhone and want to get them back, although no recycle bin on iPhone, you can get them back from iTunes backup or iCloud backup.
What happens to data when you empty trash on iPhone?
When you empty trash on iPhone, the data will be deleted. And there is no way you can undo trash on iPhone.
How do I empty trash on Mac?
The easiest way is to click and hold the "Trash" icon in the Dock. Then, select "Empty Trash" in the popup. For running Secure Empty Trash, you need to hold down the "command" key and click "Trash", and "Empty Trash" will change to "Secure Empty Trash". Just select it.
Can I restore data once I empty trash on iPhone?
Normally, you are not able to restore data. But you can use a third-party tool like Apeaksoft iPhone Data Recovery to help you recover deleted data.
Conclusion
This article lets you learn several methods to empty trash on an iPhone with detailed guides. Now, you can empty trash photos, emails, and notes regularly to release more space for your iOS device. Moreover, you can automatically free up space using Apeaksoft iPhone Eraser.