"I used a shared Google Photos account with my wife, I can find the shared photos on the website, but Google Photos is not showing all photos on my smartphone. What should I do to fix the problem?"
 Google Photos is an important Cloud service to sync photos and video files between different devices. Once you have uploaded the photos, you might still find Google Photos is not showing all photos on iPhone. Here are 5 frequently used methods from the article.

- Solution 1: Clear the Google Photos Cached Data
- Solution 2: Choose What Folders You Want to Backup
- Solution 3: Activate the Google Drive Integration
- Solution 4: More Folders Containing Photos to Internal Memory
- Solution 5: Transfer Photos between Different Smartphones
Solution 1. Clear the Google Photos Cache Data
The cache file of Google Photos is the major reason for Google Photos not showing photos. Just learn more details about how to remove the cache data to release more space for your photos.
Step 1 Navigate to Settings of your Android phone. You can tap on the Apps (Application Manager) option.
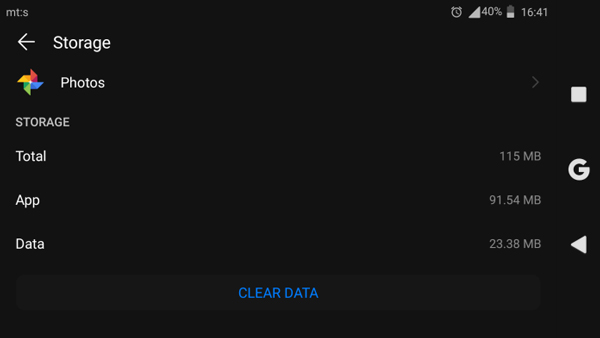
Step 2 Click on the Photos app, you can choose the CLEAR DATA option from the Storage menu to clear up the photos.
Step 3 Return to Photos and wait until the Getting Photos finishes. It will reload all photos back to your phone.
Solution 2. Choose What Folders You Want to Backup
As for the Google Photos app not showing all albums, you can re-assign the folder you want to backup for Google Photos. If you have changed the original folder, it is the method to get back the lost photos.
Step 1 Launch the Google Photos app and tap on the hamburger menu and select the Settings option.
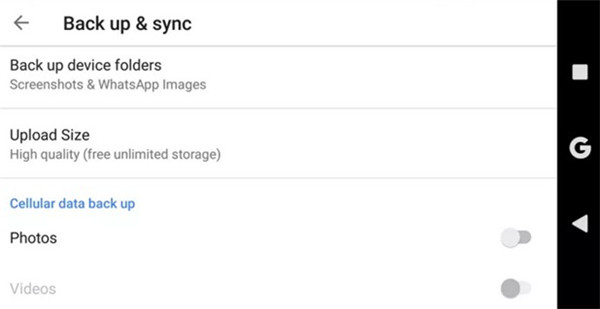
Step 2 Click on the Back up & sync option, you can choose the folder to re-assign the backup folder.
Step 3 Back to the Google Photos to check whether the Google Photos not showing pictures are available now.
Solution 3. Activate the Google Drive Integration
If only the Google Drive photos not showing up, you only have to activate the Google Drive integration. It is the most efficient method to solve the Google Drive photos not showing in Google Photos.
Step 1 Just follow the same method to open the Google Photos on Android. Choose the hamburger menu and select the Settings option.
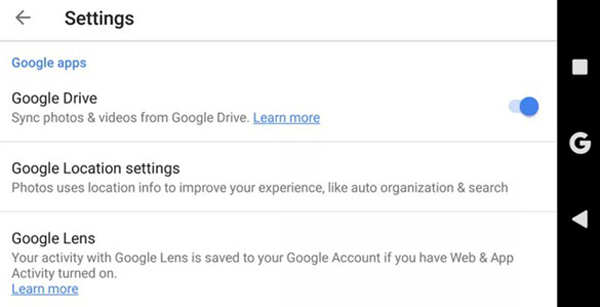
Step 2 Under the Google apps menu, you can toggle on the Google Drive option to activate the Google Drive integration.
Step 3 You can restart your smartphone and wait the Google Drive synced to the Google Photos with a few seconds.
Solution 4. Move Folders Containing Photos to Internal Memory
Since Google Photos cannot locate the folder, it is recommended that move the folder from the SD card to the internal storage. You can do it with the built-in file explorer that comes pre-installed on the device.
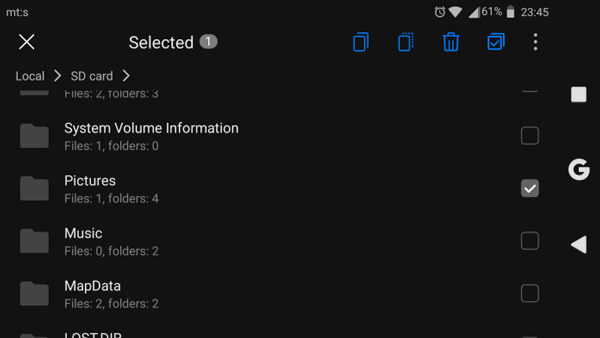
Step 1 Open the Files app and access to the SD card to tap-and-hold the photo folder you would like to move.
Step 2 Choose Move from the available options. Get back to internal memory and tap the Move option to paste the folder.
Step 3 Open Google Photos and navigate to Back up & Sync option from the Settings menu to locate the Back up device folders.
Step 4 Toggle on the newly transferred folder to fix the problem for Google Photos is not showing all photos.
If your photos on SD card are lost, you can just find how to recover the photos right now.
Solution 5. Transfer Photos between Different Smartphones
What should you do if you still cannot find the photos synced from the other smartphone? Is there an alternative method to solve Google Photos is not showing all photos? MobieTrans is an efficient method to transfer photos, contacts, music, videos and other files between different smartphones with ease.
- Convert HEIC photos from iPhone to another device automatically.
- Manage, add, delete the photos and photo album on smartphone.
- Transfer photos between devices as the Google Photos alternative.
- Manage the phone photos to make the phone orderly and efficiently.
Step 1 Connect both devices to a computer
Once you have installed the photo transfer, you can launch the program and connect both devices into the computer. Go to the Photos tab to locate the photos you want to transfer.

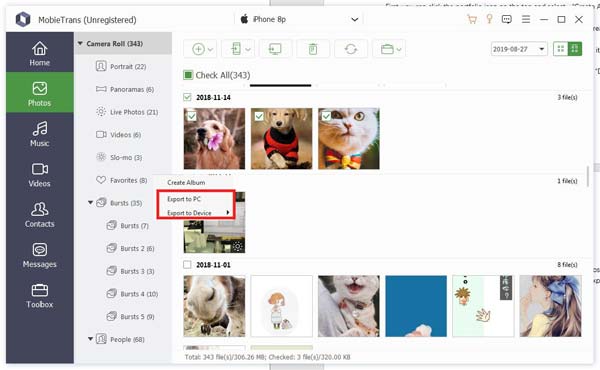
Step 2 Select the photos from the original phone
Go to the original phone and check the options for the photos you want to transfer, you can right click the photos and choose the Export to Device option and select the target phone you want to transfer.
Step 3 Transfer the photos to the desired folder
When you choose the destination folder for the target phone, you can access to them within the target phone. It should be the best alternative method to fix Google Photos not showing all the photos.
Conclusion
When you find Google Photos not showing all the photos, you can learn more about the 4 efficient methods from the article. If you are still not able to get rid of the problem, you can use MobieTrans to transfer the photos and other files between different devices with ease.