Detailed Steps on How to Erase iPhone from Find My iPhone
Erasing the iPhone with Find My on iPhone can be a safe maneuver to protect your personal privacy once your iPhone is lost, stolen, or inaccessible. This feature deletes personal data, apps, and settings from a distance, giving you peace of mind even if you cannot physically access the device. In this guide, you’ll learn the essential rules, consequences, and step-by-step methods to erase your iPhone using Find My.
PAGE CONTENT:
- Part 1: Basic Rules About Erasing iPhone from Find My iPhone
- Part 2: What Happens If You Erase iPhone on Find My iPhone
- Part 3: How to Erase an iPhone from Find My iPhone on Another One
- Part 4: A Web-Based Solution to Deleting an iPhone from Find My iPhone
- Part 5: A More Complete Way to Erase iPhone Than Find My iPhone
Part 1: Basic Rules About Erasing iPhone from Find My iPhone
Before remotely erasing your iPhone, there are several essential conditions to understand. The device must have Find My enabled beforehand and be signed in with your Apple ID. Additionally, the iPhone needs an internet connection to receive the erase command. This section explains the requirements and limitations you should know before proceeding.
1. Find My Must Be Enabled in Advance: The remote erase function only works if Find My was turned on before the device was lost or inaccessible. Without this feature enabled, you cannot send a remote erase command.
2. The iPhone Must Be Signed In with your Apple ID: Both your iPhones should be associated with the same Apple ID account. This is simply because the feature works based on the Apple ID authority if you want to erase a device from Find My on an iPhone.
3. Internet Connection Is Required: The iPhone needs an active internet connection (Wi-Fi or cellular data) to receive the erase command. If the device is offline, the erase will begin automatically once it reconnects.
4. Activation Lock Remains Enabled: Even after erasing, Activation Lock stays active. This prevents others from setting up the device without your Apple ID and password.
Part 2: What Happens If You Erase iPhone on Find My iPhone
Many users may wonder what happens if they erase their iPhone from Find My. Simply put, the device is remotely reset to factory settings, deleting all personal data, including photos, messages, apps, and saved accounts. And all the deleted content cannot be restored. In this way, your private information will be provided even if the device is not with you. However, Activation Lock remains enabled during the Lost Mode on Find My iPhone, meaning the iPhone is still linked to your Apple ID. This connection will stay for 30 days and cannot be reactivated without your credentials, even after the erase is complete.
Part 3: How to Erase an iPhone from Find My iPhone on Another One
If you have access to another Apple device, such as an iPhone or iPad, you can use the Find My app to erase your lost iPhone remotely. The process is straightforward once you log in with your Apple ID. This section provides clear steps to help you complete the remote erase securely and efficiently.
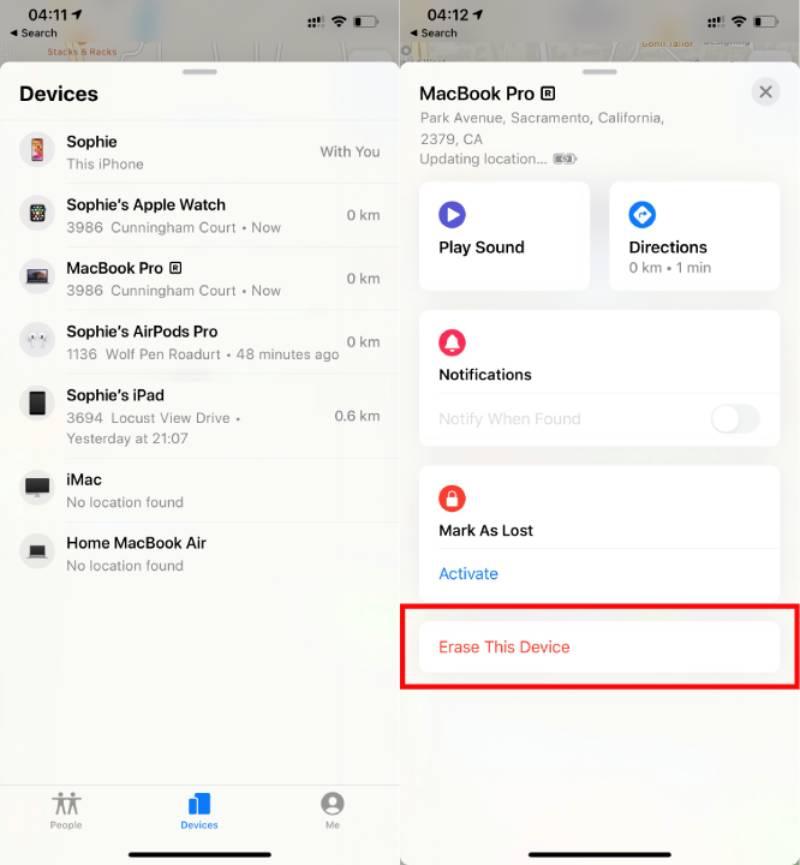
Step 1. Open Find My on your iPhone, and all your Apple devices related to your Apple ID will be displayed.
Step 2. Tap the iPhone that you want to erase with Find My on your current iPhone. You can see its detailed information, like location, battery, and so on.
Step 3. To erase the iPhone with Find My on the current iPhone, scroll down and tap Erase. Follow the instructions to complete the process.
Part 4: A Web-Based Solution to Deleting an iPhone from Find My iPhone
For users who want to manage devices through the Find My, iCloud website offers another convenient option. You can quickly locate, erase, or remove a device from your Apple ID account using macOS. This section explains how to perform the erase process from a Mac or other computers and ensure your data remains protected.
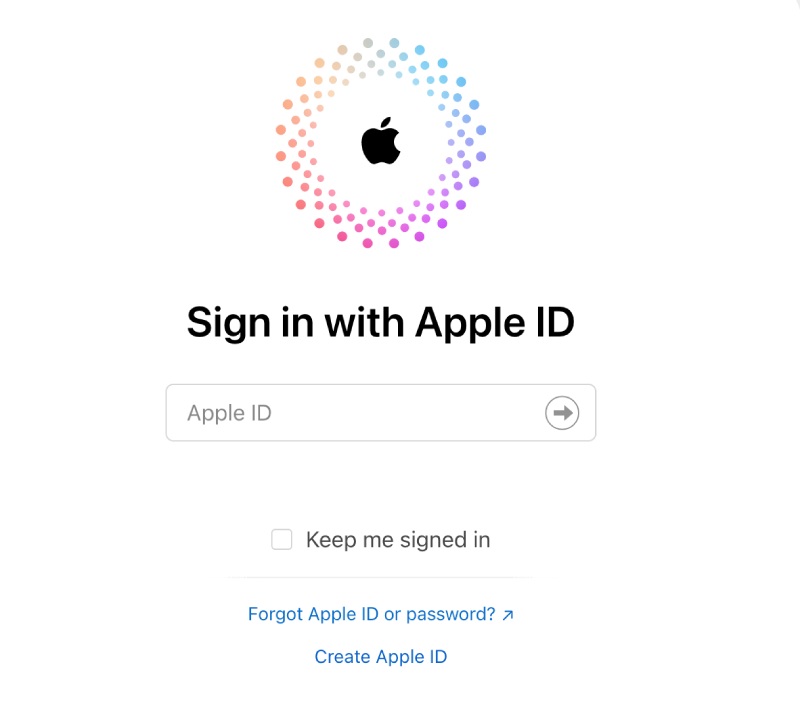
Step 1. On your browser, navigate to the official website of the Find My services and sign in with the same Apple ID that relates to the iPhone you want to delete.
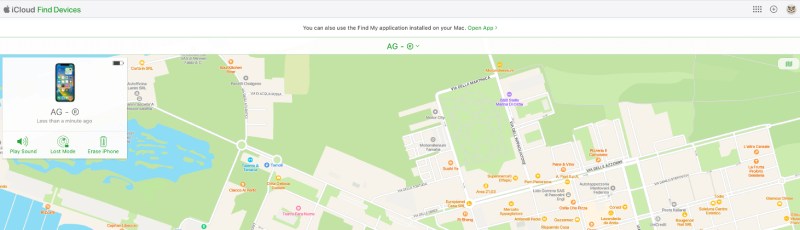
Step 2. Click All Devices at the top center of the window. To erase an iPhone with Find My iPhone, click to select the device. Then, click Erase to proceed.
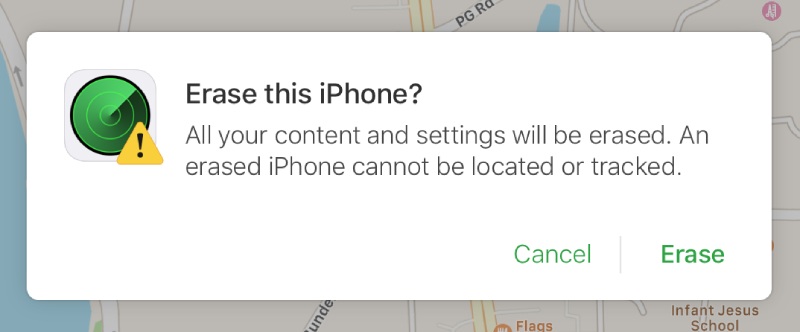
Step 3. Click Erase again to confirm the action. Now, the iPhone will be erased once it connects to the internet.
Part 5: A More Complete Way to Erase iPhone Than Find My iPhone
While erasing an iPhone from Find My can be effective from a distance, it may not always guarantee complete and unrecoverable data removal, especially if you are preparing the device for resale or permanent transfer. In such cases, Apeaksoft iPhone Eraser provides a more thorough solution. After the process, all data will be erased securely and permanently from your iPhone.
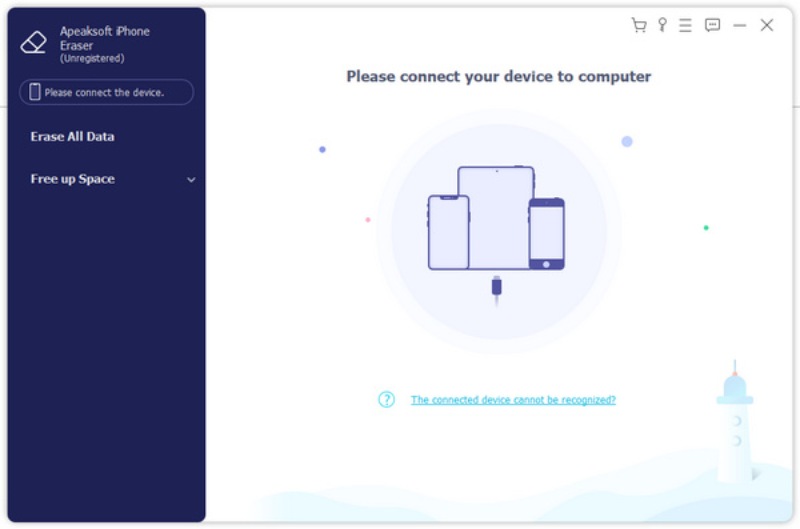
Step 1. From the official website, download and install Apeaksoft iPhone Eraser. Launch the software once it’s done.
Secure Download
Secure Download
Step 2. Connect your iPhone to the computer using a USB cable. Trust the device on your iPhone following the detailed instructions.
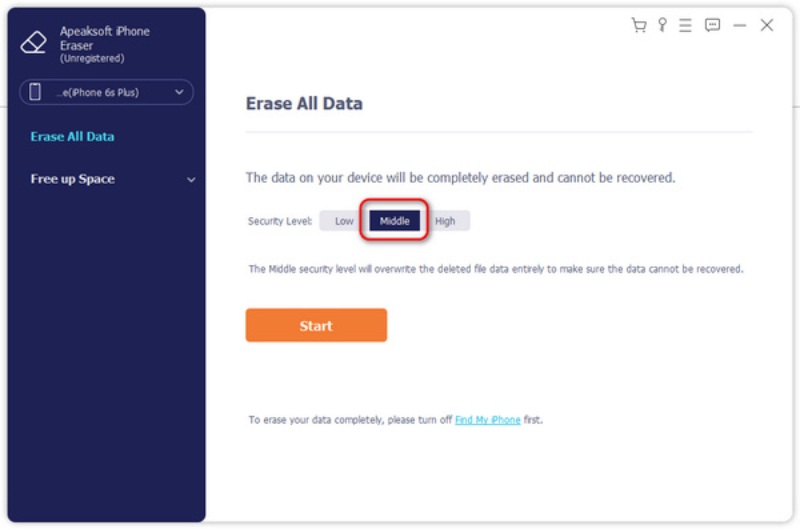
Step 3. If you want to take a more complete way to erase your iPhone than Find My on your iPhone, click Middle or High as the security level. Click Start to proceed.
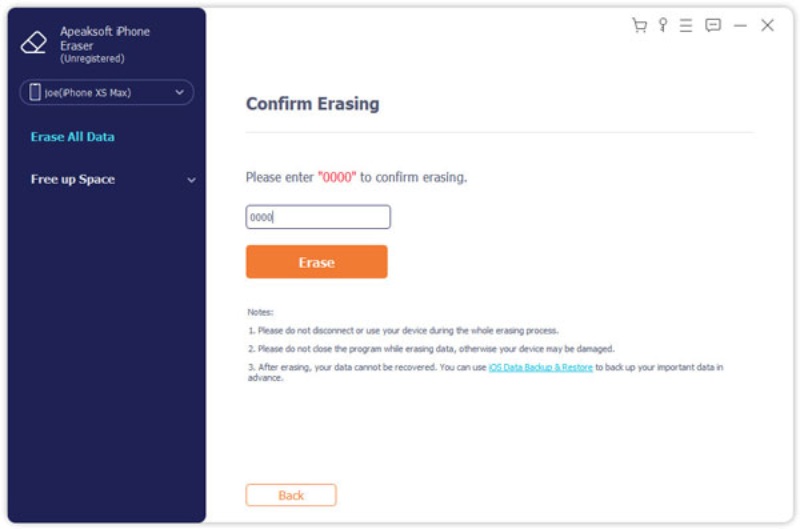
Step 4. To confirm the process of erasing, enter 0000 on the new page. Click Erase, and the process will start automatically.
Tips: This tool can work even if Find My iPhone not working.
Conclusion
Erasing your iPhone from Find My is a reliable way to protect personal data when your device is lost. However, some leftovers can remain and be extracted by some advanced tools. If you need deeper data removal, you can use Apeaksoft iPhone Eraser to delete your iPhone so that nothing remains.
Secure Download
Secure Download
