There are some reasons why you need to reinstall macOS on a MacBook Pro/Air or iMac. If you prepare to give away your Mac, for example, the easy way to clean up your device and protect your privacy is reinstallation. Moreover, some users have encountered software issues that can only be resolved by reinstalling. Fortunately, the procedure is not complicated if you follow this guide step by step.

- Part 1: Back up Mac before Reinstalling
- Part 2: How to Reinstall macOS
- Part 3: FAQs about Reinstalling macOS
Part 1: Back up Mac before Reinstalling
Backup is the first and essential step when erasing and reinstalling macOS because it is possible to run into data corruption and other problems. Of course, you can make a backup with a third-party tool. Here we demonstrate the official method, backup Mac using Time Machine.
Step 1 Connect an external drive to your Mac, which must have enough storage.
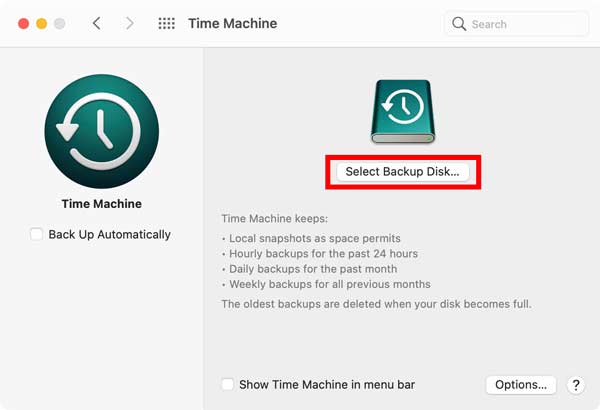
Step 2 Click the Apple menu, select System Preferences, and then Time Machine.
Step 3 Press the Select Disk button on the Time Machine window, choose the external drive, and click the Use Disk button.
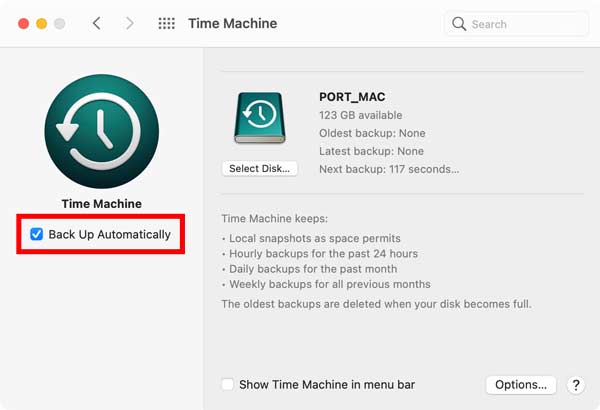
Step 4 Then you have two choices:
To back up the entire Mac, check the Back Up Automatically option to trigger the process.
If you want to back up specific files or folders, click the Options button, select them, and then make a backup.
Part 2: How to Reinstall macOS
Way 1: How to Reinstall macOS without Disc
Is it possible to reinstall macOS without a disc? The answer is yes. There is a special recovery environment called macOS Recovery. It enables you to reinstall the operating system without losing any data.
Step 1 Restart your machine, and hold down the Cmd + R keys on your keyboard during startup until the Apple logo appears on the Intel-based device.
For Apple silicon Macs, long-press the Power button while powering on, then choose Options and Continue on the startup screen.
Step 2 Select an administrator account and enter the password to boot into the macOS Recovery mode.
Step 3 To erase and reinstall macOS, select the Disk Utility option, and click Continue. If you just want to reinstall macOS, skip to the next step. Choose the startup volume on the Disk Utility window, and click the Erase button. Then give a name to the volume, and select Mac OS Extended as the Format for macOS 10.12 or earlier, or APFS for others, like macOS Mojave. Hit the Erase button to confirm it, and close the Disk Utility window.

Step 4 Next, select the Reinstall macOS [version] on the Recovery screen and click the Continue button.

Step 5 After you enter the macOS installer screen, click Continue and agree to Apple’s software license terms. Then choose the startup drive, and press Continue.
Step 6 Wait for macOS reinstallation to finish and your Mac will reboot. It may take an hour or more to complete.
Way 2: How to Reinstall macOS with a Bootable Installer
The macOS Recovery mode will reinstall the current version of the operating system. If you intend to reinstall an old version or the latest compatible macOS, you will need a bootable installer, such as a USB flash drive with at least 12GB of space. This way to reinstall macOS also requires Terminal commands.
Step 1 Format the USB drive using Disk Utility. Then download the proper macOS installer from the Mac App Store, such as macOS Catalina, macOS Mojave, etc.
Step 2 After downloading, the installer will launch automatically. Quit the installer from the menu or press the Command + Q keys to quit it.
Step 3 Open the Terminal app, type in the command sudo /Applications/Install\ macOS\ Mojave.app/Contents/Resources/createinstallmedia –volume /Volumes/USB, and press the Return key. When prompted, enter your password.
Step 4 Next, enter Y and press the Return key to create the bootable USB installer and write the installer image on the drive.
Step 5Wait for the process to finish, reboot your machine and hold down the Option key to access the boot selection menu.
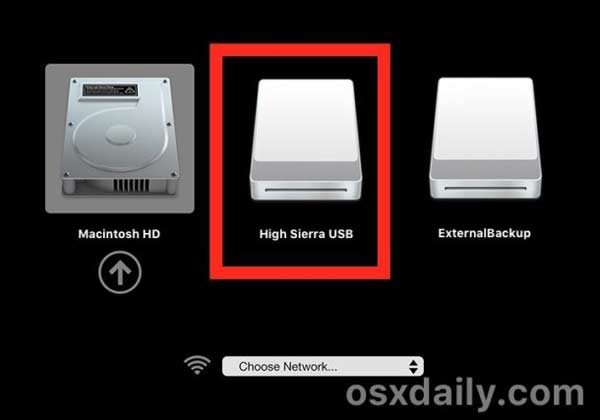
Step 6 Select the USB installer from the menu, and follow the onscreen instructions to erase and reinstall macOS on your hard drive.
Further Reading
How to Remove Boot Camp and Windows from Mac
Recommend: Best Mac Cleaner
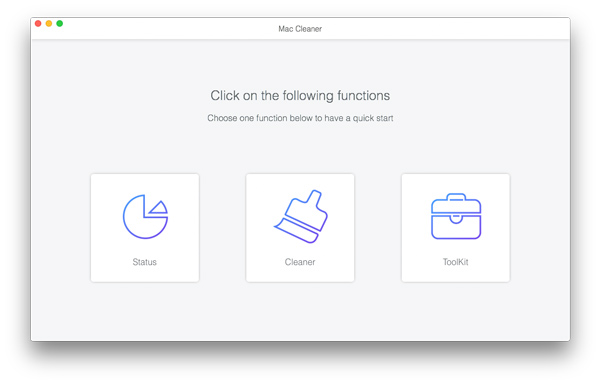
Apeaksoft Mac Cleaner is one of the best utilities to help you clean up your hard drive on your Mac. If your Mac slows down, the utility can help you improve the performance without reinstalling macOS. Moreover, it comes with a wide range of bonus tools to protect your computer and fix software issues.
4,000,000+ Downloads
Monitor the status of your CPU, memory, and storage.
Remove junk, caches, old files, duplicates, and more.
Uninstall useless apps and remove malware.
Protect your files and browsers from threats.
Part 3: FAQs about Reinstalling macOS
Does reinstalling macOS erase everything?
No. Reinstalling macOS from the Recovery screen does not erase your data. However, if there is a corruption problem, your data may be damaged. It is really hard to tell, so you’d better make a backup.
What do I do if I cannot reinstall macOS?
Firstly, check your internet connection. If you are reinstalling macOS with the Recovery mode, it requires a network to download the installer. Plus, you could try the job in safe mode.
How long does it take to reinstall macOS?
According to our research, macOS generally takes 30 to 45 minutes to install. However, it depends on the disk speed, type of installation, and other factors. Sometimes, it may spend more than an hour.
Conclusion
Now, you should understand how to reinstall macOS with the Recovery mode and bootable installer. That is an important skill for every Mac user to fresh their systems, do troubleshooting and more. With our guide, you would find that the process is not very complicated. Apeaksoft Mac Cleaner, on the other hand, can help you keep your Mac safe and fast easily. More questions? Please feel free to leave your message below this post.