How to Enlarge a Picture to Print Online and Offline
Want to print the precious photos on your mobile phone and paste them on the wall as a poster? The result is not good because the pixel quality is too low? Don’t worry! This article will guide you on how to enlarge a picture to print in high quality, whether it's for the clear output of a single photo or for enlarging a picture and printing on multiple pages.
PAGE CONTENT:
Part 1: Why Need to Enlarge a Picture to Print
When we convert digital images into physical photos, the process of enlargement is a crucial step in ensuring the quality of the prints. This is mainly due to the following 2 reasons:
Different resolution standards
A digital screen only requires 72-100 PPI to maintain clarity, while for professional printing, a pixel density of 300 PPI is needed. This means that the accuracy standards for viewing the same image on a screen and for printing it on paper are completely different.
Tips: PPI, Pixels Per Inch, refers to the number of pixels contained in each inch of a photo. It is used to measure the density or clarity of a digital image. The higher the PPI of a photo, the clearer the image will be.
Physical size limitations
Let's take a 4000×3000 pixel photo as an example.
When it is displayed on the screen, its details can be fully presented.
However, if it is directly printed according to the 300 PPI standard, only a clear image of 13×10 centimeters can be obtained. But if you want to print it on an A4 size (29.7×21 centimeters), then pixels must be supplemented through enlargement.
Part 2: Why Can’t I Simply Resize a Picture for Printing
Why can't we simply resize the image on the computer? Because simple resizing will cause pixel diffusion and result in blurring, which is a destructive enlargement:
1. Simple resizing merely stretches the pixels, rather than adding more details. Simple resizing merely converts the original pixel points of the image into larger color blocks. The image will become blurry and have jagged edges. This is similar to enlarging a mosaic mural; you will only see thicker mosaic squares.
2. Unable to meet the printing precision requirements. High-quality printing requires a resolution of at least 300 DPI. Manual resizing the low-pixel image forcefully will result in a decrease in its actual DPI - far below the standard for clear printing, which can cause the image to become blurry or distorted.
Therefore, we have to rely on professional enlargement tools.

Part 3: How to Enlarge a Picture for Printing Without Losing Quality
In fact, there are many professional tools available online that can achieve lossless enlargement of images. Here, we would like to introduce a free online tool - Apeaksoft Free Image Upscaler for the reasons below:
• Using AI technology to enlarge a picture automatically with one click.
• It can predict details intelligently, avoiding awkward jagged edges or blurriness.
• Enlarge a picture for printing without losing quality.
• Batch enlarge pictures for printing at a time.
• No ads, no virus, no download needs.
Here, we list detailed steps to show you how to enlarge a picture for printing online:
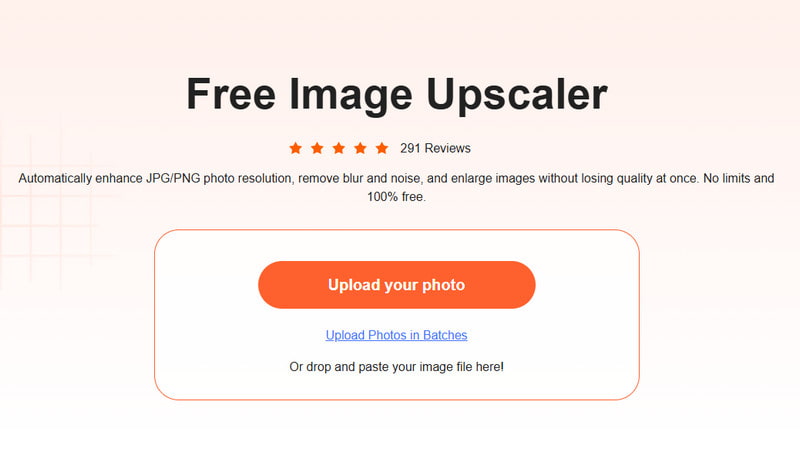
Step 1. Visit Apeaksoft Free Image Upscaler’s website.
Step 2. Press the Upload your photo button and choose your pictures.
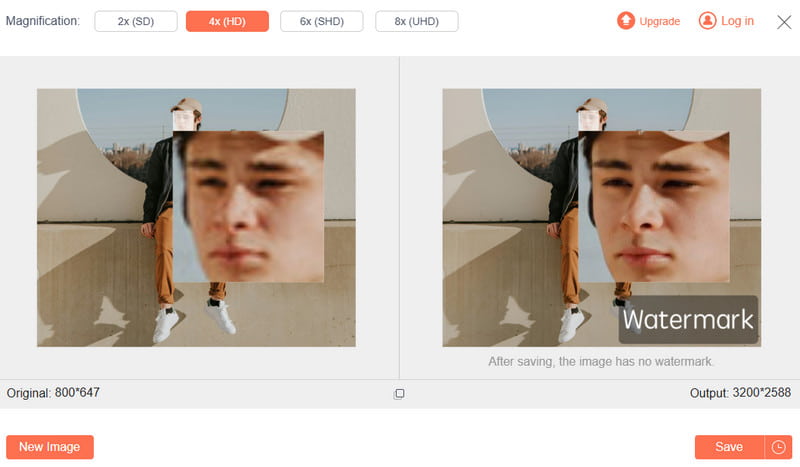
Step 3. Choose the magnification based on your needs.
Step 4. Press the Save button to finish.
Tips: This tool also allows you to restore old photos online.
Part 4: Professionally Enlarge a Picture Before Printing Using Photoshop
If you are looking for more professional methods of enlargement or if you are accustomed to using Photoshop to process images, please read the following steps on how to enlarge a picture for printing on Windows 10 or Mac:
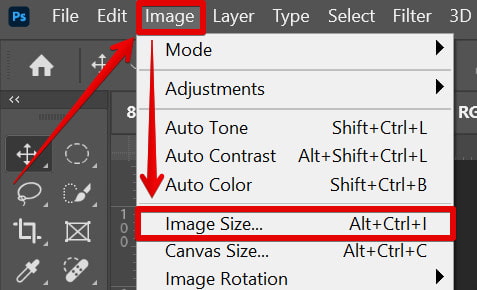
Step 1. Open your target image in Photoshop.
Step 2. Click Image - Image Size in the top menu bar.
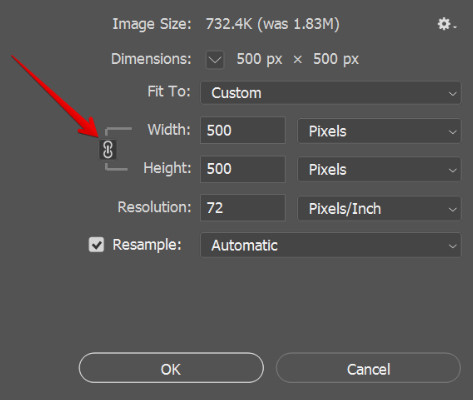
Step 3. Click the Resample option in the pop-up window and choose Preserve Details in the drop-down list.
Step 4. Enter the size in the box to resize image pixels, and then click OK.
Conclusion
The above is all the content about how to enlarge pictures for printing without losing quality. Whether you choose the convenient online tool Apeaksoft Free Image Upscaler or the more professional tool Photoshop, the core is to use AI to intelligently predict and supplement image details and textures, thereby ensuring the picture is clear while enlarging the picture. Try now and bring every cherished photo vividly to life.
