Learn 3 Easy Ways to Fix Low-Resolution Photos on iPhone
Apple equips your iPhone with a powerful camera capable of taking amazingly high-quality images. However, in some cases, you may discover that it is blurry or saved in a low resolution after taking a photo. How to increase the resolution of an image on an iPhone?
This post tells 3 useful methods to help you fix camera quality and low-resolution photos on an iPhone. You can keep reading to customize the camera settings and change the resolution of a picture on an iPhone.
PAGE CONTENT:
Part 1: Increase Photos’ Resolution Within the iPhone Photo App
Actually, you can directly enhance the clarity of low-resolution photos in the Photos app that comes with your iPhone without any additional tools.
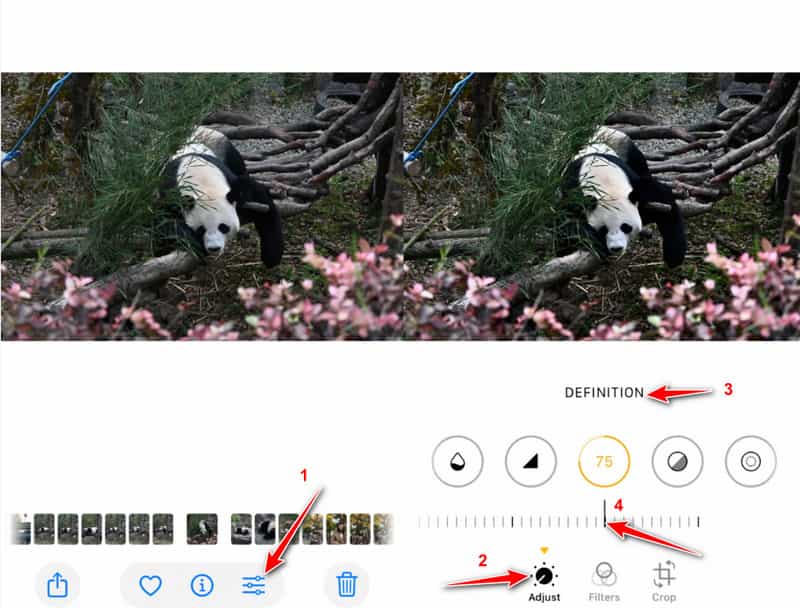
Step 1. Open the Photos app and choose the photo you want to enhance.
Step 2. Click the Edit button at the bottom, and you will see various editing tools.
Step 3. Select the Adjust tab. Swipe left until you find the Definition or Sharpness slider.
Step 4. Slide the slider to the right gradually to increase the photo’s detail and sharpness.
Part 2: Improve Photo Resolution on iPhone Online [Editor’s Choice]
iOS comes with many useful editing features for you to directly edit your captured photos and videos on an iPhone. While these tools can improve clarity and adjust details, they don’t actually increase a photo’s resolution. So when you fix low-resolution photos, you need to rely on third-party image editing tools. Here we introduce you to the easy-to-use Apeaksoft Free Image Upscaler. It offers a simple way to increase photo resolution, remove blur and noise, and resize images without quality loss.
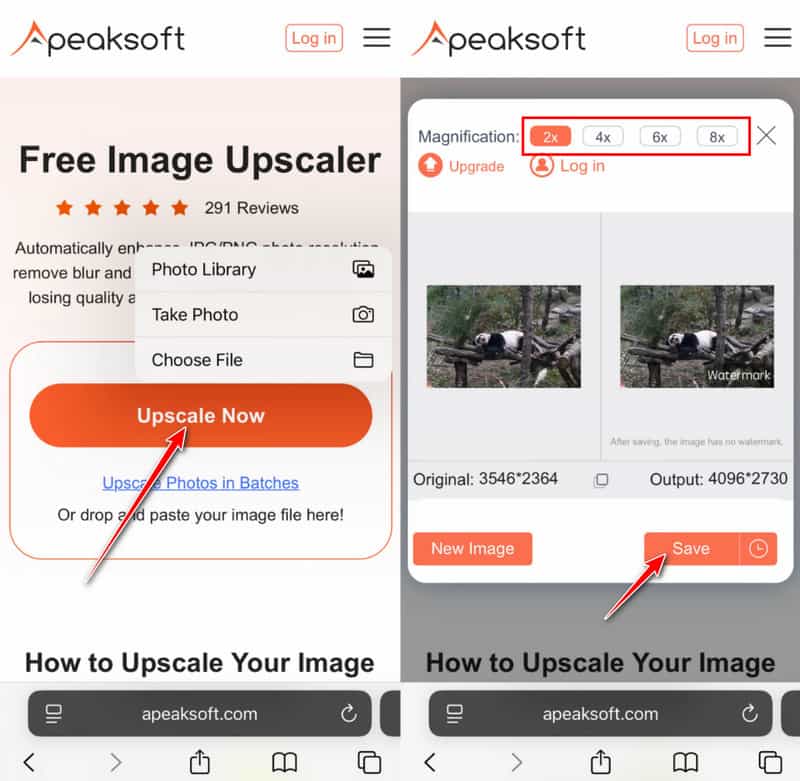
Step 1. Open the Safari app, search for, and then go to the Apeaksoft Free Image Upscaler website.
Step 2. Press the Upscale Now button and select your target photo.
Step 3. Wait for the AI to automatically process your Photo patiently. When the image uploading is finished, it will automatically increase the photo resolution, reduce noise, fix the blurred space, and do other operations to optimize it. Then, you will see a comparison of the two images.
Step 4. You can also choose to magnify your photos in the magnification area above.
Step 5. When you are satisfied with the resolution-increased photo, you can simply tap on the Save button to store it on your iPhone. This free image resolution increaser won’t add any watermark to your enhanced pictures.
Tips: This online image upscaler also enables you to enhance zoomed photos.
Part 3: Use Adobe Lightroom to Fix Low-Resolution Photos on iPhone
Besides increasing photo resolution online for free, Adobe Lightroom offers more advanced options for sharpening, detail enhancement, and noise reduction. It’s an excellent choice for improving blurry or low-resolution photos. Follow the steps below to see how to fix low-resolution photos on iPhone in Lightroom.
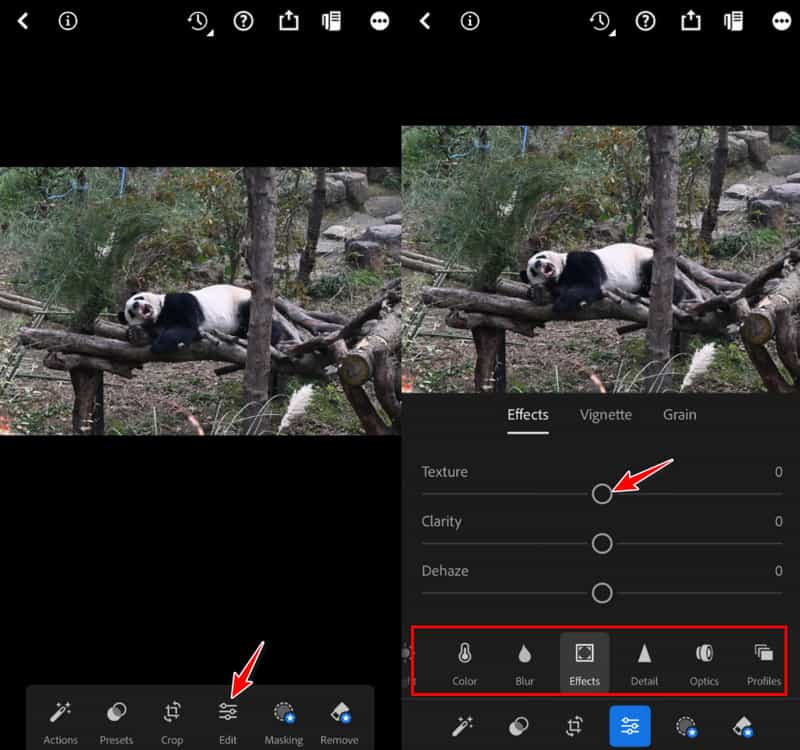
Step 1. Search and download Adobe Lightroom from the App Store. Sign in or register with an Adobe account.
Step 2. Select the photo you want to process and then head to the Edit tab at the bottom.
Step 3. Then, you can make corresponding adjustments by moving the slider left or right under different options in this tab.
Part 4: Tips for a High-Resolution Photo on iPhone
To avoid ending up with blurry or low-resolution images, it’s important to use the right shooting techniques and camera settings. Here we will list some tips before you are ready to use your iPhone to take photos.
1. Customize the Corresponding Settings
The iPhone Camera has many advanced settings for easily taking high-quality photos. To fix Camera quality and change the captured photo resolution on your iPhone, you should customize these settings.
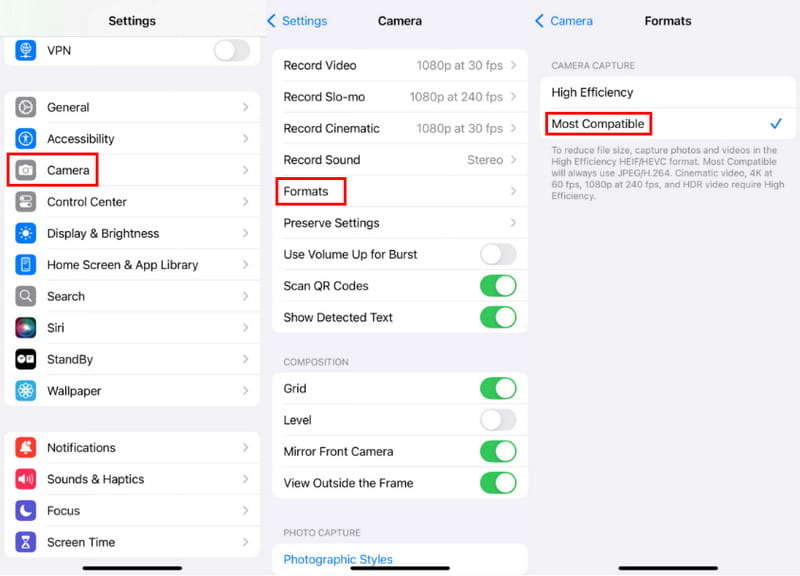
Step 1. Enter Settings on your iPhone, and scroll down to choose the Camera option.
Step 2. After that, you can tap Formats to check how your iPhone camera saves your captured photos and videos. Tap Most Compatible to capture photos and videos using JPEG/H.264. You can also enable Apple ProRAW to take high-resolution photos.
Step 3. To easily capture high-quality images, you can also choose to turn on Prioritise Faster Shooting, Lens Correction, and Macro Control. All these features can help you fix the camera quality on an iPhone.
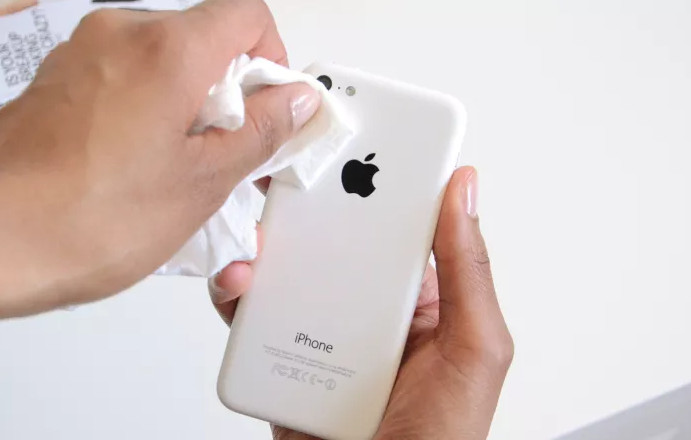
2. Keep the Lens Clean
Regularly wipe the lens with a soft microfiber cloth to prevent dust, fingerprints, or smudges from causing blurry or out-of-focus photos.
How to fix an iPhone camera that is blurry? You should first wipe off the lens and ensure it is clean when your iPhone camera is blurry. You can also try taking off your iPhone case to fix the blurry iPhone camera. In some cases, you need to close and then reopen the Camera app to troubleshoot the issue. If the problem still exists, you should restart your iPhone or upgrade your iOS system.
3. Stabilize Your Shot
Keep your phone stable when shooting. You can hold your phone with both hands or use a tripod.
4. Set Accurate Focus
Before pressing the shutter, be sure to tap the screen to set the focus.
5. Find a Well-lit Environment
Try to take photos in a well-lit environment. If necessary, you can turn on the flash or Night mode to improve the image quality.
Conclusion
If you are not satisfied with the image quality of your captured photos, you can go to the Camera settings and customize them to fix the camera quality on your iPhone, and then you can fix the low-resolution photo on your iPhone. To change or increase the resolution of your captured images, you can use the recommended Apeaksoft Free Image Upscaler.
