It cannot be denied that it is more convenient to take HD photos than ever before due to the progress of smartphones. However, the photo quality is not only determined by hardware. Sometimes, you might take photos that turn out to be a little blurry. The good news is that is not the end of the world. This guide will show you how to fix bad-quality pictures like professionals.

- Part 1: Best Way to Fix Bad Quality Pictures Online
- Part 2: How to Fix Picture Quality in Photoshop
- Part 3: FAQs about Fixing Picture Quality
Part 1: Best Way to Fix Bad Quality Pictures Online
The easiest way to fix picture quality is an online app; however, most of them have some kind of limit, such as watermarks, sign-up, extra payment, etc. Fortunately, Apeaksoft Free Image Upscaler is an exception. First of all, it is completely free to use. Moreover, it won’t add any watermarks or logos to your pictures. You can access it in a browser directly. Here are the steps to restore photo quality online.
Step 1Visit https://www.apeaksoft.com/image-upscaler/ in your web browser. If you need to restore a low-quality picture on mobile, for example in the museum, you can do it in a mobile browser.
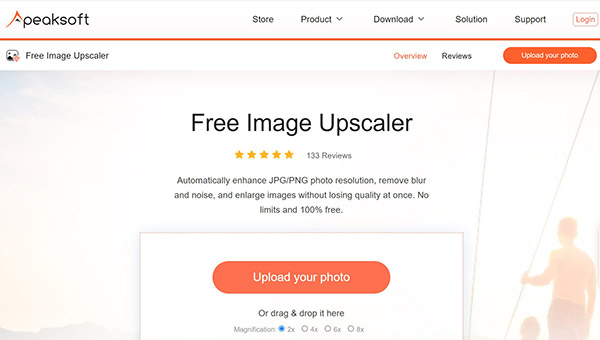
Step 2 Click the Upload your photo button, and upload the bad-quality photo from your device. After loading, you will be presented with the main page.
Step 3 Now, you can enhance the photo quality with the presets at the top of the dialog, such as 2x, 4x, 6x, or 8x. Then check the effect in the Output pane. Once you are satisfied, click the Save button and download the result.
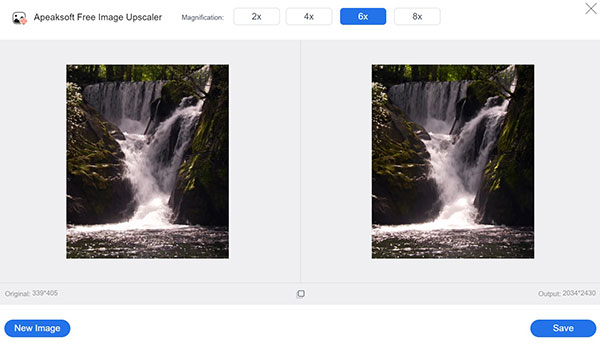
Note: As the picture quality enhances, the file size will become larger.
Part 2: How to Fix Picture Quality in Photoshop
It is well-known that Adobe Photoshop is a professional photo editor. It includes a wide range of features including low quality photo restoration. The biggest downside is the complicated workflow. Therefore, we display the steps to fix a low-quality picture in Photoshop.
Step 1 Launch the photo editing software on your desktop, and open the poor photo.
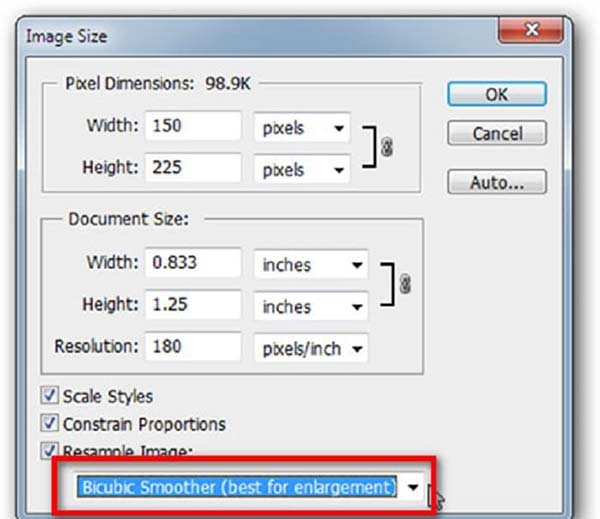
Step 2 Go to the Image menu on the top menu bar, and choose Image Size. Make sure to check the option of Resample Image. Pull down the drop-down list, and select Bicubic Smoother, which is the best for fixing image quality. Hit the OK button to confirm the settings.
Step 3 Back to the Image menu, choose Mode, and then Lab Color. That will change the color mode to Lab Color.
Step 4 Switch to the Window menu, and choose Channels. Then select the Lightness channel for enhancing the quality.
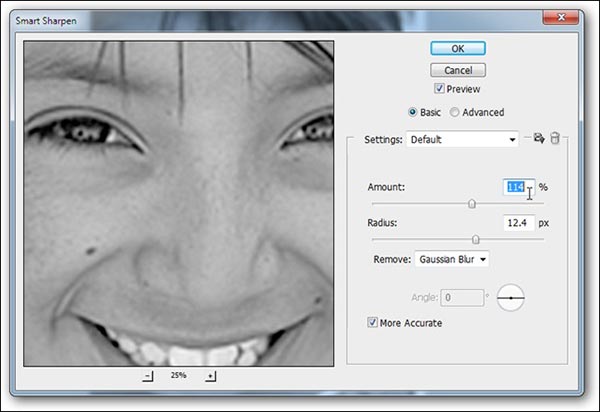
Step 5 Click and expand the Filter menu, and choose the Smart Sharpen option. That will open the Smart Sharpen dialog. Next, pull down the Remove option, and choose Gaussian Blur. Then adjust the Amount and Radius options according to your image. The preview pane will show you the effect in real-time.
Step 6 As long as you get the desired result, click on the OK button to confirm the quality photo restoration. At last, save the retouched image as a new file.
Note: We suggest you save the image in PSD so that you can adjust the changes later. Bear in mind that the output format impacts the photo quality too. The lossy image formats, like JPG, FLV, and more, will downscale your photo quality. You’d better use PNG and lossless picture formats.
Further Reading:Part 3: FAQs about Fixing Picture Quality
How to fix picture quality on Instagram?
By default, Instagram compresses your photos to save online storage and improve the experience. However, that may damage your photo quality. Now, you can fix picture quality on Instagram with proper settings. Run your social media app, go to the Settings screen, choose Media and Contacts, and toggle on Upload photos in HD.
Is it possible to fix the TV picture quality?
The answer is determined by your situation. If you are running a video from YouTube or other streaming platforms, adjust the resolution of the player. You can also upgrade the VGA or HDMI cable to resolve this problem.
Why my photo quality is bad?
Firstly, the hardware or low-end lens may lead to poor photo quality. Moreover, without the aid of appropriate settings, your photos will become bad too. Another common cause is when the photo is enlarged without proper tools. Therefore, to avoid bad photo quality, you have to improve both hardware and software.
Conclusion
This tutorial has told you the two best ways to fix a bad-quality photo online or offline. Although Photoshop is very expensive for average people, it can meet your need. Our basic steps allow you to upscale photo quality quickly. Apeaksoft Free Image Upscaler, on the other hand, produces better photo quality without installing anything on your hard drive. If you have other suggestions, please feel free to leave a message below this post.