


How to Repair Your USB Flash Drive on Windows and Mac

USB flash drives are a portable and convenient way to transfer data or temporarily back up files. However, vulnerability is a big problem. Your flash drive may suddenly become broken, corrupted, unreadable, or damaged. As a result, you cannot access it, your computer won't recognize it, and you will lose your files. Don't worry! This guide shares multiple proven ways and detailed steps to repair a flash drive on Windows and Mac.
PAGE CONTENT:
Part 1: The Ultimate Way to Recover Data Before Repairing a Flash Drive
As a powerful USB flash drive repair tool, Apeaksoft Data Recovery allows you to extract data from flash drives after they are broken, damaged, or corrupted. It can get back as much data as possible. Moreover, the clear interface makes it easy to use, especially for beginners.

Downloaded by over 1,000,000 users
- Recover data from a USB flash drive in three steps.
- Support almost all file types and formats.
- Work for corrupted, formatted, and damaged flash drive recovery.
- Preview lost files on your USB flash drives.
- Offer up to 99.7% success rate.
Secure Download
Secure Download

How to Recover Data Before Repairing Your USB Flash Drive
Step 1. Scan your flash drive
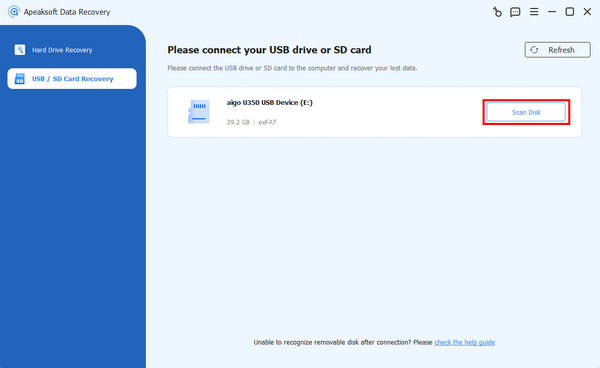
Launch the flash drive repairing tool after you install it on your PC. There is another version for Mac. Connect the flash drive to your PC. Then, go to the USB / SD Card Recovery tab, select your drive from the drop-down option, and click Scan Disk.
Step 2. Preview lost data
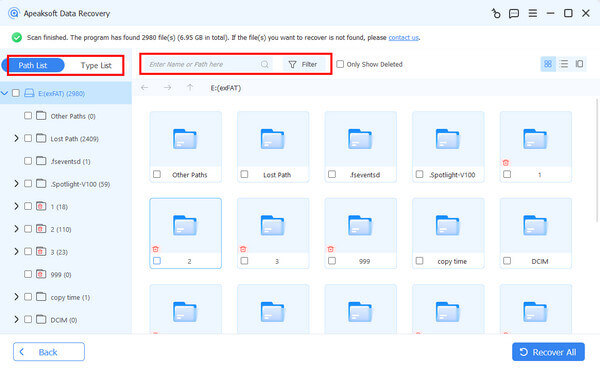
Once data scanning finishes, go to the Type List tab, select the desired file type, and check the recoverable files. If you want to view files by directory, go to Path List. The Filter option enables you to locate specific files according to name or path quickly.
Step 3. Extract data from flash drive
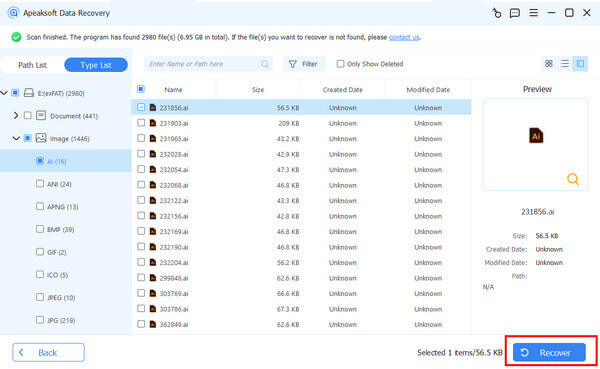
Select all files you want to retrieve, and click the Recover button. Set an output folder and confirm data recovery.
Part 2: How to Repair a Flash Drive on Windows
How to Repair a Corrupted Flash Drive via Updating the Driver
The USB driver may malfunction if you have disabled it accidentally or if it is outdated. Therefore, one easy way to repair a corrupted USB flash drive is to update your drive. Here are the steps below:
Step 1. Plug your flash drive into your PC.
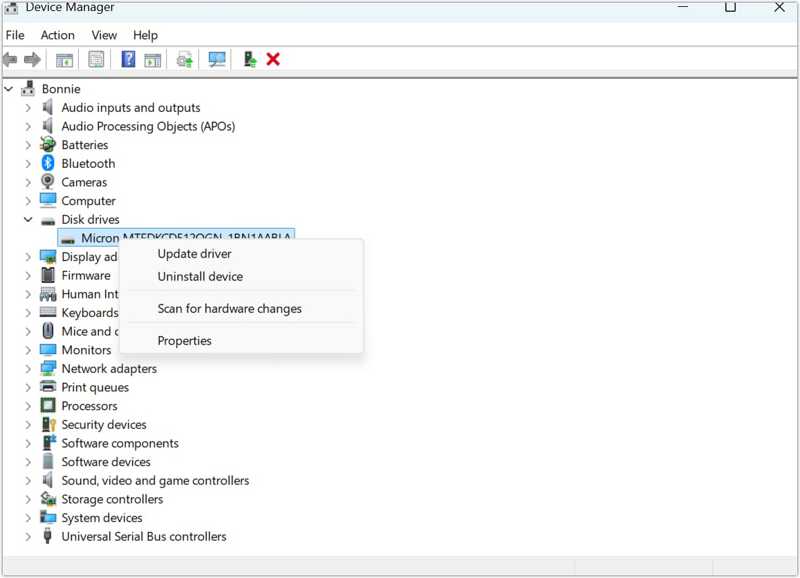
Step 2. Right-click on the Start menu and choose Device manager.
Step 3. Click and expand the Disk drives entry.
Step 4. Right-click on the USB driver and choose Update driver.
How to Repair a Flash Drive with CHKDSK
CHKDSK is the USB flash drive repair tool preinstalled on Windows. It can repair any errors found on internal and external hard drives. Then, it can recover readable information from bad sectors and fix file structures.
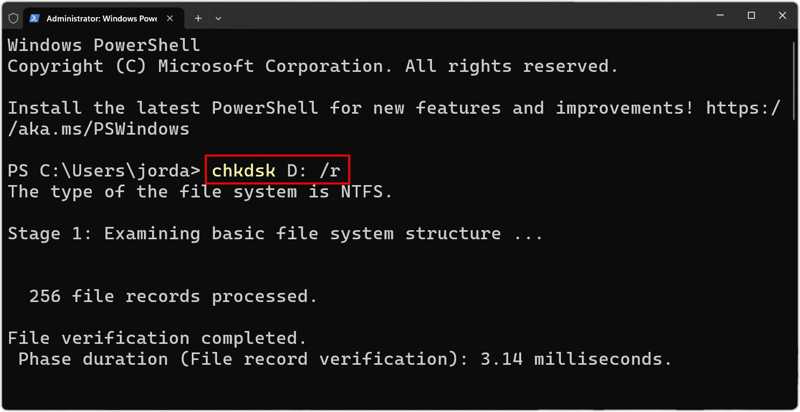
Step 1. Insert the flash drive into your PC.
Step 2. Open the Start menu and search for Command Prompt.
Step 3. Right-click on the Command Prompt app and choose Run as administrator.
Step 4. Type the following command and press the Enter key on your keyboard.
chkdsk X: /f
Replace X with the drive letter of your USB.
Step 5. CHKDSK will display the status of your USB and repair any errors it finds.
How to Repair a USB Flash Drive with TestDisk
TestDisk is an open-source USB flash drive repair tool. It restores the entire partition and addresses the underlying file system corruption. Therefore, it can repair a flash drive that is not detected without formatting it.
Step 1. Download TestDisk from a trusted source online.
Step 2. Run testdisk_win.exe in the archive.
Step 3. Plug your USB into your PC.
Step 4. Press the Enter key on your keyboard to create a log file.
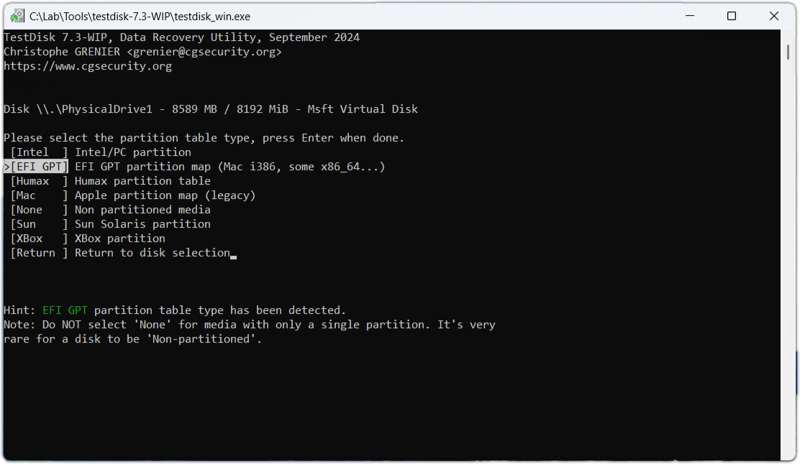
Step 5. Select the partition table type and press Enter.
Step 6. Choose the corrupted flash drive and press Enter.
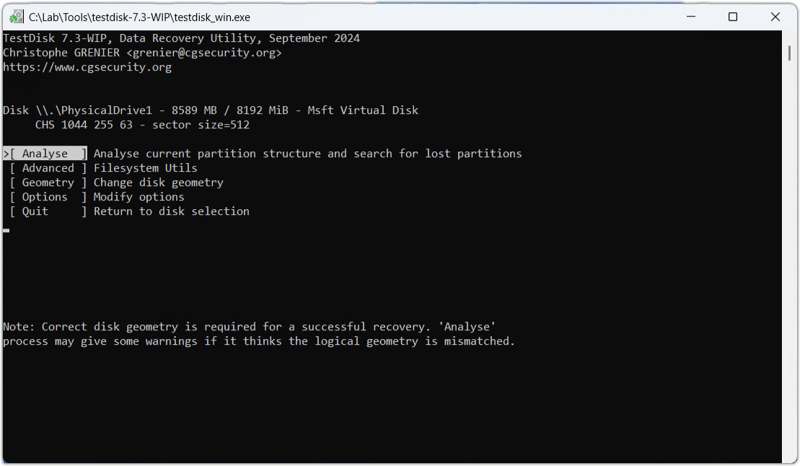
Step 7. Select Analyse and press Enter.
Step 8. Press Enter to start a quick search.
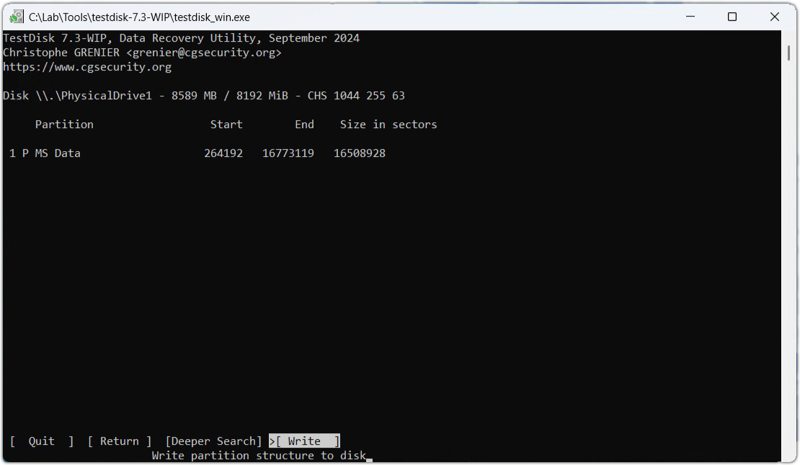
Step 9. Select Write and press Enter.
Step 10. Next, select Y and press Enter.
Part 3: How to Repair a Flash Drive on a Mac
How to Repair a Flash Drive on a Mac with First Aid
The built-in First Aid feature can repair damaged USB flash drives on Mac machines. It is integrated in the Disk Utility app on most versions of macOS. The following steps show you the detailed process:
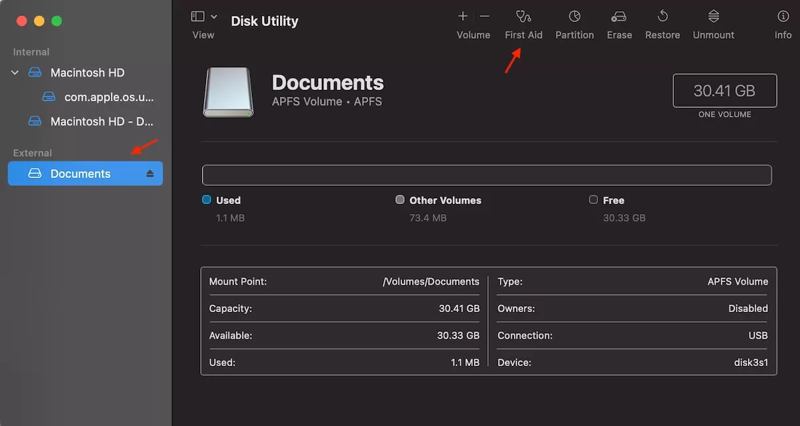
Step 1. Link the USB to your MacBook.
Step 2. Open the Disk Utility app.
Step 3. Navigate to View and Show All Devices.
Step 4. Select your USB drive from the sidebar.
Step 5. Click the First Aid button and hit Run.
Step 6. When the process finishes, click Done.
How to Repair a Corrupted Flash Driver by Terminal
If you need to repair a flash drive that is corrupted on a Mac, try the diskutil list command. Furthermore, it offers slightly more control over the whole process. This way will erase all data on your USB drive.
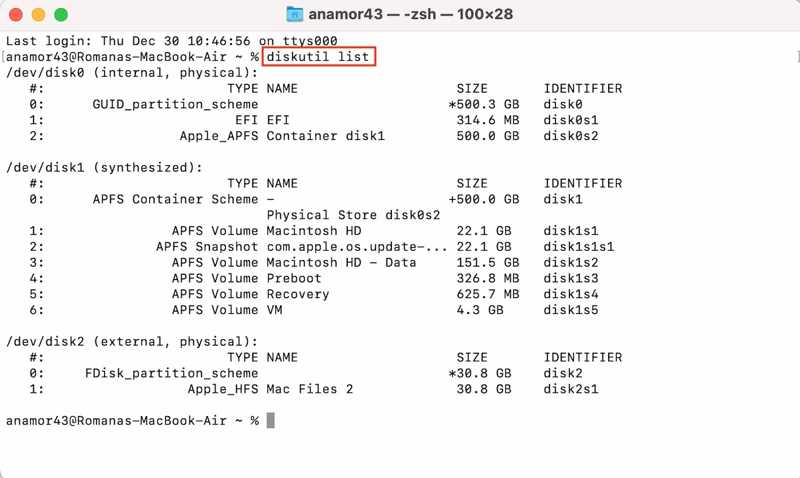
Step 1. Connect the USB drive to your Mac.
Step 2. Run the Terminal app from the Applications folder.
Step 3. Type in diskutil list and press the Return key on your keyboard.
Step 4. Input diskutil verifyDisk /dev/disk2 to verify your USB and hit Return.
Tips: Replace 2 with the disk number of your USB.
Step 5. If you get an error, type in diskutil eraseDisk JHFS+ BackupMaster disk2 and hit Return to format the drive.
Step 6. Next, input diskutil repairDisk /dev/disk2 and hit Return to begin repairing the USB flash drive that is not recognized.
Step 7. When prompted, type Y and hit Return to move forward.
Step 8. As long as the process is complete, you will see a message saying Finished partition map repair on disk2.
Further Reading
Conclusion
This guide shared six ways to repair a flash drive on Windows and Mac. The native methods are free of charge, but they require technical skills. You can pick an appropriate way and follow our steps to repair your USB flash drive quickly. Apeaksoft Data Recovery is a flexible way to retrieve lost data from your USB flash drive, even if it is corrupted or damaged.
 Apeaksoft Data Recovery
 Recover deleted or lost data on Windows and Mac computer.
Secure Download
Secure Download
Related Articles