How to Recover Deleted Emails on iPhone in 4 Methods
"I deleted some important emails by mistake. How to retrieve deleted emails on an iPhone?" According to our research, the majority of iOS users read, receive, and send emails on their iOS devices. That brings a new problem: the email is missing. Thankfully, there are methods to get back your lost emails in various situations. Our tutorial shares the proven methods and demonstrates the workflows to help you find the important messages.
PAGE CONTENT:
Part 1: How to Recover Deleted Emails on iPhone from Trash
Both the Apple Mail app and third-party mail apps equip the Trash folder. It saves the deleted emails for a specific period. Before they are permanently erased, you can get deleted emails back on your iPhone quickly.
How to Recover Deleted Emails on iPhone in Apple Mail
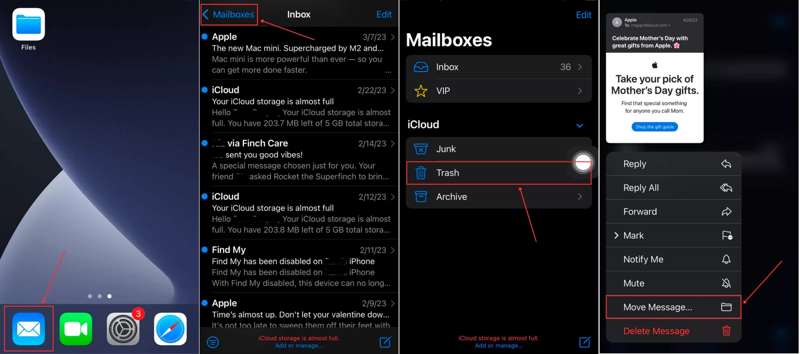
Step 1. Open the iOS Mail app on your iPhone.
Step 2. Tap Mailboxes and choose Trash on the list.
Step 3. View the recently deleted emails and long-press the message you want to recover.
Step 4. Then, choose Move Message on the context menu.
Step 5. Set the receiver folder, like the Inbox.
Step 6. Now, you can find the deleted iPhone emails in the receiver location.
How to Recover Deleted Emails from Gmail on iPhone
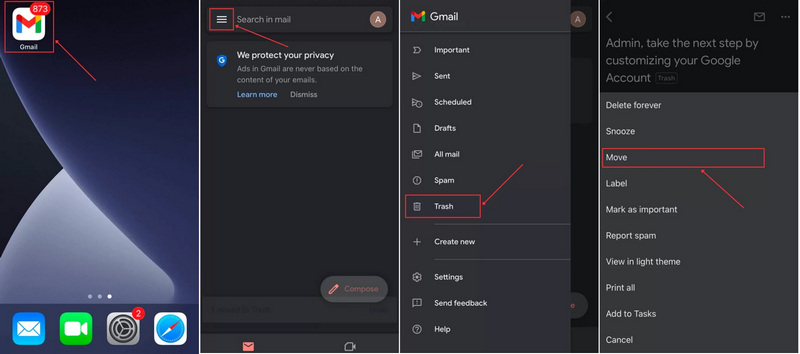
Step 1. Run your Gmail app.
Step 2. Tap the Hamburger button and choose Trash.
Step 3. Select the email you wish to retrieve, and press the More button with a three-dot icon.
Step 4. Choose Move and select the location where you want to save the recovered email from Gmail on your iPhone.
How to Retrieve Deleted Emails on iPhone from Yahoo
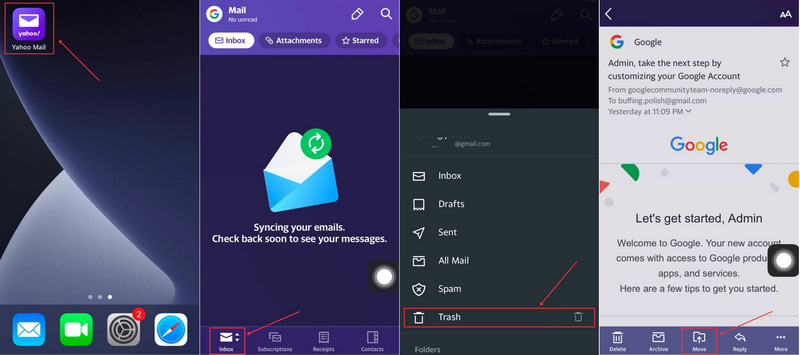
Step 1. Run your Yahoo app.
Step 2. Tap the Inbox button at the bottom and choose Trash.
Step 3. Open the email you want to restore by tapping it.
Step 4. Tap the Move button at the bottom and choose a location to save the email. If you want to manage the recovered emails independently, choose Create new folder and leave a name.
Part 2: How to Retrieve Deleted Emails on iPhone by Shake Undo
Since iOS 3, Apple has added the Shake-to-undo gesture to iPhones. It allows you to retrieve deleted emails from your iPhone immediately once you remove an email. In other words, it only works if you have just deleted an email and haven’t closed the Mail app.
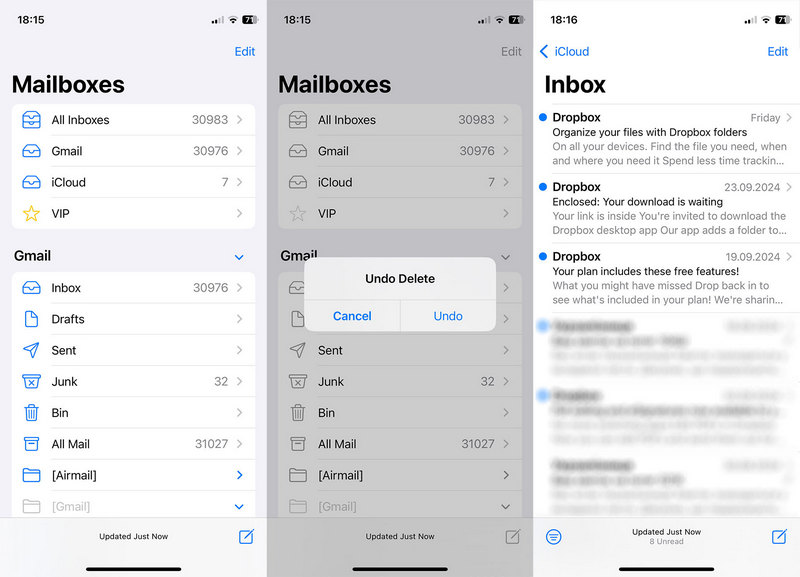
Step 1. As long as you accidentally delete an email, shake your iPhone immediately.
Step 2. Then, tap the Undo button on the pop-up dialog.
Step 3. Now, you will find the email goes back to your Inbox.
Part 3: How to Find Deleted Email on iPhone from iCloud
As the official cloud service, iCloud keeps your emails in either your account or a backup. It means that you can get back deleted emails on iPhone from your iCloud account or iCloud backup, depending on your situation.
How to Find Deleted iPhone Email from iCloud.com
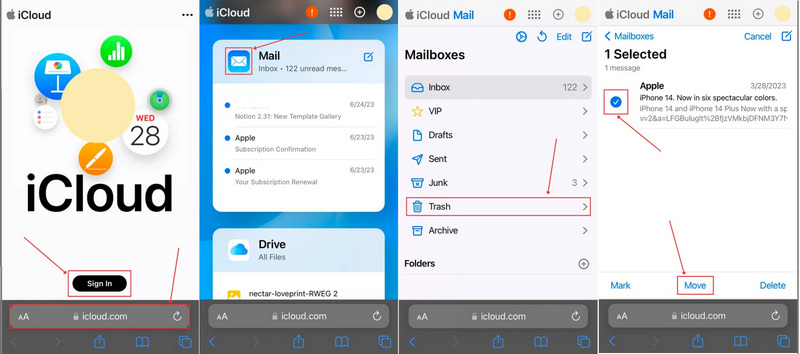
Step 1. Open your web browser, go to www.icloud.com, and sign in with your account.
Step 2. Choose the Mail app.
Step 3. Tap Mailboxes and choose Trash.
Step 4. Check the desired emails and tap the Move button.
Step 5. Set the desired location and hit Move.
How to Restore Deleted Emails on iPhone from iCloud Backup
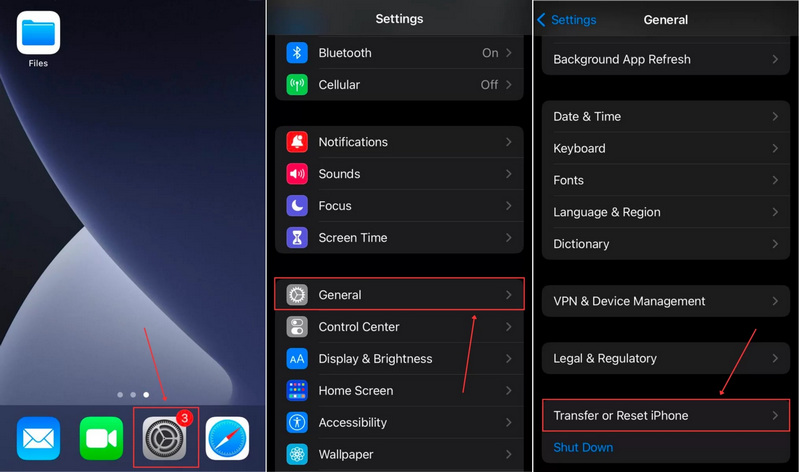
Step 1. If you cannot find deleted emails on iCloud.com, run your Settings app.
Step 2. Navigate to General, and Transfer or Reset iPhone.
Step 3. Choose Erase All Content and Settings. This process will erase your iPhone.
Step 4. If prompted, enter your iPhone passcode or Apple ID password.
Step 5. Follow the onscreen instructions to erase your device.
Step 6. When your iPhone restarts, set it up and connect to a Wi-Fi network.
Step 7. Choose From iCloud Backup on the Apps & Data screen.
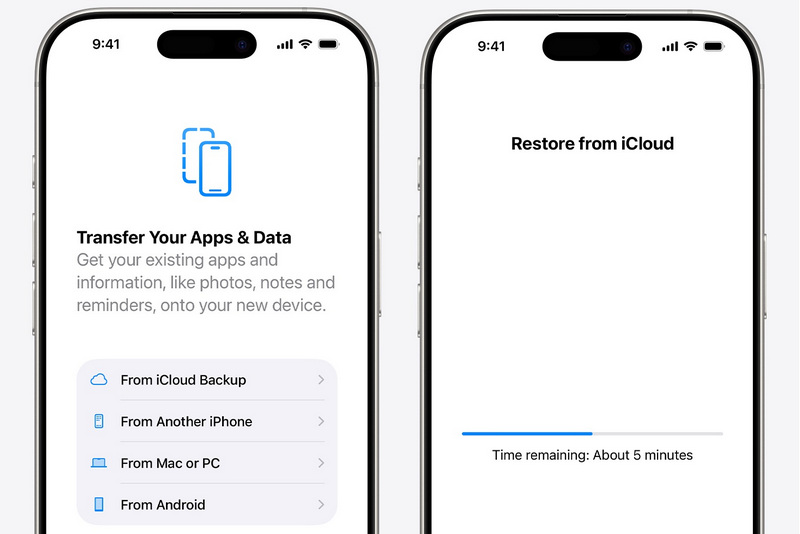
Step 8. Input your Apple ID and password.
Step 9. Pick the backup that may include the lost emails.
Step 10. When it is done, complete the setup.
Note: Recovering permanently deleted emails on iPhone from iCloud backup requires you to erase your device first.
Part 4: How to Restore Deleted Emails on iPhone Without Backup
Even if you don’t have a backup, it is possible to recover permanently deleted emails on your iPhone. All you need is a powerful data recovery tool for iPhones, such as Apeaksoft iPhone Data Recovery. It provides three modes for email recovery on your iPhone, iTunes backup, and iCloud backup. More importantly, it is easy to use, especially for novice users.
The Best Way to Restore Deleted Emails on iPhones Without Backup
- Recover deleted emails from your iPhone memory.
- Extract emails from backups without erasing your device.
- Preview the lost data on your iPhone.
- Support a wide range of data types.
- Compatible with the latest versions of iOS and iPadOS.
Secure Download
Secure Download

How to Restore Deleted Emails on Your iPhone Without Backup
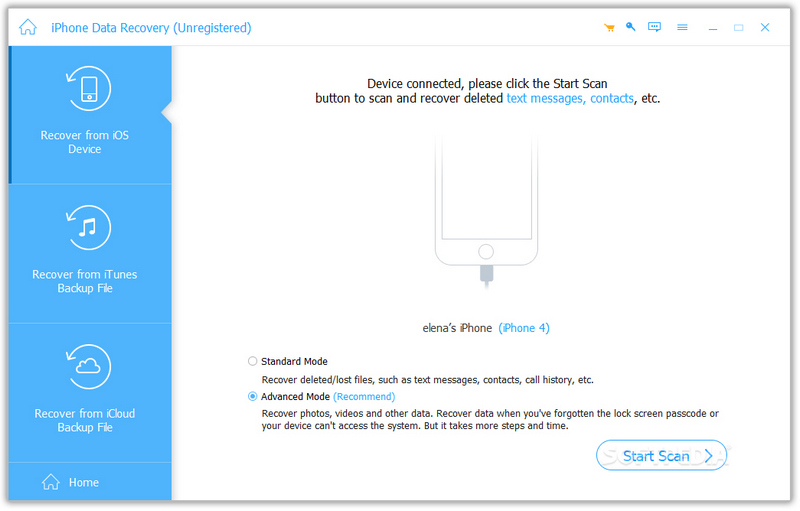
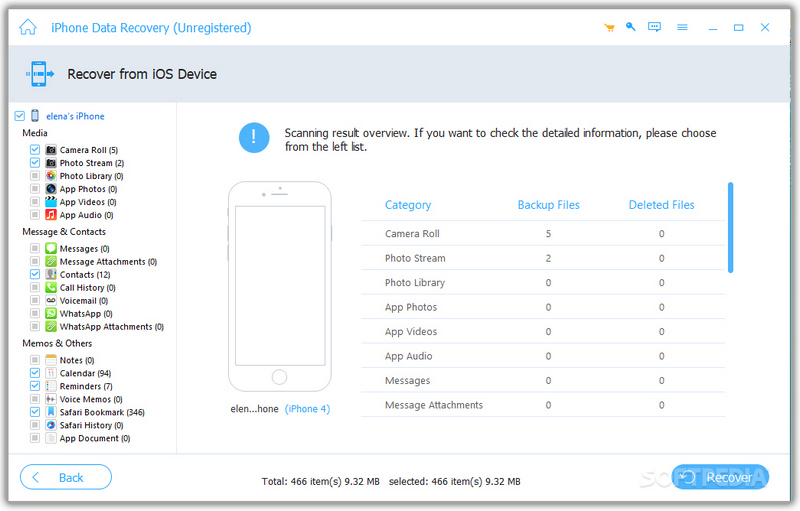
Step 1. Scan your iPhone
Launch the best data recovery software for iPhone after installing it on your computer. Connect your iPhone to your computer with a Lightning cable. Once your device is detected, go to the Recover from iOS Device tab and click the Start Scan button to begin scanning your memory.
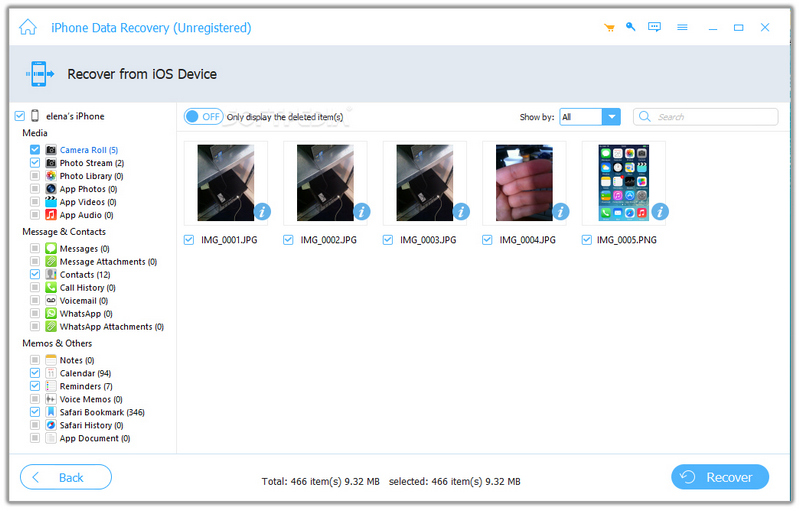
Step 2. Preview lost data
When scanning is complete, choose the data types you want to get back. Then, view the lost files, like deleted email attachments.
Step 3. iPhone data recovery
Select the files and items you wish to retrieve and click the Recover button. Then, set an output folder, and hit Recover again to confirm it. You can also recover deleted photos on iPhone.
Tips: The software will recover deleted emails and attachments to your hard disk. It won’t interrupt existing data on your device.
Conclusion
Now, you should understand how to retrieve deleted emails on your iPhone. The Trash folder in the Apple Mail app or third-party email apps allows you to find lost emails quickly. Plus, you can access your iCloud account or iCloud backup to restore your emails. Apeaksoft iPhone Data Recovery is the easiest way to restore lost emails from your iPhone. It is easy to navigate and doesn’t require any technical skills.
