How to Take a Photo with a Webcam on Your Computer

Today, most computers and laptops come with a webcam by default. Generally speaking, it is used to share your face and reactions when making online meetings or creating e-learning. In fact, the webcam can do more things, such as taking a photo with your webcam. This concrete guide walks you through the proven methods and steps to guarantee the quality of selfies on Windows and macOS.
PAGE CONTENT:
Part 1: How to Take a Photo with a Webcam on a PC
In addition to the built-in webcam, you also need a camera application to take a photo with the webcam. On Windows 11/10, Microsoft has added a Camera app. It enables you to use the webcam to capture pictures.
Step 1. Type camera into the Windows search bar.
Step 2. Open the Camera app from the result.
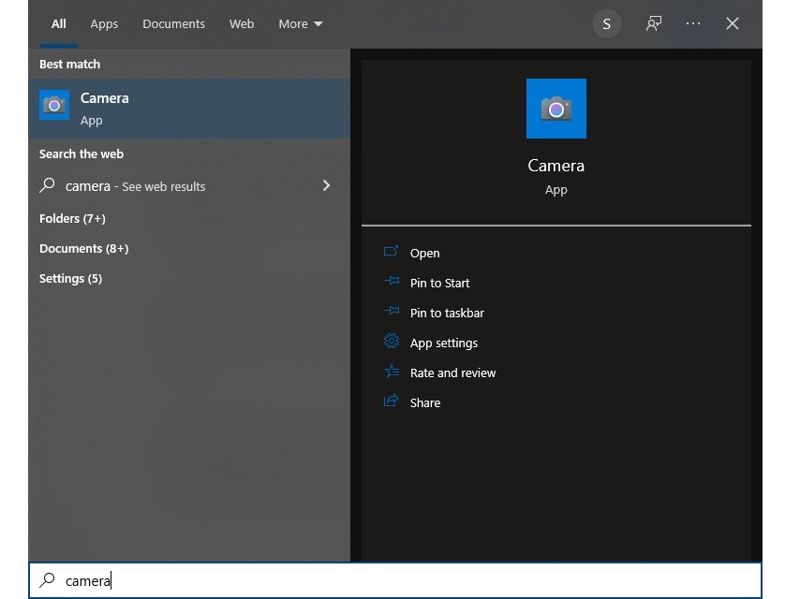
Step 3. If your PC integrates a webcam or you have hooked up an external webcam to your PC, allow the Camera to access it.
Step 4. When you are ready, click the Camera button.
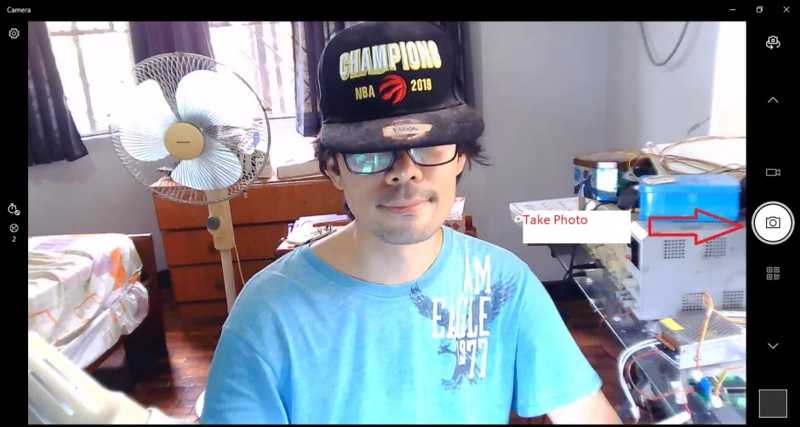
Step 5. To see the photo, click the camera roll button to open the destination folder.
Part 2: How to Take a Photo with a Webcam on a Mac
The Photo Booth on a MacBook allows you to take a passport photo with a webcam and generate a high-quality result. This app is preinstalled on almost all Mac laptops. Here are the steps:
Step 1. Open the Finder app and go to the Applications folder.
Step 2. Find the Photo Booth app and open it.
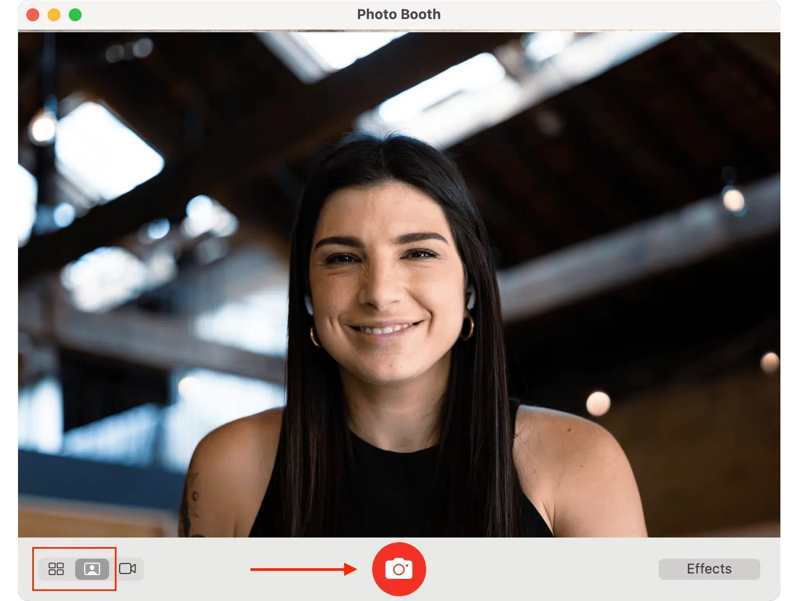
Step 3. Then, your Mac camera will activate automatically.
Step 4. Optional, click the Effects button to apply visual effects.
Step 5. Decide to take a portrait or four consecutive photos at the bottom left side.
Step 6. Click the Camera button once you are ready.
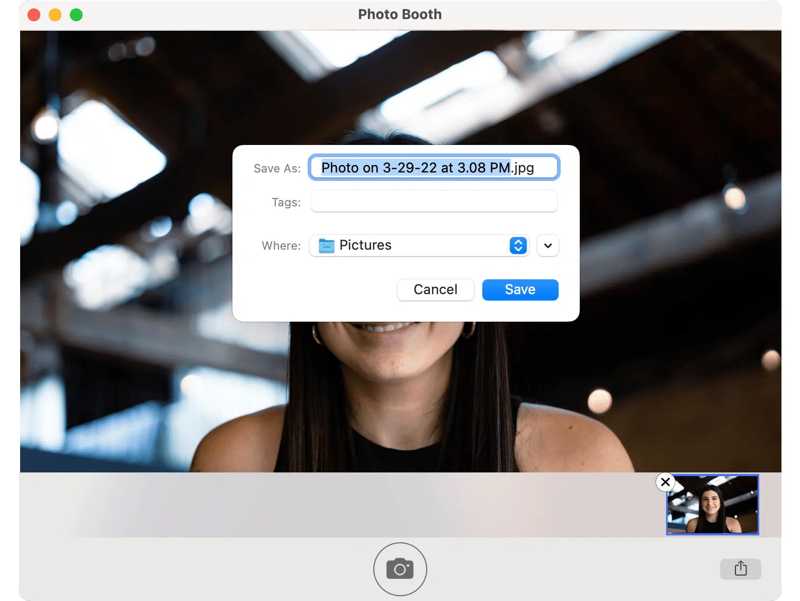
Step 7. After taking a photo, right-click on it and click Export.
Step 8. Leave a filename and set a location.
Step 9. Click the Save button to save it.
Part 3: How to Take a Photo with a Webcam Online
The built-in camera app is an easy way to take a photo with a webcam, but it is very simple. If you want bonus features and more custom options, you can try an online camera recorder app, such as pixect.com.
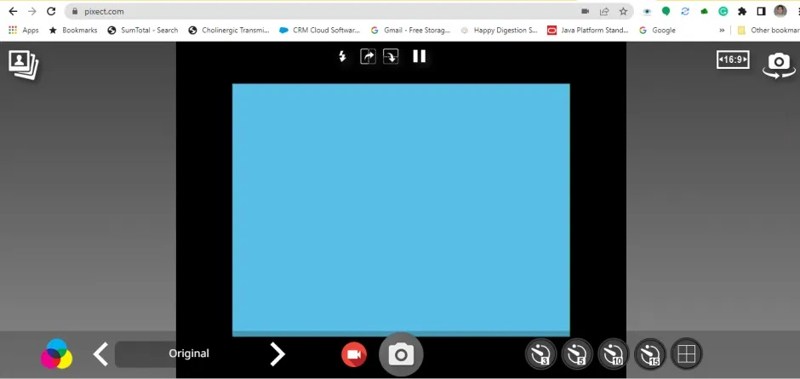
Step 1. Visit Pixect in your browser.
Step 2. Click the Get started now button.
Step 3. Then, choose the Use Camera option to activate the webcam.
Step 4. Permit the website to access your webcam.
Step 5. Click the Resolution button at the top right side, choose a resolution and aspect. It can take a photo up to 2K.
Step 6. Click the Done button to confirm the selection.
Step 7. To add effects, click the Effect button at the bottom.
Step 8. When you are ready, click the Camera button.
Step 9. Next, retouch the photo online.
Step 10. Finally, click the Save button to download it.
Part 4: How to Take Photos with a Webcam in High Quality
If you don't have an internet connection, try Apeaksoft Screen Recorder. It can record through your webcam on Windows and macOS. More importantly, it uses AI to optimize output quality automatically. The onscreen instructions streamline the workflow.

Downloaded by over 1,000,000 users
- Take photos with a webcam on a computer with one click.
- Offer various custom options.
- Capture photos at up to 4K.
- Record a wide range of sources.
- Support all popular video and image formats.
Secure Download
Secure Download

How to Take Photos with a Webcam on a PC
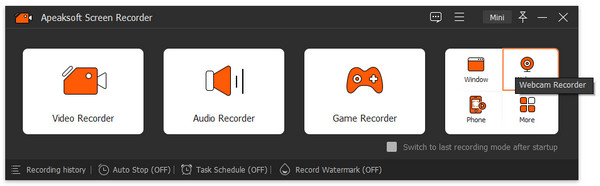
Step 1. Set up the webcam recorder
Launch the webcam recorder after you install it on your PC. There is another version for Mac. Choose the Webcam Recorder mode. If the software accesses your webcam for the first time, permit it.
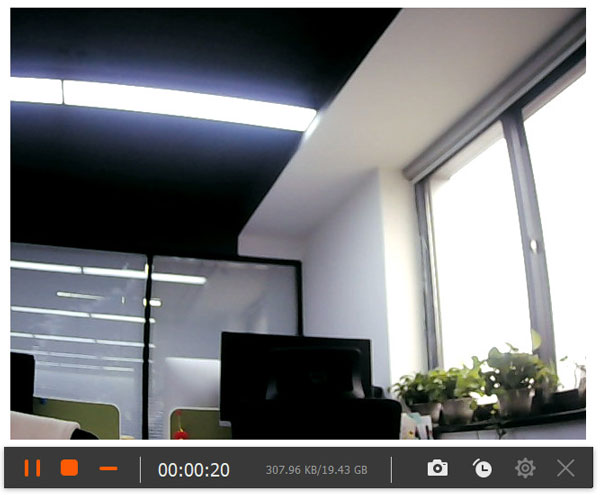
Step 2. Record webcam
Double-check your camera in the Webcam field. If you have multiple webcams, make sure to select the right one. Click the Resolution option and select a proper resolution. Click the REC button to start recording who is in front of your webcam.
Tips: If you want to change the output format and other options, click the Settings button.
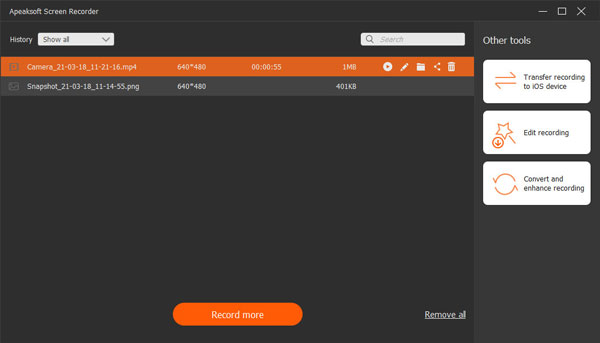
Step 3. Take photos
When the recording finishes, click the Stop button. After rendering, it will open in the media player. Preview the webcam recording. Place the slider in the right frame on the timeline and click the Screenshot button to take a photo. Then, you can find the selfies in the Image tab.
Conclusion
This guide explained how to take a photo with your webcam on your Windows or macOS computer. The built-in Camera app is a quick way to take photos and videos. Furthermore, webcam apps enable you to capture a webcam and retouch it online. Apeaksoft Screen Recorder is a great option if you want to take multiple selfies in high quality through the webcam on your computer. It utilizes AI to enhance webcam quality.
 Apeaksoft Screen Recorder
Record any video and audio on phone and computer screen.
Secure Download
Secure Download
Related Articles