Practical Solutions to Sharing an Album on Your iPhone
Sharing photo albums on an iPhone is one of the easiest ways to keep friends and family connected, whether it’s for travel memories, family events, or daily moments. However, many users are unsure where to start or how Apple’s shared albums actually work. This guide walks through the entire process step by step, helping you share albums on your iPhone smoothly, securely, and without confusion.
PAGE CONTENT:
Part 1: Preparations Before Sharing Albums on iPhone
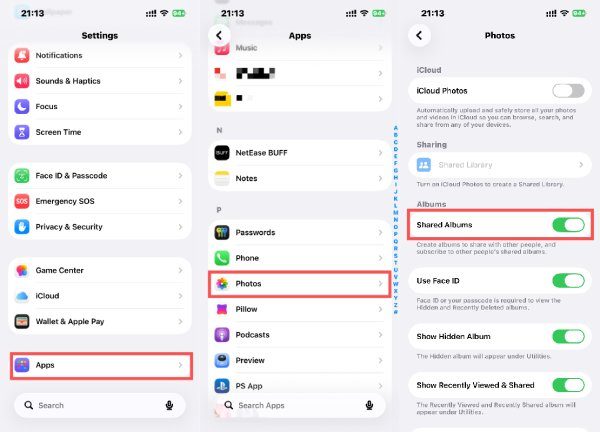
Before sharing an album on an iPhone, a few essential settings and conditions should be checked in advance. Apple’s Shared Albums feature relies on iCloud services, network connectivity, and proper permission settings. Understanding what needs to be enabled beforehand ensures the album-sharing process runs smoothly and avoids unnecessary interruptions during setup.
Step 1. Open Settings on your iPhone. Scroll down to find and tap Apps.
Step 2. In the new page, navigate and tap Photos to access a new page.
Step 3. When you find Shared Albums, tap the button to turn on the function.
Part 2: How to Create a Shared Album on iPhone
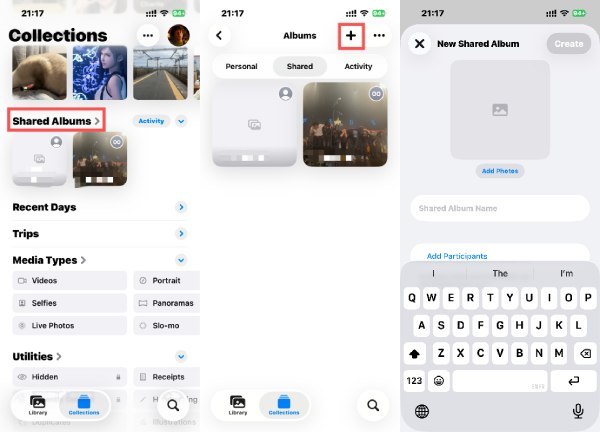
Creating a shared album is one of the most convenient ways to share an album on your iPhone, as it opens a collaborative photo sharing. Through this feature, you can invite others and control viewing or contribution permissions. Once the album is created, it can be reused for long-term sharing, making it ideal for events, trips, or family photo collections that need continuous updates. This way provides you with a more convenient way to share photos than transferring data from iPhone to iPhone.
Step 1. Open Photos, under the Collections tab, find and tap Shared Albums.
Step 2. Tap Add in the upper right corner to access a new page.
Step 3. Tap Add Photos to select the photos you want to share. Tap OK when you have entered all the necessary information.
Part 3: How to Add Photos to a Shared Album on iPhone
Sometimes, you may want to add photos to an existing Shared Album to update it. For this requirement, iPhone also provides a way, allowing you to manually select existing media or upload new content directly into a Shared Album on your iPhone. This process ensures all invited participants can instantly view updates, making shared albums a convenient solution for real-time photo sharing without repeatedly sending individual files.
Step 1. Open Photos and select the photo that you want to add to a Shared Album on iPhone. Tap Share.
Step 2. A new window will pop up. Tap Add to Shared Album to proceed.
Step 3. Tap to select an existing Shared Album and tap Post to add the photo to this Shared Album. You can also change the album name during the process.

Part 4: How to Accept a Shared Album on iPhone
You’ve learned how to create an album on iPhone, but how can you accept to join a Shared Album? When someone shares an album, recipients must accept the invitation before accessing its contents. Once accepted, the shared album on your iPhone becomes available alongside personal albums.
Step 1. When you receive an invitation to a Shared Album from your friends, you will get a notification. Tap the notification and unlock your iPhone to access the page.

Step 2. Please confirm that all the information is correct. Then tap Accept to join this Shared Album on your iPhone.

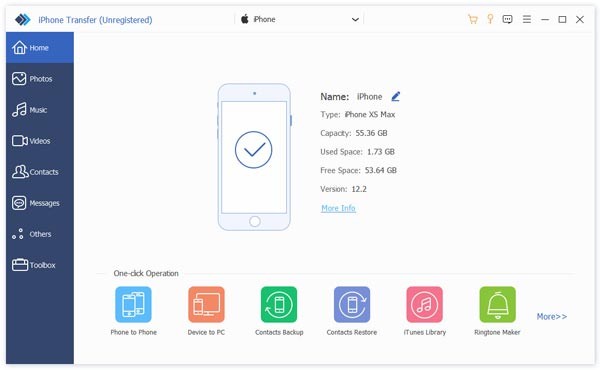
Part 5: A Powerful Tool to Add Photos to iPhone for a Shared Album
Before sharing albums on your iPhone, you can actually add more interesting memories from other devices. And when it comes to importing photos from different devices like a computer, Apeaksoft iPhone Transfer provides a safer and faster way without relying on iCloud storage limits. It allows you to preview, select, and organize photos selectively or in bulk.
Step 1. Download and install a tiny installation package. Then, launch Apeaksoft iPhone Transfer and connect your iPhone to the computer using a USB cable.
Secure Download
Secure Download
Step 2. Apeaksoft iPhone Transfer will soon detect your iPhone. Next, click Photos on the right side.
Step 3. Under the Photos tab, click Add and then Add Files or Add Folder to proceed.
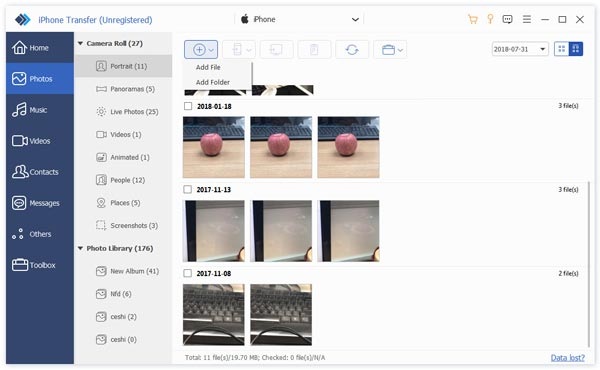
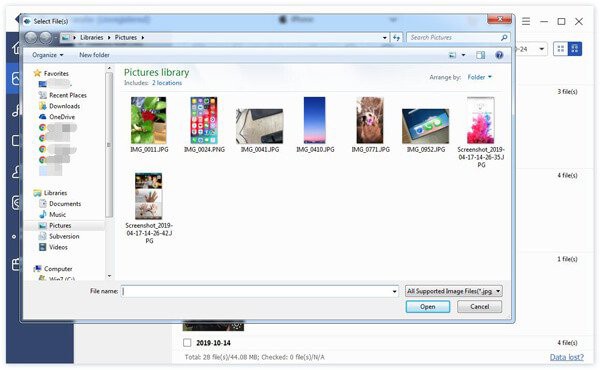
Step 4. A new window will pop up, allowing you to select the photos from your local path. Once you finish the selection, click Open to add these photos to your iPhone for adding to a Shared Album.
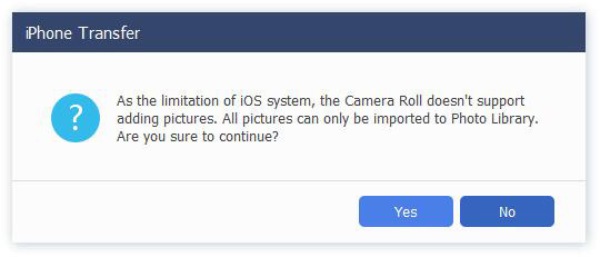
Tips: Due to the limitations of iOS system, photos cannot be added to Camera Roll directly. So you can only add pictures to the Photo Library, which actually works for the Shared Album.
Conclusion
Making a Shared album on iPhone is a convenient way to keep photos organized and accessible for your friends. For added peace of mind, backing up essential photos before sharing ensures nothing is lost. To make sure all your photos and data remain safe, you can trust Apeaksoft iPhone Transfer.
Secure Download
Secure Download
Related Articles
This article will show you how to fix 2 iPhone photos not showing up issues - one on PC missing codec, and one in Camera Roll.
Is Photo Stream not syncing on your iPhone or iPad? This is all-in-one tutorial on how to fix My Photo Stream feature is not working as usual.
Photos not uploading to iCloud from iPhone or iPad? Here are 5 ways for syncing photos from iPhone to iCloud, covering the latest iPhone 17 series and iOS 26.
Looking for ways to transfer notes from an iPhone to another iPhone? Here are five effective approaches for note migration.
