How to Transfer Music from iPhone or iPod to a Computer
Since Apple enforces serious copyright regulations, you cannot download any songs on your iPhone. In other words, you have to purchase and download music from Apple Music and other authorize streaming services. However, it is inconvenient to manage songs on your iOS device. This guide lists the proven methods to transfer music from an iPod or iPhone to a computer. Thus, you can back up and manage your songs without taking up your memory.
PAGE CONTENT:
Part 1: Ultimate Way to Transfer iPhone/iPod Music to Computer
If you are looking for an easy way to move music from iPhone or iPod to computer, Apeaksoft iPhone Transfer is a good option. It lets you view and manage all songs, playlists, and albums on your computer. It doesn’t require an internet connection or technical skills.
An Ultimate Way to Transfer Songs from iPod or iPhone to Computer
- Move music from an iOS device to a computer quickly.
- Transcode music files according to the target platform.
- Protect your music quality automatically.
- Support a wide array of music file formats.
- Compatible with the latest models of iPhone and iPod.
Secure Download
Secure Download

How to Transfer Songs from Your iPhone to PC
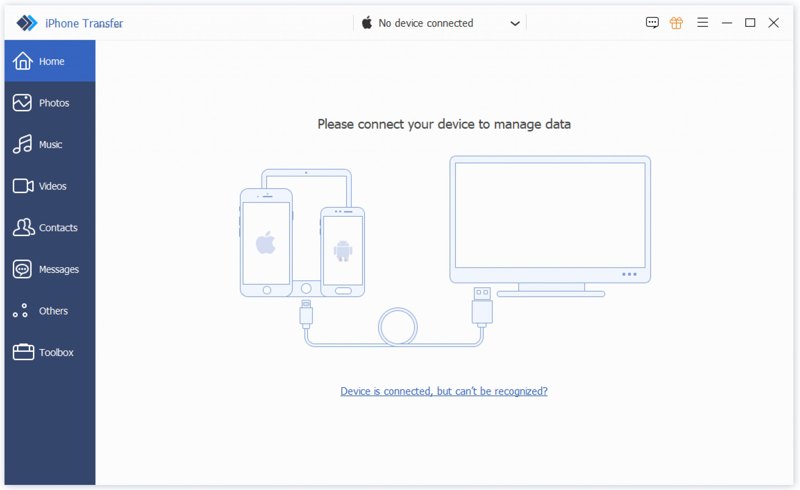
Step 1. Install iPhone Transfer
Run the iPhone music transferring software after installing it on your PC. There is another version for Mac. Link your iPhone to your PC with a Lightning cable. If prompted, tap Trust on your screen to trust this PC.
Step 2. Preview your music
Once your device is recognized, go to the Music tab on the sidebar. Now, you can view and manage all songs on your iPhone.
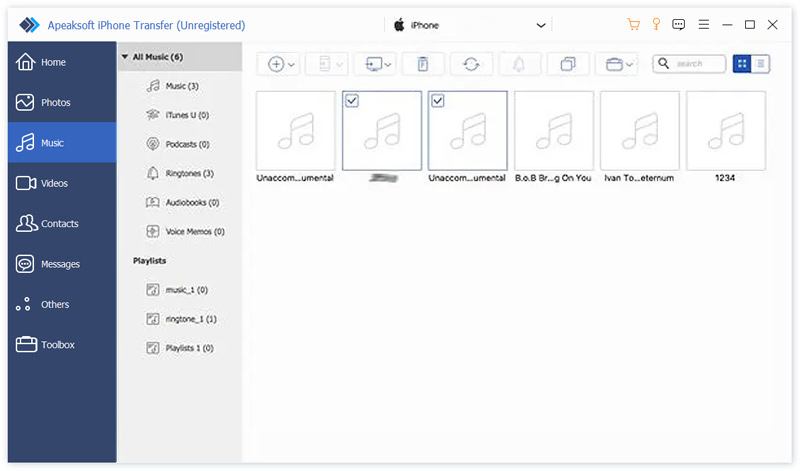
Step 3. Transfer music to PC
Select the songs you want to transfer. Click the Monitor button on the top ribbon, and choose Export to PC. Then, set an output folder and confirm it. This program can also help you export iPhone contacts to another iPhone.
Part 2: How to Transfer Songs from iPhone to PC/Mac via iCloud Drive
As mentioned previously, you cannot move songs from an iPhone to a computer with a USB cable directly due to copyright regulations. However, you can use iCloud Drive to transfer downloaded music files.
Step 1. Move the downloaded music files to the iCloud Drive folder in your Files app.

Step 2. Run the Settings app and tap on your profile.
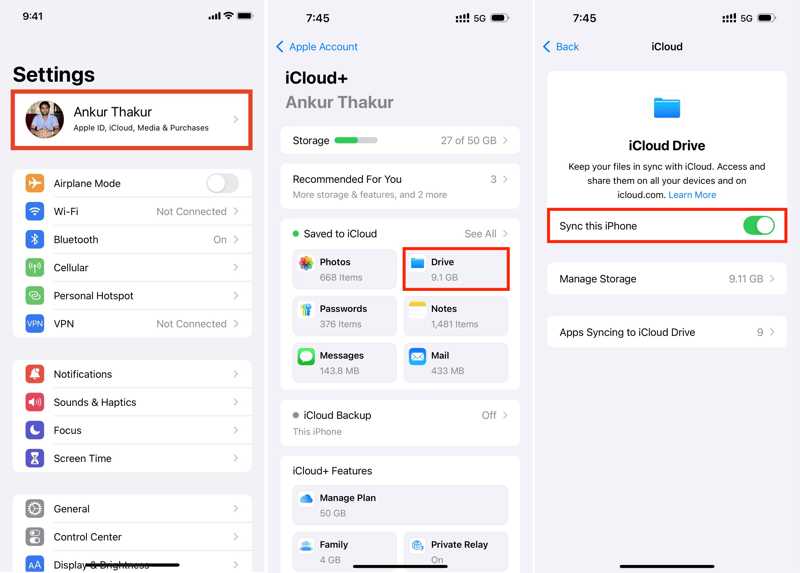
Step 3. Choose iCloud, tap iCloud Drive, and toggle on Sync this iPhone.
Step 4. When syncing finishes, go to www.icloud.com in a browser on your computer.
Step 5. Log in with your Apple ID and password.
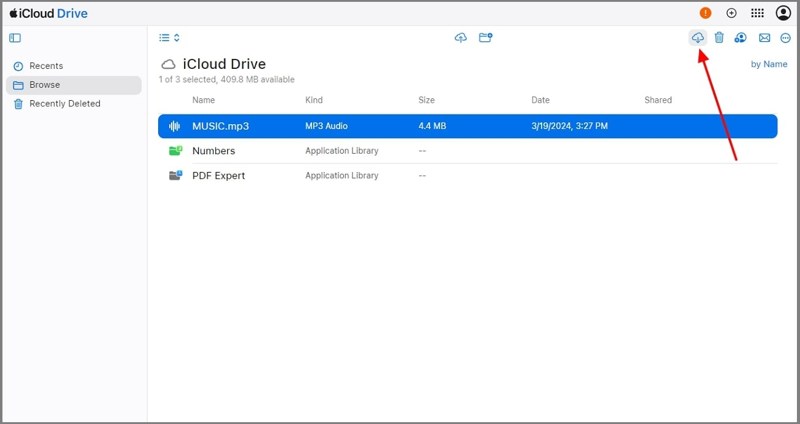
Step 6. Choose Drive, find and select the music files.
Step 7. Click the Download button to move music from iPhone to computer.
Part 3: How to Transfer Songs from iPhone to Mac by AirDrop
AirDrop is Apple’s wireless connection. It allows you to transfer songs from your iPhone to your Mac quickly. This way works for the non-purchased music. Remember that it takes time to move large music files.
Step 1. Open Control Center on your Mac or the Finder app.
Step 2. Choose AirDrop, toggle it on, and select Everyone.
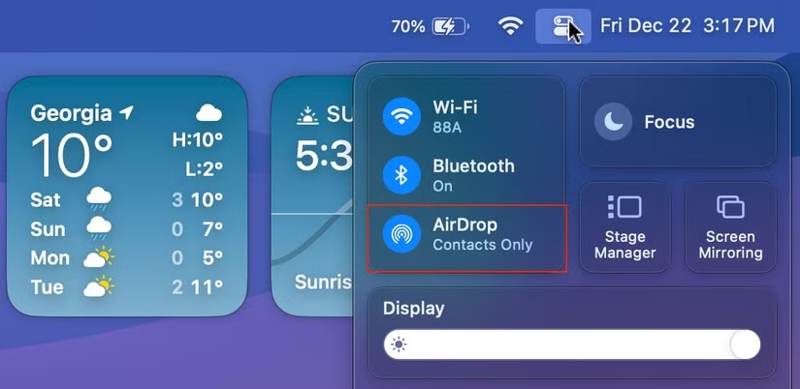
Tip: Turn on Bluetooth and Wi-Fi on your Mac if AirDrop doesn't work.
Step 3. Turn to your iPhone and enter the Control Center.
Step 4. Enable Bluetooth and Wi-Fi.
Step 5. Tap AirDrop, and choose Everyone.
Step 6. Locate the music file you want to transfer.
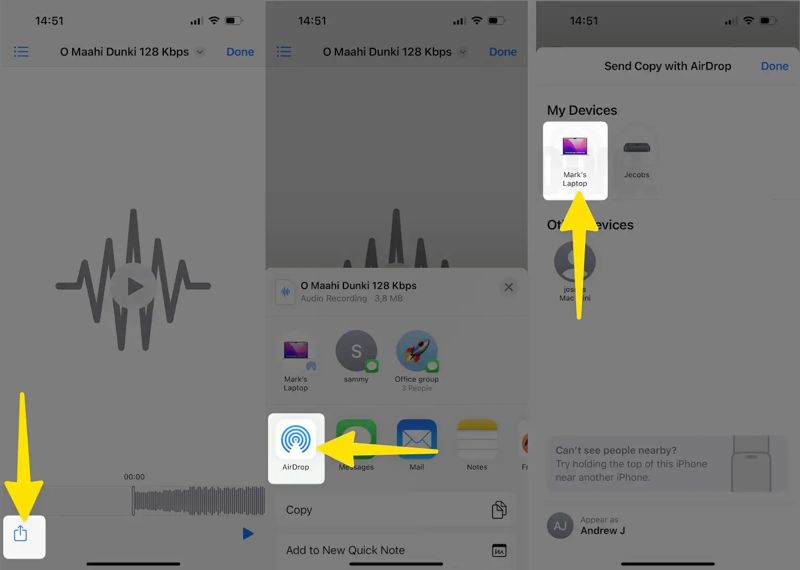
Step 7. Tap the Share button, choose AirDrop, and tap your Mac.
Step 8. Switch to your Mac and accept the music file.
Part 4: How to Move Music from iPod to Computer Using Apple Music
If you want to transfer purchased music from an iPod or iPhone to a computer, you have to use the Apple Music service. Currently, it has replaced iTunes for music management on PC and Mac.
Step 1. Start the Settings app on your iPhone or iPod. Connect to a stable internet connection.
Step 2. Scroll down and go to the Music tab.
Step 3. Toggle on the Sync Library option.
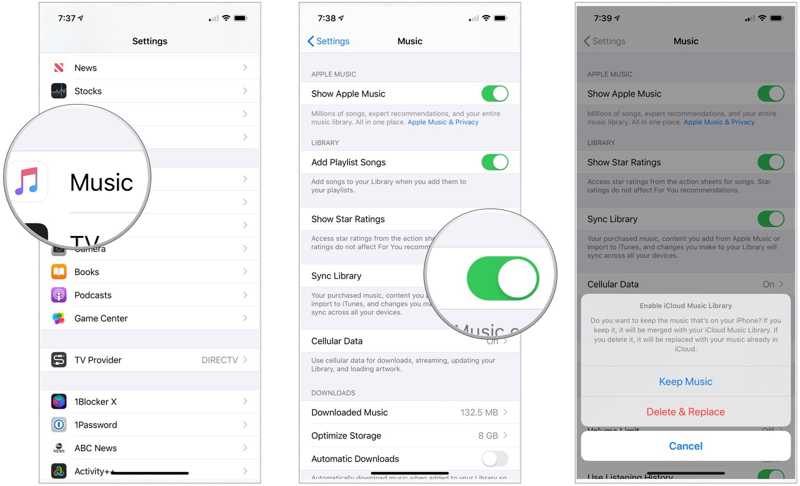
Step 4. Choose Keep Music or Delete & Replace on the dialog. The former will merge your music library, and the latter will replace it with your music library.
Step 5. Then, sync your music library on Mac or PC:
For Mac
Open the Apple Music app, choose Account in the menu bar, and sign in with the same Apple account.
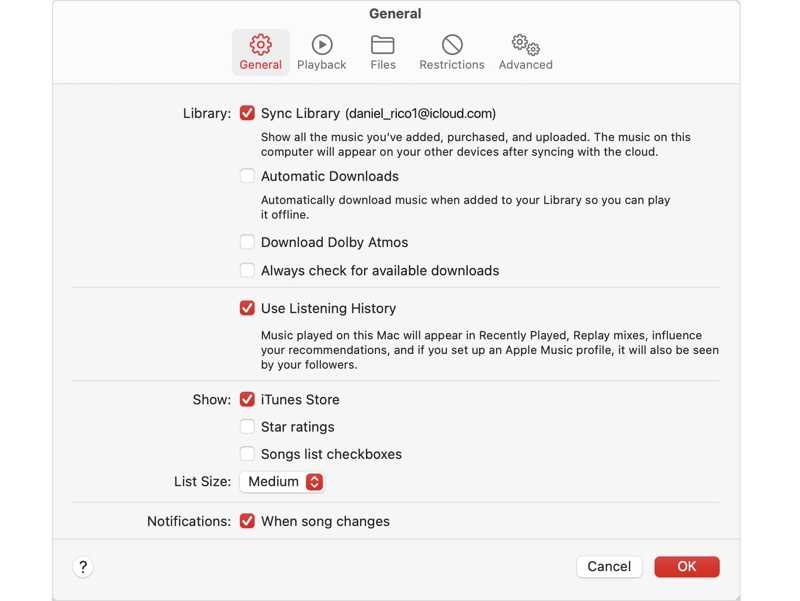
Step 6. Click the Music menu, choose Settings, and switch to the General tab.
Step 7. Check Sync Library, and click OK.
For PC
Open the Apple Music app. You can install it from the Apple website.
Step 8. Click your name and log in with the same Apple account.
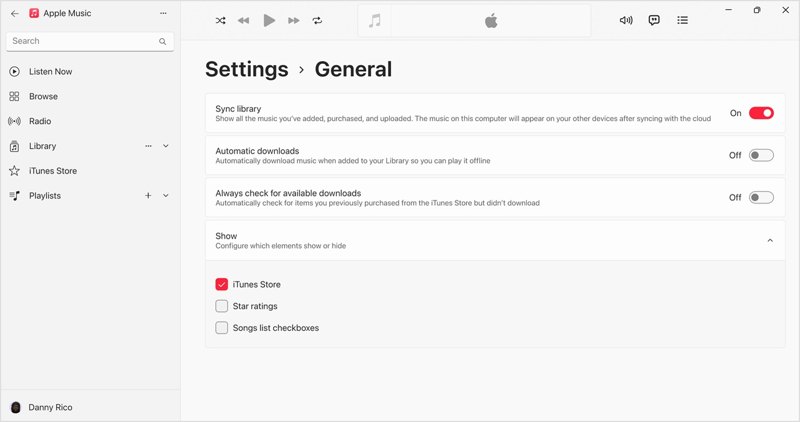
Step 9. Click the Menu button at the top of the sidebar and choose Settings.
Step 10. Go to the General tab, and turn on Sync library.
Conclusion
Now, you should understand how to transfer music from iPhone to computer. You can share non-purchased songs on your iPhone or iPod to a computer using iCloud Drive or AirDrop wirelessly. For syncing purchased songs, you have to use the Apple Music service. Apeaksoft iPhone Transfer is a quick way to transfer your iPhone music to any platform.
