If you want to send photos to groups of people, you can share a photo album with all pictures and videos contained directly. For iOS users, Apple releases the default iCloud Photo Sharing feature. All subscribers can view and add comments to the shared album. It is also supported to post new photos to the shared photo album.

The collaborative album stores the precious memories and important moments of all participants. Sounds pretty good, right? Here is the complete tutorial to share an album on iPhone. Thus, you can share photos with families and friends via iOS 26 devices easily.
Part 1: How to Share an Album on iPhone
The iCloud Photo Sharing feature can be enabled on iPhone, iPad, Mac and PC. For people who want to share an album on iPhone with someone else, you can do as the following paragraphs tell. To start with, you need to update iPhone to the latest iOS. Sign into iCloud with the Apple ID that you want to share iPhone albums.
Section 1: Create Shared Photo Albums
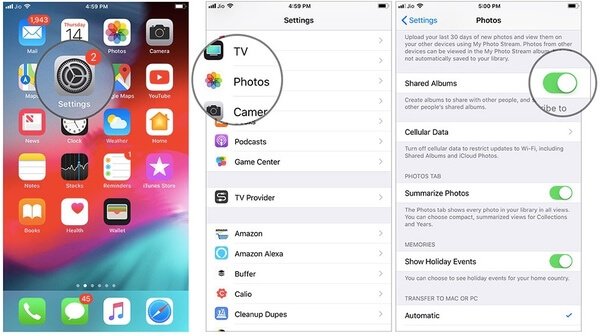
Step 1Launch "Settings" app on iPhone.
Step 2Tap your name followed by "iCloud" and "Photos" in the list.
Step 3Switch on "Shared Albums" to set up iCloud Photo Sharing.
Step 4Later, you can get more details to create an album on iPhone with the Photos app.
Section 2: Share an Album on iPhone with iCloud Users
Step 1Open "Photos" app. In the "Albums" section, tap "See All" next to "Shared Albums" to view shared albums on iPhone.
Step 2Tap "Edit" followed by "+" to create a new shared album.
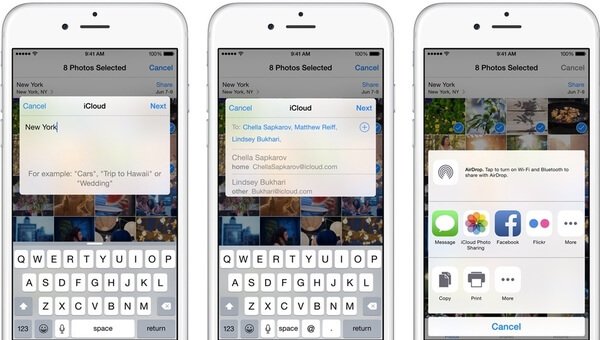
Step 3Set a name for your shared album. Tap "Next" to move on.
Step 4Enter the email addresses (associated with the iCloud account) of invitees in the "To" section. You can invite up to 100 people to subscribe to the shared photo album.
Step 5Tap "Create" and "Done" to share an album on iPhone in 2019.
Section 3: Share an Album on iPhone with Non-iCloud Users
Step 1Create a shared album on iPhone without invitations. You can also change the album name after creating it.
Step 2Open this shared album on iPhone. Tap "People" at the bottom.
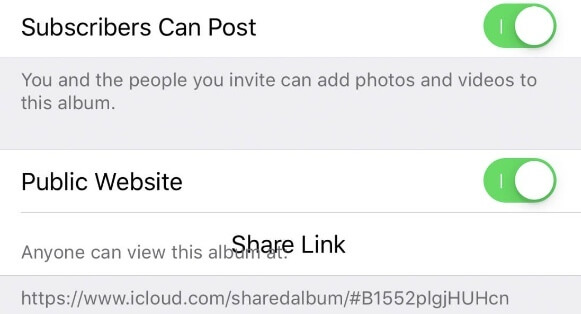
Step 3Turn on "Public Website" to get a link of your iPhone shared album.
Step 4Tap "Share Link" to send the share link to anyone. Thus, you can even share iPhone album with Android via the link.
Section 4: What You Can Do with a Shared Album
You can share one iCloud Photo Library within family or any invited user with above steps. When others accept the shared album invite on iPhone, your shared album can be visible immediately.
What's more, you can trigger on "Subscribers Can Post" and "Notifications" to unlock more features. Subscribers can add photos to the shared photo album too. By the way, you can get notified when subscriber like, comment, or add photos or videos to this shared album.
Part 2: How to Share an Existing Album on iPhone
It is easy to add photos to the existing shared album. Then how about sharing an existing album on iPhone? It is not supported to share the existing photo album on iPhone with iCloud Photo Sharing. During this time, you need to share photos and albums via phone transfer tools.
Way 1: Best Way to Share Albums from iPhone to iPhone/Mac/PC/iTunes
Apeaksoft iPhone Transfer is capable to transfer data from iPhone/iPad/iPod to PC/Mac/iTunes/another iOS device without data loss. You can transfer thousands of pictures from iPhone selectively with ultrafast speed. The built-in photo manager allows users to manage and transfer any iPhone photo with ease. In a word, you can get one-stop solution to transfer existing albums from iPhone to other devices.
- Transfer photo albums, pictures, videos, music, contacts, messages from iPhone flexibly.
- Create, rename, delete, preview and edit any photo album or picture within the built-in photo manager.
- Fully compatible with iPhone 16/15/14/13/12/11/X, etc.
- Cause no data loss while transferring any iOS data.
- Organize the photos on iPhone in an album like move, delete, etc.
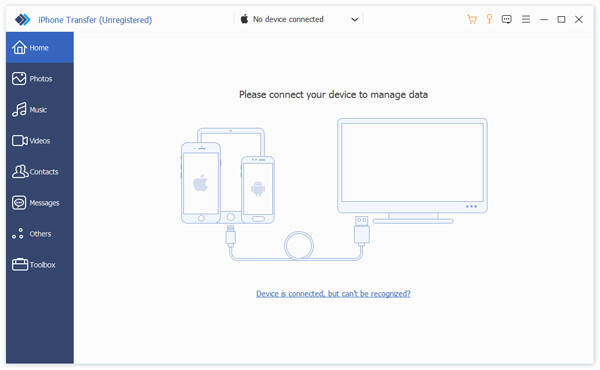
Step 1Free download, install and launch iPhone Transfer. Plug your iPhone into the computer with a USB cable. If you want to share an album from iPhone to another iPhone or iPad, you need to connect the iDevice to PC too.
Step 2Scan iPhone albums
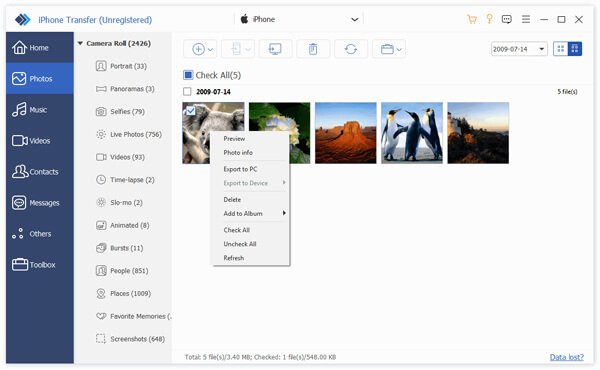
Unlock your iPhone and trust the computer. Click "Photos" in the left pane. Later, iPhone Transfer can extract all photos and albums stored on your iPhone. Right-click on any picture to preview details.
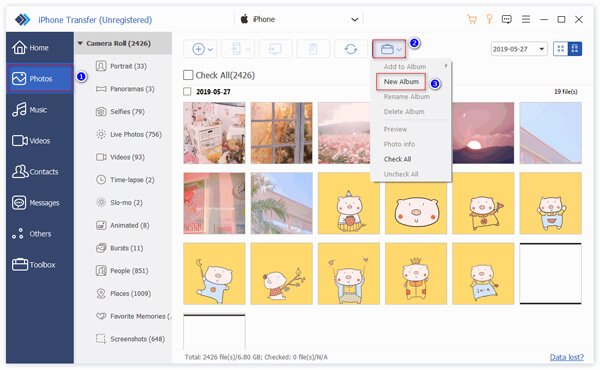
Step 3Open any album under the "Photo" category. Click "Folder" on the top toolbar. You can create a new album, add photo to album, rename the album and even delete an album freely. In addition, you can get the photo info in details.
Step 4Share an existing photo album on iPhone
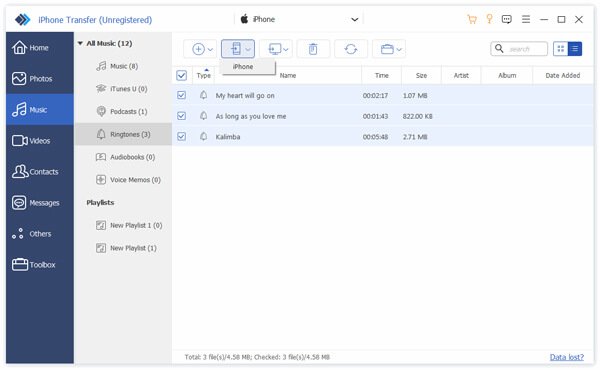
Select the whole existing album or newly-created album you want to move. Click "Export" to set the output device. You can share albums from iPhone to iPhone and computer freely.
Way 2: Share a Photo Album on iPhone via Email
If there are no more than 5 pictures in your existing photo album, you can share albums by email too. Of course, you can also upload multiple pictures as email attachments. Later, you can share an existing photo album with non-Apple users in different email providers.
Step 1Run "Photos" app.
Step 2Open an album or collection. Tap "Select" to choose the photos you want to share.
Step 3Tap "Share" and select "Email" in the list.
Step 4Complete the required information to share an iPhone album via email.
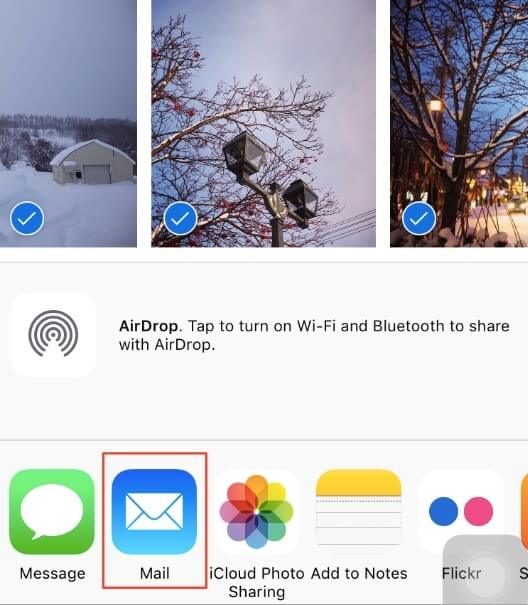
Way 3: Share a Photo Album on iPhone with AirDrop
AirDrop is a good application that can share photos and albums from one iPhone to another iPhone wirelessly. You can AirDrop an album on iPhone with photos in full resolution. Actually, you can share up to 100 photos within an album on iPhone via AirDrop. Make sure the person you want to share is nearby and within Bluetooth and Wi-Fi range.
Step 1Open "Photos" app. Browse which iPhone album you want to share.
Step 2Tap "Share" and select "AirDrop" for photo sharing.
Step 3Tap "All" to select all photos in an album. You can select a range of photos or different photos too.
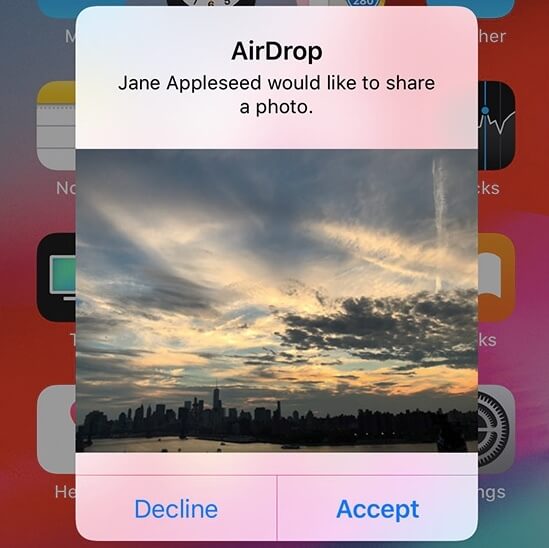
Step 4Select the device name you want to share.
Step 5Tap "Accept" in the receiving device to share photos on iPhone.
These are proven ways to share an album on iPhone XR and other iOS devices. Actually, you can share an album from iPhone to WhatsApp and other apps too. If you are in a poor Wi-Fi condition, or the shared albums are not available for this device, you can run Apeaksoft iPhone Transfer to share albums in large file size. The iPhone photo transfer software has the superfast file transferring speed and high-quality output. Thus, you can transfer data from iPhone to iPhone or other devices via iPhone Transfer losslessly and quickly.