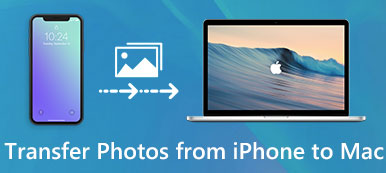
After taking photos by your professional camera on the trip, it will be much more convenient to view the photos on iPad. To do this, you need to transfer these photos from the camera to your iPad first.

No matter what solution you use, you can't drive round the two steps. In this passage, you will learn how to import photos from a professional camera to iPad with easier and quicker methods.
- Part 1. Transfer Photos from Camera to iPad with iPad camera connect kit
- Part 2. Transfer Camera Photos to iPad via Apeaksoft iPad Transfer
Part 1. Transfer Photos from Camera to iPad with iPad camera connect kit
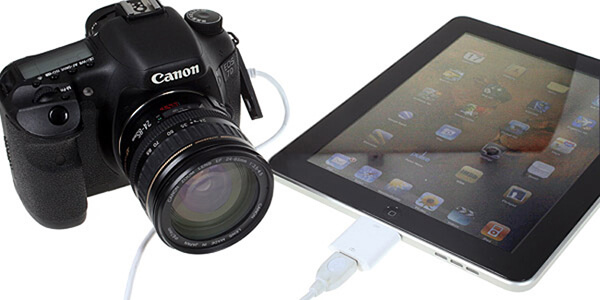
All the digital cameras are equipped with a USB cable, which is used to transfer photos from cameras to a computer. Different from regular computer, iPad does not come with a USB port. If you do want to transfer photos from camera to the iPad, you can buy a optional iPad Camera Connection Kit to do that.
The iPad Camera Connection Kit is tailored specially for iPad, enabling you to import images and videos in full quality without a computer. It has two components: a USB adapter and an SD card adapter. And you can buy it for $29 from Apple Store. Next here are the detailed steps to transfer photos from camera to iPad with iPad camera connect kit:
Step 1: Connect your camera to iPad
Use one of the connectors in the kit to connect the camera to your iPad, and unlock your iPad with the password.
If you uses an SD card to save photos on the camera, connect it to your iPad with the SD card adapter. And if you uses other storage cards , such as Sony's proprietary card, connect it to the USB adapter through the included USB cable.
Step 2: Set camera to transfer pictures
Next turn on the digital camera, and set it to transfer picture from camera to iPad. You can refer to the manual of your camera if you do not know how to set.
Step 3: Launch Photo inn iPad
Get into your iPad again and start Photo app. Then you can see a list of images from the digital camera on the iPad.
Step 4: Import images from camera
At last you are able to select which photos to transfer from your camera to the iPad. You can also tap on the check mark to organize these photos into albums or delete them freely!
Isn’t it easy? Now you are capable to view, edit these transferred photos in the iPhoto app, share them with your friends on Facebook or other social websites, as well as upload them to Dropbox and other cloud storage service.
Part 2. Transfer Camera Photos to iPad via Apeaksoft iPad Photos Transfer
If you are not willing for pay $29 to buy an iPad Camera Connection Kit, maybe you can choose a professional transfer tool instead. Here this passage suggests you to use Apeaksoft iPhone Transfer, one of the best and most powerful transfer tool among the market to transfer photos from camera to iPad.
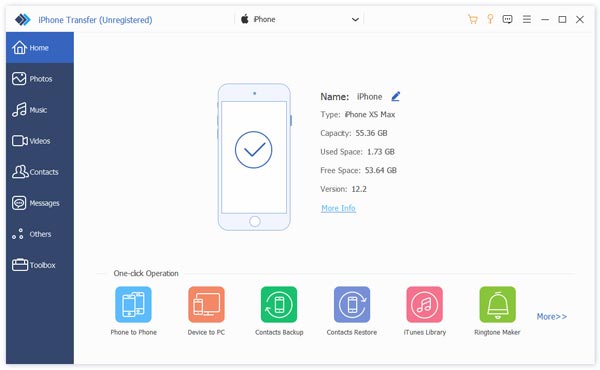
With this wonderful transfer program, you are able to sharing photos or other files between cameras, computers, iTunes library, iPhone, iPad and iPod Touch without connecting the camera to iPad.
Key Features:
- Sync photos or other files from cameras to iPad, iPhone, iPod Touch/ iTunes in one click.
- Transfer photos safely without any loss of data between multiple devices, such as from a digital camera to iPad.
- Friendly interface enables you to copy lost, deleted or damaged photo files easily even for fresh hands.
- Manage and edit your photos and other media files separately, such as deleting, renaming, creating albums conveniently.
After having a general knowledge about Apeaksoft iPhone Transfer’s key features, now let’s start learning how to transfer photos from camera to iPad with Apeaksoft iPhone Transfer:
Step 1: Connect your camera to computer
First use the USB cable of the camera to plug your digital camera into the computer, and then import your selected images to computer.
Step 2: Download Apeaksoft iPhone Transfer
Download and install Apeaksoft iPhone Transfer on the computer. You can easily download this iPad photos transferring software with the download button above. Choose a proper version of Windows or Mac.
Step 3: Connect the iPad to computer
Launch this iPad pictures transfer tool by tapping on its icon. Connect your iPad to computer via its data cable. Once connected, iPhone Transfer will detect the files of iPad automatically.
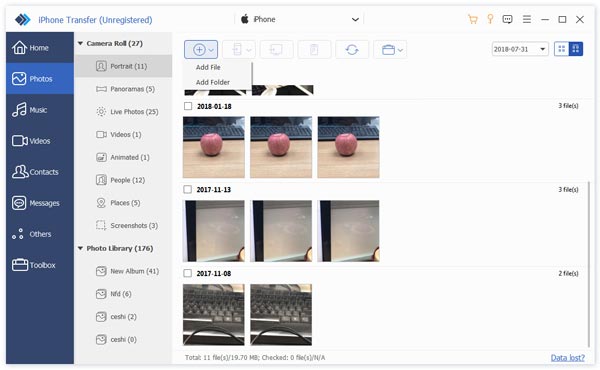
Step 4: Import photos from computer
Then select Photos from the sidebar on the home menu, and click on the Add button in the top left corner to add photos from computer to iPad.
It is done! Now you have managed to transfer images from camera to your iPad successfully! Go to enjoy your beautiful memory the files on the iPad! Here you may also want to know what to do when photos disappeared from iPhone or iPad.
Conclusion
This passage is an ultimate guidance about how to transfer photos from a digital camera to to the iPad. Both these two transferring methods mentioned above are quite easy and require little technology.
In particular, you are high recommended to have a try about Apeaksoft iPhone Transfer. In addition to transfer photos from camera to iPad, you can also use it to backup and restore your iPhone, iPad and iPod touch as an alternative to iTunes.
At last, if you still have any query about how to transfer photos from a digital camera to to the iPad, please share them in the following comments. Do not forget to share this article with your friends on your social websites if it helps you to some extents!