If you have just bought a new computer, you need to transfer all your files from the old PC to the new one first. You can find lots of solutions to transfer data and settings between two computers. The article lists the most efficient and easiest 4 methods to transfer files between different PCs. You can choose the desired one to manage files on computer. Read on the article and learn more details.

- Part 1: How to Transfer Files from One PC to Another via Windows Easy Transfer
- Part 2: How to Sync Files from PC to PC with Windows Transfer Cable
- Part 3: How to Move Files And Settings from Old PC to New PC by One Drive
- Part 4: How to Transfer Files from PC to PC via External Hard Drive
Part 1: How to Transfer Files from One PC to Another via Windows Easy Transfer
Windows Easy Transfer is a built-in tool of Windows 7 that enables you to transfer files from PC to PC for free. You can also use the program with Windows XP, migrate data to new computer with an external device.
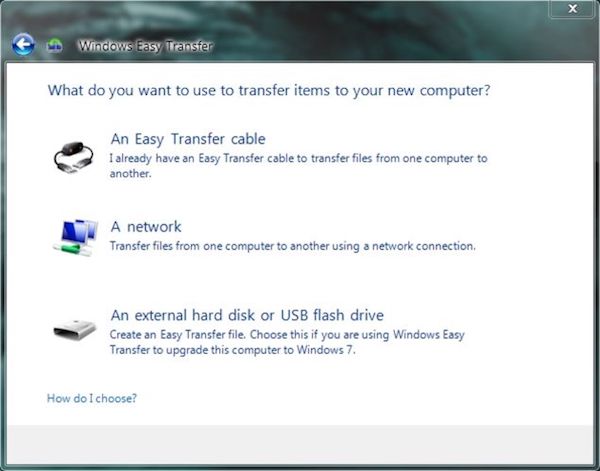
Step 1: Plug in external drive
Get into your old PC that running Windows 7, and plug in your external drive and hit the Start menu.
Step 2: Enable Easy Transfer
Then search Easy Transfer in the search box of Start Menu to launch it, and select "This Is My Old Computer" option from the screen.
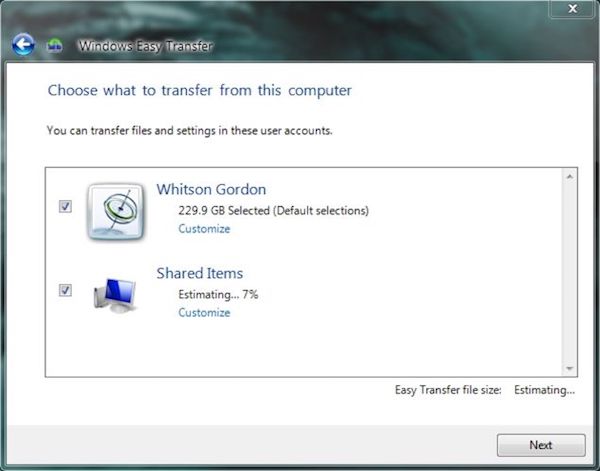
Step 3: Import files to external drive
Next Windows Easy Transfer will transfer your files from the old computer to the external driver automatically.
Step 4: Move to another PC
Head back to the new machine, and plug the external drive into it. Also, launch Windows Easy Transfer on the new computer.
Step 5: Transfer files to new PC
Choose the external drive form the list to start the transferring process. Wait for a few minutes, your new PC will reboot.
Now you can see all the files have been transferred successfully from your old PC to new PC.
In addition, what you need to know is that Windows Easy Transfer only migrates your files and settings, but not the programs and apps. With Windows Easy Transfer, you are able to know what programs you need so that you can have a quick installation about them.
Part 2: How to Sync Files from PC to PC with Windows Transfer Cable
Using Windows Transfer Cable is a relatively cheap choice for you to transfer files from PC to PC in Windows 10. Just prepare a transfer cable and two USB 3.0 male connectors, you can easily share huge amount of files like high-quality videos between computers.
But you need to pay attention that transferring files from PC to PC via a Windows transfer cable cannot make a backup of these converted files. You’d better create a backup beforehand to prevent data loss.
Step 1: Connect two computers
Connect both of your computers with the Windows transfer cable and USB connectors, which can be bought on amazon for about $30.
Step 2: Transfer files automatically
Once connected, the related program will transfer files, settings, user accounts as well as folders from one PC to another.
Step 3: Save files to another PC
Next the screen of another computer will get black. Wait for it to restart, and then you are able to save these files into the local folder in another PC.
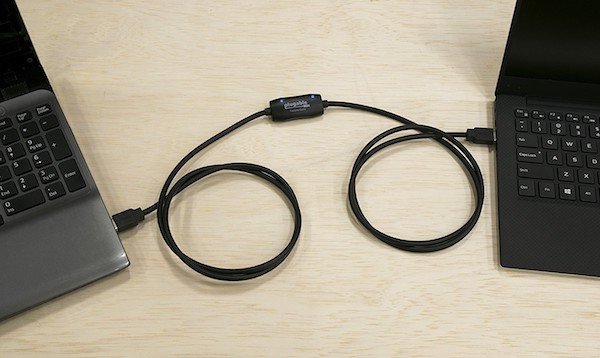
To transfer the whole apps from PC to PC, you are advised to ask PC mover Professional for help.
Part 3: How to Move Files And Settings from Old PC to New PC by One Drive
Cloud Storage services, such as One Drive, Dropbox, Google Drive, and so on, also offers great solutions to help you transfer files from one Windows devices to another, or backup and restore your computer and etc. with cloud storage service, you can easily share files with multiple devices and protect them from damaging.
Take One Drive as an example. As long as you sign in One Drive with your Microsoft account, you will automatically get 5 GB of cloud storage space for totally free. Though it is not too much storage memory, use it to transfer files from your old PC to new PC should be enough. Or you can also pay $2 per month to gain 50 GB of storage space.
Step 1: Log in One Drive
After downloading One Drive app on Google Play Store, launch it on your two PCs and sign into with your Microsoft account.
Step 2: Share files with One Drive
Next select files on the source computer that you are going to transfer to the target computer, and then upload it to the One Drive app.
Step 3: Save files on target PC
And turn to the target PC, find the imported files, and tap on the Download button to save them to the computer.

Part 4: How to Transfer Files from PC to PC via External Hard Drive
If you are looking for a way to transfer your files from an old PC to a new PC at any times you like, then you can take external hard drive into your consideration. With an external hard drive along with you, you are able to access these files without an Internet connection.
However, it will take a long time to complete the entire transferring process manually. What’s more, the external hard drive is quite easy to get destroyed, lost.
Step 1: Import file to external hard drive
Insert your hard device into one PC, then find and locate files that you are going to transfer to another PC, and drag it into the hard drive folder directly.
Step 2: Reverse the transfer process
Next poll out the external hard drive and inset it again into another PC, open its folder, and move the converted files to the local folder of another PC.
Step 3: Open and view the file
Finally, you can tap on the icon of transferred files to access them. And you can even do some edits to the files.
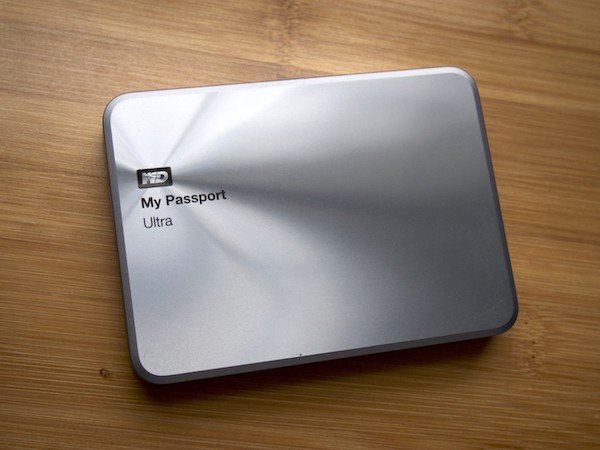
You are not supported to transfer settings or apps on Windows via an external hard drive.
Conclusion
When you need to transfer files from one PC to another, you can find the 4 different methods from the article. Whether you transfer files with hard devices, such as USB drive or transfer cable, or sync files via cloud service, you can get the desired solutions to sync files between computers with ease.