


How to Unlock a Disabled iPod with/Without iTunes or a Computer

Many users encounter the "iPod is disabled" message when they enter the wrong passcode too many times, either because they forget the iPod passcode or because they make too many accidental touches. A disabled iPod prevents users from using the iPod normally.
The good news is that this article explains the reasons for this issue and shows how to unlock a disabled iPod.
PAGE CONTENT:
- Part 1: Why Is Your iPod Disabled
- Part 2: How to Unlock a Disabled iPod with iTunes/Finder
- Part 3: How to Unlock a Disabled iPod via Recovery Mode
- Part 4: How to Unlock a Disabled iPod via iCloud Find My
- Part 5: How to Unlock a Disabled iPod Without iTunes (Recommended)
- Part 6: Comparison of Unlocking Disabled iPod Methods
Part 1: Why Is Your iPod Disabled
Why will you encounter the "iPod is disabled" screen? Actually, this is a security protection mechanism of the Apple system. When you repeatedly enter incorrect lock screen passwords, the iPod's built-in security anti-theft mechanism will be triggered in stages. Eventually, the device will be locked and deactivated by the system. The specific analysis rules are as follows:
| Wrong Password Attempts | Result |
| 6 times consecutively | Disabled for 1 minute |
| 7 times consecutively | Disabled for 5 minutes |
| 8 times consecutively | Disabled for 15 minutes |
| 9 times consecutively | Disabled for 60 minutes |
| 10 times consecutively | Disabled permanently. You cannot wait for it to unlock automatically. You must restore it on your computer. |
During the disabled period, you cannot re-enter the password.
Next, this article will guide you step by step on how to unlock a disabled iPod.
Part 2: How to Unlock a Disabled iPod with iTunes/Finder
If you have ever backed up your iPod on this computer and trusted it before, you can use the Restore Backup function in iTunes to unlock your iPod without a passcode in just one step. This is the most reliable official way, suitable for all iPod models.
Step 1. Open iTunes and connect your iPod to the computer.
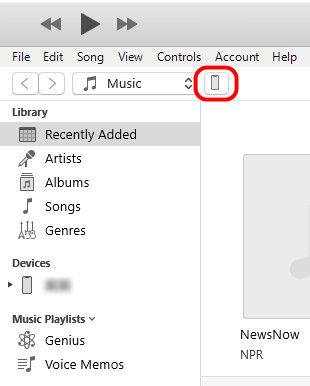
Step 2. Click the device icon in the upper-left corner.
Step 3. On the right interface, click on Restore Backup.
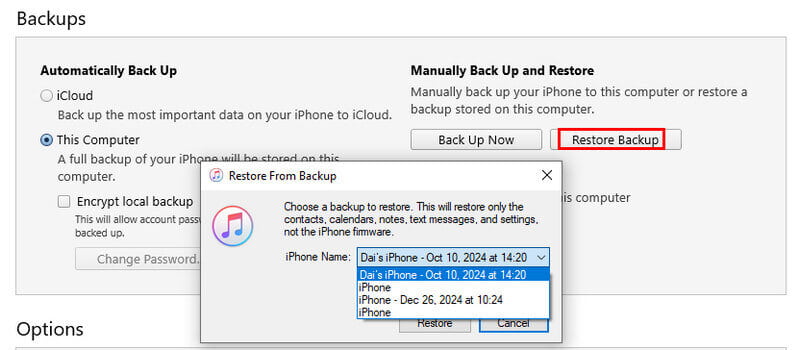
Step 4. Select the corresponding backup and click Restore. After completion, the iPod password will be automatically cleared.
Tips: The steps for Finder on Mac are similar to those for iTunes on Windows.
Part 3: How to Unlock a Disabled iPod via Recovery Mode
If you haven't backed up your iPod using iTunes or Finder, you can only unlock it in recovery mode.
Step 1. Connect your iPod to a computer with a USB cable.
Step 2. Turn off your iPod, then put it into Recovery Mode.
For iPod Touch 7 and later: Hold the Volume Down and Top buttons together until the iTunes logo appears.
For older iPod Touch models: Press and hold the Home and Top buttons at the same time until the Recovery Mode screen appears.
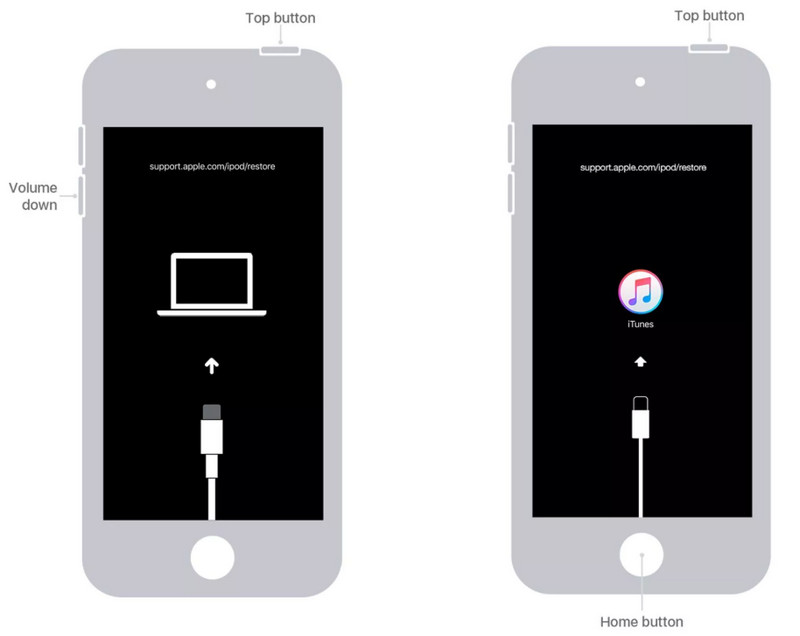
Step 3. Open the latest iTunes. The computer will detect your iPod in recovery mode. Click Restore iPod.
Step 4. The system will download firmware and erase all data. After finishing, activate your iPod with your Apple ID.
Tips: All data will be erased. Back up your iPod in advance.
Part 4: How to Unlock a Disabled iPod via iCloud Find My
If your iPod is signed in to your Apple ID and Find My iPod was enabled before it was disabled, you can use iCloud Find My to unlock an iPod that is disabled without a computer.
Step 1. Visit iCloud.com in the browser on any other device.
Step 2. Log in with your Apple ID and password.
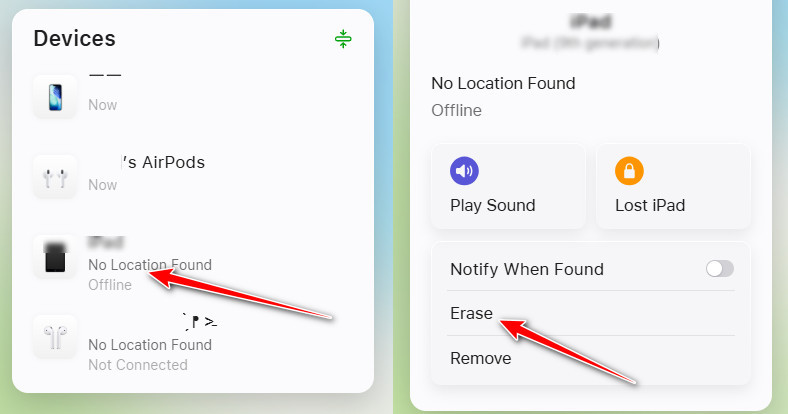
Step 3. Click Find My and select your disabled iPod from the device list.
Step 4. Click Erase iPod to remotely wipe the device.
Part 5: How to Unlock a Disabled iPod Without iTunes (Recommended)
If iTunes or Finder can't recognize your device and you can't use the iCloud Find My feature because you forgot your Apple ID, a professional third‑party iOS unlocking tool, such as Apeaksoft iFoneKit iOS Unlocker, may be a better solution.

Downloaded by over 1,000,000 users
- Unlock a disabled iPod without a passcode or Apple ID.
- Unlock an unavailable iPod with just a few clicks.
- Works even if the iPod cannot be recognized by iTunes.
- Beginner-friendly and easy-to-follow steps.
- Supports most iPod touch models and iOS versions.
Secure Download
Secure Download
Step 1. Download this tool on your computer from the button above.
Step 2. Launch the program and connect your disabled iPod to the computer.
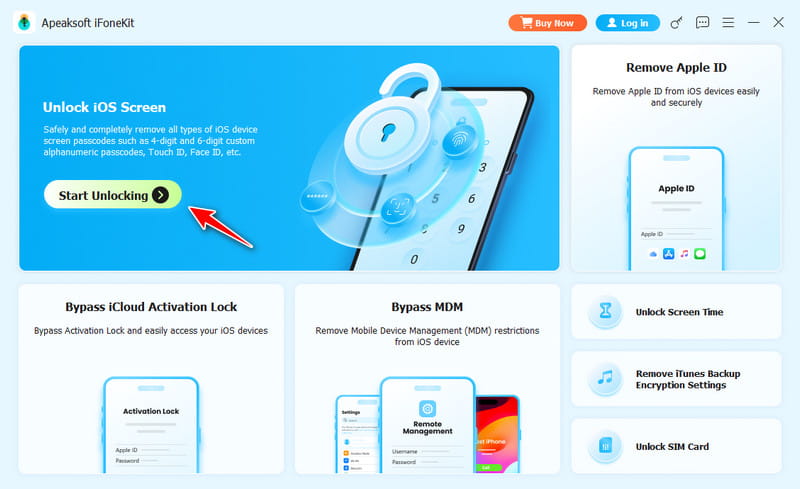
Step 3. Choose Unlock iOS Screen from the main interface.
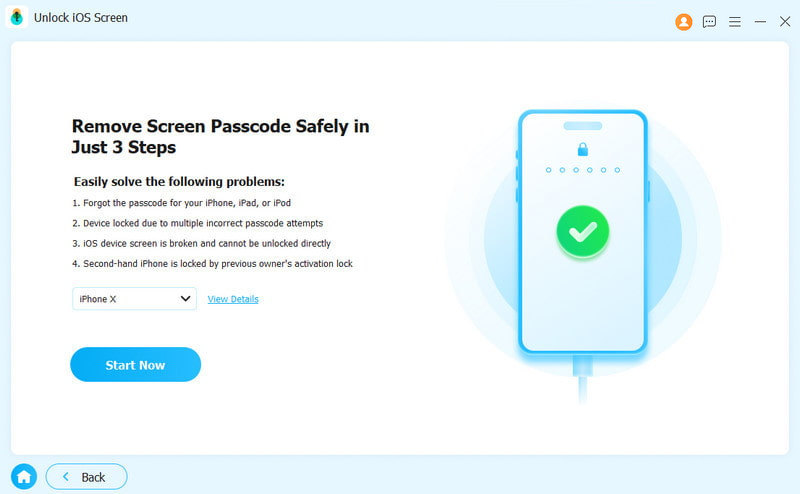
Step 4. Check the information of your device carefully, and then click Start Now to download the relevant firmware.
Step 5. Carefully read the reminders on the screen and click Confirm to move on. After a short while, your disabled iPod can be unlocked.
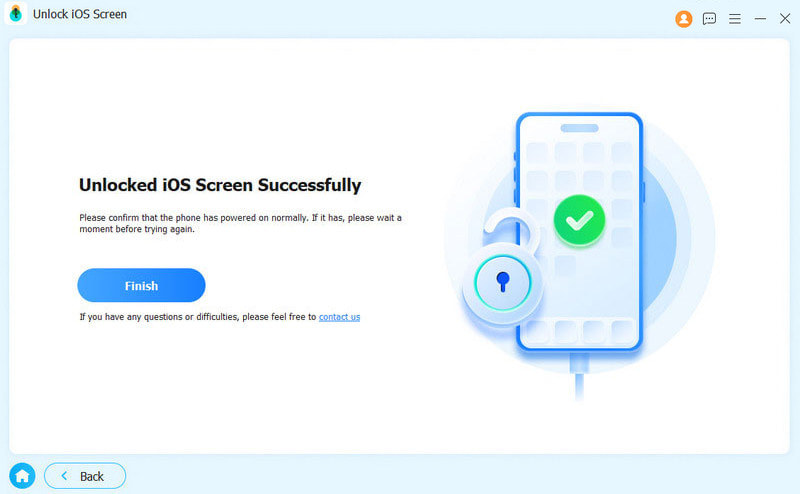
Tips: This method will also erase all iPod data. After unlocking, you still need the original Apple ID to activate the device. This tool also works when you want to remove the iCloud activation lock.
Part 6: Comparison of Unlocking Disabled iPod Methods
| Method | Need Computer | Need Apple ID | Data Loss | Best for |
| iTunes/Finder Restore | Yes | No | Yes | Have a computer; prefer official solutions |
| Recovery Mode | Yes | No | Yes | Devices are not recognized by computer |
| iCloud Find My Erase | No | Yes | Yes | No computer available; remember Apple ID |
| Third-Party Unlocking Software | Yes | No | Yes | Don’t want to use official ways; want one-click operation; no backups |
Conclusion
If you enter incorrect passwords multiple times, the iPod will be locked permanently. This article explains how to unlock a disabled iPod through the official computer restore, remote iCloud erasing, or reliable third-party software such as Apeaksoft iFoneKit iOS Unlocker. All these methods will erase the device data. Make sure all important data has been backed up.
 Apeaksoft iFoneKit
 Unlock all types of iOS passwords from iPhone, iPad and iPod.
Secure Download
Secure Download
Related Articles