"How can I export and burn an iMovie project to a DVD to play on your TV DVD player? Since iDVD is not available on my MacBook Pro with macOS Catalina, what should I do?"
Apple has discontinued iDVD since OSX Lion on 2010. When you need to export videos from iMovie projects to a DVD on Mac as profession. Here are 3 methods that enable you to edit video/audio files, add subtitles and chapters, and burn video to DVD, ISO files and more. Just learn more about the details from the article now.

- Part 1: How to Export and Burn iMovie Files to DVD with Ease
- Part 2: How to Burn iMovie Projects to DVD with iDVD
- Part 3: How to Export iMovie Videos to DVD via iTunes
Part 1: How to Burn iMovie Files to DVD with Ease
In order to export an iMovie project as a DVD, or even customize video and audio files, add subtitles, merge/split chapters, or even set up the thumbnails, Apeaksoft DVD Creator for Mac is one of the best iDVD alternative to burn DVD/Blu-ray Disc/ISO files within one click. Moreover, you can also edit the videos and audio files, add subtitles/chapters and more others.

4,000,000+ Downloads
Burn iMovie files to DVD with all kinds of video and audio formats easily.
Export and save iMovie projects to Blu-ray disc, folder and even ISO files.
Customize the DVD with menus, titles, templates, backgrounds and more.
Burn engine and hardware acceleration to export the video to DVD.
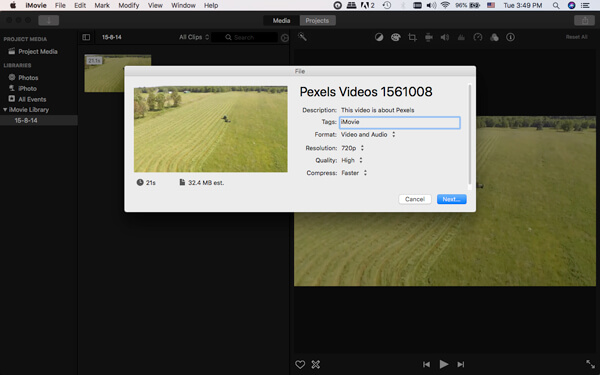
Step 1 Export iMovie projects to video file
In order to export the iMovie projects to DVD, you have to export them as video files beforehand. Check the iMovie project you want, click the "Share" button and choose the "File" button to export iMovie to videos for DVD.
Step 2 Add exported video to DVD creator
Download and install DVD creator on your computer, select the "Add Files" option to load the videos into the program. Once you have imported the files, you can preview the details for the video and audio files within the program.
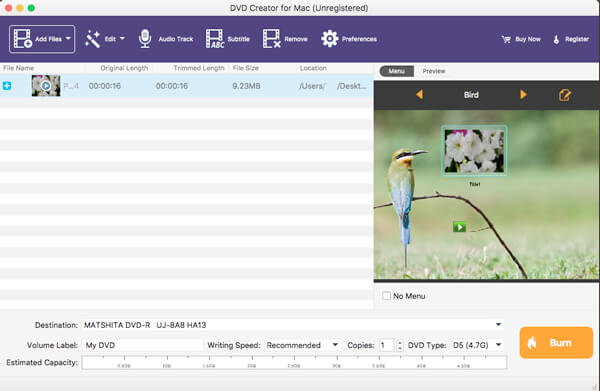
Step 3 Edit the videos, menu and subtitle
After that, you can edit the videos, trim the video, apply effects, crop the files, add watermark, edit the subtitle, choose the output format and video resolution and choose the destination folder for the output DVD.

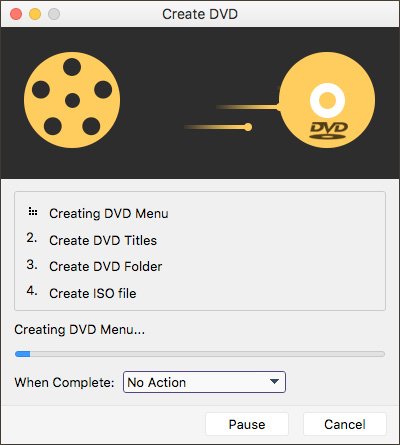
Step 4 Burn iMovie videos to a DVD
You can insert the DVD to a connected external DVD drive and click the "Burn" option to export iMovie videos into a DVD. Of course, you can also save the files as an ISO file, or a DVD folder beforehand.
Part 2: How to Burn iMovie Projects to DVD with iDVD
If you were still using the old macOS Mavericks with a DVD drive, you can take advantage of iDVD to burn video from iMovie projects to DVD. As the default DVD Burner on Mac, you can learn more about the detailed process as below.
Step 1 Export iMovie projects to iDVD
Just click the "Share" button on the menu bar once you have edited the video. You can choose the "iDVD" option, which enables you to export the videos from iMoive to iDVD on your MacBook automatically.

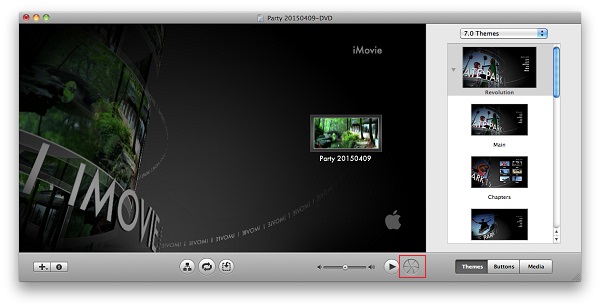
Step 2 Edit the videos within iDVD
You can create a DVD menu for the iMovie files, customize DVD themes, add titles, and even make a title page when you have more than one iMovie video on a disk before burning videos from iMovie to DVD.
Step 3 Burn iMovie projects to DVD
Go to the "File" and choose the "Burn DVD" option to export the videos to a DVD on your Mac. iDVD is able to collect the iMovie videos together and export them as a DVD for your TV.
Part 3: How to Export iMovie Videos to DVD via iTunes
When you need to burn or export a DVD folder only for your Windows or Mac, iTunes is another iMovie DVD burner allows you to create various types of discs. But you are not able to use the burned DVDs play on a regular DVD player or TV.
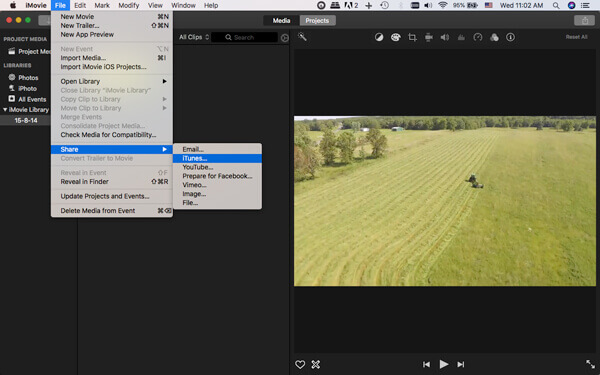
Step 1 Share iMovie projects to iTunes
Launch the iMovie on your Mac, Go to the "File" menu and click the "Share" option to share the iMovie projects to other channels. You can choose the "iTunes" option from the list.
You can also share the iMovie videos to YouTube online directly.
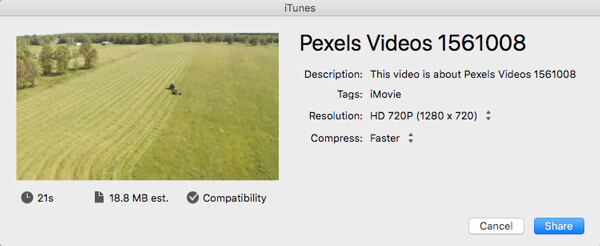
Step 2 Tweak the settings for the video
In order to have the best quality for the output iMovie project, you can choose the highest resolution available. You can also adjust the other parameters before clicking the "Share" button.
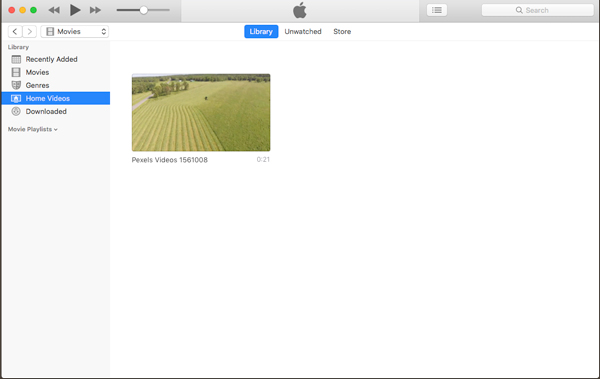
Step 3 Select the videos on your iTunes
After that, you can launch the iTunes, go to "Movie" > "Library" > "Home Videos" to check the shared iMovie video. Create a playlist that contains the iMovie video.
Step 4 Burn iMovie video to DVD via iTunes
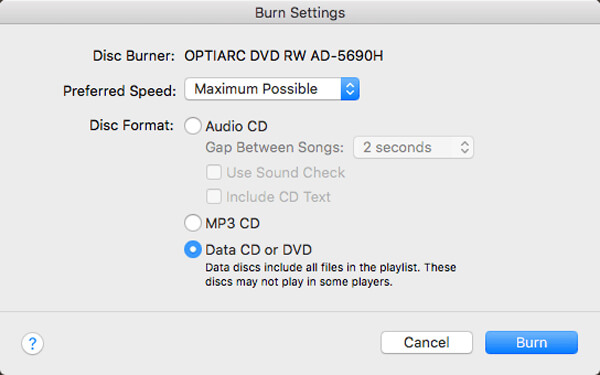
Insert a DVD into your Mac, choose the "File" > "Burn Playlist to Disc". In the Burn Settings dialog box, select the "Data CD or DVD" option. Click the "Burn" option to burn iMovie projects to a data DVD.
Conclusion
Apple discontinued the default DVD burner iDVD about 10 years. It does not mean you cannot burn iMovie projects to DVD. As for the old macOS, you can still use the iDVD to export the iMovie videos to a DVD. iTunes is another choice if you do not need to watch the DVD with a DVD player or TV. In order to get a desired DVD, or even access to the advanced editing features, Apeaksoft DVD Creator is always the best choice you have to take into consideration.