How to Edit YouTube Videos with the Best YouTube Editors
As one of the best social media platforms, YouTube is prevalent around the world. Millions of hundreds of users access the platform and view oceans of videos. In fact, everyone can share videos on YouTube with an account. However, it is far more than posting the recorded videos. For content creators and marketers, it is a good idea to edit YouTube videos and optimize the viewing experience with our concrete guide.
PAGE CONTENT:
Part 1: How to Edit YouTube Videos Offline
One of the best ways to edit YouTube videos is by using an offline YouTube video editor software, such as Apeaksoft Video Converter Ultimate. It is able to make a video story using video clips. Moreover, it integrates several features for retouch YouTube videos, like adding subtitles, applying background music, and more.
The Quick Way to Edit YouTube Videos Offline Without Quality Loss
- Retouch videos for sharing on YouTube.
- Edit YouTube videos with something in the background.
- Optimize video quality using advanced technology.
- Preview the result in real time.
- Export edited videos for YouTube.
Secure Download
Secure Download

How to Edit a YouTube Video Offline
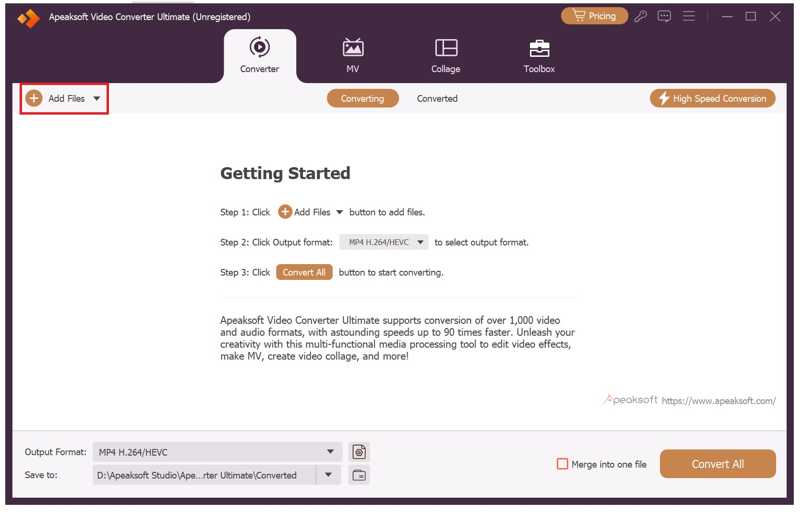
Step 1. Import videos
Start the good editing software for YouTube once you install it on your PC. It is compatible with Windows 11/10/8/7. There is another version for Mac users. Click the Add Files menu, and open the videos you want to share on YouTube. The software can batch process multiple videos at one time.
Step 2. Retouch YouTube videos
Click the Edit button under a video to open it in the built-in video editor:
Rotate video: Go to the Rotate & Crop tab, and rotate it in 90 degrees clockwise or counterclockwise. The other two options are used to flip the video horizontally or vertically. If you want to rotate all videos, click Apply to All.
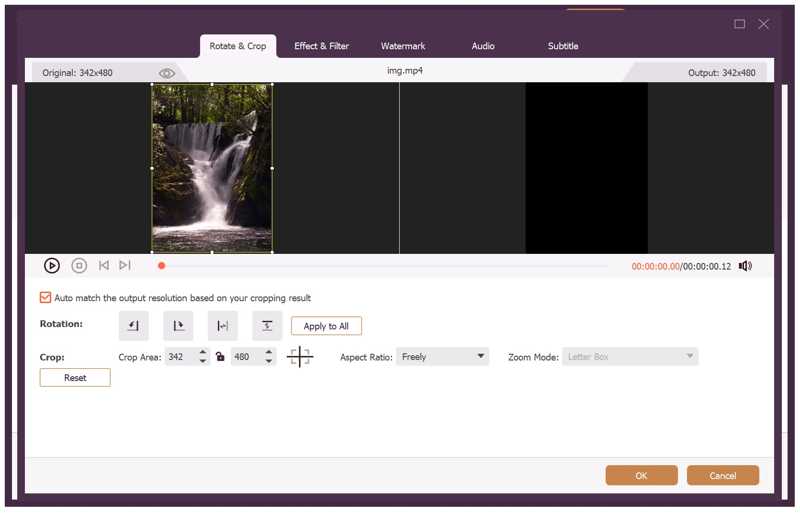
Crop video: Once you enter the Rotate & Crop tab, a cropping box will appear on the video. Drag the borders until you are satisfied.
Apply video effect or filter: Head to the Effect & Filter tab, and adjust Contrast, Saturation, Brightness, and Hue. Or choose a proper filter under the Filters section.
Watermark video: Go to the Watermark tab, and add a watermark with text or an image. Here you can customize the watermark with options.
Use audio background: Go to the Audio tab, click the Add button next to Audio Track and add the background audio. Adjust the volume and delay.
Add subtitles: Switch to the Subtitle tab, and click the Add button to apply subtitles.
If you want to cut and split the video, click the Cut button to open the video in the Cut window. Then, set start and end positions on the time.
Tip: If you want to use other video editing tools, go to the Toolbox at the top of the window and pick the desired tool.
Step 3. Export videos for YouTube
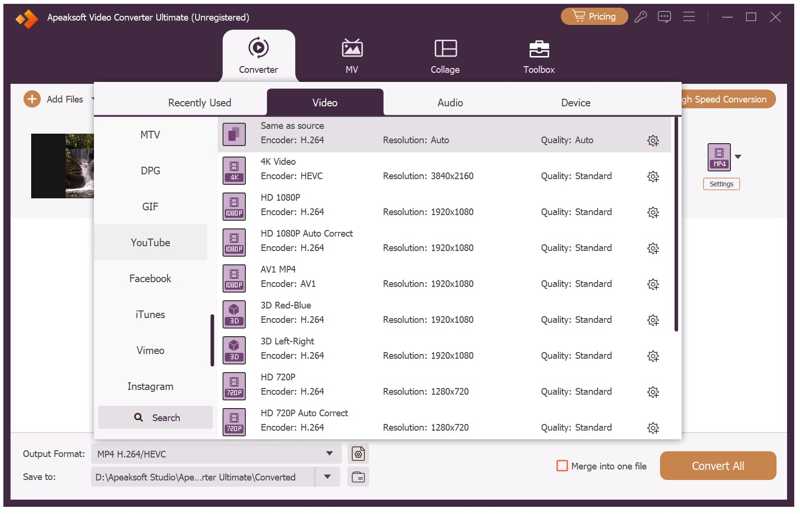
When you are done with YouTube video editing, click the Output Format option at the bottom to open the format dialog. Go to the Video tab, choose YouTube on the sidebar, and pick a preset. If you want to change the parameters, click the Settings button.
Then, set an output folder at the bottom and click the Convert All button.
Note: If you need to edit a video story for YouTube, go to the MV tab on the top ribbon.
Part 2: How to Edit YouTube Videos Online
What editing software do YouTubers use? YouTube Studio is a free program to edit videos for YouTube online. In fact, it is the built-in video editor on YouTube. Although it only provides basic video editing features, it is a good starting point.
Step 1. Access www.youtube.com in a web browser.
Step 2. Sign in with your account.
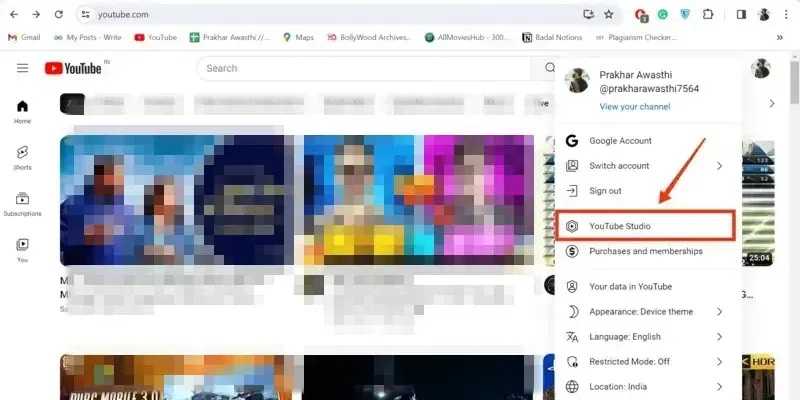
Step 3. Click your profile and choose YouTube Studio to begin editing a YouTube video with YouTube Studio.
Step 4. Go to the Content tab on the sidebar, and select the video you want to edit.
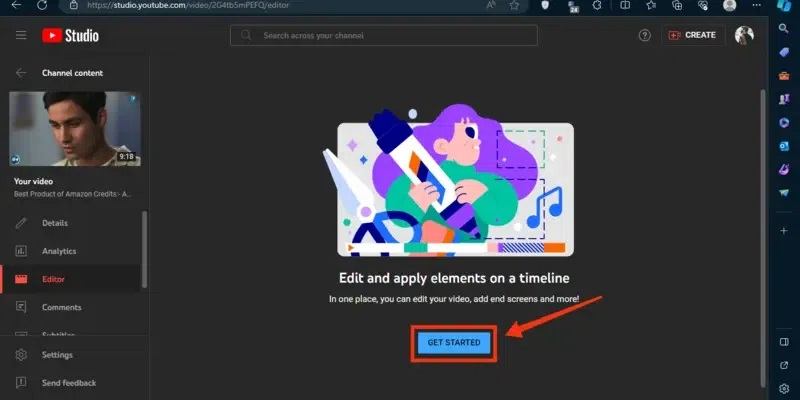
Step 5. Next, click the Editor button from the Details tab, and hit GET STARTED.
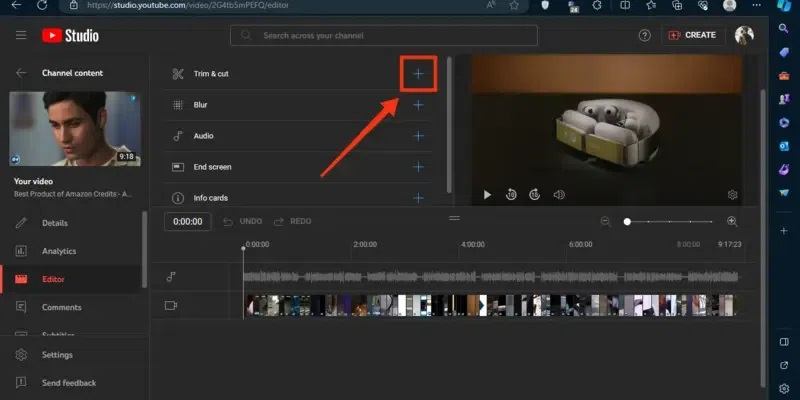
Step 6. Here you can find all based YouTube video editing tools, like Trim & Cut, Blur, Audio, and more. Choose Trim & Cut to continue.
Step 7. Select the unwanted frames on the timeline, and press the Delete key on your keyboard to remove them.
Step 8. When editing is done, click the SAVE button.
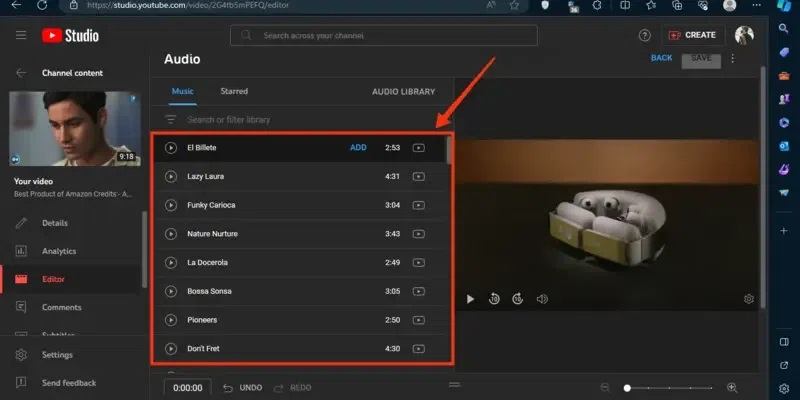
Step 9. If you want to add background music to your video, click the Audio tool and select a music file from the library.
Step 10. Then, click the SAVE button to confirm editing the YouTube video online.
Step 11. Next, you can upload the edited video to YouTube directly.
Part 3: Tips for Beginners to Edit YouTube Videos
There are two main purposes for editing YouTube videos: following YouTube rules and increasing engagement of your video story. To achieve the two goals, you'd better follow our tricks below:
1. YouTube supports video formats: MOV, MP4, AVI, WMV, FLV, MPEGPS, 3GP, and WebM. The recommended video format for YouTube is MP4 with H.264 video codec and AAC audio codec.
2. You'd better use the standard aspect ratios, 4:3 or 16:9, to avoid video distortion.
3. The standard video frame rate for YouTube is from 24 to 60. The higher the frame rate, the better the video quality. However, a high frame rate leads to a large file size.
4. Add a title, caption, or subtitles to your YouTube video to enhance viewer engagement.
5. Use background music and sound effects to increase the overall impact of YouTube videos.
6. Balance video quality and video file size to optimize the viewing experience.
Extended Reading:
How to Clear YouTube Cache on Desktop and Mobile [2026]
[Latest] How to Find Deleted YouTube Videos with/Without URL
Conclusion
This guide demonstrated how to edit YouTube videos offline and online. YouTube Studio is the built-in video editor in YouTube. It allows you to edit your videos before uploading them to your YouTube page. Nevertheless, the video editor is too simple for advanced retouching. Apeaksoft Video Converter Ultimate is an ultimate option for YouTube video post-production. It includes a wide range of advanced features for YouTube video editing.
Related Articles
Here are multiple methods to compress a video on iPhone, Mac, Windows, and Android devices without losing video quality.
If you enjoy watching movies but don't feel like going out, a top-notch 4K UHD video player can offer you a cinematic-level experience.
If you want to trim an MP4 video but don't know how to do it, just spend a few minutes reading this post, and you can solve your problem.
This tutorial shares nine methods to effectively convert a MP4 to an animated GIF image online, with Photoshop, and using tools.
