Is it safe enough to keep all important data into one digital device? What if your Mac is stolen or get other physical damages? How can you get your irreplaceable data back after suffering those scenarios? Instead of regretting not to back up your MacBook Pro, MacBook Air and other Mac series, you had better make a copy right now!
Though there are many Mac backup software, things will be better if you can backup Mac without installing the third party program, right? Therefore, this article aims to show you how to backup Mac with Time Machine and other renowned tools step by step.

- Part 1: How to Backup & Restore Mac with Time Machine
- Part 2: How to Backup Mac with Cloud
- Bonus Tips: How to Make More Space for Mac
Part 1: How to Backup & Restore Mac with Time Machine
Time Machine is a built-in backup tool that is inserted in every Mac computer. Thus, you can use Time Machine to backup Mac to external hard drive for free. Well, not totally free, you need to prepare one external hard drive with enough storage space. Here comes the solution.
Section 1: Set up Your Time Machine on Mac for Further Backup
Step 1. Connect your external hard drive to Mac
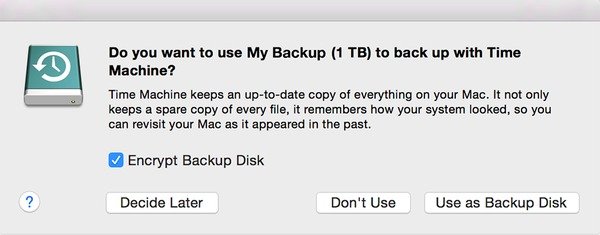
Use a USB cable to plug into an external hard drive with your Mac computer directly. Confirm to backup Mac with Time Machine when you are asked.
Step 2. Use your external hard drive to backup Mac with Time Machine
You can click "Encrypt Backup Disk" to protect the security of your Mac backup, then tap "Use as Backup Disk".
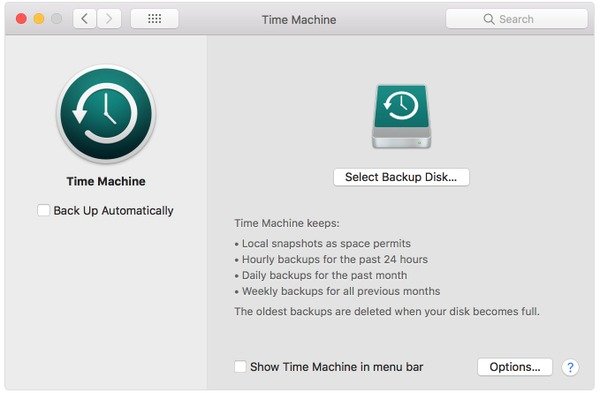
If you fail to see the notification, open Apple menu to choose "System Preferences" and "Time machine". Well, it is also the answer for what does Time Machine Backup. When you open Time Machine Preferences, choose "Select Backup Disk", and then add your external backup disk from the list to use it manually
Section 2: How to Backup Mac to External Hard Drive with Time Machine
Step 1. Start backing up Mac using Time Machine
Select "Back up Now" from the menu of Time Machine. You can check its backup state with the progress bar. And you can also choose "Skip/Stop This Backup" to cancel it. The first time you back up MacBook Air or MacBook Pro with Time Machine, it will take longer time than usual. Well, the file sizes also matter a lot. After that, Time Machine will only back up when the files are changed or something new is added on your MacBook Pro. So future backups will be much faster.

Step 2. Manage Mac to external hard drive backup settings
If you want to exclude items from your Mac backups, open Preferences from the Time Machine menu, tick "Options" and tap the "Add" button to remove unwanted backup file on Mac. As for stop backing up Mac to external hard drive using Time Machine automatically, here are different solutions. For macOS Sierra or later users, you can unselect "Back Up Automatically" in its preferences menu. Otherwise, OS X EI Caption or earlier users can turn off Time Machine to stop automatic backups.
The moment you set up Time Machine, it will start backing up your Mac automatically, including hourly backup, daily backup and weekly backup. The old Time Machine backup will be deleted automatically according to the left storage space.
Section 3: How to Restore Mac with Time Machine Backup
Step 1. Locate the file you want to restore
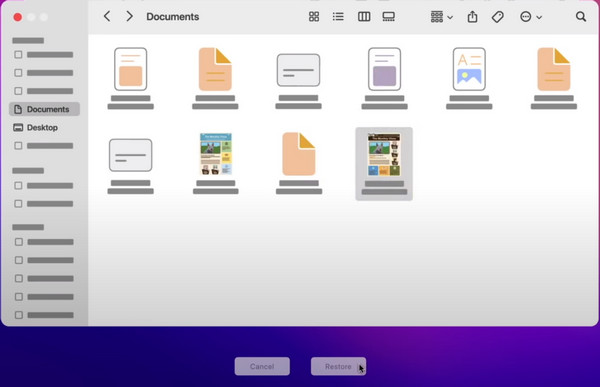
To be more specific, you need to open the folder where you delete that file. For instance, you need to open the Documents folder if you want to restore a document accidentally deleted before.
Step 2. Restore a file from Time Machine backup
Open Time Machine menu and select "Enter Time Machine". Otherwise, you can also choose Time Machine in the Dock. Later, find the backed up file to restore on Mac. You can use the timeline to locate the certain file with the accurate date and time. Press "Space Bar" in the keyboard to preview in detail. Finally, hit "Restore" to restore with Time Machine backup on Mac.
More details about restoring Mac from Time Machine, you can find here.
Note: If you intend to restore your Mac completely, choose "Restore from Time Machine Backup" utility in macOS Recovery to complete it. As a result, there will only be the contents restored from Time Machine while others are erased automatically.
Some people may wonder what does Time Machine backup. Actually, Time machine can back up every change happened on your Mac since the setup. So it is quite a time-saving method to use Time Machine to make a copy of your MacBook Pro and MacBook Air.
Part 2: How to Backup Mac with Cloud (iCloud, Dropbox and Google Drive)
Some people may want to backup Mac to external hard drive without Time Machine. And there are also some people who prefer cloud storage tools instead of the real external hard drive. The common Mac backup software are iCloud, Dropbox and Google Drive. So the followings will show detail operations of how to backup Mac to iCloud and other platforms.
Section 1: How to Backup Mac to iCloud
Update your MacBook Pro or other Apple products to the latest version. You can open the Apple menu and select "Software Update" to see whether there is an available update.
Step 1. Turn on iCloud on Mac
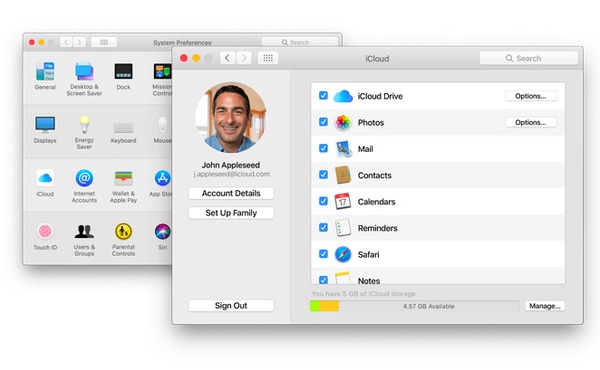
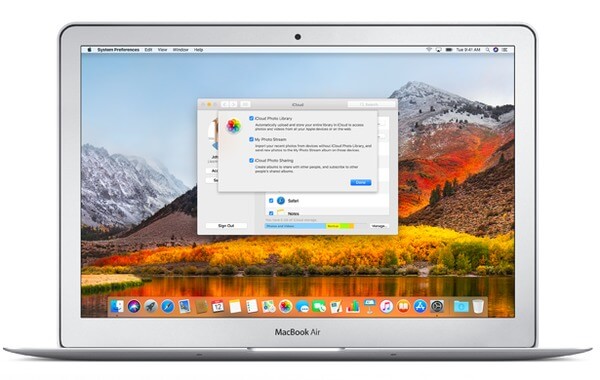
Open "System Preferences" from the Apple menu. Choose "iCloud" to sign into iCloud account with your Apple ID and password. Now you can tick before items you want to back up. Every iCloud user has 5GB free cloud storage space, upgrade it if you have much more files need to be backed up on Mac.
Step 2. Backup Mac photos to iCloud automatically
There is "Options" besides "Photos" under iCloud menu. Click it and choose "iCloud Photo Library", "My Photo Stream" and "iCloud Photo Sharing" to backup photos from Mac to iCloud automatically.
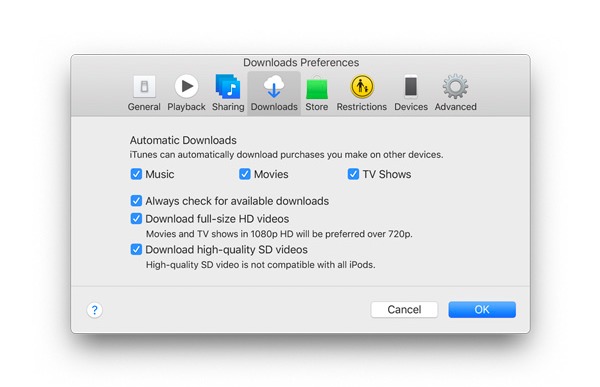
Step 3. Enable automatic downloads on Mac
Open iTunes and locate Preferences on your Mac computer. Choose "Downloads" button, and then you are able to see music, movies and TV shows that you can download automatically. Set automatic download settings and hit "OK" to continue. With all these have been done, iCloud can back up your Mac automatically.
Don't miss: For more details of how to backup MacBook Pro/Air to iCloud, you can check this post.
Section 2: How to Backup Mac to Dropbox
Step 1. Set up your Dropbox account
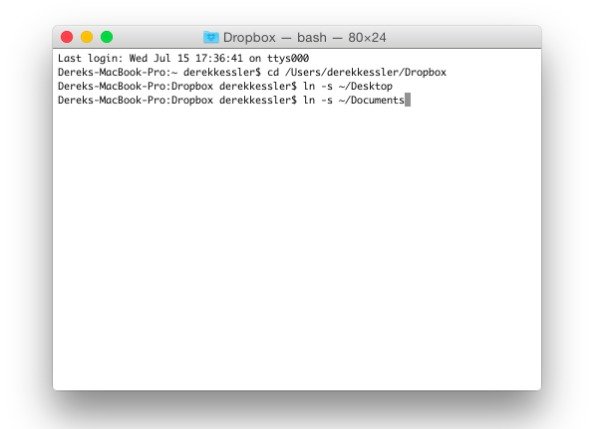
Download and install Dropbox app from its official site. Once the installation completes, open "Terminal" and locate your Dropbox folder.
Step 2. Start backing up data with Dropbox on Mac
Create symbolic links to create a new folder and begin backing up Mac to cloud via Dropbox.
Section 3: How to Backup Mac to Google Drive
Step 1. Put files from Mac to Google Drive
Free download and install Google Drive on your Mac computer. Run this Mac backup software and activate your Google account to move files into the Google Drive folder.
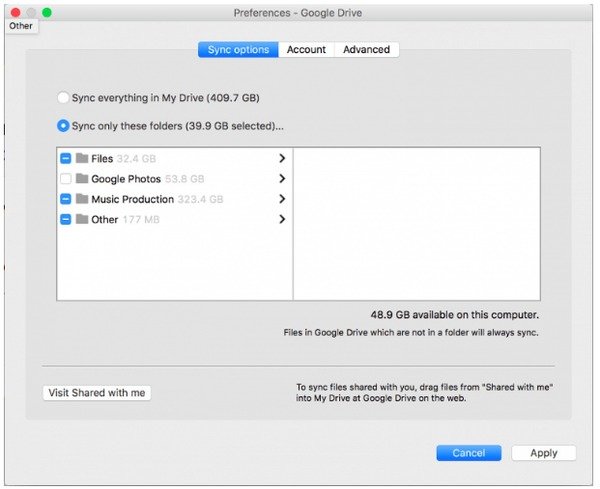
Step 2. Set Google Drive sync options
After the Mac to Cloud backup process ends, you can open Preferences menu of google Drive to adjust sync settings. You are able to choose whether to sync everything or selected folders to your Google Drive. Hit "Apply" to save those changes.
Don't Miss: Best iPhone Backup Extractor for Mac
Bonus Tips: How to Make More Space for Mac
No matter you want to backup Mac to external hard drive or cloud storage space, you should not forget to keep enough operating space for your Mac computer. Otherwise, your Mac will run into system crash, overheating and other problems that may cause data loss. To remove unwanted files easily, you can use Aiseesoft Mac Cleaner, which can monitor your Mac performance in multiple aspects.
- Scan and remove junk files, unneeded files, large files, old files, duplicate iPhoto photos and Finder and uninstall app quickly and safely.
- Preview all files before cleanup in detail.
- Encrypt files on Mac.
- Monitor disk utilization, battery status, memory performance and CPU usage.
- Help you clean Mac up as a Pro without tech skills.
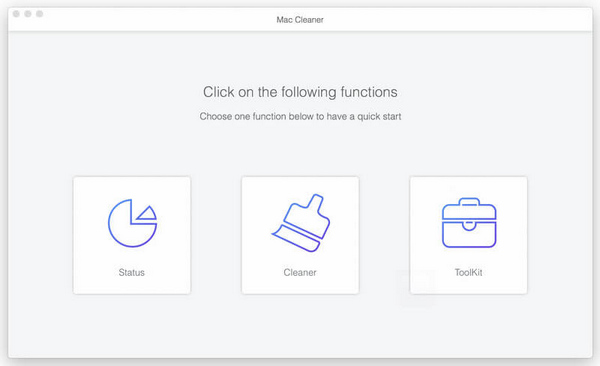
Step 1. Run Mac Cleaner
Free download Mac Cleaner to clean and speed up your Mac computer. Launch it and check the system status of your Mac.
Step 2. Delete unwanted files
Choose items you want to delete in the left panel, then hit "Scan" to scan your Mac files. Later, mark before items you want to remove and hit "Clean" in the lower right corner to start deleting.
Step 3. Cleaning is done
Wait for a while, and then Mac Cleaner can delete all unnecessary files successfully. As a result, repeat above steps to remove other junk files on Mac.
All in all, these are popular solutions of Time Machine backup and how to backup Mac without external hard drive. Furthermore, clean up your Mac is also an important task you should operate regularly. In addition, it is also supported to use Disk Utility to backup Mac data. The whole process is similar with Time Machine. So if you want to know how to backup Mac to external hard drive using Disk Utility, just follow above steps in the similar way.