How to Fix iPhone Not Turning On (Support Latest iOS 26)
When you want to open a second-hand iPhone, you may find the iPhone won't turn on. This is really frustrating for every iPhone user. You must not want to see your iPhone become just a useless brick. This article will show you how to fix the iPhone not turning on problem. However, you should know in advance that perhaps you have to replace a battery if necessary. But don't be sad, you can try up to 6 methods in this article; hope that you can easily solve your iPhone screen won't turn on problem.
PAGE CONTENT:
Part 1: Common Reasons Why an iPhone Won't Turn On
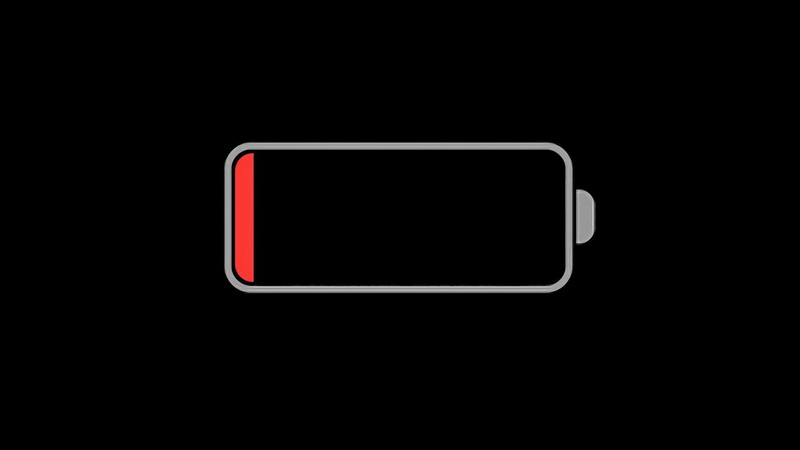
"Why my iPhone won't turn on?" There are many potential reasons that can cause your iPhone not to turn on. Maybe the battery in your iPhone is worn out, or perhaps there are severe glitches and malware in your iOS. Maybe your iPhone is just running out of power so it won't turn on. Anyway, you should check the common reasons why your iPhone won't turn on.
1. Battery Issues
If your iPhone battery's health condition is very poor, then your iPhone will easily shut down, and it's very difficult to charge the iPhone. In that case, you will easily encounter the iPhone won't turn on problem. A damaged charger, cable, or charging port can prevent the phone from charging, which will also make your iPhone not turn on.
2. Software Issues
A system crash can cause the phone to freeze or become unresponsive, and then your iPhone may shut down and cannot turn on. If an update was interrupted, the system might be corrupted, and you may encounter the iPhone not turning on problem. If you have jailbroken your iPhone, it could be stuck in a boot loop or bricked.
3. Display or Hardware Problems
Perhaps your iPhone may be working, but the display could be damaged or disconnected. That causes you to consider that your iPhone is not turning on. Also, if the Power button is broken, you won't be able to turn on the iPhone.
4. Water or Physical Damage
Does your iPhone suffer from liquid damage? Although many iPhone models are said to be water-proof, it doesn't mean that the device can be fully exposed to much water. Water exposure can short-circuit internal components, which causes the iPhone won't turn on problem, even if the phone was not submerged.

5. Product Failure Rate
When your iPhone won't turn on when it's just a newly purchased device, you can consider that your device is an early-failure product. In that case, you can contact an Apple post-product near you to check your iPhone. Perhaps, you can fix the iPhone not turning on problem by replacing a new iPhone for free.
Part 2: How to Deal with iPhone Not Turning On Problem
You've checked the possible reasons why iPhone won't turn on. Then, you can view some specific methods to fix the problems on your iPhone. You can also find corresponding solutions that match the condition of your iPhone. Check how to fix the iPhone not turning on problem in 7 ways.
1. Charge Your iPhone
If you can not figure out specific reasons why your iPhone won't turn on, try this first step: charge your iPhone directly. Plug your iPhone into a charger using an original Apple cable and adapter. Wait at least 15-30 minutes to see if it turns on. You can try a different charger or cable if your iPhone still won't turn on.
2. Check for Screen Issues
Perhaps your iPhone can turn on, but the screen cannot show anything. If you hear sounds or feel vibrations but see a black screen, the display might be faulty. You can also try calling your phone to check if it rings. If no sound or vibration is giving off, then maybe you truly encounter the iPhone not turning on problem.
3. Force Restart Your iPhone (Recovery Mode)
If your iPhone still won't turn on, you should try force restarting your iPhone, which is also putting your iPhone into the Recovery Mode. This is a reliable way to fix the problem or test if your iPhone is still workable.
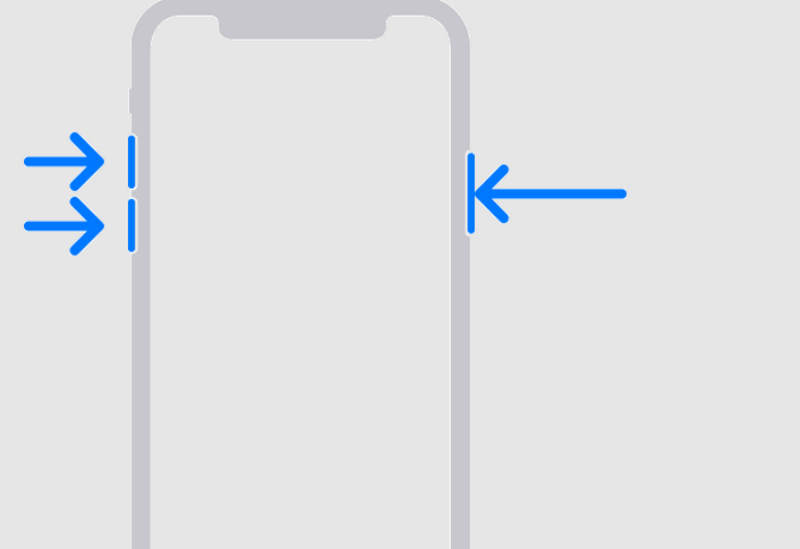
Step 1. Put Your iPhone into Recovery Mode
Connect your iPhone to your computer and launch iTunes on Windows (Finder on Mac).
For iPhone 8 and later: Quickly press and release the Volume Up button, then quickly press and release the Volume Down, then press and hold the Power button until you see the iTunes logo come up.
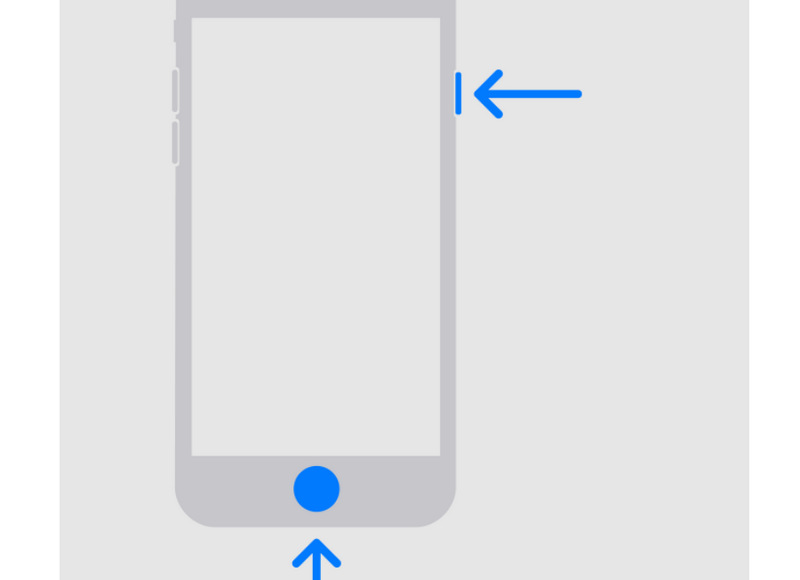
For iPhone 7/7 Plus: Press and hold the Volume Down button and the Power (Side) button together until the iTunes logo appears.

For iPhone 6s and earlier: Hold the Home and Power buttons together until the iTunes logo shows up.
Note: If your iPhone has no any response, perhaps there's a severe problem that cause your iPhone not to turn on. You may need to contact a professional or Apple post-production to help you deal with the problem.
Step 1. Restore Your iPhone
On your iTunes or Finder app, click the Device button in the top left side. Then, iTunes or Finder will notify you with a popup which says there's a problem with your iPhone, and you should upgrade or restore it. Here, you should click the Restore button to try fixing the iPhone not working problem.
4. Fix System Errors (Recommended)
There's an excellent method to fix the iPhone won't turn on or charge problem - Apeaksoft iOS System Recovery. This program can fix screen problems, system issues, iPhone stuck problems, and more on your iPhone. Therefore, it can easily solve your iPhone 16/15/14/13 won't turn on problem unless your iPhone has severe hardware issues. Moreover, this software can also help you upgrade and downgrade your iOS version. Any other system errors can also be deeply fixed.
Easily Solve iPhone Won't Turn On
- Connect your iPhone to your computer to scan system errors.
- Deal with over 150 system and screen issues on iPhone 16/15.
- Offer a deep fix mode to remove all system and software problems.
- Upgrade and downgrade your iPhone while fixing your iPhone.
Secure Download
Secure Download

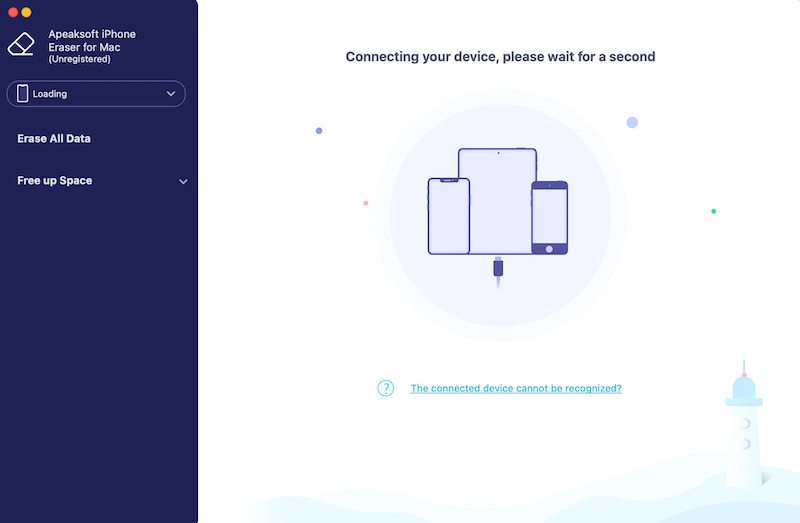
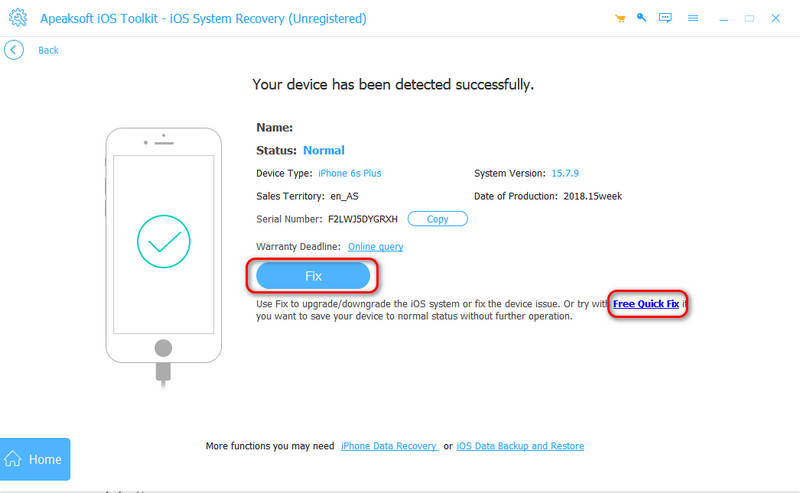
Step 1. Download and install Apeaksoft iOS System Recovery on your computer and launch it. Plug your iPhone into your computer. Then, click the Start button on the main interface to start fixing your iPhone won't turn on problem.
Step 2. In this window, you can choose the Free Quick Fix feature to quickly fix your iPhone won't turn on or charge problem. This feature will keep your iPhone's current state. You can also click the Fix button to fix the problem deeply.
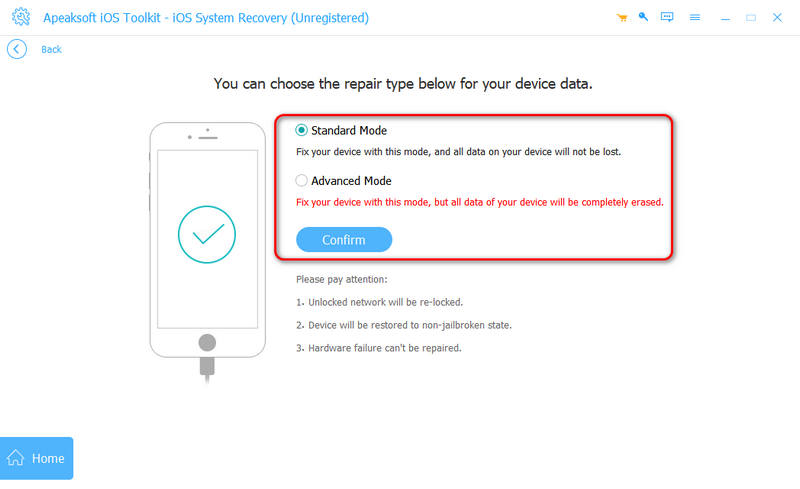
Step 3. In this window, you can choose from a Standard Mode or an Advanced Mode. The Advanced Mode will erase all data and settings on your iPhone, but can fix severe problems, such as fixing a water-damaged iPhone. If you consider your iPhone not turning on problem is not that severe, you can choose the Standard Mode and click the Confirm button to go on.
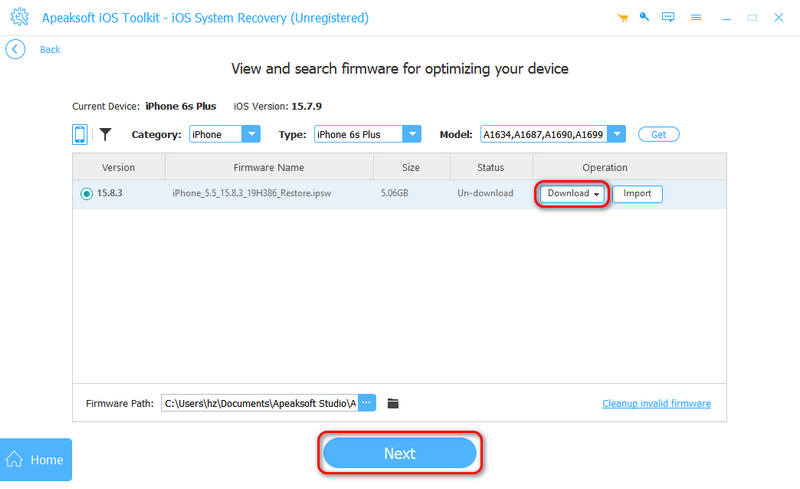
Step 4. You can choose an iOS version for your iPhone and click the Download button to download the system firmware package. After downloading, you can click the Next button to fix your iPhone won't turn on or charge problem.
5. Replace a Battery
If your iPhone randomly won't turn on due to a drained battery, perhaps it's time to replace the battery. It costs a lot if you directly change to a new iPhone, so it saves a lot of money to replace a battery to fix the iPhone won't turn on problem.
6. Contact Apple
If none of these methods work, visit an Apple Store or an authorized repair center to fix the iPhone not turning on problem. As mentioned above, if your iPhone is a newly purchased device and it cannot turn on regularly because of hardware issues, Apple will probably replace a new iPhone to you for free. If you visit an unauthorized repair store, you won't enjoy the Apple Limited Warranty or AppleCare Warranty.
Part 3: How to Prevent the iPhone Won't Turn On Problem
After you fix the iPhone won't turn on problem, you also need to learn to prevent the problem from happening again.
1. Take Care of the Battery
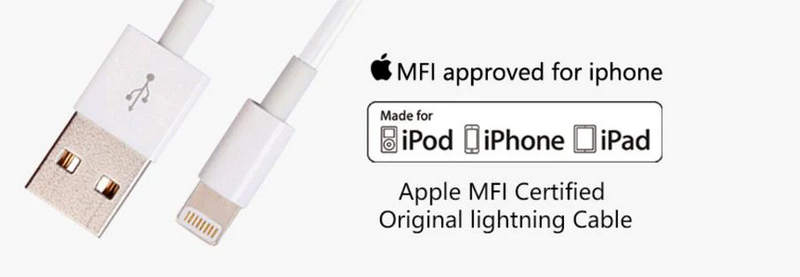
After you fix the iPhone not turning on problem, you should take care of the battery's condition. For example, avoid letting the battery drain completely too often. Charge it before it reaches 20%, or your iPhone battery will drain quickly. Also, you'd better use an original Apple charger or certified (MFI) cables to prevent power issues. Moreover, you should avoid overcharging for extended periods. You also should store your iPhone at room temperature, avoiding extreme heat or cold.
2. Keep iOS Updated
Maybe you've heard that iOS updates will drain your iPhone battery and make your iPhone randomly lag, but that's different in today's new iPhone models. If you want to avoid the iPhone 16/15/14/13 not turning on problem, you should to regularly update your iPhone to the latest iOS version to fix bugs that may cause system crashes. Also, you should avoid installing untrusted apps that may interfere with system performance.
3. Restart Your iPhone Regularly
Although the iPhone 16 is able to be awake for the whole 24-hour per day because of it's high-end techniques in the screen, you'd better regularly restart your iPhone to prevent the iPhone won't turn on problem. Restarting your iPhone once a week can help clear temporary glitches and keep it running smoothly.
4. Protect Against Physical & Water Damage
You'd better use a protective case to prevent impact damage from drops and keep your iPhone away from water and moisture, even if it's water-resistant. Physical or water damage on your iPhone's hardware will make your iPhone get hot easily, which will increasingly cause the iPhone not to turn on problem.
5. Avoid Jailbreaking iPhone
Last but not least, don't jailbreak your iPhone. Jailbreaking can make the system unstable and lead to boot issues or crashes, which could directly cause the iPhone won't turn on problem. Thankfully, you don't need to jailbreak an iPhone today because those new iPhone models have enough convenient features.
Conclusion
This article has told you how to fix the iPhone 15 won't turn on problem easily in 6 ways. You can replace a new iPhone battery if your battery is severely worn out. You can also use Apeaksoft iOS System Recovery to quickly fix system errors and software issues to solve the iPhone not turning on problem. The most important is that you'd better learn to prevent the iPhone from being damaged and maintain it in good condition.
Related Articles
If you no longer need them, you can follow our concrete tutorial to quickly delete old iPhone backups on your Mac computer.
Why does SOS only or SOS appear on the top of your iPhone, and how to fix it? Learn everything you should know about this situation.
Have you ever been confused when there was an error verifying the passcode of your iPhone? Come and explore 6 methods to fix iPhone passcode not working!
How do you reset a frozen iPhone? Do you know how to reset a frozen iPhone? Come and learn about the iPhone frozen screen reset.
