How to send a message to a group of contacts at the same time? If you need to send important news to your collages, or a reunion activity to all family members, you have to know more about how to create a contact group on the iPhone beforehand.
The article shares 3 different methods to create and edit groups in iPhone contacts with ease. Besides, you can also learn more about the method to remove the duplicates, backup contacts and more. Read on the article and get the desired information according to your requirement.

- Part 1: How to Create a Contact Group on iPhone Directly
- Part 2: How to Make a Group Contact on an iPhone via iCloud
- Part 3: 6 Methods to Download Audiobooks for iPhone/iTunes
Part 1: How to Create a Contact Group on iPhone Directly
Apple has removed the ability to create groups in iPhone’s Contacts app after a few iOS updates. You can only view and use iPhone contact groups created rather than make a new contact group on the iPhone. Just take “Groups” app as an example. You can learn more details about how to make a desired contact group on iPhone as below.
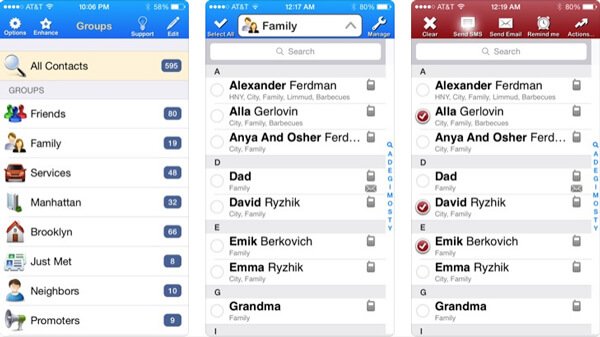
Step 1Search for the “Groups” app from App Store, install and launch the program to detect the contacts on your iPhone. It will ask for permission to access your “Contacts” app for the first time.
Step 2Choose the “Add New Group” label and enter a name for the contact group on the iPhone. Then you can tap “No Contacts – Add Some” option to add contacts for the groups on your iPhone.
Step 3It will detect the contacts from Contacts app, which you can select the desired contacts you want to add to the group. Then you can tap the “Done” option to create a group to contacts on the iPhone.
When you make a contact group on the iPhone in the method, you can only send messages, or explore more features within a purchased version. The contact groups are not available to the Contacts app on iPhone.
Part 2: How to Make a Group Contact on iPhone via iCloud
What should you do if you want to organize and create iPhone contact groups directly within Contacts for free? iCloud is the default method you can create and populate groups of contacts. Once you make a contact group on the iPhone, it will sync to the iPhone and other iOS devices linked to the same iCloud account automatically.
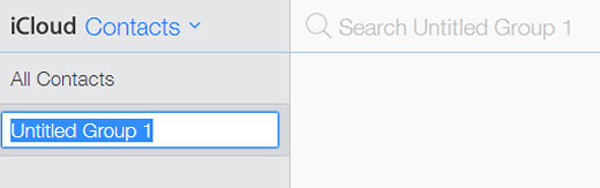
Step 1Access iCloud.com with any web browser and log in your iCloud account associated to your iPhone. Once you log into the account, just click “Contacts” to open iCloud Contacts.
Step 2Locate the bottom left side, click the “Plus” button and select the “New Group” option to add a group to contacts on the iPhone. Then enter a name for the contact group on iCloud.
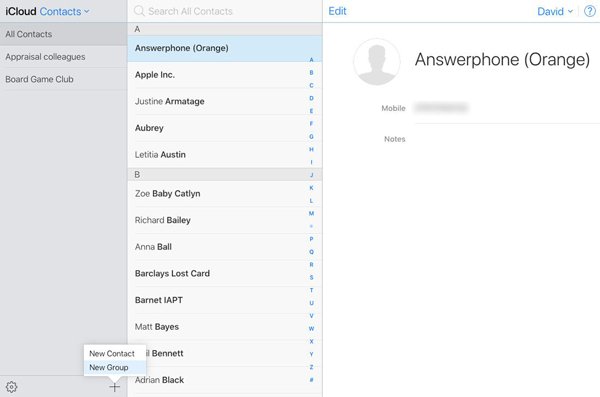
Step 3Select the new contact group on the left hand column, then drag and drop the contacts into the desired group. Moreover, you can also use the same contact for several groups.
Step 4Once you create a contact group via iCloud, it will automatically sync to iPhone linked to the same account. Go to the “Contacts” app, select the “Groups” and find the iPhone contact groups.
Note: It is recommended to have a backup for all contacts. When you sync the contact groups from iCloud contact, it might replace the new contacts you just added on the iPhone.
Part 3: How to Edit a Group in iPhone Contacts with iPhone Transfer
Once you create a contact group on iPhone, how do you manage or edit the contacts with ease? When you have a large amount of contacts, you should know the easy method to edit groups in iPhone contacts. Apeaksoft iPhone Transfer is an excellent iPhone contacts manager, which you can transfer, de-duplicate, remove, backup, edit and manage the contacts on iPhone with ease.
Apeaksoft iPhone Transfer
- Transfer contacts between iPhone and computer within one click.
- Detect and remove the duplicated contacts on iPhone with ease.
- Edit the contacts on the computer and preview them on the computer.
- Support a wide range of iOS devices, such as iPhone 17/16/15/14/13/12/11, etc.
How to Create iPhone Contact Groups on iPhone & iCloud
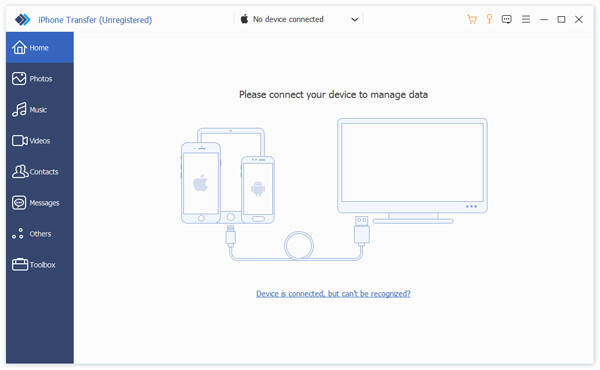
Step 1Connect iPhone to computerDownload and install iPhone Transfer from the official website. Then launch the program on your computer. Connect iPhone to your PC with the original USB cable. Usually it will detect your iPhone automatically.
 Step 2Preview contacts on iPhone
Select the “Contacts” tab from the left menu, which you can get all contacts information. It includes contacts from iPhone, iCloud contacts as well as contacts from Outlook and other locations.
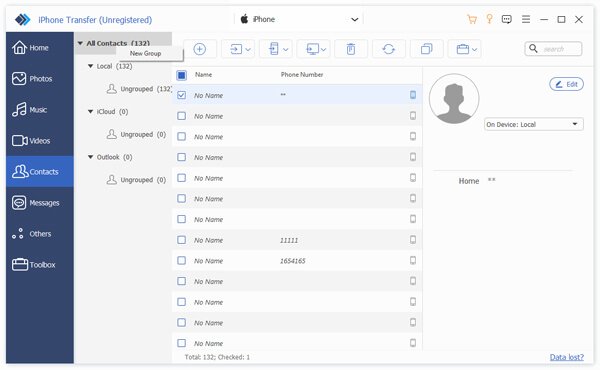
 Step 3Create iPhone contact groups
Right click the “All Contacts” menu, which you can find the “New Group” menu, click the menu to create a new iPhone contact group on iPhone, iCloud or Outlook according to your requirement.
How to Edit and Manage Groups in iPhone Contacts
Besides the methods to make an iPhone contacts group, you can also take advantage of the program to import more contacts from computer, remove duplicate contacts, delete unwanted items, edit the information, and back them up to a computer.
Step 1Import Contacts to iPhone in a Batch ProcessClick the “Plus” button to add a new contact for iPhone, or click the “Import” button to import contacts in a batch process from CSV file or vCard format in a batch process.
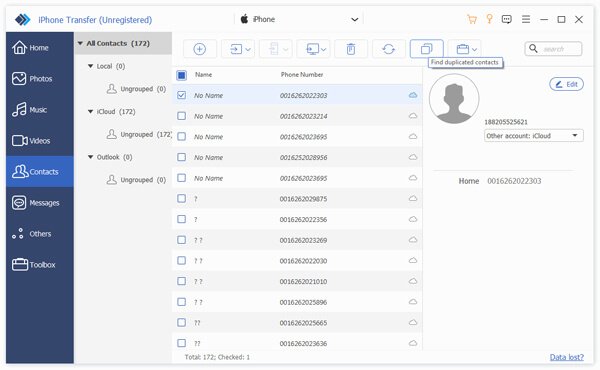
Step 2Remove the Duplicated Contacts on iPhoneClick the “Merge Duplicate Contacts” option, and then you can select a match type to locate the duplicate items. After that you can click the “Merge” option to remove the duplicated contacts.
 Step 3Back up iPhone Contacts to Computer
Whether you need to create a new iPhone contact group, or further edit the contacts on iPhone, you can select the “Backup” option from Toolbox menu to save the iPhone contacts to a computer.
Step 4Remove Contacts from iPhoneTick the checkboxes next to the unwanted contacts and click the “Trash” button on the top ribbon to delete them. Alternatively, you can find the delete option in the Toolbox menu.
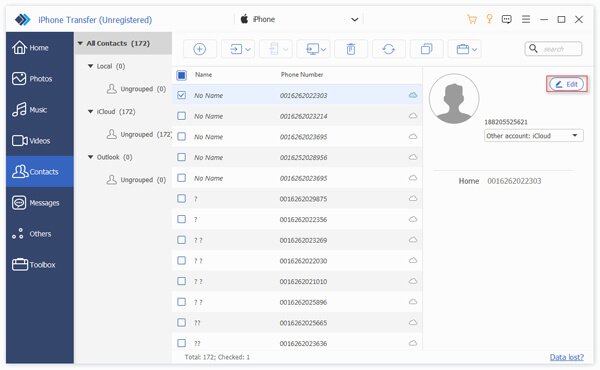
Step 5Edit Contacts on iPhoneIn order to edit a contact, select it on the list and click the “Edit” button to switch to the edit mode. Then you can modify the details easily within your computer.
Conclution
This article shares 3 different methods about how to create a contact group on the iPhone. When you use the 3rd party tool to create a new iPhone contact group, you have to rely on the app with purchasing service. In order to make one for Contact App, you can use iCloud instead. iPhone Transfer not only makes an iPhone contact group directly for iPhone Contacts, but also provides some excellent tools to manage the contacts with ease.