Safari Browser Does Not Work – 6 Easy Ways to Solve It
Safari may be the most frequently used web browser on Apple devices. However, it may go wrong, and you can't open any web page. Read this article to find out why Safari is not working and how to fix it. We will mainly take the iPhone as an example, while some methods can also be used when Safari is not working on Mac.
PAGE CONTENT:
- 1. Fix Safari Not Working: Check the Network
- 2. Fix Safari Not Working: Detect and Fix iOS Automatically
- 3. Fix Safari Not Working: Clear Safari History
- 4. Fix Safari Not Working: Turn on Cellular Data
- 5. Fix Safari Not Working: Update the System/App
- 6. Fix Safari Not Working: Check Screen Time Settings
1. Fix Safari Not Working: Check the Network
Step 1. Go to Settings > Wi-Fi. Check whether or not you have turned on Wi-Fi. If not, turn it on and connect to your Wi-Fi.
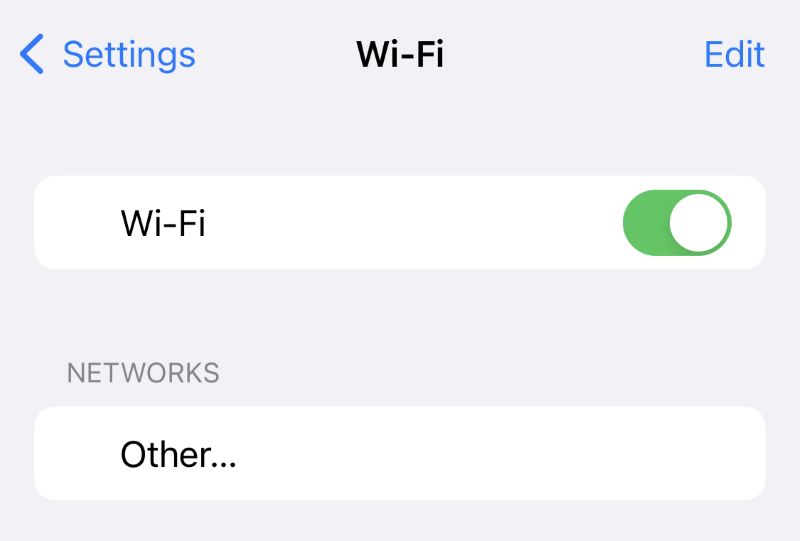
Step 2. Try to load a web page in Safari. If Safari still can't open the page, choose another strong WiFi.
If it is the same case when you use Safari on Mac, check your Mac's network.
2. Fix Safari Not Working: Detect and Fix iOS Automatically
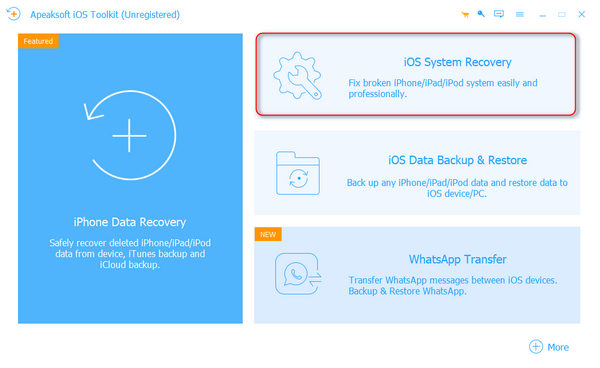
Suppose you have turned on your Wi-Fi and the network connection is strong, you still can't figure out why Safari is not working. We recommend you try Apeaksoft iOS System Recovery. It can detect your iPhone/iPad/iPod issues automatically and fix them in a short time. No matter what goes wrong with your device, this software can fix all the problems easily.
Step 1. Download and install the software for free. Both Windows and Mac are supported. Connect your iPhone to the computer via a USB cable.
Secure Download
Secure Download
Step 2. Launch it. Click on iOS System Recovery.
Step 3. Click the Start button to start scanning your iPhone automatically.
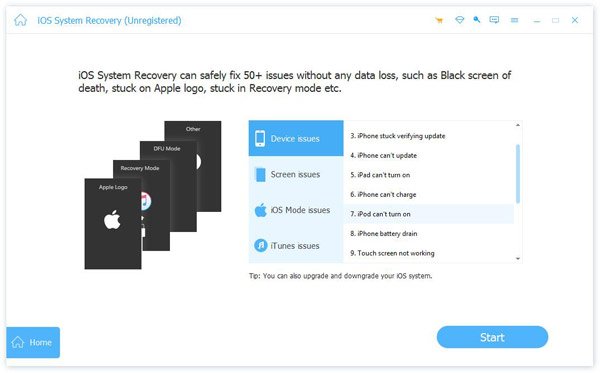
Step 4. You can first try the Free Quick Fix option. It can quickly fix some easy problems on your device without additional operations.
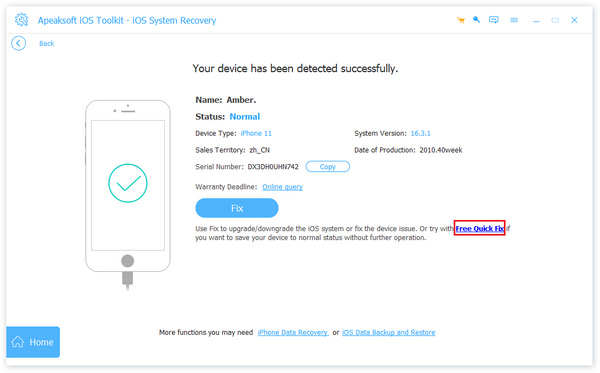
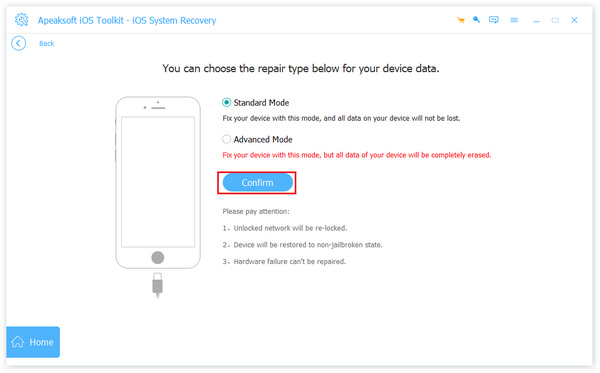
Step 5. If the Free Quick Fix can't fix the Safari not working on iPhone issue, click on Fix to enter the next window, which will provide you with another two repair modes.
Step 6. You can choose either the Standard Mode or the Advanced Mode, depending on your needs. If you think your iOS has complex problems, choose the latter. Once you have determined the mode, click on Confirm.
Step 7. All the applicable firmware versions are shown on the screen. Choose the one you want to fix. If you have this firmware version on your computer, click on Import. If you don't have it, click on Download.
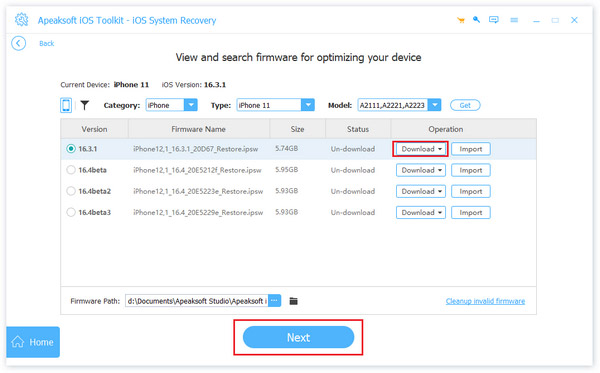
Step 8. At the bottom of the page, click on Next to start repairing.
3. Fix Safari Not Working: Clear Safari History
If your Safari is loaded with too much history, it may not have enough storage, which leads to Safari not working on iPhone. If your also haven't clear Safari history on Mac for a long time, and you find Safari is not working on Mac, you can also try this method. Here, we take iPhone as an example.
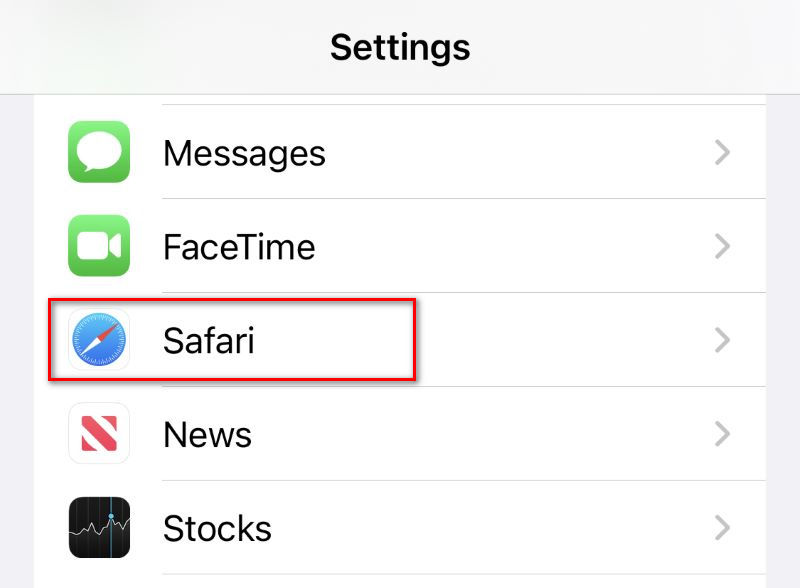
Step 1. Go to Settings > Safari.
Step 2. Scroll down to find Clear History and Website Data. Tap it.
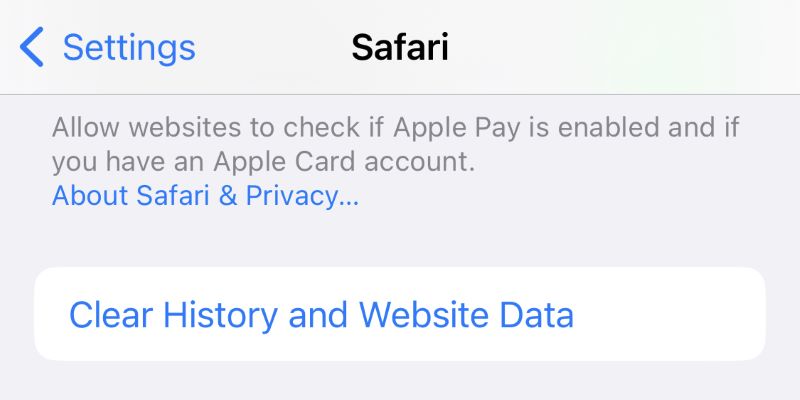
Step 3. Tap Clear History to confirm.
You can also clear cache in Safari to free up more storage space for Safari to function normally.
4. Fix Safari Not Working: Turn on Cellular Data
Safari needs cellular data to function correctly if the network is not good. If you disable cellular data for Safari or your cellular data is not working, it's likely that the Safari browser does not work.
Step 1. Go to Settings > Cellular.
Step 2. Scroll down to find Show All.
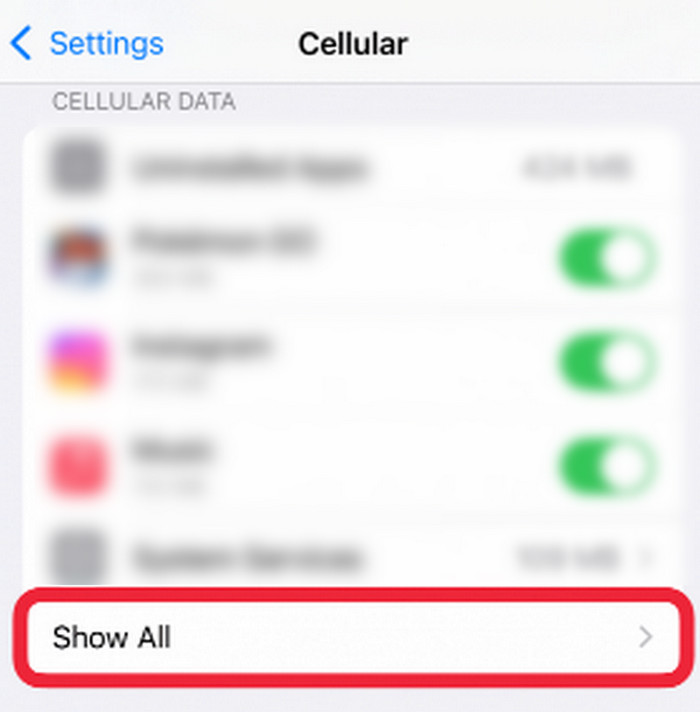
Step 3. Check if the toggle next to Safari is green. If not, tap it to turn on cellular data.
5. Fix Safari Not Working: Update the System/App
If your iOS is too old or the Safari version is outdated, it's possible that your Safari can't open on the iPhone. It is also the same case for Mac. Safari doesn't work on Mac if the computer's old system can't support the normal functions of Safari.
For updating your iOS:
Step 1. Go to Settings > General > Software Update.
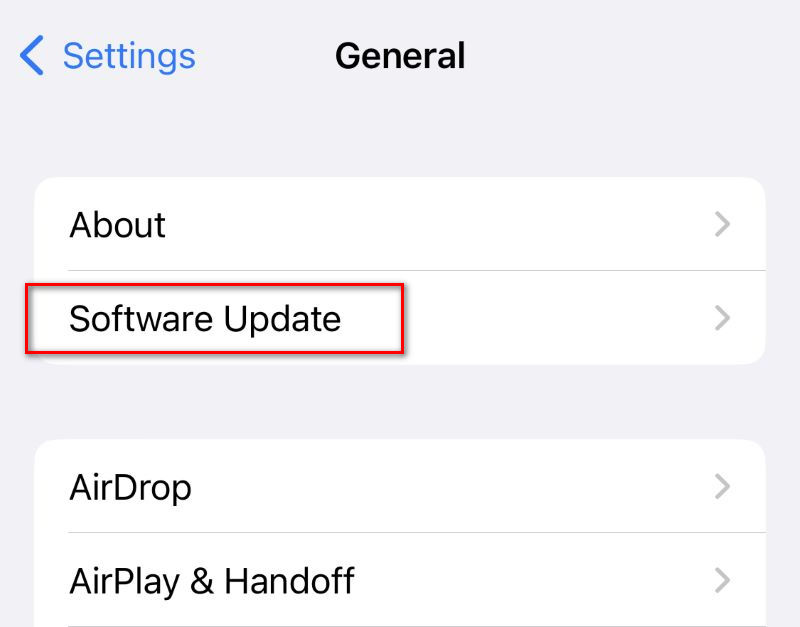
Step 2. Check if your iPhone has updated to the latest version.
For updating Safari:
Step 1. Go to the App Store. Tap your profile picture.
Step 2. Scroll down the list to check if Safari needs updating.
6. Fix Safari Not Working: Check Screen Time Settings
If you have set an app limit for using Safari on iPhone/Mac before, Safari can't open on the iPhone/Mac beyond the time limit. You need to turn the limit off to have Safari work again. We take the iPhone as an example, the steps required for Mac are almost the same.
Step 1. Go to Settings > Screen Time.
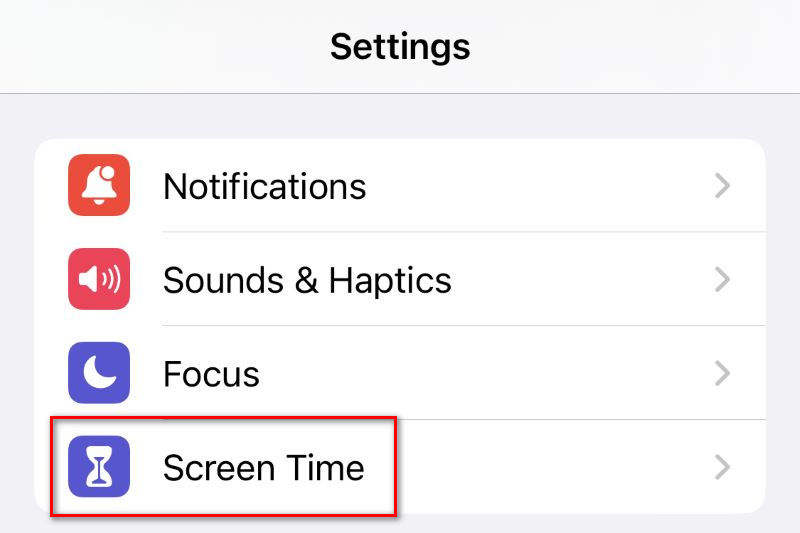
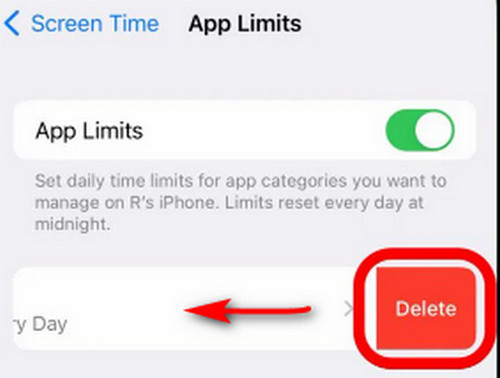
Step 2. If you have turned on Screen Time, tap App Limits.
Step 3. If Safari is in the list, swipe left on it to tap Delete.
Conclusion
Somehow, you don't know what led to your Safari not working on iPhone/Mac. In that case, try to use Apeaksoft iOS System Recovery to help you fix this issue with a few clicks. If all these methods don't work, try to use other web browsers.
Related Articles
The screen of your iPhone is just black and says iPhone Unavailable. Here are four solutions to fix this problem efficiently.
iCloud contacts could stop syncing for various reasons. Check the four ways other users have proved helpful in this article and see if they are valid.
You can regularly clear cookies to improve your online browsing experience. And if you want to clear safari cookies, this article will be helpful.
Can Safari bookmarks be recovered? How do you recover deleted bookmarks from Safari? Learn how to restore deleted bookmarks in Safari on your iPhone and Mac.
