As iOS users, you must know that the iOS system has a relatively strict registration during the usage process, for example, you can not install apps freely like users of Android or use the third-party app to unlock your iPhone without password. In this case, jailbreaking iOS devices like jailbreaking iPhone is popular among users. Thus, this article will show you how to jailbreak iPhone on Windows using Checkra1n. Besides, there will be an efficient way for you to back up your iPhone data so that you can jailbreak your iPhone without worries.

- Part 1: What is iPhone Jailbreaking?
- Part 2: How to Back up iPhone Data Before Jailbreaking
- Part 3: How to Jailbreak iPhone on Windows Using Checkra1n
- Part 4: How to Use Checkra1n to Jailbreak iPhone on Mac Computer
- Part 5: Recommendation: Best Software to Unlock iPhone
- Part 6: Devices That iOS Unlocker Supports to Jailbreak
- Part 7: FAQs on iPhone Jailbreaking
Part 1: What is iPhone Jailbreaking?
Before starting the guide, let us discuss what iPhone jailbreaking is. If you have used iOS devices for years, you may be familiar with iPhone jailbreaking. In short, iPhone jailbreaking is a technical means to obtain the highest permissions on iOS, the operating system of Apple's portable devices. Users can obtain the highest permissions on iOS by using this technology and may even further unlock the restrictions on mobile networks imposed by operators. If your iPhone is jailbroken successfully, you can have the right to download and install apps not from the App Store.
However, jailbreaking iOS 17/18/26 is harder than ever, and Checkn1x has not supported jailbreaking iOS 17/18/26 up to now, so this post will meanly present the step-by-step guide on jailbreaking iOS 16 and before.
Part 2: How to Back up iPhone Data Before Jailbreaking
To avoid iPhone jailbreaking from damaging your data stored in the device, backing up your data is necessary before jailbreaking your iOS devices. And we recommend you an effective program, Apeaksoft iOS Data Backup & Restore, to help you finish the data backup process.
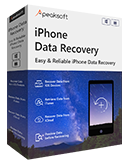
4,000,000+ Downloads
Back up various iOS data like photos, contact, message, note, etc., in one click.
Preview and restore all iOS files from backup without overwriting.
Support all popular iOS devices, data types, iOS versions and systems, and so on.
Step 1. Install and run iOS Data Backup & Restore.
Go to the official website of this software and download it, then click the package to open and install iOS Data Backup & Restore on your Windows or Mac computer according to the on-screen instruction. Later, launch it on your computer.
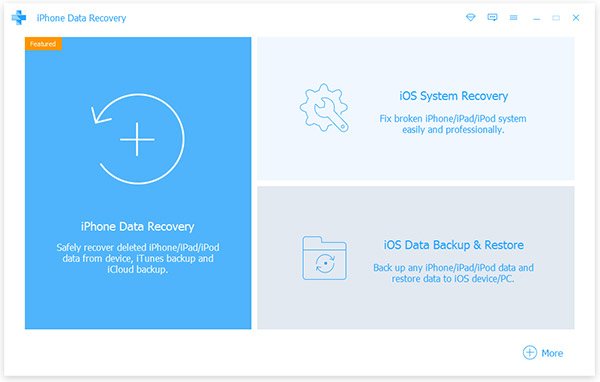
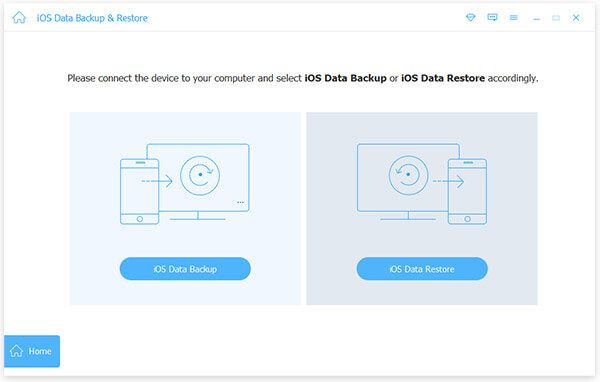
Step 2. Select iOS Data Backup
Choose the iOS Data Backup & Restore option from the interface, then click the iOS Data Backup button to enter the backup window.
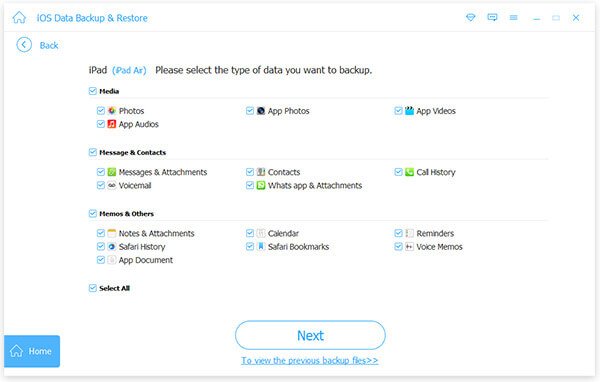
Step 3. Customize backup data
After scanning your iPhone, the data types you can backup will be presented on the interface for you to select, containing photos, videos, audio, messages, call history, etc. Later, you can click the Next button to start backing up your iPhone data to the computer.
Part 3: How to Jailbreak iPhone on Windows Using Checkra1n
Before reading and using this tutorial to jailbreak your iPhone on your Windows computer, please ensure that
• Use other devices to display this tutorial because the jailbreak process on Windows requires exiting the Windows system. Therefore, the tutorial cannot be displayed.
• Your computer’s system is Windows 7 or later.
• Your iPhone should run iOS 12.3 to iOS 14.8 and not have a lock screen password if it is an iPhone 8/8 Plus/ X.
• You should prepare a blank USB flash drive with over 2GB of capacity.
Here are the steps in detail:
1. Create a Jailbreak Environment Using a USB Drive
Step 1. Download the necessary Checkra1n ISO files and the balenaEtcher software.
Checkra1n ISO files:
https://github.com/asineth0/checkn1x/releases/download/1.1.7/checkn1x-1.1.7.iso
balenaEtcher: https://etcher.balena.io/
Step 2. Select the Flash from file option on the main interface and select your downloaded Checkra1n ISO files.

Step 3. Click the Select target option and choose your USB drive.

Step 4. Press the Flash button to start the process. The process will be finished soon.

2. Enter BIOS Mode and Modify the Startup Order
Step 1. Shut down and restart your computer. Keep pressing the Delete button to enter the BIOS mode. Different brands require different keys for the BIOS entry. You can search for corresponding instructions online.
Step 2. Find Boot or Startup Settings and make your USB drive the first one by pressing the + or – button.
You should note that which option to choose specifically depends on the interface style after you enter the BIOS. And common items are:
Boot
Boot Options
Startup
Boot Priority Order
Advanced Mode – Boot

Tips: By default, your computer shows that the first option is the Windows system, and the USB drive is the second option if no other devices are connected.
Step 3. Press F10 to save your operations and exit the screen.
3. Jailbreak
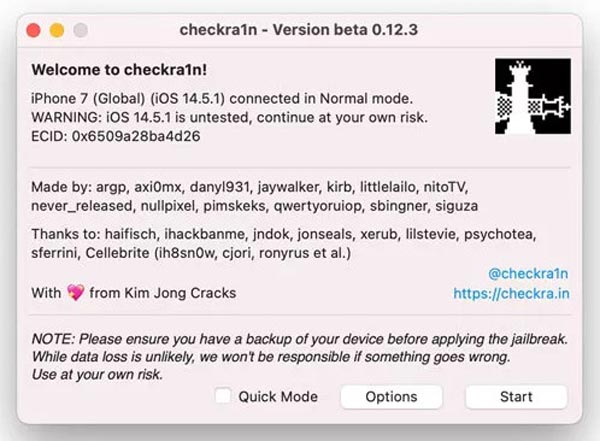
Step 1. Press Alt + F2 to enter the checkra1n screen.

Step 2. Click Start to start the jailbreak process. Your device will be detected and enter recovery mode automatically.

Step 3. Follow the on-screen instructions to enter DFU mode on your device. Then, the jailbreak process will start.

Tips:After jailbreaking, you need to re-enter BIOS mode to reset the boot order and place Windows prior to the USB drive. If not, the files in the USB will be displayed first when the computer is opened next time.
Step 4. Press Ctrl + Alt + Del to restart the computer.
Part 4: How to Use Checkra1n to Jailbreak iPhone on Mac Computer
Step 1. First of all, you should download, install, and launch checkra1n on your Mac computer.
Download link:
https://assets.checkra.in/downloads/macos/754bb6ec4747b2e700f01307315da8c9c32c8b5816d0fe1e91d1bdfc298fe07b/checkra1n%20beta%200.12.4.dmg
Step 2. Connect your device to your computer and click the Start button to begin jailbreaking.
Step 3. Your device will enter recovery mode automatically. Click Next to continue.

Step 4. Click Start and follow the onscreen instructions to enter DFU mode.

The program will start work once it detects the device in DFU mode. The device will restart after a successful jailbreak.

Part 5: Recommendation: Best Software to Unlock iPhone
After jailbreaking iPhone successfully with steps above, you can do more operations on your iOS devices with few limitation. Hence, we recommend you an effective and convenient tool: Apeaksoft iOS Unlocker. When you forget password of your iPhone and it has been jailbroken, you can download and install this software to easily unlock it without password.
4,000,000+ Downloads
Wipe iPhone passcode to get into screen-locked device.
Remove forgotten Apple ID to activate iPhone as a new one.
Recover and remove Screen Time restriction password.
Part 6: Devices That iOS Unlocker Supports to Jailbreak
OS
arm64 iOS 15.0-26
Devices
iPhone: iPhone 6s (Plus), iPhone SE (2016), iPhone 7 (Plus), iPhone 8 (Plus), iPhone X.
iPad: iPad mini 4, iPad Air 2, iPad (5/6/7th generation),
iPad Pro (9.7″), iPad Pro (10.5″), iPad Pro (12.9″) (1st/2nd generation).
iPod Touch: iPod Touch (7th generation)
Part 7. FAQs on iPhone Jailbreaking
Can jailbreak ruin your iPhone?
In a physical sense, jailbreak does not damage your iPhone. But the files you download in a jailbroken iPhone may cause system errors. In that case, you can turn on iPhone safe mode to remove the faulty tweaks.
Is jailbreak a virus?
The jailbreak itself is not a virus, but it is easily affected by viruses because users can download and install apps from the source that Apple or Google does not protect on the jailbroken iPhone.
Does updating iOS remove the jailbreak?
No, updating iOS does not remove the jailbreak, but it can lead to a boot loop.
Conclusion
After looking through this post, you might know how to jailbreak your iPhone with checkra1n. And you also get a great data backup tool for your iPhone if you need to back up your information one day.