Single, Multiple, and Mass Delete Messages on Mac Computer
As time passes, iMessages can take up a lot of space on our Mac, but we usually don't check messages on a computer. Regularly deleting messages on the iMessage app helps you organize your data and frees up your Mac storage. In this article, we will tell you how to delete messages on Mac: single and multiple delete or delete all messages.
PAGE CONTENT:
Can You Delete iMessages Only on Mac?
Yes. You can delete iMessages only on Mac and keep them on other Apple devices like iPhone and iPad. Since the iCloud service syncs data among different devices through Apple ID, turn off the iCloud sync service on the Mac before you delete messages so that the deletion only takes effect on the computer.
Let's see how to delete iMessages on Mac only.
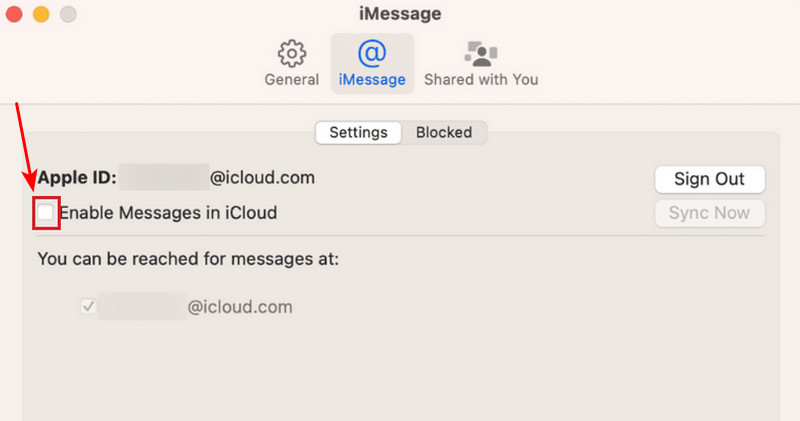
Step 1. Open the Messages program, click the Messages menu, and then choose Settings.
Step 2. Click iMessages.
Step 3. On this screen, you will see Enable Messages in iCloud. Click the box before it and leave this box bland to disable sync messages among devices.
Now, you can follow the four methods below to delete iMessage on Mac, and the deletion won't be synced. If you want to delete messages for all devices, leave messages enabled on iCloud.
Method 1. How to Delete iMessages on Mac Individually
First, let's check how to delete messages on MacBook. You are allowed to delete one piece of message in a conversation and delete one conversation with a specific sender.
Step 1. Open Message on Mac.
Step 2. Right-click the message.
Step 3. Click Delete on the cascade.
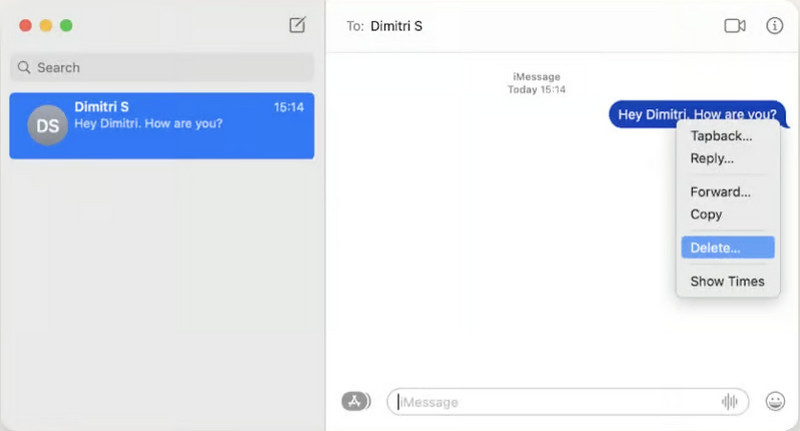
Deleting a single conversation is similar to deleting an individual message. Select a conversation and right-click it or double-click on the touchpad, and then click Delete on the pop-up menu.
Tips: We recommend you back up your message first before deletion or any other editing in case of any accidental deletion of messages. This rule also applies to deleting other data on your computer.
Method 2. How to Delete All Messages on Mac Using Finder
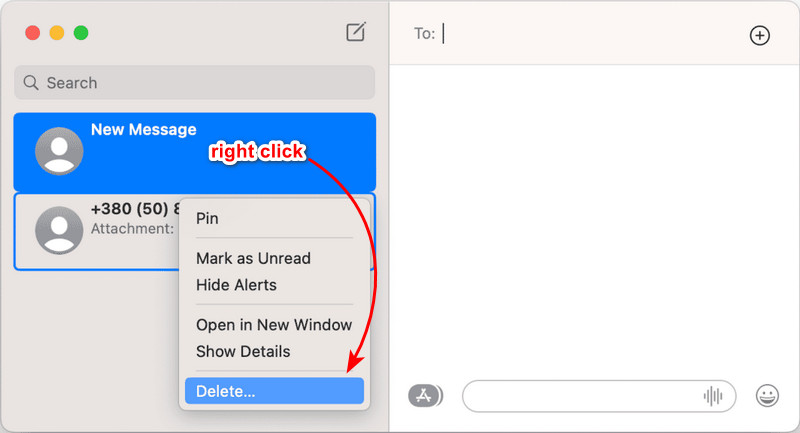
There is not a Delete All like button on the Messages program on Mac. If you only have a few conversations on Mac, just select messages one by one, or hold Command and select multiply and delete them so that you can clear them all. However, in this part, we will tell you how to clear messages on Mac on Finder and clear all messages at one time.
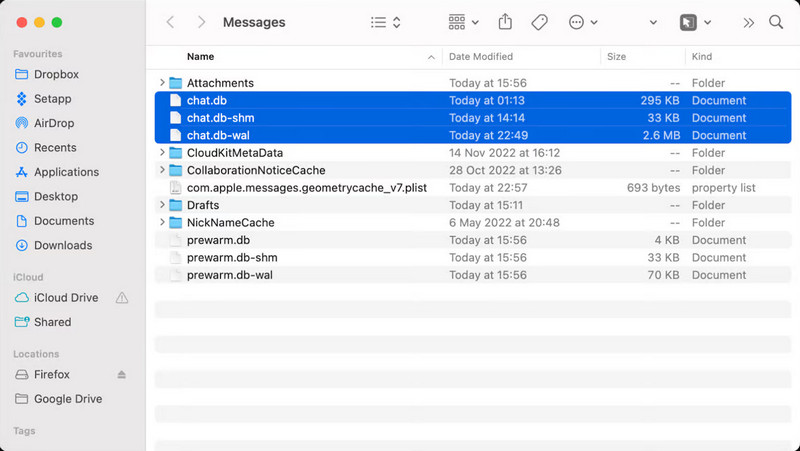
Step 1. Open Finder on your Mac.
Step 2. Press Shift + Command + G to invoke the Go menu. Input this path: ~/Library/Messages.
Step 3. In the folder, select the following three files: chat.db, chat.db-wal, and chat.db-shm. To clear all attachments, enter the Attachment folder and delete all files in it.
Tips: You can also delete duplicate photos on Mac in Finder.
Method 3. Delete iMessage Files on Mac and Free Up Storage
In this part, we would like to recommend a program to free up your Mac storage: Apeaksoft Mac Cleaner. It is an easy-to-use and powerful program that clears all caches, junk files, and duplicate files on Mac. It also monitors the memory usage and battery health of your computer.
If your Mac computer is running out of storage, you have to clear something essential to free up space because Apeaksoft Mac Cleaner clears junk files automatically for you. And now you can try it for free.
Let's see how to clear Messages on Mac using Apeaksoft Mac Cleaner.
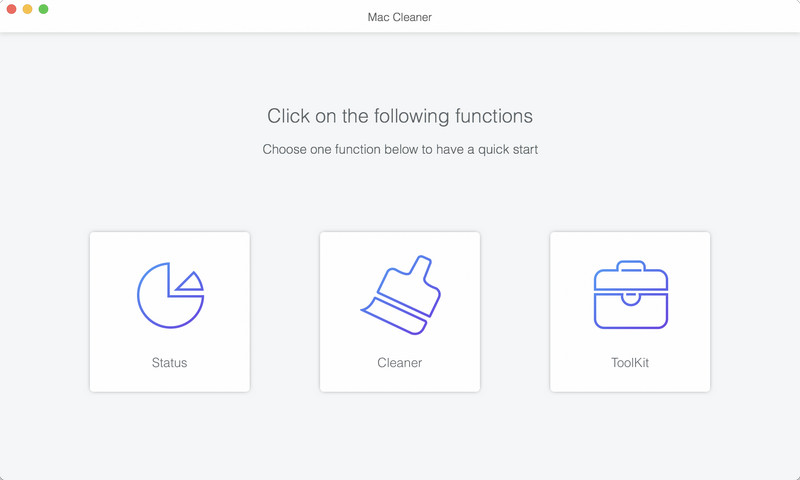
Step 1. Download the program and install and launch it on your Mac. Select the Clear function.
Secure Download
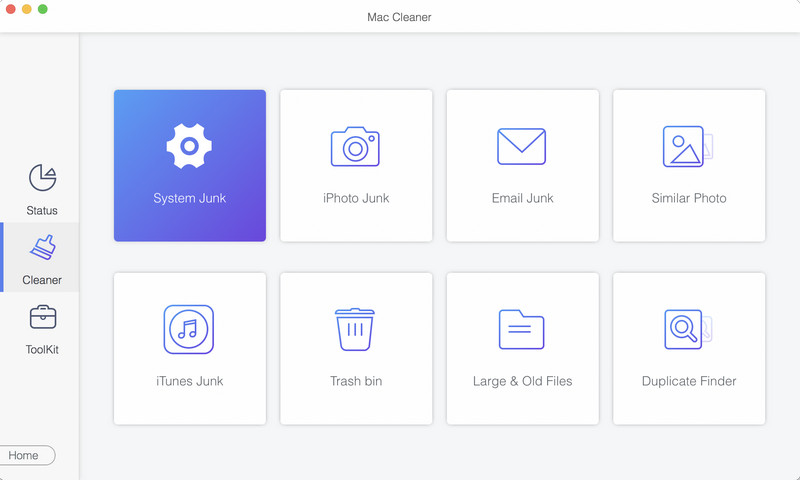
Step 2. Click System Junk.
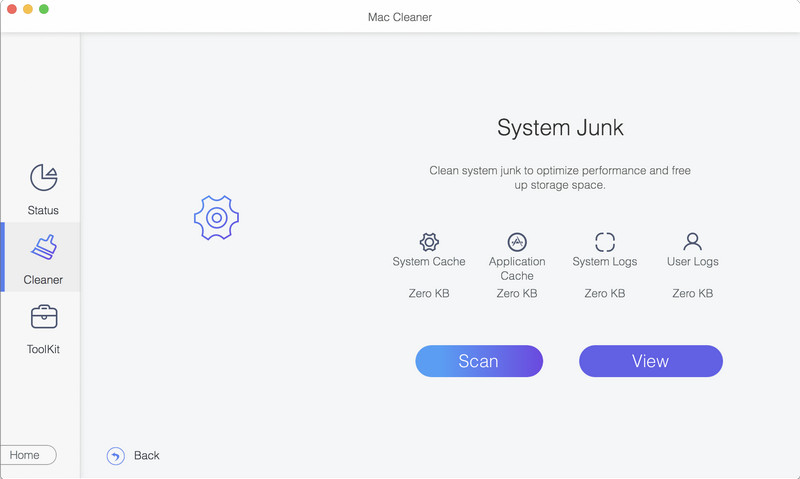
Step 3. On the interface, click Scan, and the program will start to scan all caches and junk files generated by system programs, like Messages, Safari, etc. You can click Rescan after scanning if you have any new modifications on your Mac. When scanning is finished, click View.
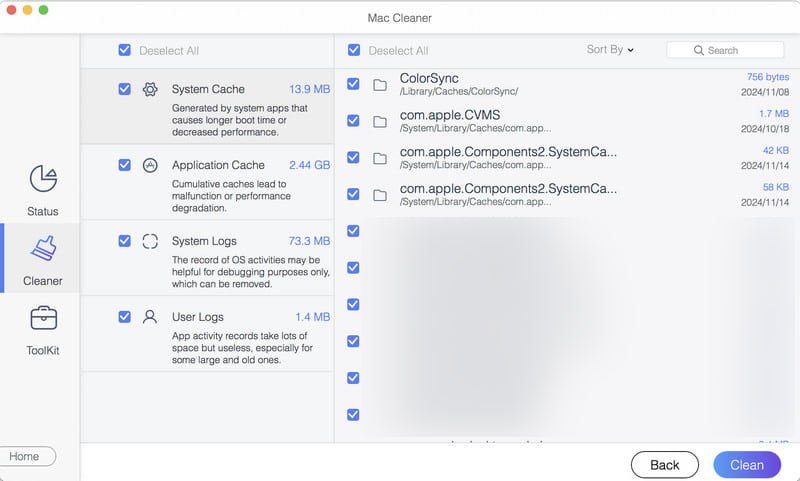
Step 4. Generally, all files in the system junk section are useless. You can click Clean to delete them safely.
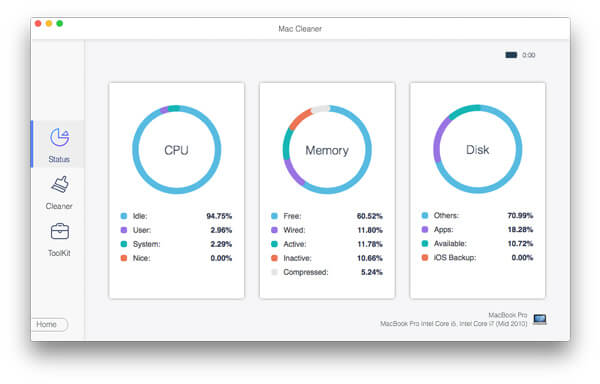
Now, all junk files on your Mac are erased. To check the disk storage, click Status instead of Clear in Step 1. You can see the status of CPU usage, Memory usage, and disk usage here, and check what is taking up your Mac space.
Method 4. Delete All Message Attachments on Mac
Over time, message attachments can accumulate and take up significant storage. While the Message program itself doesn't provide a one-click option to remove all attachments, you can locate and delete these files manually using Finder. The procedure involves accessing the Messages' storage location and identifying the attachments, helping you keep your system organized and optimize storage space.
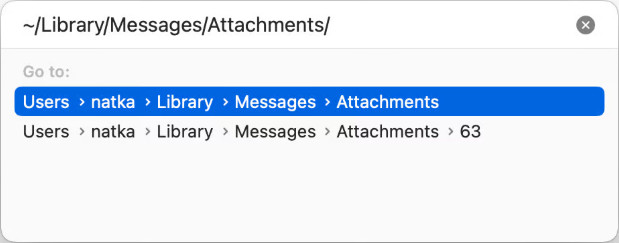
Step 1. Open the Finder program on your Mac and press Command + Shift + G to invoke Go to.
Step 2. In the window, input ~/Library/Messages/Attachments and press Enter.
Step 3. Delete all files in the Attachments folder.
Conclusion
How to clear messages on Mac? You can delete messages individually or multiply them on the Messages app easily. To delete all messages on Mac, you should use Finder and clear the database files manually. We also introduce a program to clear messages cache and junk files to free up Mac storage. You can try it for free using the specific download link.
Bonus Tip: Clear Message Cache and Free Up Storage
- Automatically clear cache generated by Message on your Mac.
- Automatically clear cache on Mac: browser, email, and other system programs.
- Viw the healthy status and memory usage situation.
- Support many MacOS versions.
Secure Download

