How to Make an Image Smaller on Computer and Mobile
As technology progresses, taking super high-quality images is easier than ever before. In fact, most high-end smartphones can take full HD photos. The drawback is that these photos and images take up storage space. That may slow down your computer or mobile device. Instead of deleting your images, it is essential to manage image size on your device. This guide explains how to make an image file smaller on your computer or mobile device.
PAGE CONTENT:
- Part 1: How to Make an Image Smaller Online Without Quality Loss
- Part 2: How to Make Image Size Smaller on Windows 11/10
- Part 3: How to Reduce Photo File Size on Mac
- Part 4: How to Downsize Images in Photoshop
- Part 5: How to Make Images Smaller in DaVinci
- Part 6: How to Make an Image Smaller on iPhone
Part 1: How to Make an Image Smaller Online Without Quality Loss
Apeaksoft Free Image Compressor is a simple way to downsize images online without quality loss. It is a good option for beginners. It is able to compress popular image formats online for free. Plus, it can handle up to 40 images at a time. If it is inconvenient to install a dedicated image compressor, you can use it in a browser directly.
Step 1. Go to https://www.apeaksoft.com/free-online-image-compressor/ in a browser.
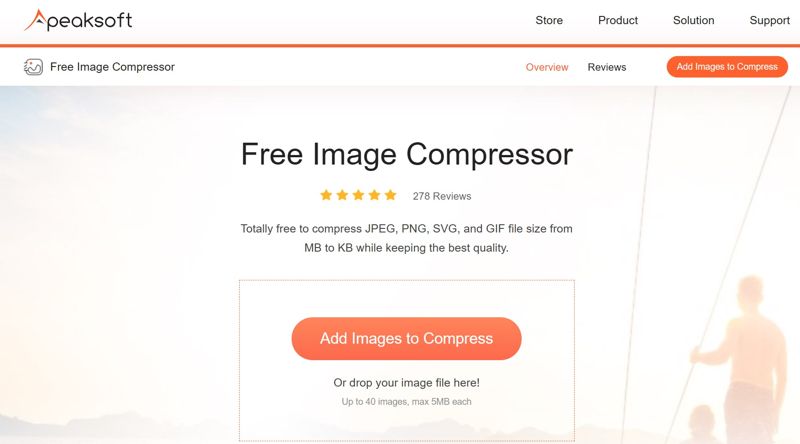
Step 2. Click the Add Images to Compress button, and upload large image files from your hard drive.
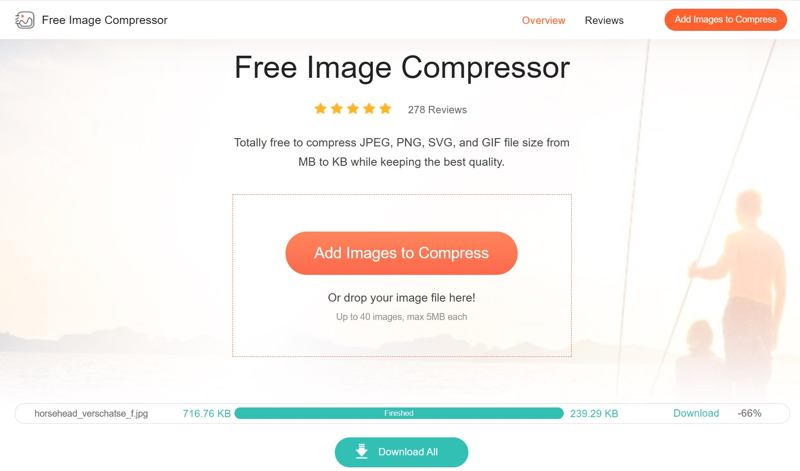
Step 3. After uploading, the online tool will compress your images automatically.
Step 4. When it is done, click the Download button on each image or hit Download All to save them as one archive.
Part 2: How to Make Image Size Smaller on Windows 11/10
Since Windows 10, Microsoft has introduced a Photos app to manage images on your PC. It integrates basic photo editing tools and allows you to make the image size smaller on Windows 11/10 by downscaling the quality.
Step 1. Open a File Explorer window and locate a large image.
Step 2. Right-click on the image file, choose Open with, and pick Photos to open it in the Photos app.
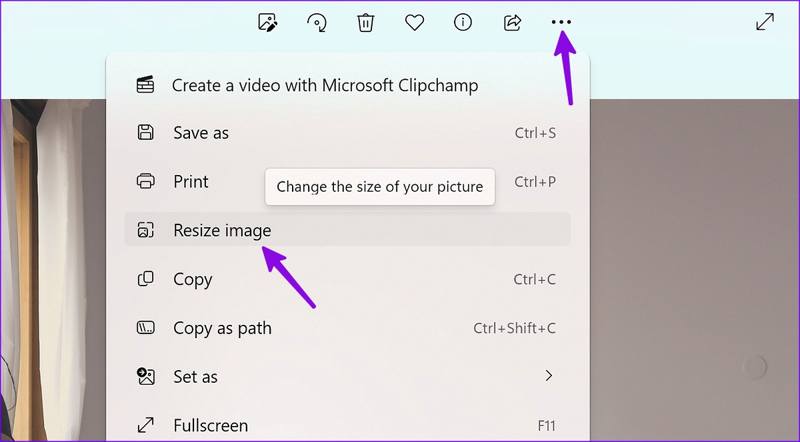
Step 3. Click the More button with a three-dot icon, and choose Resize image.
Step 4. Move the slider under the Quality option.
Step 5. Select jpg from the File extension option, which is a lossy image format and produces a smaller file size.
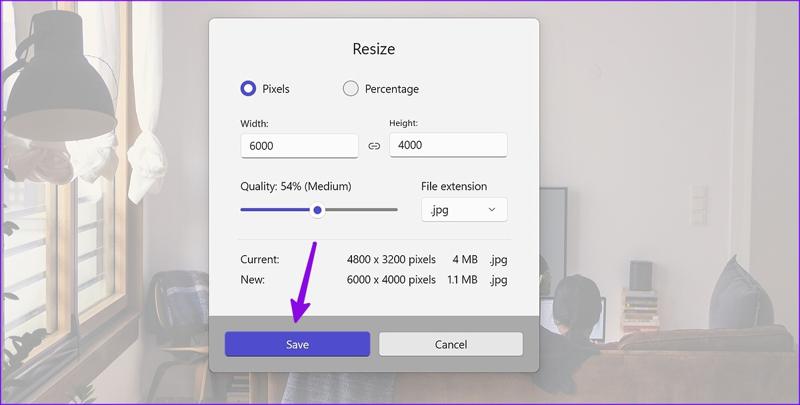
Step 6. Finally, click the Save button to save the photo with a reduced file size.
Part 3: How to Reduce Photo File Size on Mac
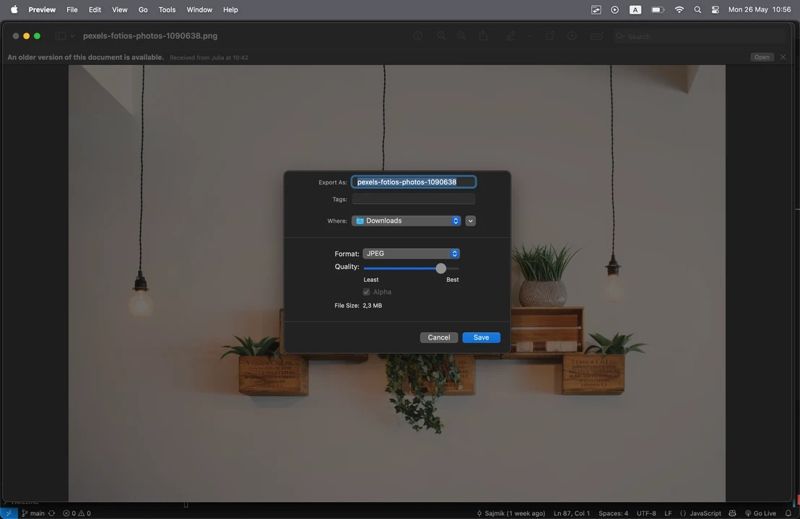
One easy way to make an image smaller on a Mac is the pre-installed Preview app. It can process a single image or handle multiple pictures at the same time. The only drawback is image quality loss.
Step 1. Open Preview from your Applications folder.
Step 2. Drag and drop an image or several images you want to process.
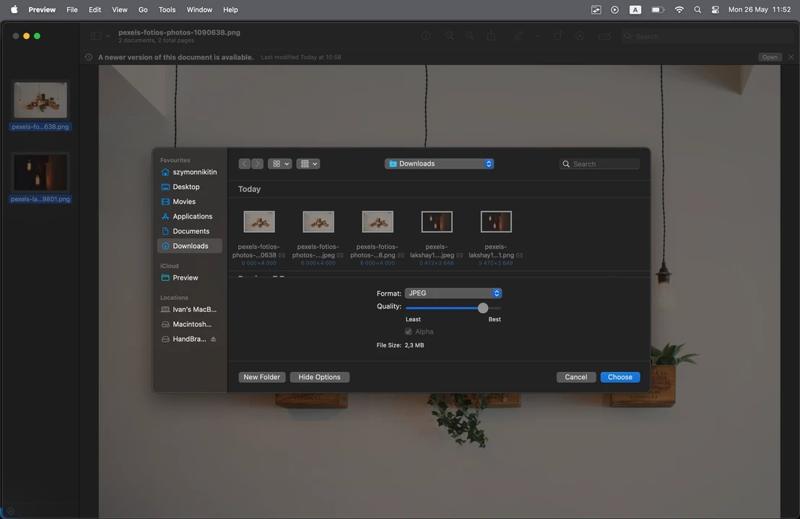
Step 3. Select all thumbnails in the sidebar.
Step 4. Click the File menu, choose Export or Export Selected Image.
Step 5. Make sure to select JPG from the Format option.
Step 6. Then, downscale the Quality until the file size is okay.
Step 7. Click the Save or Choose button to reduce the photo file size.
Part 4: How to Downsize Images in Photoshop
As a professional photo editor, Photoshop provides lots of useful features. The Save-for-web option might be a great choice to downsize an image while keeping the balance of image file size and quality. Also, the autosave feature can help you easily recover Photoshop file.
Step 1. Run your Photoshop and open the image you intend to handle.
Step 2. Edit the image as you wish.
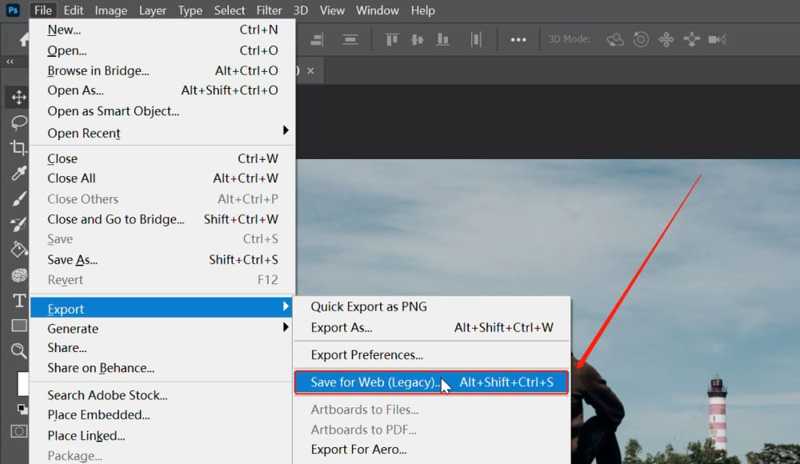
Step 3. Then, go to the File menu, choose Export, and click Save for Web(Legacy).
Step 4. In the Save-for-Web dialog, set a number between 1 and 99.
Step 5. Check the reduced image size at the bottom left corner.
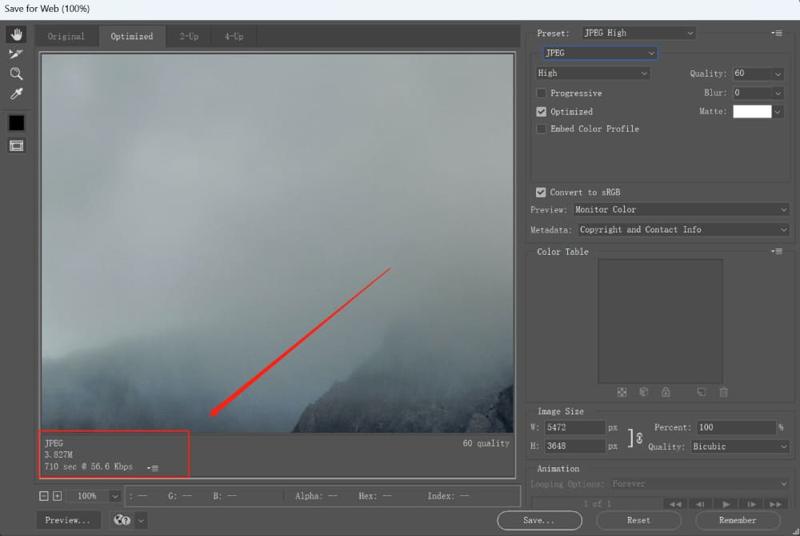
Step 6. Once you are satisfied, click the Save button and follow the onscreen instructions to export downsized image in Photoshop.
Part 5: How to Make Images Smaller in DaVinci
Can you make images smaller in DaVinci? The answer is yes. Although it is primary a video editor, it can edit images and retouching videos on the timeline. Here are the steps to resize images:
Step 1. Run the free video editor and click the Project Settings option.
Step 2. Locate Master Settings, find Timeline Settings, and pick Custom from Timeline Resolution.

Step 3. Set the desired resolution for your images. You’d better keep the aspect ratio.
Step 4. Switch to Image Scaling, and select Scale Entire Image to Fit.
Step 5. Enter the Edit screen, and press Ctrl and I to open the Import Media dialog.
Step 6. Import the desired images and add them to the timeline.
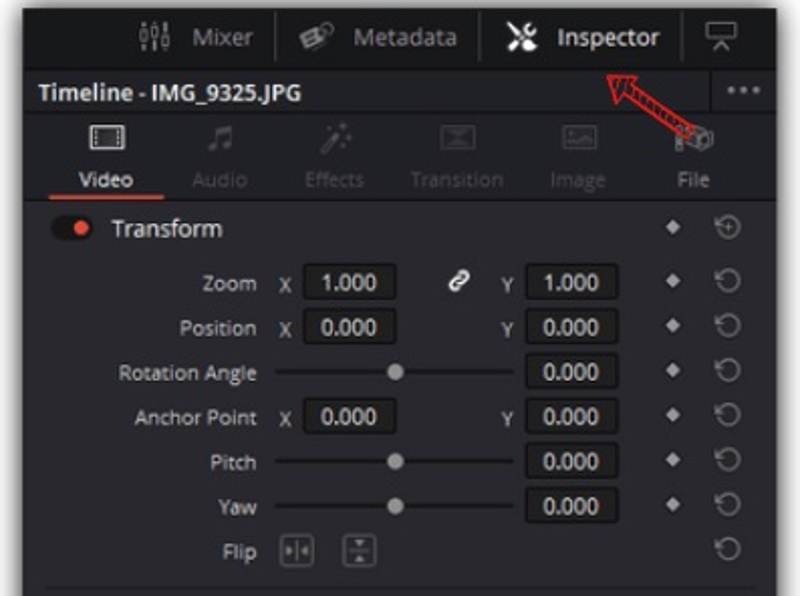
Step 7. Next, enter the Inspector panel and locate the Transform section.
Step 8. Zoom out the images to make images smaller in DaVinci.
Step 9. At last, export the images.
Part 6: How to Make an Image Smaller on iPhone
By default, the iPhone compresses photo file size automatically. It means that you can make an image smaller on an iPhone through the proper settings. After taking a photo, you can make it smaller with the Shortcuts app.
How to Reduce Photo File Size before Shooting
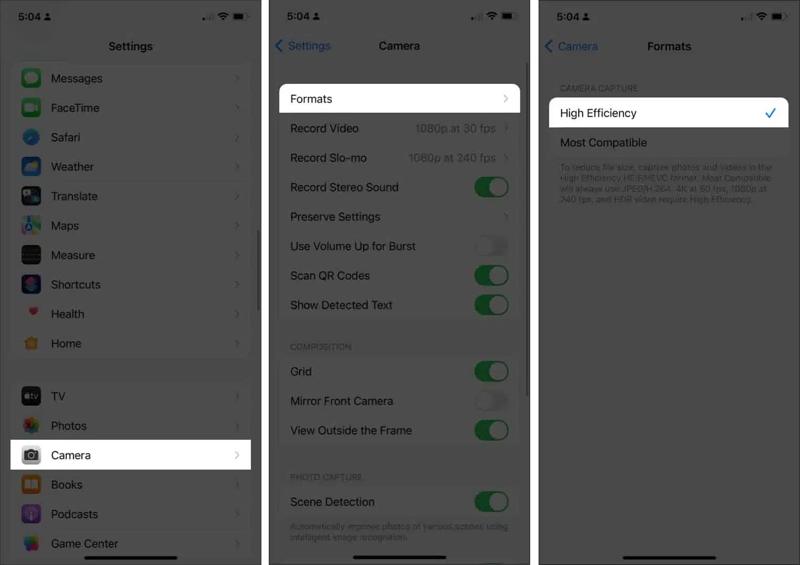
Step 1. Open the Settings app.
Step 2. Go to the Camera tab and choose Format.
Step 3. Select High Efficiency. Then, the photos shot on your iPhone will be saved as HEIC, which is smaller than JPEG on file size.
How to Downsize Images on Your iPhone
Step 1. Download Change Image Quality & Share from https://www.icloud.com/shortcuts/b37e70e2646941179f0a729ad2b1c230.
Step 2. Tap Add Shortcut, and the Shortcuts app will open automatically.
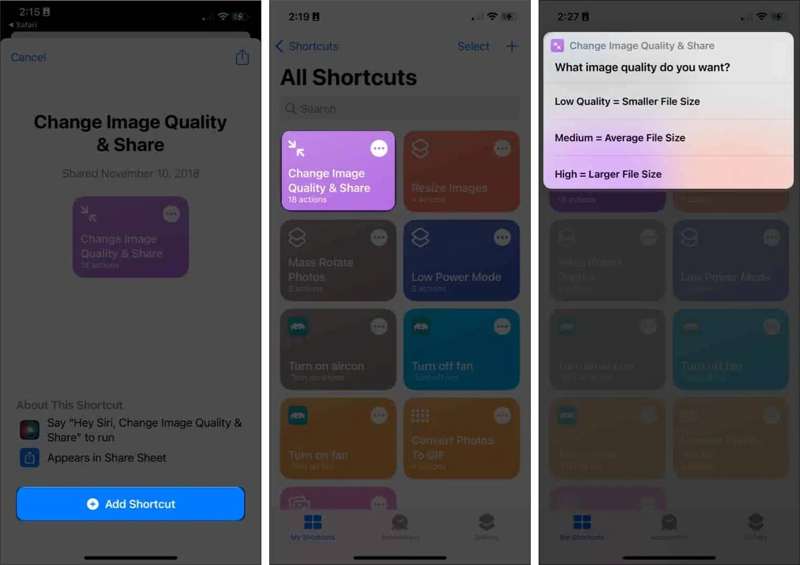
Step 3. Choose Change Image Quality and Share.
Step 4. If prompted, tap Allow Access.
Step 5. Next, select the images you want to edit and tap Add.
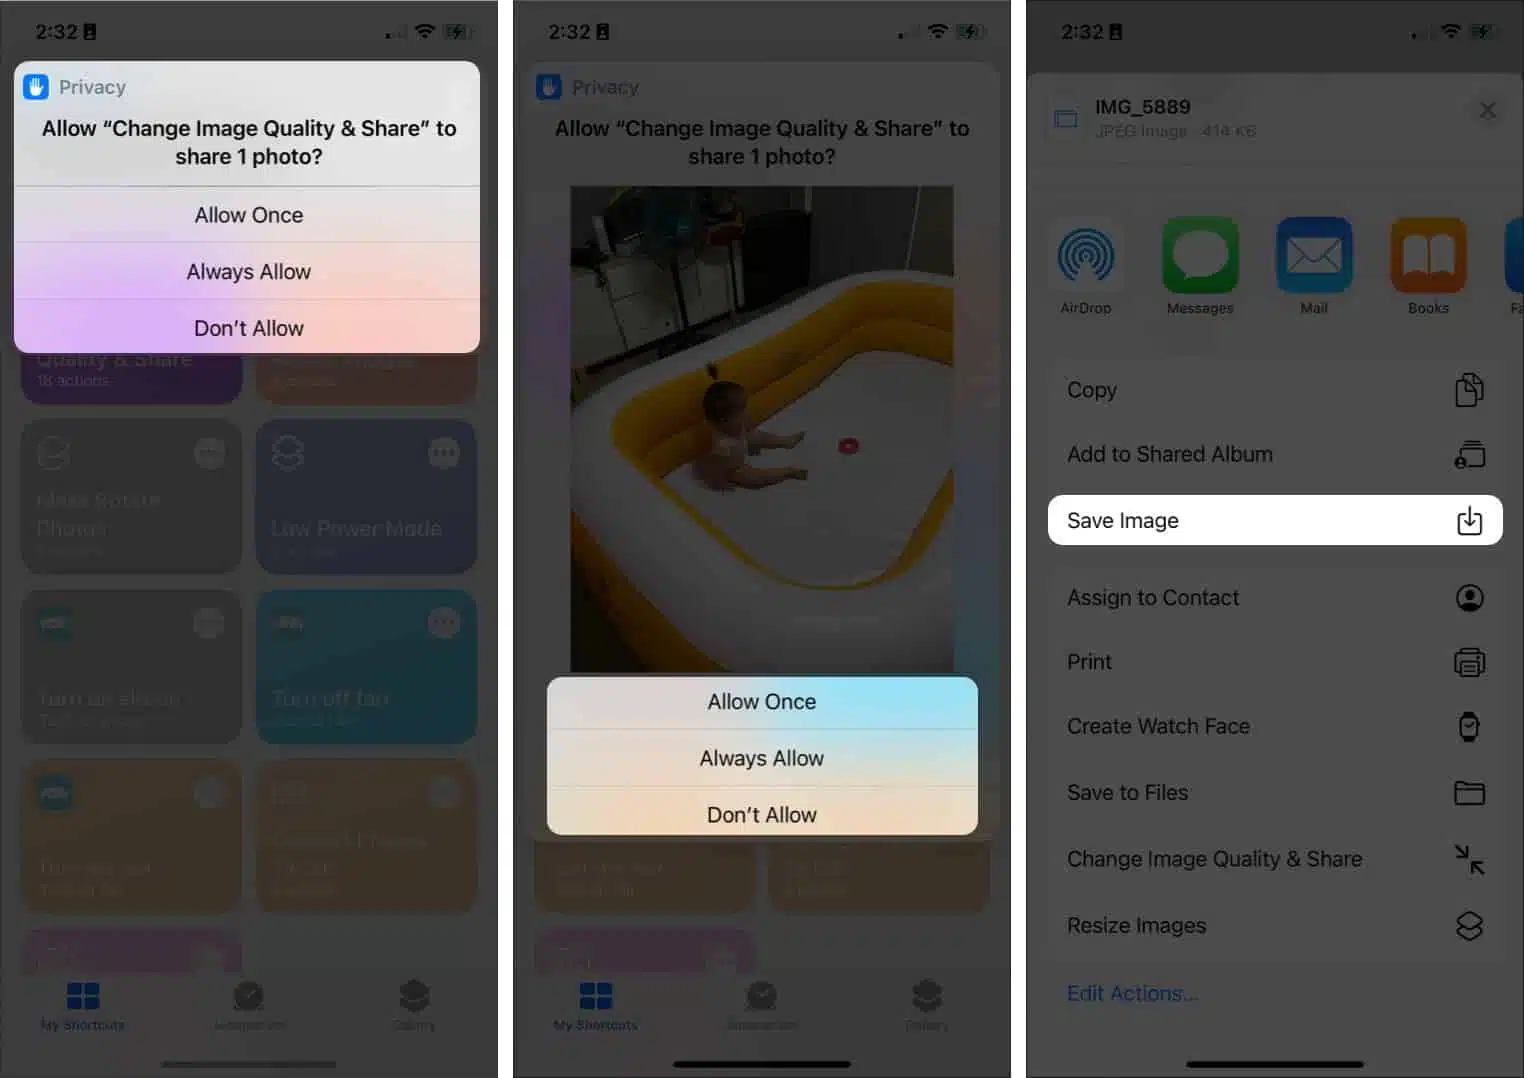 Step 6. Select a lower quality and choose Allow Once or Always Allow.
 Step 7. Tap Save Image on the share sheet. The compress photo will be saved in the Photos app. You can also back up photo to iCloud.
Conclusion
Now, you should learn at least six ways to make image file size smaller on Windows, macOS, and iPhone. Some of them are completely free to use. Others provide professional tools and require a license or subscription. You can pick the right tool based on your situation. Apeaksoft Free Image Compressor is a good starting point for beginners and average people. Moreover, it doesn’t ask you to download or install any software on your desktop. The built-in AI technology can protect image quality effectively.
