You have probably heard image sharpness, but the technical term is acutance. This concept refers to the contrast of an image’s edge with respect to what is around it. There are many reasons why you need to get an image sharpness. It highlights the details of an image and makes a blurry image clear. This guide will discuss how to sharpen an image in Adobe Photoshop without quality loss.

- Part 1: How to Sharpen an Image in Photoshop
- Part 2: Alternative Way to Sharpen an Image Online
- Part 3: FAQs about Sharpening an Image in Photoshop
Part 1: How to Sharpen an Image in Photoshop
As a professional photo editor, Photoshop comes with a wide range of features. When it comes to sharpening an image in Photoshop, you have at least three ways. We demonstrate how they work in detail below.
Way 1: How to Sharpen an Image in Photoshop via Unsharp Mask
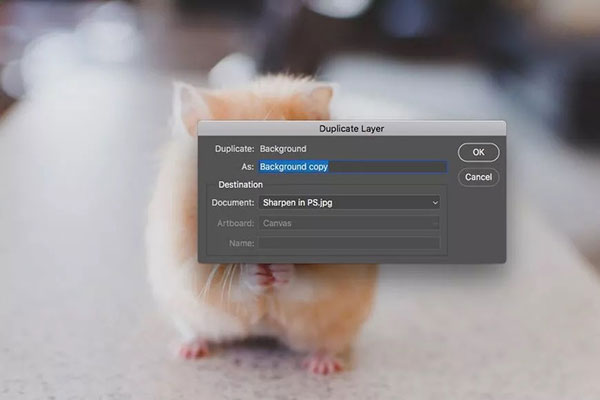
Step 1Open the blurry image in your Photoshop. Locate the Layer panel on the right side, select the background layer, and duplicate it with the Copy Layer button.
Step 2Select the copy layer, click and expand the Mode option, and turn to the Luminosity mode from Normal. This mode considers the lightness of the pixels when working with contrast.
Step 3Go to the Filter menu on the top menu bar, choose the Sharpen option, and select Unsharp Mask. That will open the Unsharp Mask dialog.
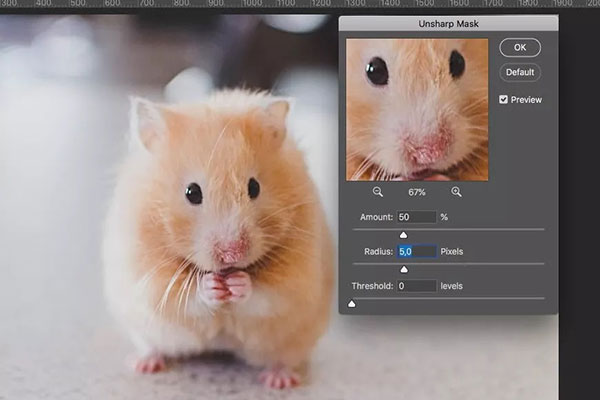
Step 4Make sure to check the box next to Preview. You will see a zoomed-in area to display the changes in real-time. There are three options on the dialog, Amount, Radius, and Threshold.
The first one controls the amount of sharpness, the second refers to the pixels affected, and the last one indicates how much contrast is applied. Adjust them until you are satisfied. Hit the OK button.
Step 5Finally, fine-tune the sharpening image in Photoshop to make the effect look natural.
Way 2: How to Sharpen an Image in Photoshop by High Pass
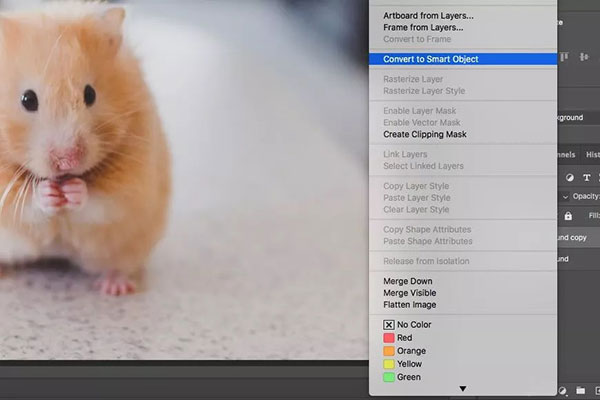
Step 1Add the desired image in Photoshop and also copy the background layer.
Step 2Right-click on the copy layer, and choose Convert to Smart Object on the context menu. That sharpens the image in Photoshop non-destructively.
Step 3Next, head to the Filter menu, choose the Other option, and select High Pass. This filter puts a neutral gray layer on the image and marks the edges.
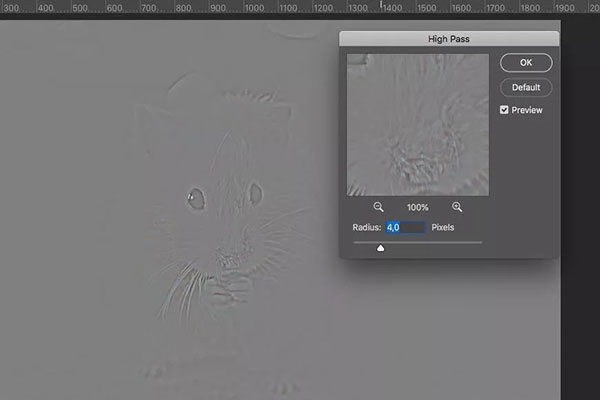
Step 4Set the Radius option and look at the effect in the Preview panel. It determines how many pixels are around the edge of each color. You’d better start at the lowest value, such as 1, and slowly slide it to the right until you get the desired effect.
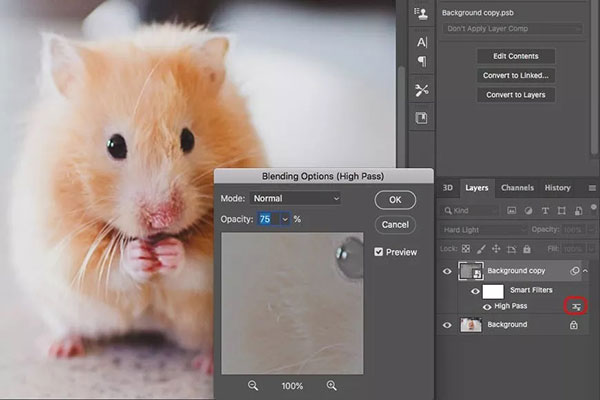
Step 5Press the OK button to confirm the changes. Then right-click on the Mode option, and switch to the Hard Light mode.
Step 6Hit the slider button next to the filter on the Layer panel. That opens the Blending Options dialog. Adjust the value of Opacity to the desired effect. Then click the OK button.
Way 3: How to Sharpen an Image in Photoshop with Smart Sharpen
Step 1Also, duplicate the background layer after you open the blurry image.
Step 2Access the Filter menu, choose the Sharpen option and turn to Smart Sharpen. That will open the Smart Sharpen dialog.
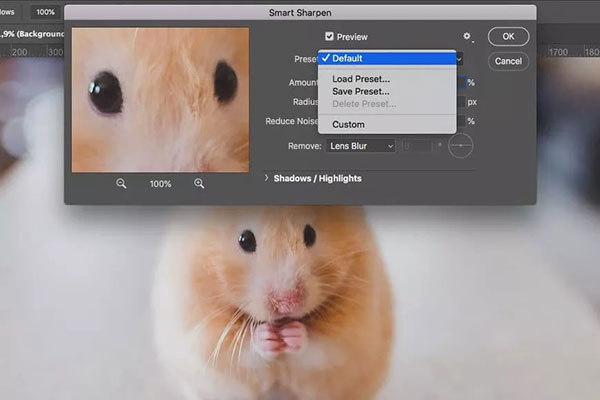
Step 3Pull down the Preset option, and switch to Custom. Then adjust the parameters below, such as Amount, Radius, etc. The Reduce Noise option lets you diminish the noise. Pull down the Remove option, and you can fix some imperfections, like Lens Blur.
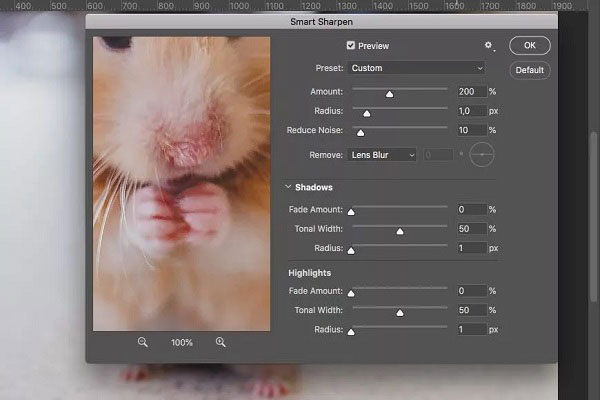
Step 4Click the OK button to apply image sharpness brightness in Photoshop. You can also fine-tune with masks or opacity. At last, save the image.
Part 2: Alternative Way to Sharpen an Image Online
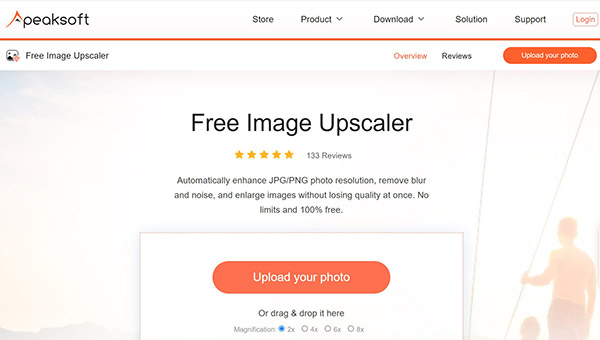
It cannot be denied that Photoshop is a professional way to sharpen a blurry image; however, it is expensive and difficult to learn. Apeaksoft Free Image Upscaler, on the other hand, is the easiest alternative to Photoshop. As its name indicated, the web app is completely free of charge. Moreover, you can get a blurry image sharpness without Photoshop or installing any software. Here are the steps below.
Step 1Access https://www.apeaksoft.com/image-upscaler/ in your web browser, click on the Upload your photo button and open the target image. The web app supports popular image formats, like JPG and PNG.
Step 2As long as the image uploads, you will be presented with the main page. There are four presets at the top and you can pick an appropriate one.
Step 3The Output panel displays the result in real-time. Once you are satisfied, click the Save button to download the sharpened image to your hard disk.
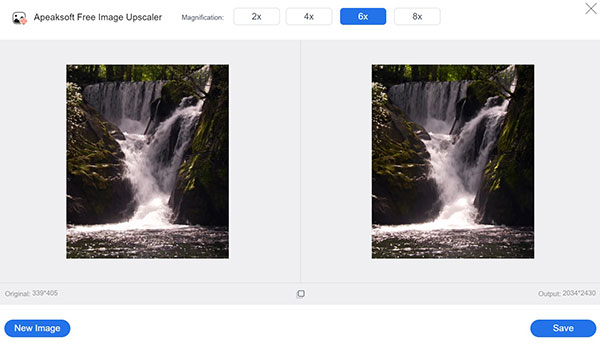
Note : Upscaling an image will increase the dimensions, which are displayed on the Output panel too.
More Reading:Part 3: FAQs about Sharpening an Image in Photoshop
Question 1. Is it possible to increase image contrast in Photoshop?
Yes. To add contrast to your image, go to the Image menu, and choose the Adjustments option. Then move the Contrast Slider to increase image contrast in Photoshop.
Question 2. Why you should make blurry image clarity?
Firstly, it takes time to take photos. Blurred photos are unbearable. Moreover, blurry images cannot attract any audience on social media. Therefore, you should sharpen your blurry images with Photoshop or other software.
Question 3. Where is sharpen in Photoshop?
There are three ways to sharpen an image in Photoshop, the Unsharp Mask filter, the High Pass filter, and the Smart Sharpen filter. You can find them on the top menu bar to depixelate an image.
Conclusion
This guide has demonstrated how to sharpen a blurry image in Adobe Photoshop. You can read our post, pick an appropriate way, and follow the steps to get the desired result. If you do not have professional software, Apeaksoft Free Image Upscaler is the easiest alternative solution. It simplifies the workflow and does not ask you to install any software. If you have other questions about this topic, please feel free to leave a message below this post and we will reply to it quickly.