How to Record Skype Video Calls on Windows, Mac or Mobile Devices
As one of the most popular online video call tools, Skype is widely used for recording interviews, hosting business meetings, or just having casual daily chats. Want to record your Skype video calls so you won't miss any important details? This guide will help you master Skype video call recording on Mac, Windows, and mobile devices!
Remember: Always ask for the other person's permission before recording a Skype call! Recording Skype calls without consent could break the law, and you'd be responsible for any risks.
PAGE CONTENT:
Part 1: How to Use Skype Video Calls Built-in Recorder
Skype's built-in recording feature lets you record voice or video calls easily for online content creation. It's super user-friendly, but its functions are quite basic, so the audio and video output quality isn't great, and you need to turn to another tool for post-editing.
Once you start recording, the file is automatically uploaded to the cloud. When the call ends, all participants receive a cloud storage link, which is valid for 30 days. You can download the recording from the cloud anytime within 30 days. If your internet drops while recording, don't worry. Anything that's already recorded won't disappear. Skype saves it as a temporary local file. If you have higher requirements for recording quality and stability, this option is not recommended.
Here is a step-by-step guide:
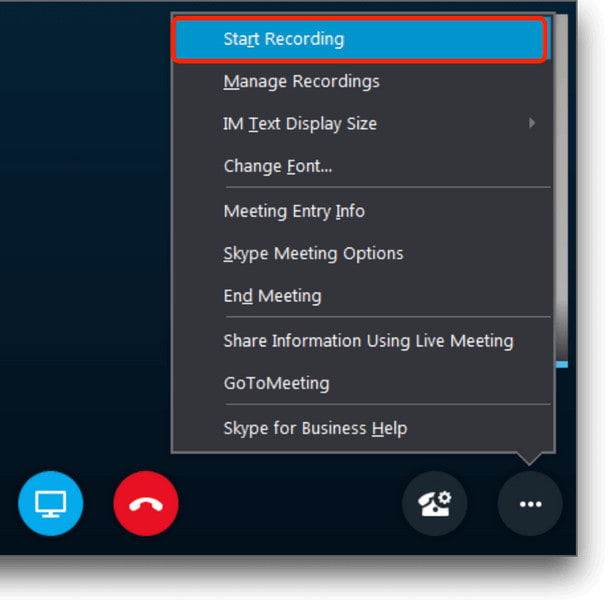
Step 1. Start a Skype call.
Step 2. Click the three dots in the lower-right corner and select Start recording.
Step 3. Hit Stop recording to end it, or let the recording stop automatically when the call ends.
Step 4. Click three dots in the top-right corner and select Save to Downloads or Save as....
Note: If you work on mobile, you must first tap the screen to reveal the call controls, then tap three dots to start recording.
- No installs and downloads.
- Automatically generates a shareable link for all participants.
- Completely free.
- Maximum recording time: 24 hours.
- Output quality: 720p, 30fps.
- Cloud storage only lasts 30 days.
- No advanced editing features.
Part 2: How to Record Skype Calls on Mac/Windows
If you need higher quality and more stable recording, Skype's built-in recorder may not satisfy your needs. Instead, using a skype call recording software is a better choice for advanced requirements and long-term use. Below are two powerful options for recording Skype calls on Mac/Windows.
Apeaksoft Screen Recorder
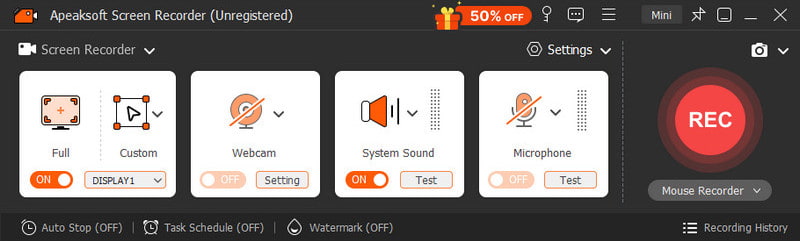
Apeaksoft Screen Recorder allows you to record calls with flexible settings and higher output quality. Designed for both Mac/Windows users, it features an intuitive interface and easy-to-find buttons, making it easy for beginners.
Best Skype Calls Recorder on Mac/Windows
- Record high-quality video and audio smoothly.
- Support full-screen or a custom area recording.
- Support numerous output formats.
- Provides a built-in editing tool to implement your recordings.
Secure Download
Secure Download

Steps to record a Skype call on Mac/Windows:
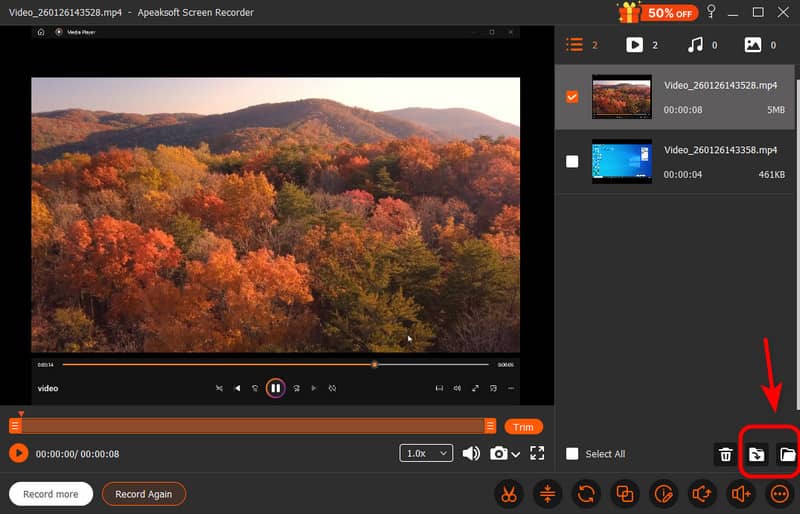
Step 1. Download and install Apeaskoft Screen Recorder, then launch it.
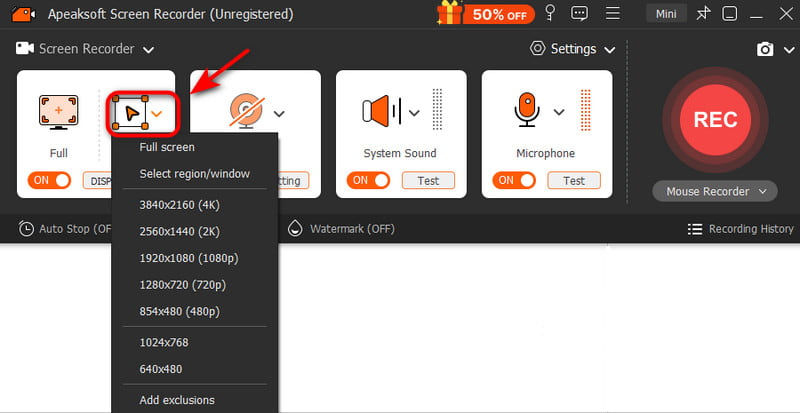
Step 2. Choose Screen Recorder in the top-left corner, click Custom to choose your fixed region.
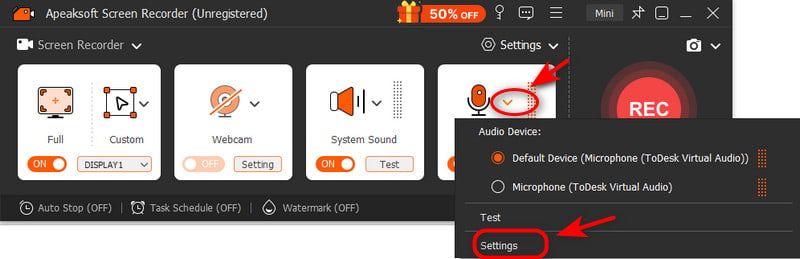
Step 3. Click the system sound and microphone to adjust the audio.
Step 4. Hit the REC button to start recording.
Step 5. Select the save path and export it!
Tips: You can record the screen, system sound, microphone, and webcam at the same time smoothly, or you can record audio only to make a voice-over!
QuickTime Player (Mac)
If you work on a Mac, you can use the built-in tool - QuickTime Player to record a Skype conversation without installing any third-party software. It's easy to use and completely free.
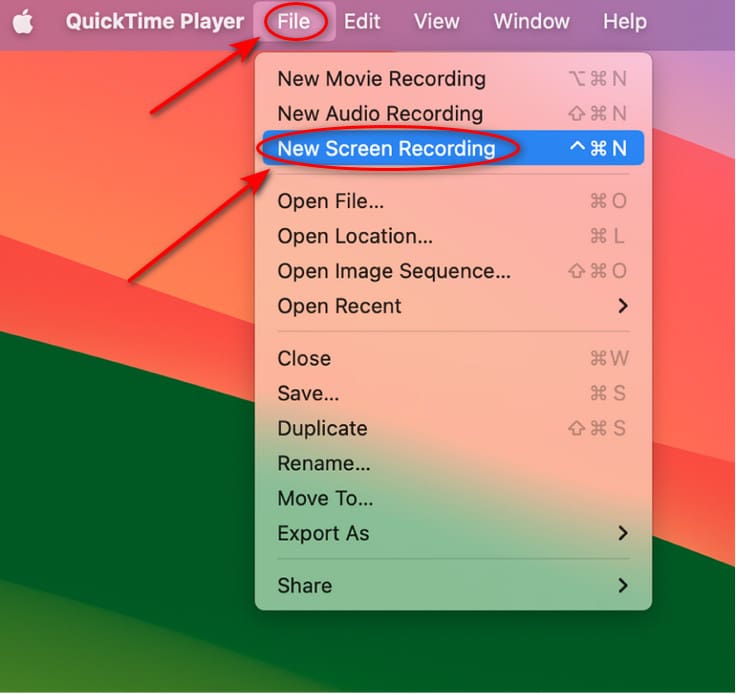
Step 1. Open QuickTime Player from Applications.
Step 2. Select File and then choose New Screen Recording.
Step 3. Click it next to Record and select Built-in Input.
Step 4. Hit the Record button.
Step 5. Choose to record your Skype window or your entire screen, then start your call!
Part 3: How to Record Skype Calls on Mobile
For iOS Users
If you don't want to download any other app, you can directly use the built-in tool to record Skype calls on your iPhone. In this way, the recording quality depends on the device's performance and available storage.
Step 1. Go to Settings and select Control Center, ensure Screen Recording is enabled.
Step 2. Go to Control Panel and press Recording.
Step 3. Start your Skype call. Back to the Control Panel and tap Recording again.
Step 4. The recording call will be saved automatically in the Photos app.

For Android Users
A third-party app can help you record Skype calls on Android. AZ Screen Recorder is a top pick for its full HD recording quality. It's root-free, watermark-free, and allows you to do basic post-editing, such as trimming, merging and cropping.
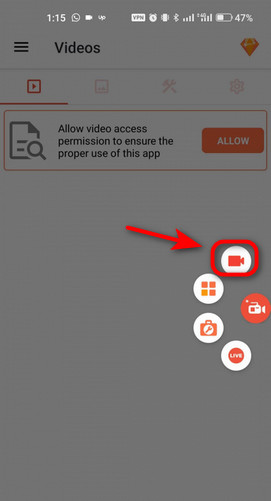
Step 1. Download and install AZ Screen Recorder from the Google Play, then launch it.
Step 2. Tap Camera to start recording.
Step 3. Start your Skype call as usual.
Step 4. Press the Stop (square) to end recording. Videos are saved in a folder named AZ Recorder.
Conclusion
Ultimately, recording Skype calls is more than preserving a conversation. It helps record critical Zoom Meeting, key interview insights and meaningful moments with loved ones. No matter which Skype call recording method you use, always get permission from all the participants first. Then pick a tool that fits your needs, get high-quality recordings and never let vital information slip away.
Related Articles
This post shows you how to do phone call recording on iPhone with/without apps if you want to record a phone call on iPhone.
Viber doesn’t have a built-in call recording feature. To record calls on Viber, you can use your phone’s built-in recording tool or a third-party recorder.
The Omegle itself isn't equipped with a video recorder. Therefore, this article will introduce several recoders and steps to record an Omegle video call.
Even though WhatsApp doesn't support recording calls by default, you can record WhatsApp calls on PC, iPhone and Android following our concrete guide.
