How to Record Minecraft Gameplay on Computers and Consoles
Gameplay recording has become a hot topic as YouTube, TikTok, and Twitch become popular. Players can share their gameplay and attract followers and attention. That also becomes an important way to do monetization through content creating. Minecraft, for example, is a prevalent 3D sandbox adventure game that attracts oceans of players and followers. This guide demonstrates the proven methods to record Minecraft on computers and game consoles properly.
PAGE CONTENT:
Part 1. Ultimate Way to Record in Minecraft on Your Desktop
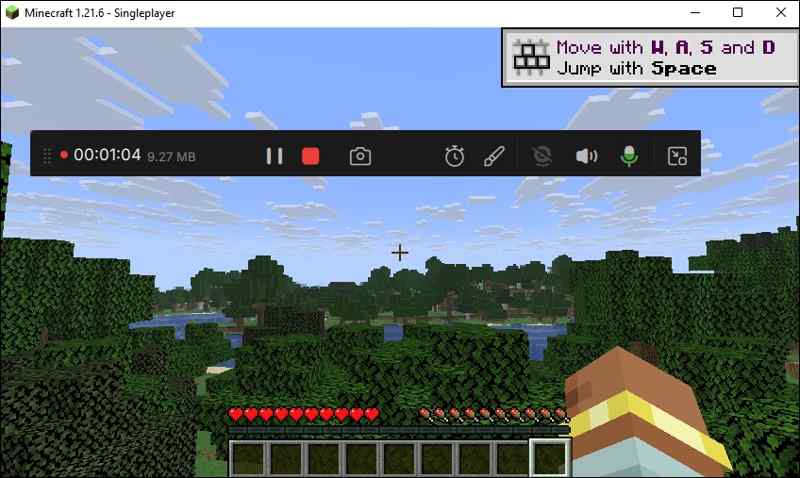
With the right game recorder, you can record a Minecraft video for YouTube and other platforms with no lag. For instance, Apeaksoft Screen Recorder integrates a specific mode for gameplay recording. That optimizes your computer performance and keeps the smooth gameplay while recording the screen.
The Best Way to Record Minecraft Gameplay on PC and Mac
- Integrate the best screen recorder for Minecraft on PCs.
- Record Minecraft gameplay with no lag.
- Add your reactions and voice to the game recording.
- Paint gameplay recording directly.
- Preview Minecraft recordings before exporting.
Secure Download
Secure Download

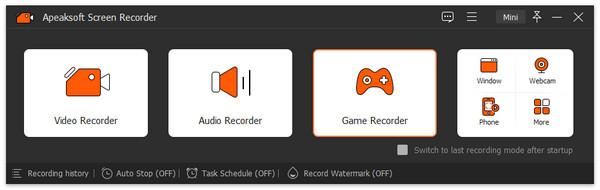
How to Record Minecraft on Your PC
Step 1. Install the Minecraft screen recorder
Open the best screen recording software for Minecraft once it's installed on your PC. There is another version for Mac. Pull down the menu at the top left corner and pick Game Recorder.
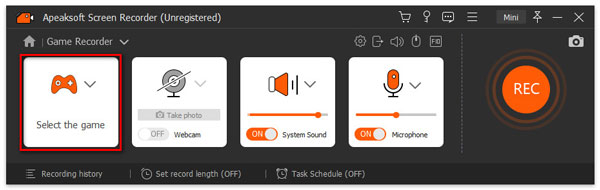
Step 2. Record Minecraft on your PC
Click Select the game and choose Minecraft. Toggle on System Sound and adjust volume. To add your reaction and voice to the gameplay recording, turn on Webcam and Microphone. Click the REC button and begin playing Minecraft.
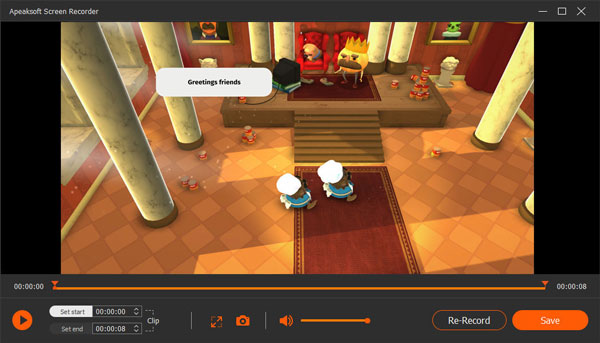
Step 3. Preview and save the recording
When you want to stop, click the Stop button. Then, check the recording and cut unwanted frames with the Clip tool. Finally, click the Save button.
Part 2. How to Record in Minecraft with Game Bar
One of the best free screen recorders for Minecraft on a PC is the Game Bar feature. By default, it is the game recorder on Xbox. Since Windows 10, Microsoft has migrated this feature to PCs. Here are the steps to record your Minecraft gameplay:
Step 1. Open Minecraft on your PC.
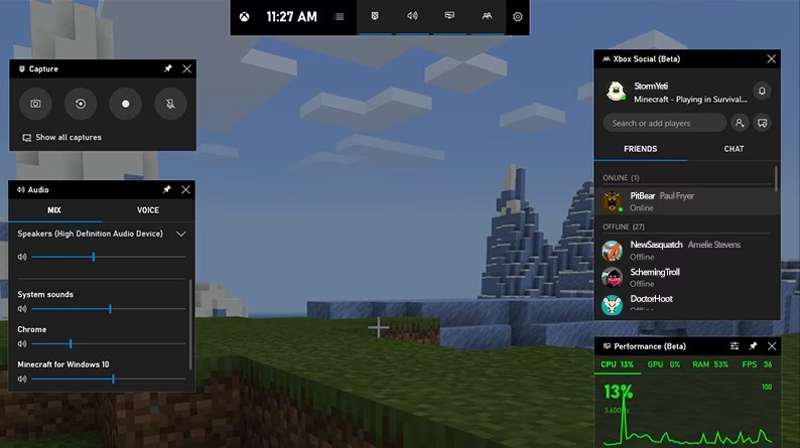
Step 2. Press the Windows and G buttons on your keyboard to trigger Game Bar.
Step 3. Set the gameplay audio in the Mix tab on the Audio panel and sound from the microphone in the Voice tab.
Step 4. Click the Record button on the Capture panel to begin recording Minecraft gameplay on your PC.
Step 5. When gameplay finishes, click the Stop button. Game Bar will save the recording in MP4.
Part 3. How to Record Minecraft Using OBS
OBS screen recorder is another option to record a Minecraft video for YouTube. As an open-source project, lots of vloggers use OBS to produce gameplay videos and share them on YouTube, Twitch, and other platforms. The downside is the complicated configuration.
Step 1. Run OBS on your computer.
Step 2. Click the + button in the Scenes pane and give a name for the scene.
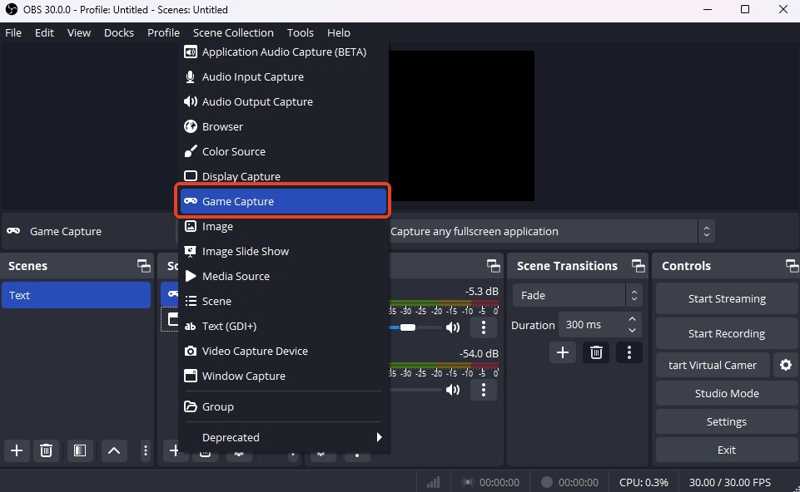
Step 3. Hit + in the Sources pane, and select Game Capture.
Step 4. Name the source and hit OK.
Step 5. Adjust the Capture Mode according to your game and click OK.
Step 6. Click Settings and switch to Audio.
Step 7. Turn on Desktop Audio and Mic/Auxiliary Audio under Global Audio Devices.
Step 8. Click Apply and hit OK.
Step 9. Go to Video, and set the output format and other options.
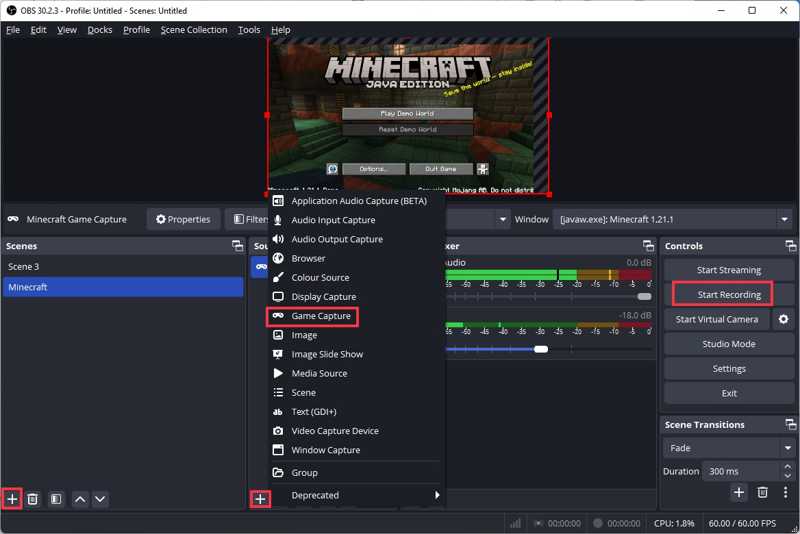
Step 10. Finally, play Minecraft and click the Start Recording button to record Minecraft using OBS.
Part 4. How to Record Minecraft on Xbox
Minecraft is not only available on PCs. Many players access Minecraft on their game consoles, such as Xbox. Of course, you can record Minecraft gameplay on Xbox for sharing on your social media account.
Step 1. Play Minecraft on your console.
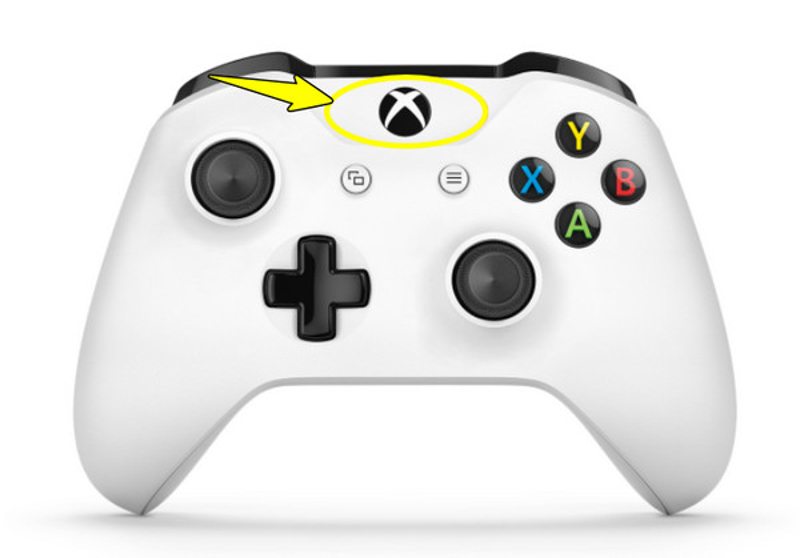
Step 2. Press the Xbox button on your controller.
Step 3. Slide to Capture & share, and select Start recording or Record what happened.
Tips: The latter records gameplay up to 2 minutes. If you want to record longer than that, choose Start recording instead.
Step 4. To stop recording, press the Xbox button again, choose Capture & share, and pick Stop recording.
Note: Depending on the model of your Xbox, the workflow above is a little different.
Conclusion
This guide talked about how to do Minecraft recording on Windows, Mac, and Xbox. The built-in Game Bar feature is a simple option on Windows 11/10. For Mac users and old versions of Windows, OBS is a free method, but the configuration is complicated, especially for non-tech-savvy. The game capture feature on Xbox enables users to record any gameplay quickly. Apeaksoft Screen Recorder is a flexible option to capture your gameplay for different purposes. It is easy to use and offers a wide variety of custom options.
