Step-by-Step Guide to Recover Overwritten Files Safely
Just finished saving a file and realized you clicked "Replace" by mistake? Watching an important file disappear in an instant can be really frustrating. Are the overwritten files gone forever? Don't lose hope! This guide will introduce multiple solutions for recovering overwritten files using powerful data recovery software, built-in system features, or other effective methods for both PC and Mac users.
PAGE CONTENT:
Part 1: Is the Overwritten File Gone Forever?
An overwritten file means its original data has been replaced by new data. This usually happens when you save a new file with the same name or replace an existing file. Once a file is overwritten, the original content is no longer directly accessible.
So, can overwritten files be recovered? The answer depends on the situation. Overwritten files are not always gone forever. If you have a backup, you may be able to restore from a previous version. If the file is only partially overwritten, data recovery software may still recover the lost data for you. If the file is fully overwritten and no backup exists, recovering the data becomes very difficult. This is why regular backups are essential to prevent permanent data loss.
Part 2: The Easiest Way to Recover Overwritten Files on PC/Mac
Accidentally deleted files and not sure if they can still be recovered? It's best to try data recovery software as soon as possible to recover overwritten files! Apeaksoft Data Recovery can help restore all types of overwritten files on both Windows and Mac. Whether your files were deleted by mistake, removed after emptying the Recycle Bin, or lost due to disk damage/system updates/virus attacks, this tool can recover overwritten files without a previous version in just three simple steps!
Promise a 99.7% Success Rate to Get Your Lost Data Back
- Support recovering 200+ file formats in various scenarios.
- Recover all types of lost files like images, emails, videos, documents, and more.
- Restore overwritten files from SD/CF card, external drive, and other storage media.
- Get your data back without existing data loss.
Secure Download
Secure Download

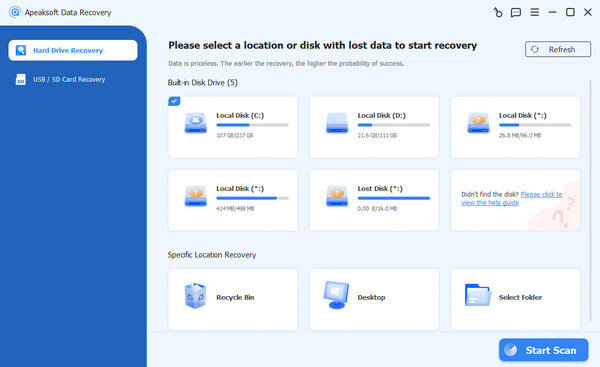
Step 1. Launch the software on your computer. You can see all the hard drives on the interface, choose the hard drive you want to recover from, and click Start Scan.
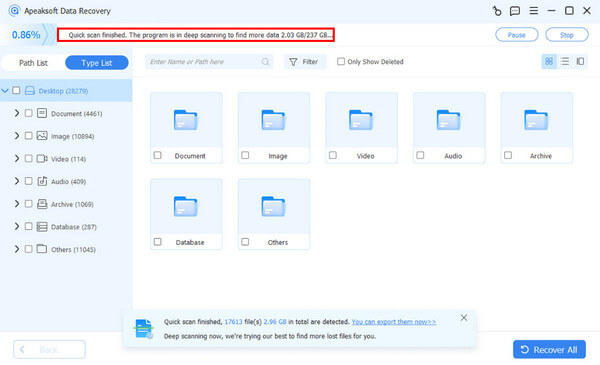
Step 2. The software will start scanning your computer. If the file you want to recover is not found, click Deep Scan to retrieve more data.
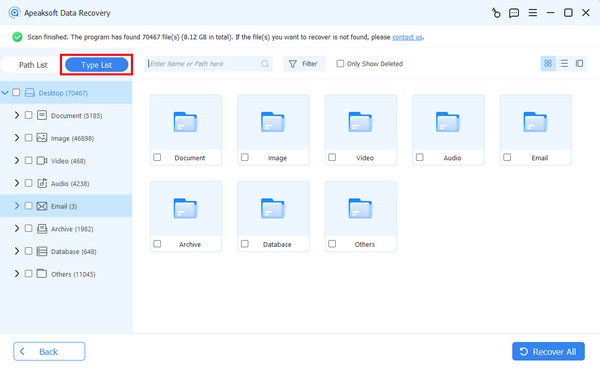
Step 3. You can preview the files by clicking the Type List in the left bar. You can also type a name or path in the search window to find the file.
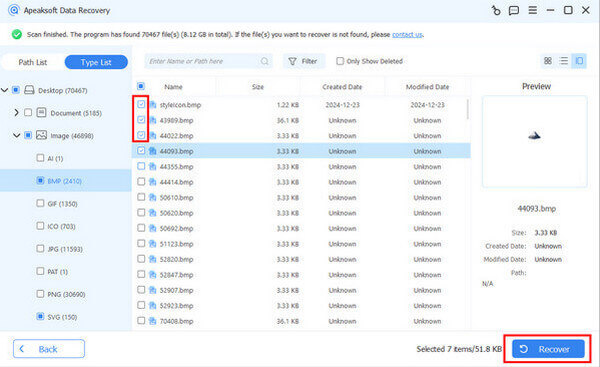
Step 4. Select the files you want to recover. Click Recover to retrieve the files to your computer.
Part 3: How to Recover Overwritten Files on Windows
On Windows, files may be overwritten for various reasons, such as accidental replacement or system changes. Windows provides several built-in recovery options to help you recover lost data. The following methods explain how to use these features to restore overwritten files.
Method 1: Restore Overwritten Files from the Previous Version
If you've enabled File History on your Windows PC, you may have a previous version of overwritten files. This method allows you to restore files quickly without affecting other files or system settings.
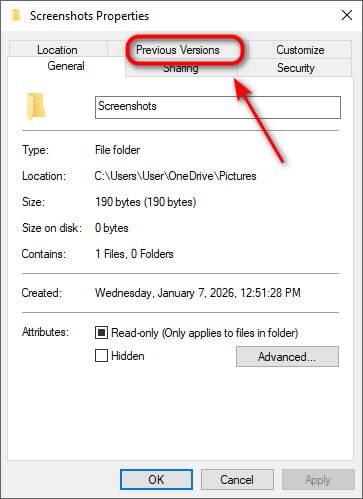
Step 1. Go to the folder where the original file was located.
Step 2. Right-click anywhere in the white space and select Properties.
Step 3. Select the Previous Versions tab. Choose an earlier version and click Restore.
Method 2: Restore Overwritten Files Using Backup and Restore
The Backup and Restore feature is a built-in utility in Windows that helps protect your data. If you created a backup before the files were overwritten, you can use this feature to recover the overwritten files.
Step 1. Open the Start Menu and type Control Panel in the search bar. Select Backup and Restore (Windows 7).
Step 2. Click Restore my files in the bottom right corner.
Step 3. Click Browse for files and select the files you want to recover, then click Next.
Step 4. Choose a location to restore your files. Click Restore to start.

Method 3: Restore Overwritten Files with System Restore
If the recovery methods above are not available, System Restore may still help. You can revert the system to the last backup point to retrieve your data.
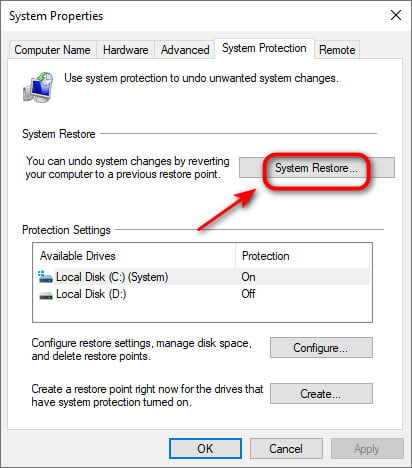
Step 1. Open the Start Menu and type restore point in the search bar, click Create a restore point.
Step 2. Click System Restore and follow the on-screen instructions.
Step 3. Select the restore point before the file was replaced, and click Next to proceed.
Step 4. Confirm the disk to restore, then click Finish.
Part 4: How to Recover Overwritten Files on Mac
Many Mac apps, such as Pages, Numbers, Microsoft Office and Photoshop, have built-in backup features that work automatically in the background. You can use these features to recover overwritten files on Mac without installing extra software.
Method 1: Restore Overwritten Files via Browse Version History
We'll take Microsoft Office on Mac as an example to show how it works.
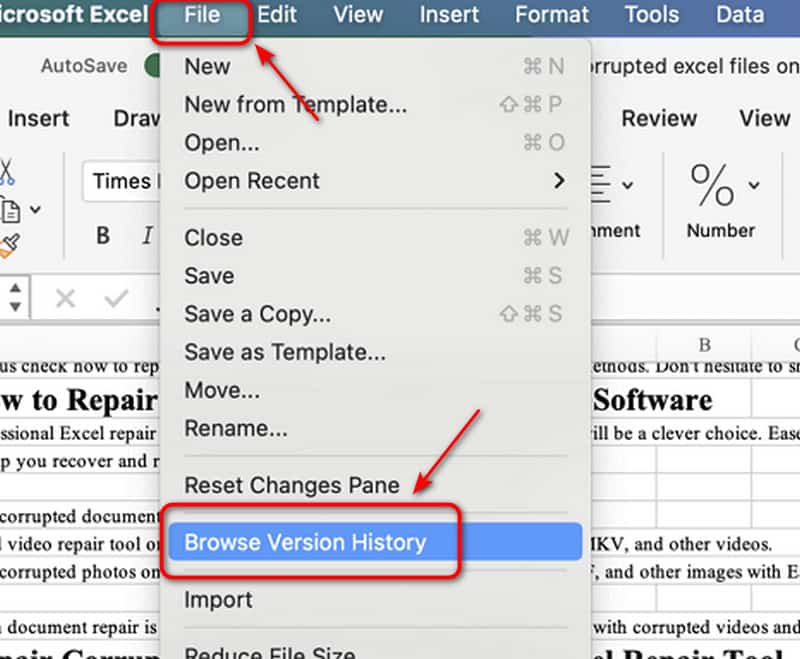
Step 1. Open the overwritten file you want to recover.
Step 2. Click File in the toolbar and select Browse Version History.
Step 3. Select the correct version and save the file to a new name to recover.
Method 2: Restore Overwritten Files with Time Machine
Time Machine is Apple's built-in backup tool for macOS. It creates regular backups and keeps multiple versions of your files. So, you can go back in time and restore your Mac from Time Machine.
Step 1. Connect your backup drive to your Mac. Open the folder containing overwritten files before.
Step 2. Click the Time Machine icon in the menu bar, then choose Browse Time Machine backups.
Step 3. Navigate available backups and select a previous version.
Step 4. Select the files you want to restore, then click Restore.

Part 5: Tips to Prevent Overwritten File Loss
Now that you know why files are overwritten and how to recover overwritten files on Mac or Windows, it's time to take action to prevent this frustrating issue. Follow these steps to keep your files safe from being overwritten in the future:
- Enable automatic backups using Time Machine or Windows File History and sync data with iCloud, so you always have earlier file versions to restore.
- Back up your data regularly to an external hard drive.
- Take a moment to confirm it's the correct file when prompted to overwrite.
- Use cloud services to keep previous versions of files, such as iCloud Drive, OneDrive, or Google Drive.
- Use clear and unique file names to prevent accidental replacements.
Conclusion
This guide explains how to recover overwritten files on both PC and Mac. Our final reminder is to build good habits to avoid permanent file loss. Always keep regular backups, enable File History or Time Machine on your computer, and double-check before replacing files. If a file is overwritten, start data recovery as soon as possible - acting quickly can greatly improve the chances of successful recovery!
