


How to Get Back Deleted Files from Mac Trash Easily

Ever deleted an important file on your Mac by mistake? Just rush to the Trash - sometimes you're lucky enough to find it still there. Other times, though, the Trash has already been emptied. On macOS, deleted files are first moved to the Trash, where they stay temporarily until you restore them or empty the bin to free up space.
But accidents happen. It's easy to delete the wrong file or empty the Trash without realizing what was inside. If that happens to you, don't panic. This guide will show you how to recover Trash on Mac, whether the files are still in the Trash or have already been emptied.
PAGE CONTENT:
Part 1: How to Recover Trash on Mac if Not Emptied
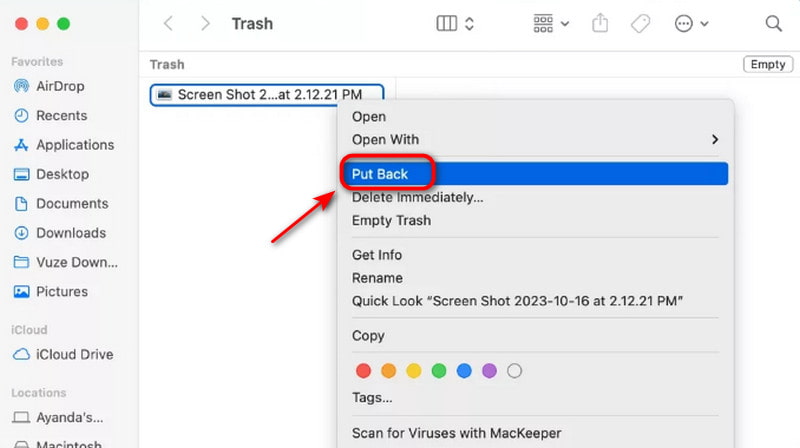
If you delete the files accidently and want to get them back, the first thing you need to do is to check whether they are still in the Trash. As long as the Trash hasn't been emptied, you can restore the deleted files on your Mac directly.
Steps to recover trash on Mac:
Step 1. Click the Trash icon at the bottom of the Dock.
Step 2. View the content in Trash and find the files you want to recover. Right-click and choose Put Back, then the file will go to its original location. Or you can hold the click and drag the file to your desktop or any folder.
Part 2: How to Recover Emptied Trash on Mac
The worst situation is: you deleted the files and also emptied the Mac by mistake. The deleted files are no longer stored in Trash. In such a case, how to recover permanently deleted Trash on Mac? Is there any way to recover the emptied Trash? Here are 3 reliable methods that can help you.
Note:
If emptied, stop using your Mac immediately to avoid overwriting deleted files!
Use Data Recovery Software
This powerful data recovery software - Apeaksoft Data Recovery makes it possible to recover emptied Trash on Mac and Windows. It can retrieve all types of lost files due to various reasons and recover deleted files on many media storage and digital devices.

Downloaded by over 1,000,000 users
- Recover images, audio files, songs, videos, documents and any other types of files.
- Restore files from emptied Trash, hard/flash drive, SD/CF card, and more.
- Scan and recover at a faster speed than you expected.
- Guarantee your privacy, data settings, and everything safe during the process.
Secure Download
Secure Download

Here is a step-by-step guide:
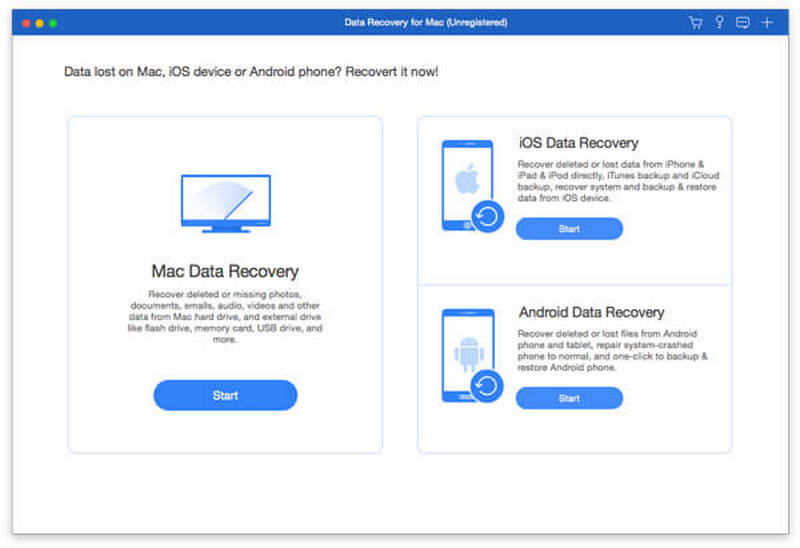
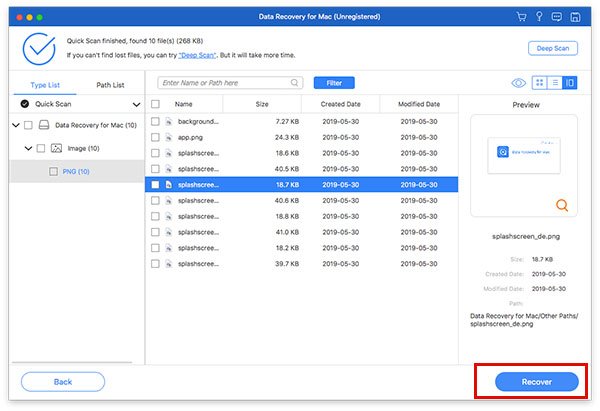
Step 1. Launch the software on your Mac. Choose Mac Data Recovery on the interface.
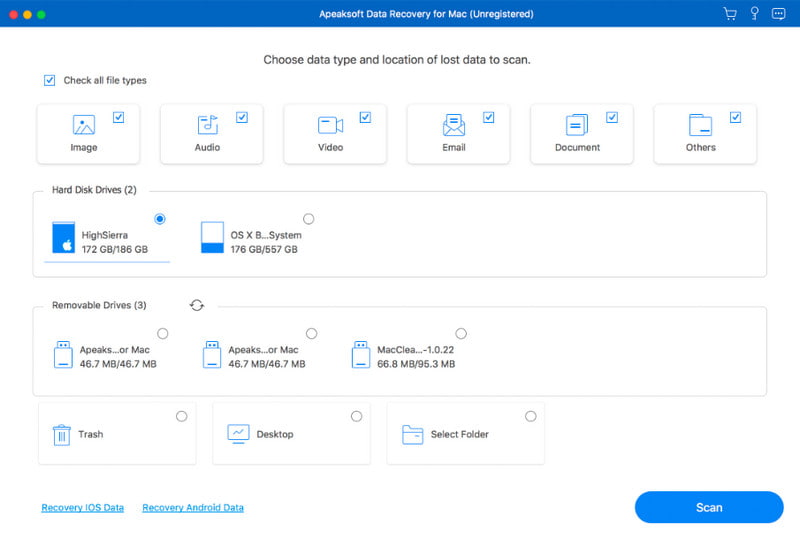
Step 2. Select the file type you want to recover and click Scan.
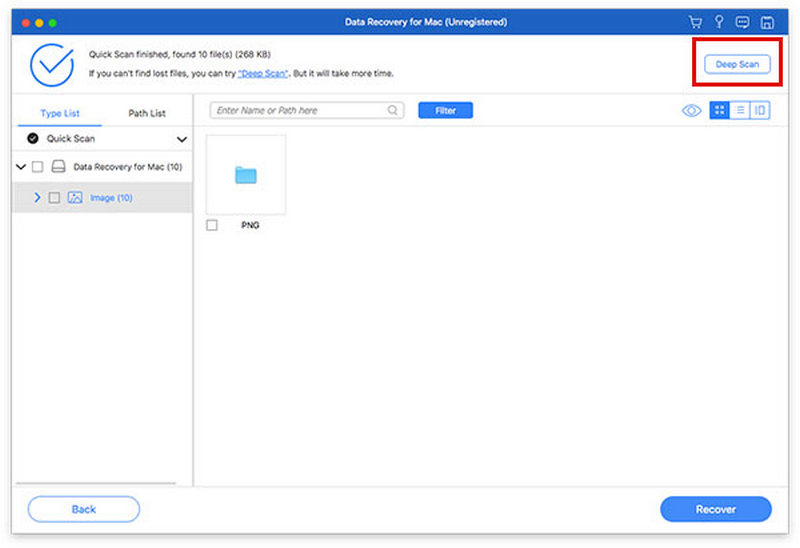
Step 3. The software will start a quick scan immediately. If the files you want are not found, click Deep Scan to retrieve more data.
Step 4. Find the files, click Recover and choose the save path.
Use Time Machine
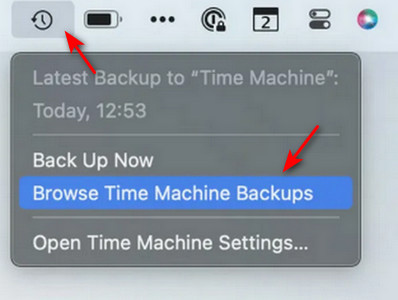
Time Machine is a built-in backup tool on Mac. When your Mac is connected to an external hard drive, it will automatically back up all files, applications, settings, and system data. If you accidentally delete a file, Time Machine can help you restore it to the previous version. If you've enabled Time Machine on your Mac, this is the easiest way to retrieve emptied Trash on Mac without any extra software.
Step 1. Connect the hard drive with the Time Machine backup to your Mac first.
Step 2. Open the folder where the deleted files were originally located. Click the Time Machine icon in the Menu bar and select Browse Time Machine Backups.
Step 3. Find the files you want to recover, then click Restore to restore the selected file.
Use iCloud Backup
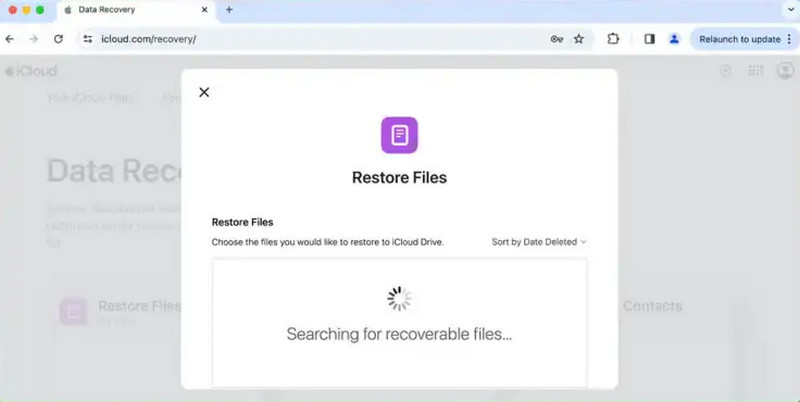
iCloud is Apple's cloud service that allows you to store data online. It helps you sync your files, photos, documents and other data across all your iOS devices. So, you can manage and recover your files anytime and anywhere. If you have an iCloud backup, you can use it to recover files from the emptied Trash on Mac.
Step 1. Go to iCloud and log in with your Apple ID and password.
Step 2. On the interface, click iCloud Drive to view all your files.
Step 3. Look for the files you want to recover, then hit the Download icon on the toolbar.
Part 3: Pro Tips to Prevent Data Loss from Emptying Trash
Enable Time Machine on Mac
Regularly back up your data using Time Machine. This way, even if you empty your Trash by mistake, you can restore your files from a previous version.
Turn Off Automatic Trash Emptying
If you turn on the automatic deletion setting, files in the Trash will be emptied after 30 days. To disable this feature, open Finder in the Menu bar > select Settings or Preferences > click Advanced and uncheck Remove items from the Trash after 30 days.
Use iCloud Syncing
Sync your data to iCloud to access it from any device and free up disk space on Mac. Even if you lose your device or need to set up a new one, you can restore all your important files from iCloud.
Part 4: FAQs About Recovering Trash on Mac
How to recover emptied Trash on my Mac for free?
If you have backups, you can restore your files via Time Machine/iCloud. If not, you can use a free third-party software like Apeaksoft Data Recovery to get Trash back from Mac.
How to undo the empty Trash on Mac?
Unfortunately, once you empty the Trash on your Mac, macOS does not provide a built-in "undo" option for this action. But you still can recover the deleted files using the methods mentioned.
Is there a way to recover emptied trash on a Mac without software?
Yes, you can recover deleted files from Trash on a Mac without software by restoring them from Time Machine or iCloud backups. However, this method only works if you have set up a backup in advance.
Conclusion
To sum up, recovering Trash on Mac is simple when you follow the right steps. If the Trash hasn't been emptied, you can restore your files directly with a click. If it has been emptied, use data recovery software, or restore from a Time Machine/iCloud backup. To avoid future data loss, remember to enable Time Machine backups, sync your data to iCloud, and turn off auto-empty Trash feature. Follow these tips, and you'll be well prepared to retrieve your lost files easily.
 Apeaksoft Data Recovery
 Recover deleted or lost data on Windows and Mac computer.
Secure Download
Secure Download
Related Articles