What Is Recovery Mode for MacBook Pro/Air and iMac
The macOS Recovery Mode is a built-in powerful feature to diagnose and resolve system glitches, such as logical errors, reinstall macOS, and more. Every time you log into macOS, you actually enter the standard mode. However, sometimes, you have to put your computer or laptop in Recovery Mode. For ordinary people, it is a little difficult to master Recovery Mode. This guide explains this mode and tells you the involved knowledge.
PAGE CONTENT:
Part 1: What Is Mac Recovery Mode
As its name suggests, macOS Recovery Mode was designed to recover your macOS. It is a software feature that can load up before you enter the operating system. Therefore, it can fix serious software issues.
Here are some scenarios where Mac Recovery Mode can help:
1. Repair logical errors.
2. Reinstall macOS.
3. Restore Mac from a Time Machine backup.
4. Configure a volume.
5. Clean install of macOS.
6. Factory Reset Mac.
7. Run Terminal to isolate system-level issues.
8. Set and reset firmware passwords.
Part 2: How to Enter Recovery Mode on Mac
The workflows for restarting Mac in Recovery Mode are different, depending on your chip. If your macOS works abnormally, you can follow our steps to enter Mac Recovery Mode and diagnose disks.
How to Enter Recovery Mode on a Mac with Intel
Step 1. Go to the Apple menu and choose Restart. If your Mac is powered off, turn it on.
Step 2. As it starts, immediately hold down the Command + R keys on your keyboard.
Step 3. Release the keys when you see the Apple logo.
Tip: If you get a login window or desktop, you didn't press the keys early enough. You must try again.
Step 4. If prompted, enter an administrator username and password.
Step 5. Once the macOS Utilities window appears, it means your Mac is booting in Recovery Mode.
How to Put macOS in Recovery Mode on M1 Mac
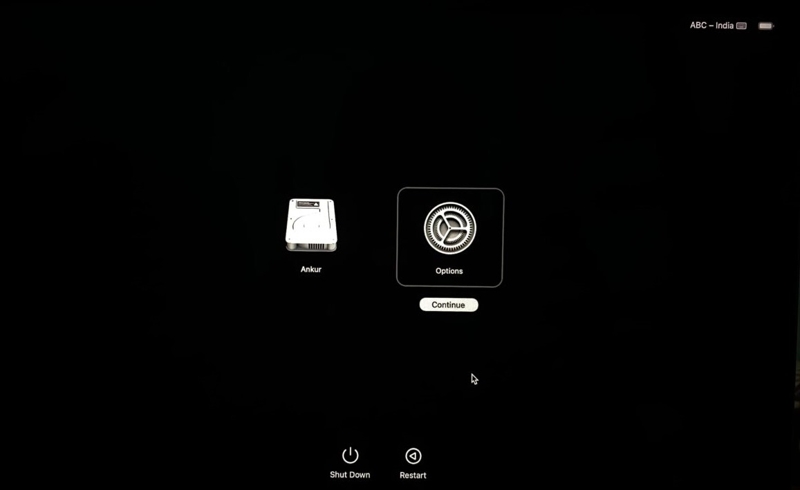
Step 1. Shut down your Mac.
Step 2. Press and hold the Power button until the Loading startup options appear.
Step 3. Click the Options button.
Step 4. Next, click the Continue button.
Step 5. If prompted, enter the password for your administrator account to run Mac in Recovery Mode.
Part 3: How to Use Mac Recovery Mode
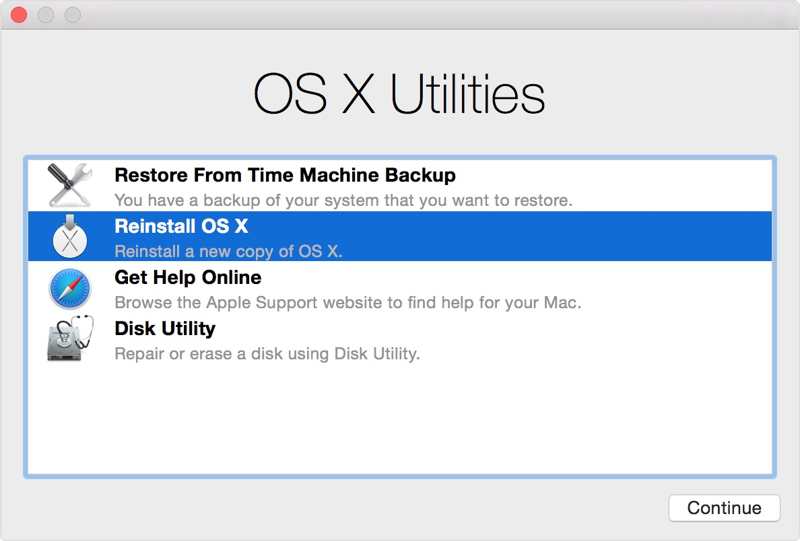
After starting your Mac in Recovery Mode, you can restore your Mac from Time Machine backup, reinstall macOS, run Safari to get help online, and erase the disk using Disk Utility. We demonstrate how to use macOS Recovery Mode below:
How to Restore a Time Machine Backup
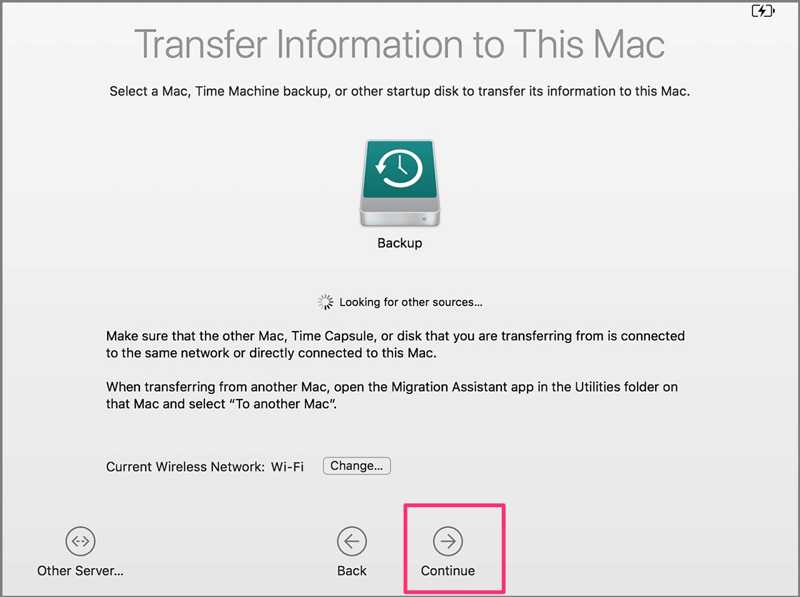
Step 1. Connect your Time Machine backup drive to your Mac.
Step 2. Choose Restore From Time Machine Backup and click Continue.
Step 3. Decide to restore from an external backup disk, a Time Capsule, or a network backup disk.
Step 4. Select the date and time of the backup, and follow the instructions to restore it in Mac Recovery Mode.
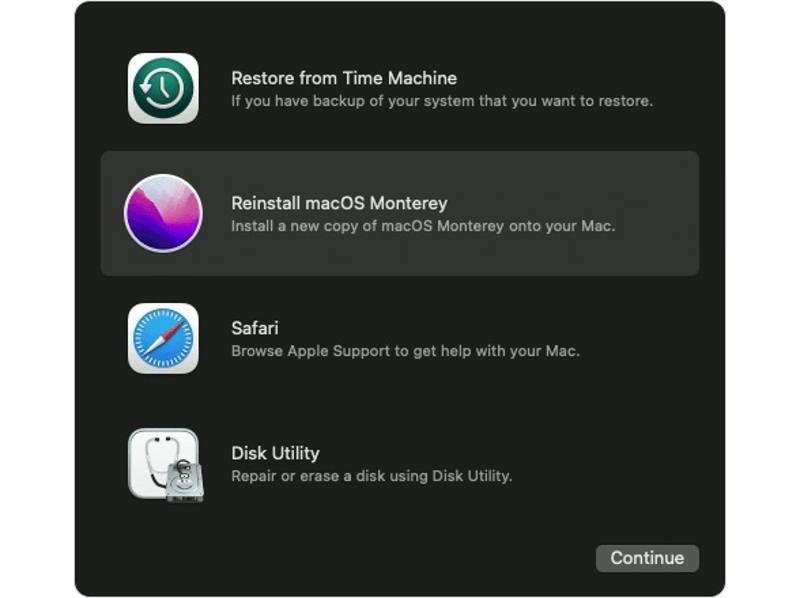
How to Reinstall macOS
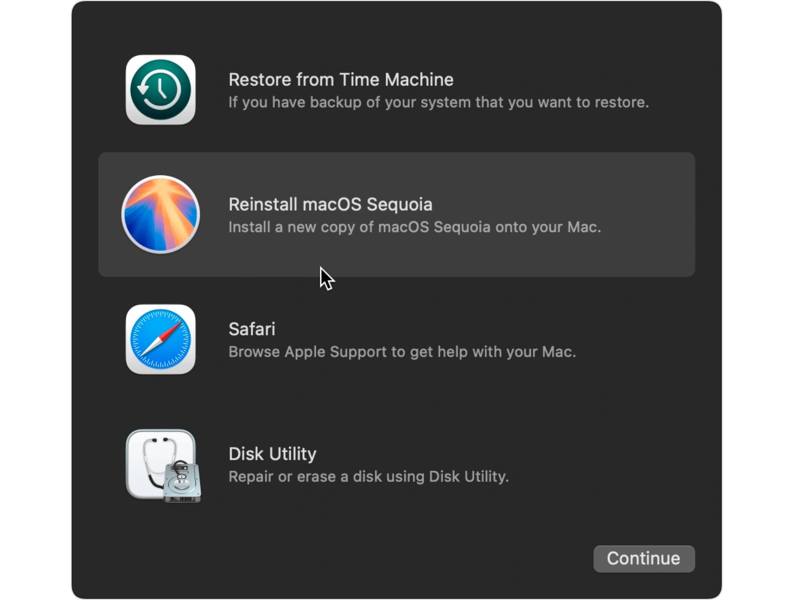
Step 1. Choose Reinstall macOS Sequoia or an available version.
Step 2. Click the Continue button to proceed.
Step 3. Select the Macintosh HD that you want to install macOS.
Step 4. Follow the onscreen instructions to install a new copy of macOS.
Note: Reinstalling macOS in Recovery Mode won't remove your personal data.
How to Run Safari
Step 1. Choose afari or Get Help Online after putting your Mac in Recovery Mode.
Step 2. Click Continue to open your browser.
Step 3. Now, you can search for help online.
How to Access Terminal
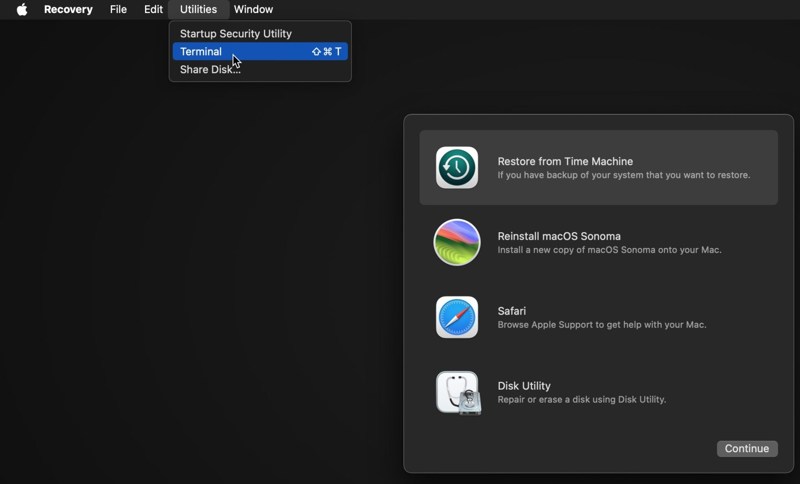
Step 1. Go to the Utilities menu in Mac Recovery Mode.
Step 2. Choose Terminal to run Terminal.
Step 3. Now, you can perform command lines to fix software issues.
How to Repair or Erase a Disk with Disk Utility
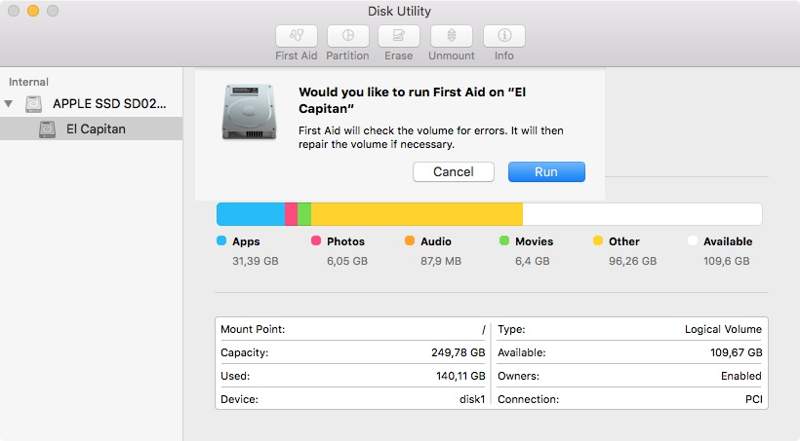
Step 1. Choose Disk Utility in Mac Recovery Mode.
Step 2. Click the Continue button.
Step 3. Select the disk you want to repair or erase.
Step 4. Click the First Aid button. If you want to erase Mac from Recovery mode, click the Erase button.
Step 5. Finally, confirm the action.
Part 4: How to Exit Mac Recovery Mode
After troubleshooting, restoring, or erasing the Mac, you need to exit Mac Recovery Mode and boot into the standard mode. Of course, Apple provides the quit option to bring you to the normal login screen.

Step 1. Click the Apple menu.
Step 2. Choose Restart or Shut Down to reboot your computer.
Step 3. Then, you will be presented with the login screen.
Note: If your Mac gets stuck in Recovery Mode, choose Startup Disk in the Apple menu, select your startup disk, and restart your machine. If it doesn't work, your Mac may lack a working operating system. You'd better reinstall macOS and get out of Recovery Mode.
Part 5: How to Recover Data on Mac After Erasing in Recovery Mode
If you repair and erase your Mac in Recovery Mode, your important files and data may be lost. Thankfully, Apeaksoft Data Recovery for Mac can help you resolve this problem. It is able to scan your disks, look for lost files, and retrieve them. More importantly, it is designed for ordinary people and doesn't require technical skills.
A Quick Way to Recover Data After Erasing Mac in Recovery Mode
- Recover lost data from Mac and external hard drives.
- Preview lost files for selective recovery.
- Support a wide range of file types and formats.
- Provide a deep scan to discover more files.
- Compatible with Mac OS X 10.7 and above.
Secure Download
Secure Download

How to Recover Data After Erasing Mac in Recovery Mode
Step 1. Install Mac Recovery Tool
Download the Mac Data Recovery Tool and follow the onscreen instructions to install it on your computer. Choose Mac Data Recovery to enter the home interface. Select the disk where your lost data is saved and click the Scan button to begin performing a quick scan.

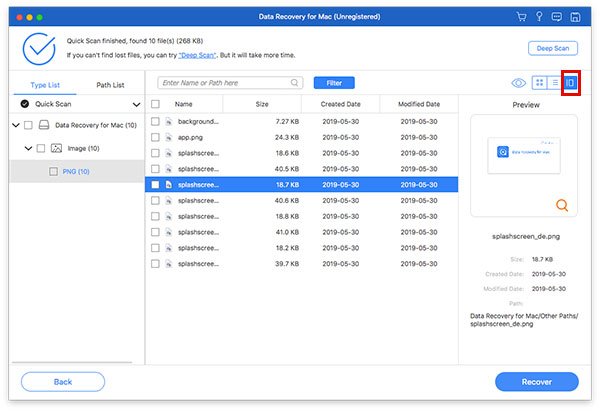
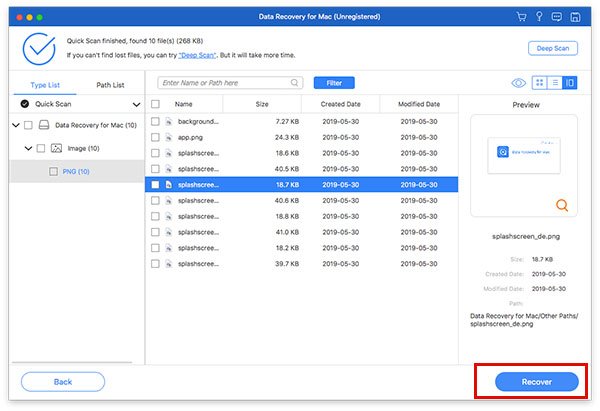
Step 2. Preview files
After disk scanning, go to the Type List tab, and select the data type you want to recover. To recover images, for example, choose Image and preview all lost images on your disk. You can quickly locate the lost files with the Filter feature. You can also find the desired files in the Path List tab. It can help you easily recover Trash on Mac.
If you cannot find the lost files, click the Deep Scan button to perform a deep scan and discover more lost files. It may take a while to complete the process.
Step 3. Recover data
Next, select the files you want to recover. Then, the files will be marked. Click the Recover button at the bottom right corner. In the pop-up window, set an output folder and confirm data recovery. When it is done, click the Open Folder button to see the recovered files.
Note: You'd better select another disk or folder to save the recovered data.
Conclusion
This guide explained what Mac Recovery Mode is and how to use it to restore your Mac, reinstall macOS, or troubleshoot. You can follow our guide to learn this useful feature on MacBook Pro/Air, iMac, and more. After you perform a Mac restore, erase, and reinstall, you can quit Recovery Mode quickly. Apeaksoft Data Recovery for Mac is a quick way to get back your data after erasing a disk with no technical skills.
Related Articles
Is McAfee slowing down your Mac? Master the complete uninstallation techniques now to remove all leftover files and free up system performance thoroughly.
To completely uninstall BlueStacks Android emulator platform from Mac without leftover, you can read and follow our guide.
This tutorial will introduce the 5 best snipping tools for Mac, as well as how to use the snipping tool on Mac. Read and snip on Mac with ease!
This step-by-step tutorial explains how to transfer photos from your iPhone to Mac computer or laptop wirelessly or with a cable.
