


[2026 Updated] 5 Best Equivalent of Snipping Tool on Mac

"Does Mac have a Snipping tool? How do I snip and paste on a Mac?" You may once have questions like these.
Unlike Windows, Mac does not have an app officially named Snipping Tool. Snipping Tool is only compatible with Windows. Fortunately, there are many equivalent of Snipping Tool on Mac to take a screenshot.
This page shows the top 5 Snipping Tools for Mac so that you can grab the Mac screenshot as easily as Windows.
PAGE CONTENT:
Is There a Snipping Tool for Mac
As we know, Snipping Tool is the built-in screenshot utility in Windows to take a screenshot via free-form snip, rectangular snip, Windows snip, and full-screen snip. With different colored pens, erasers, and a highlighter, you could take a PNG, JPEG, or GIF image with the simple drawings. However, if you are switching from Windows to Mac, you may find that Mac does not include an app named Snipping Tool. Instead, macOS provides built-in screenshot features that offers similar feature as Snipping Tool on Windows.
[Built-in] Mac Equivalent of Snipping Tool
Starting with macOS Mojave, Apple introduced the Screenshot toolbar, which replaced the older Grab utility and works as the built-in equivalent of Snipping Tool on Mac. How to use Snipping Tool on Mac? You can press Command + Shift + 5 on your keyboard. Or, you can go to Finder - Applications - Utilities - Screenshot.
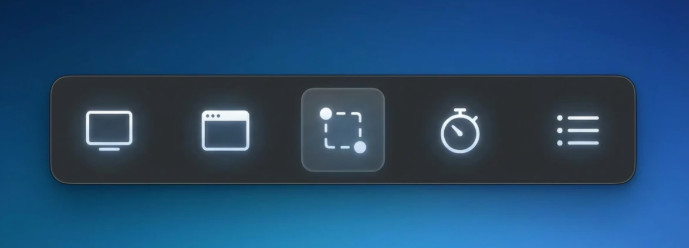
Key Features
- Capture the entire screen.
- Capture a selected window.
- Capture a selected portion.
- Record the entire screen.
- Record a selected portion.
- Set screenshot options.
Other Shortcuts for Snipping Tool on Mac
Apart from the applications on Mac, you can use the keyboard shortcuts to take screenshots on Mac without downloading any apps. All the screenshots will be saved as PNG on your Mac desktop. Better than using the Snipping Tool on Windows, you can use the hotkeys to take a screenshot.
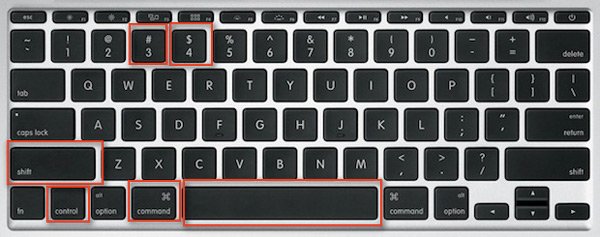
| Needs | Actions |
| Snip the entire screen | Command + Shift + 3 |
| Capture a selected portion | Shift + Command + 4, and then drag to select the area of the screen to capture. |
| Take a screenshot of a window | Shift + Command + 4, and then press the space bar. |
| Snip a menu | Shift + Command + 4, press the space bar to change the pointer to a camera, and then click the menu to capture it. |
Note: To save the screenshot to the clipboard, you need to print screen on your Mac. Just hold the Control key while pressing the above key combinations.
[Editor's Choice] Apeaksoft Screen Recorder
Output image format: PNG, JPEG, BMP, TIFF, GIF
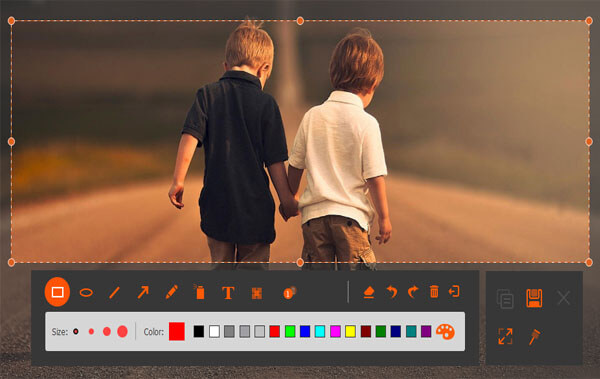
Apeaksoft Screen Recorder consists of a video recorder, audio recorder, webcam recorder, etc. The screen capture software is a better alternative to Snipping Tool for Mac. It captures the screenshot in the form of a free region and a window snip.
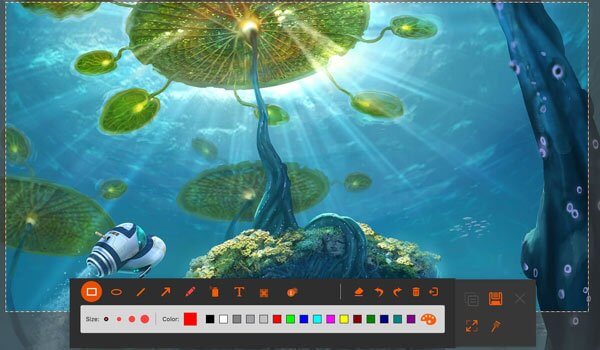
Apart from the basic screenshot features, it also provides you with the editing board to add text, use the pen, add a callout, draw a line or rectangle, add an arrow, etc. After the screenshot is complete, you can save it or copy and paste it freely on your Mac.
Unlike Mac's built-in screenshot utility, Apeaksoft Screen Recorder allows you to edit screenshots immediately after capturing, including adding text, arrows, shapes, and annotations.
- Take a screenshot with a free-portion snip and a window snip.
- Edit the screenshot like drawing a line, adding an arrow, text, a callout, etc.
- Save the image to the hard drive, pin it to the screen, and copy it to the clipboard.
- No menu option for selecting the portion of the screenshot, but only move or drag over the screenshot part.
How to Use Snipping Tool on Mac
Step 1. Press the button below to download this powerful alternative Snipping Tool for Mac.
Secure Download
Step 2. Click the Screen Capture option on the main interface.
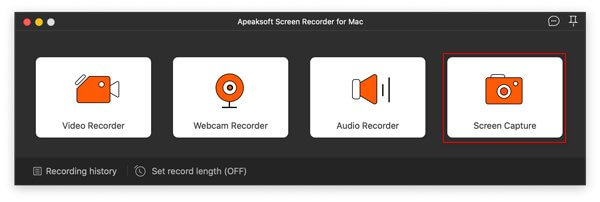
Step 3. Click, hold, and drag your mouse to select the area you want to take a screenshot of.
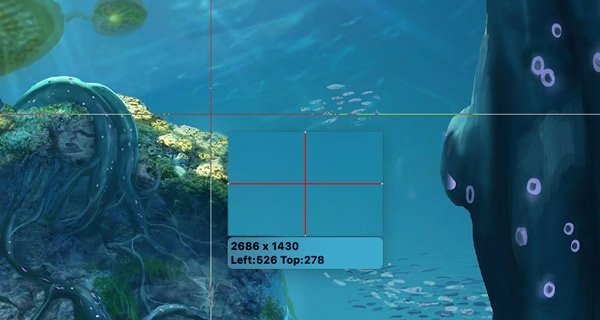
Step 4. You can draw or annotate the capture using the tools shown on the screen. Then, click the disk-like button to save the screenshot.
Tips:
1. For selecting the screenshot output format, you should click Preferences from the dropdown menu of Screen Recorder for Mac and navigate the Output tab to find Screenshot format.
2. More features to record games or video with this game recorder, just check it here.
[Advanced] Snagit
Output image format: PNG、JPG、GIF、BMP、TIFF
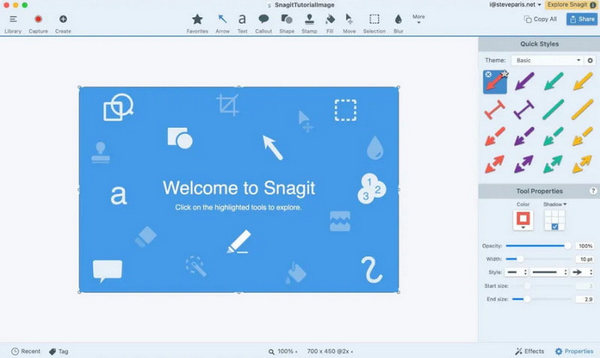
Snagit is a professional screen capture and recording tool that functions as an advanced alternative to the Snipping Tool for Mac. It allows users to take scrolling screenshots, record screen videos, and add annotations, addressing limitations of the native Snipping Tool on Mac.
- Captures scrolling content (web pages, documents) in a single action.
- Records screen videos and exports as GIF/MP4.
- Provides annotation tools (arrows, text, blur) without external editors.
- Expensive ($62.99 one-time purchase).
- May be excessive for simple screenshot needs.
- No mobile application support.
[Lightweight] Lightshot
Output image format: PNG, JPG

Lightshot is a lightweight snipping tool for Mac that allows you to quickly capture a selected area of your screen. You can add text, arrows, lines and highlight marks to the screenshot, and then save or share the image online. It also supports uploading the screenshot to the cloud and generating a shareable link.
- Quickly capture a selected area.
- Add annotations as you like.
- Share the screenshot with a link.
- No full-screen or scrolling screenshot support.
- Limited editing features.
[Annotation] Skitch
Output image format: PNG, JPG, Skitch HEIC, TIFF, GIF, BMP, PDF
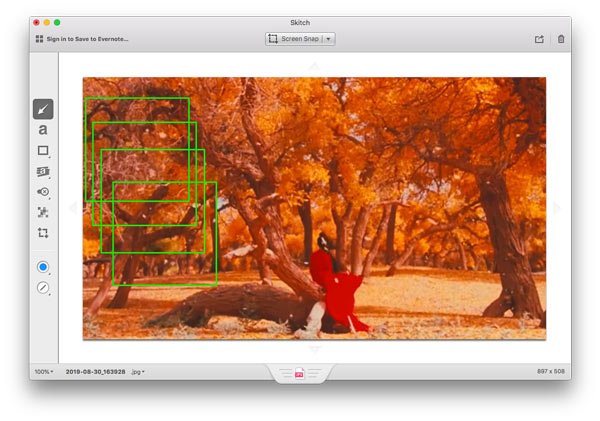
Skitch is another free snipping software on Mac. This free tool lets you capture full screen, selected portion, timed snapshot, etc. It can also screenshot an image or PDF, and then edit the snapshot with text, rectangle, pixelate, arrow, etc.
- Snip a screenshot via various modes.
- Create a blank image and add the effects of notes.
- Various editing features of the screenshot.
- It is a little hard to use the snipping tool for a new user.
- No revert option in the menu, but only revert it by clicking it in the Edit option.
FAQs About Snipping Tool on Mac
Does Mac have a Snipping Tool?
No. Snipping Tool is a built-in feature on Windows. The Screenshot app is an equivalent of Snipping Tools for Mac.
How to Use a Snipping Tool on Mac?
You can press Command + Shift + 5 to open the app window.
Does Mac still have the Grab screenshot tool?
No. Grab was Apple's built-in screenshot utility for older macOS versions, including macOS High Sierra and earlier. On newer Macs, you can use Command + Shift + 5 to open the Screenshot toolbar.
Conclusion
Snipping Tool is the built-in screenshot tool on Windows. As for Mac, it does not work. However, Mac also offers you ways to snip the screenshot via keyboard shortcuts or screen control. Moreover, you could also find the 5 equivalent snipping tools for Mac to capture the screen easily.
 Apeaksoft Screen Recorder
 Record any video and audio on phone and computer screen.
Secure Download
Secure Download
Related Articles