How to Quickly Restore a MacBook Pro to Factory Settings
Restoring MacBook Pro to factory settings means bringing your laptop to the box status. There are a few reasons why you have to perform a factory reset on your device. Before selling your MacBook Pro, for example, you must factory reset it and erase all data to protect your information. That is also a significant step of troubleshooting when you are locked out of your laptop, the screen is frozen or unresponsive, and more.
PAGE CONTENT:
Part 1: Before You Start Restoring MacBook Pro
Since restoring factory settings on a MacBook Pro will erase all data on your laptop, you’d better back up your device using Time Machine. Moreover, you need to sign out of services and accounts on your device.
Back up MacBook Pro with Time Machine
Step 1. Insert a backup storage device into your laptop.
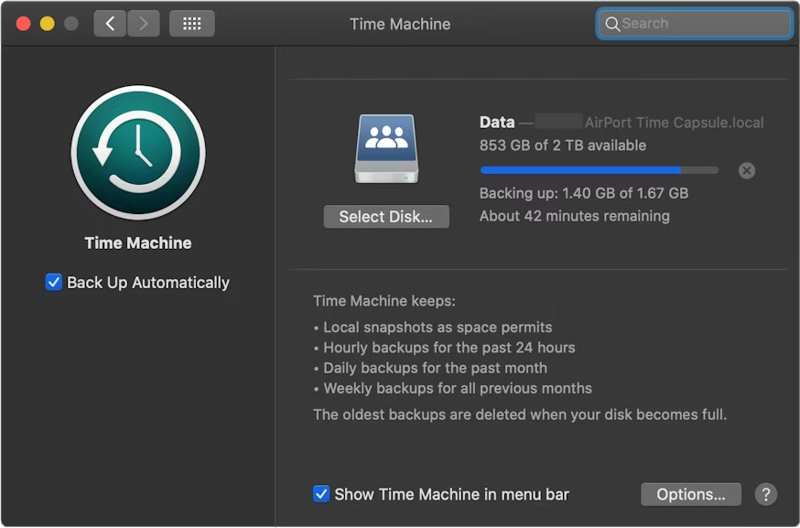
Step 2. Click the Apple menu and choose System Settings or System Preferences.
Step 3. Click General on the sidebar and choose Time Machine.
Step 4. Hit Add Backup Disk or hit the Add button.
Step 5. Next, select your backup storage device, and click Set Up Disk.
Step 6. Follow the onscreen instructions to set up the backup storage device.
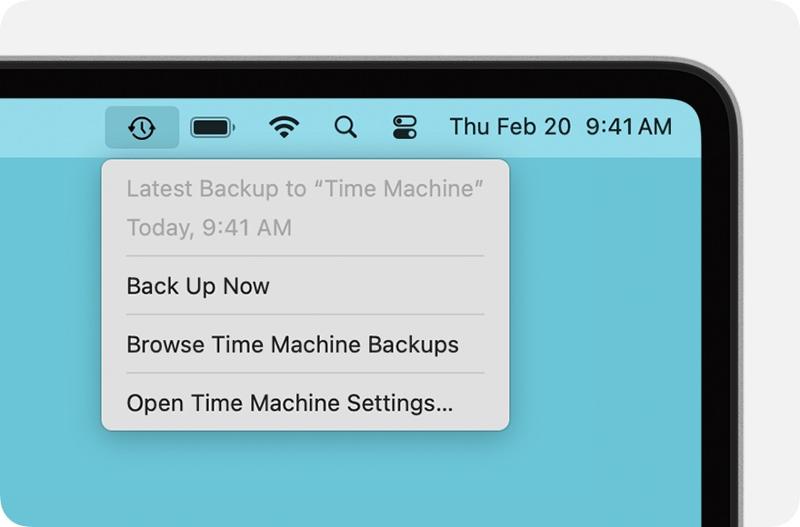
Step 7. After setup, click the Time Machine menu on the top ribbon and choose Back Up Now to back up your MacBook Pro before factory resetting it.
Sign out Accounts
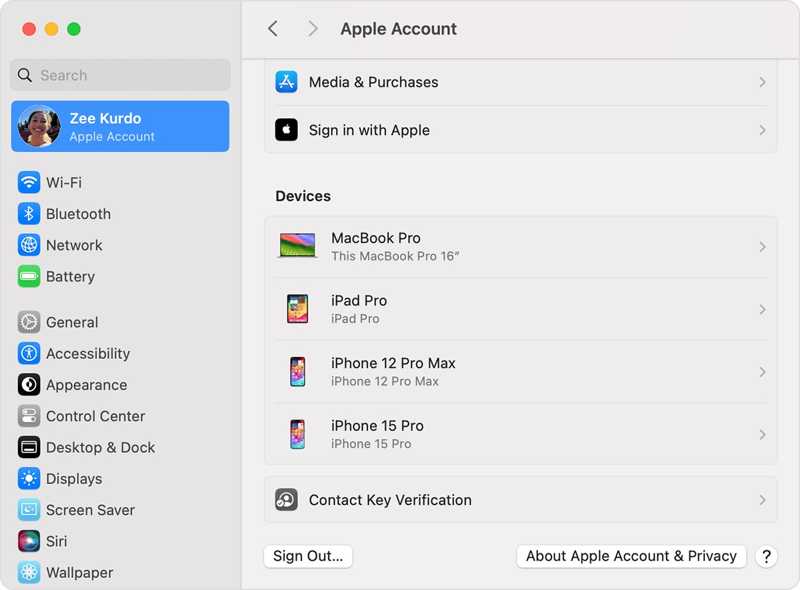
To complete restore MacBook Pro to factory default, you must sign out all accounts added to your machine.
On macOS Catalina or later, choose System Settings or System Preferences in your Apple menu. Toggle off Find My Mac. Then, click Apple Account, scroll down, and hit Sign Out.
On macOS Mojave or earlier, choose System Preferences in the Apple menu. Click iCloud, and hit Sign Out.
Plus, you’d better sign out of iMessage, FaceTime, and other services.
Part 2: How to Restore MacBook Pro from Settings
If your machine has updated to macOS Ventura or later, the easiest way to restore factory settings on a MacBook Pro is the built-in feature in your System Settings. This method can complete the job in the normal mode.
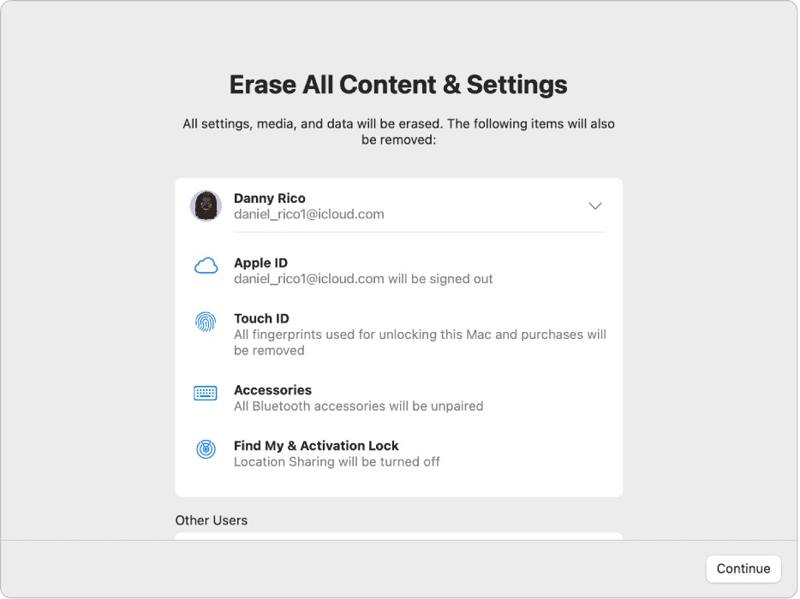
Step 1. Click the Apple menu on any screen.
Step 2. Go to System Settings, choose General, and click Transfer or Reset.
Step 3. Click the Erase All Content and Settings option.
Step 4. If prompted, enter your Apple ID password or admin password.
Step 5. Read the alert and click Continue to begin restoring your MacBook Pro.
Part 3: How to Restore MacBook Pro to Factory Settings with Disk Utility
If you cannot restore factory settings on MacBook Pro from System Settings or you are using macOS Monterey or earlier, you have to put your laptop in Recovery Mode and reset it using Disk Utility.
Note: You'd better ensure that you've backed up MacBook to iCloud or other storage in advance.
Step 1. Go to the Apple menu and choose Shut Down to power off your laptop. If your screen is unresponsive, long-press the Power button until it turns black.
Step 2. Hold the Power button to turn on your Mac and immediately press the Command-R key until the Apple logo appears.
Tips: If your MacBook Pro is equipped with Apple Silicon or Apple T2 Security Chip, hold the Power button after your laptop turns on.
Step 3. When prompted, enter your admin password. Then, you will face two options:
Option 1:
Step 4. Select the Disk Utility option once the macOS Utilities window pops up.

Step 5. Click the Continue button to proceed.
Step 6. Now, you should see your startup disk. If you have a data disk, select it, click Edit, choose Delete APFS Volume, and hit Delete.
Step 7. Next, select your startup disk. By default, it is Macintosh HD.
Step 8. Click the Erase button.
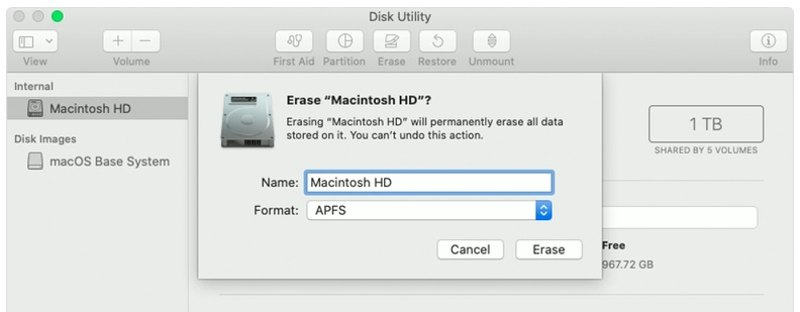
Step 9. Type Macintosh HD as the name and select a format.
Step 10. Click the Erase button again.
Step 11. If prompted, enter your Apple ID password or admin password.
Step 12. Wait for the MacBook Pro factory restore to finish.
Step 13. When it is done, you will be taken to the macOS Utilities screen.
Step 14. Choose Reinstall macOS and follow the onscreen instructions to set up your laptop.
Option 2:
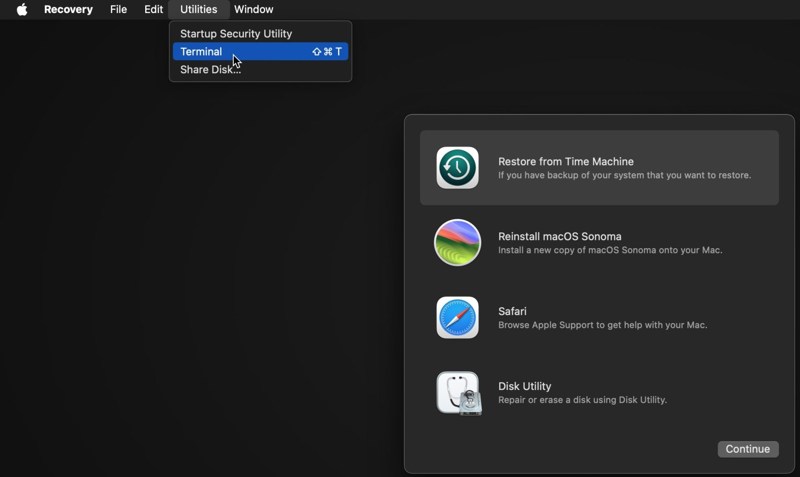
Step 4. Click the Utilities menu and choose Terminal.
Step 5. Type diskutil list and press the Return key on your keyboard to identify the startup disk.
Step 6. Next, perform the command:
diskutil eraseDisk APFS "Macintosh HD" disk0
Tips: If your Mac equips a hard drive instead of an SSD, perform the command: diskutil eraseDisk HFS+J "Macintosh HD" disk0.
diskutil eraseDisk HFS+J "Macintosh HD" disk0.
Step 7. Then, download the latest macOS with the command below:
softwareupdate --fetch-full-installer --full-installer-version [number].
Step 8. Input sudo /Applications/Install macOS Sequoia.app/Contents/Resources/startosinstall --eraseinstall --newvolumename "Macintosh HD", and hit Return to reinstall macOS.
Step 9. When your MacBook Pro reboots, set it up.
Part 4: How to Recover Data After Restoring MacBook Pro
After restoring the MacBook Pro, all your data will be erased. Thankfully, Apeaksoft Data Recovery can help you resolve this problem. It can scan your hard disk and retrieve lost data without a backup.
One Click to Access Deleted YouTube Videos
- Recover lost data on MacBook Pro with one click.
- Available for various situations, like factory reset, accidental deletion, and more.
- Support a wide range of data types.
- Preview lost files for selective recovery.
- Compatible with macOS 10.7 and above.
Secure Download
Secure Download

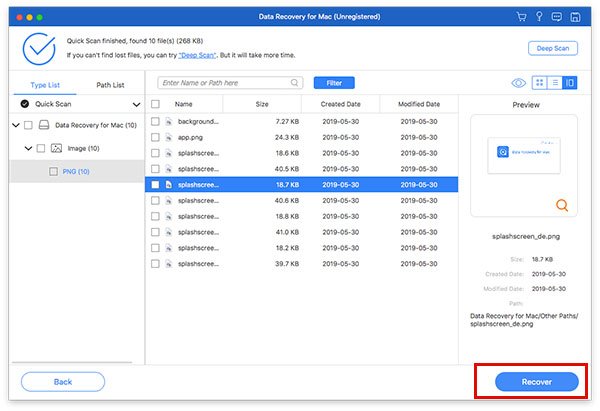
How to Recover Data on MacBook Pro After Restoring
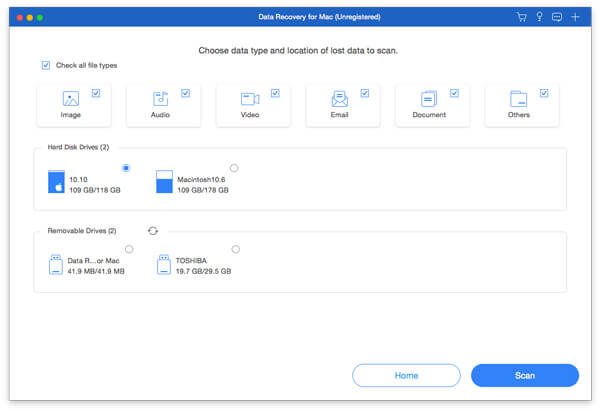
Step 1. Select data types
Launch the best data recovery for Mac after installing it on your MacBook Pro. Select the data types you want to recover, like Image, Audio, Video, and more. Then, select the disk where the lost files are. Click the Scan button to begin scanning the Mac.
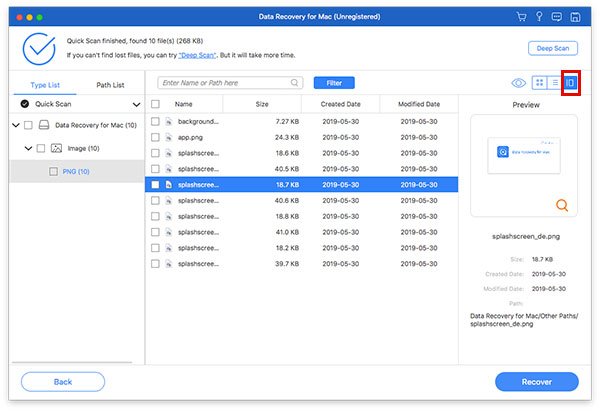
Step 2. Preview lost files
When scanning finishes, go to the Type List tab, and preview lost data by type. You can also find a specific location in the Path List tab. If you cannot find the desired files, click the Deep Scan button to perform a deep scan.
Step 3. Recover files on MacBook Pro
Make sure to select all files and items you wish to get back and click the Recover button. Set an output folder and hit Recover again. This program can even recover deleted messages on Mac.
Conclusion
Now, you should understand how to restore a MacBook Pro to factory settings. For newer versions, you can perform a factory reset in the System Settings app. For older versions, you can do the job in Recovery Mode. Apeaksoft Data Recovery is able to restore lost data after factory resetting on MacBook Pro. It doesn’t require a backup.
