What Is Android Recovery Mode and How to Use Recovery Mode
Today, we almost always stay with our smartphones and tablets every minute. They come with built-in features, like taking photos, recording videos, and more. Plus, there are oceans of apps in the Google Play Store and third-party app stores. Much like other digital devices, Android phones may freeze or get stuck due to hardware and software glitches. Thankfully, Android Recovery Mode enables users to troubleshoot and regain access to Android devices.
PAGE CONTENT:
Part 1: What Is Android Recovery Mode
What is Android Recovery Mode? As mentioned previously, Recovery Mode in Android is a unique startup mode on all Android devices. It provides a set of tools for diagnosing and troubleshooting software glitches and bugs without entering the operating system. It is typically used to perform software updates, factory reset, or install custom ROMs when your phone gets stuck, freezes or crashed.
Android Recovery Mode Options Explained

You can get a few options on the Android Recovery Mode screen. The options may be a little different, depending on what brand or model of your device. We explain the main Android Recovery Mode options below:
1. Reboot system now: restart your Android device to the normal system.
2. Apply update from ADB: connect your phone to your computer and update the operating system with Android SDK.
3. Wipe data/factory reset: wipe all data on your device, including photos, videos, music, apps, app data, custom settings, and more. Factory resetting an Android in Recovery Mode is an essential step for troubleshooting.
4. Mount/system: mount the data partition or system and alter everything that the partition brings. This option helps view, analyze, and edit all data in the system partition.
Part 2: Put Your Android Phone in Recovery Mode
How to enter Recovery Mode on Android? Generally speaking, you can put your device in Recovery Mode with the button combination. However, the workflow is a little different, depending on your phone brand and model.
How to Put a Google Pixel in Recovery Mode
Step 1. Long-press the Power + Volume up buttons together and power off your phone.
Step 2. Then, hold the Power + Volume down buttons for a few moments.
Step 3. When the Bootloader mode appears, release all buttons.
Step 4. Select the Recovery mode with the Volume buttons, and hit the Power button to confirm it.
Step 5. Next, tap the Volume up + Power buttons when the Android robot image appears.
Step 6. Now, your Android boots into Recovery Mode.
How to Enter Recovery Mode on Samsung Galaxy
Step 1. Hold the Power button and shut down your phone. If your screen is unresponsive, long-press the Power button until your screen turns black.
Step 2. Hold the Power + Volume Up buttons or Power + Volume Up + Home/Bixby buttons until you see the Samsung logo.
Step 3. Now, your Android enters Recovery Mode.
How to Go into Recovery Mode on Motorola
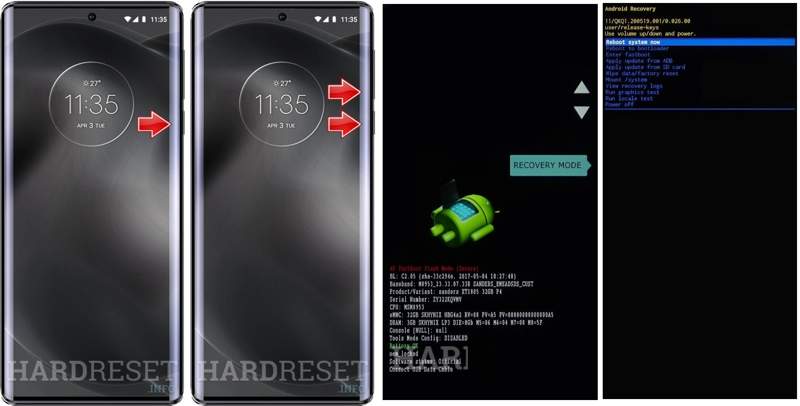
Step 1. Hold down the Power key and turn off your phone.
Step 2. Long-press the Power + Volume Down buttons together for about 10 seconds until the Bootloader mode appears.
Step 3. Use the Volume keys to select Recovery Mode, and hit the Power button to confirm it.
Step 4. Press the Power button while shortly tapping the Volume Up button on the No command screen.
Step 5. Then, your Android goes into Recovery Mode.
How to Open Recovery Mode on OnePlus

Step 1. Hold the Power key to turn off your phone.
Step 2. Hold the Power + Volume Down buttons for a moment.
Step 3. Then, release the Power button when you see the OnePlus logo.
Step 4. Select your language and open Recovery Mode on your Android phone.
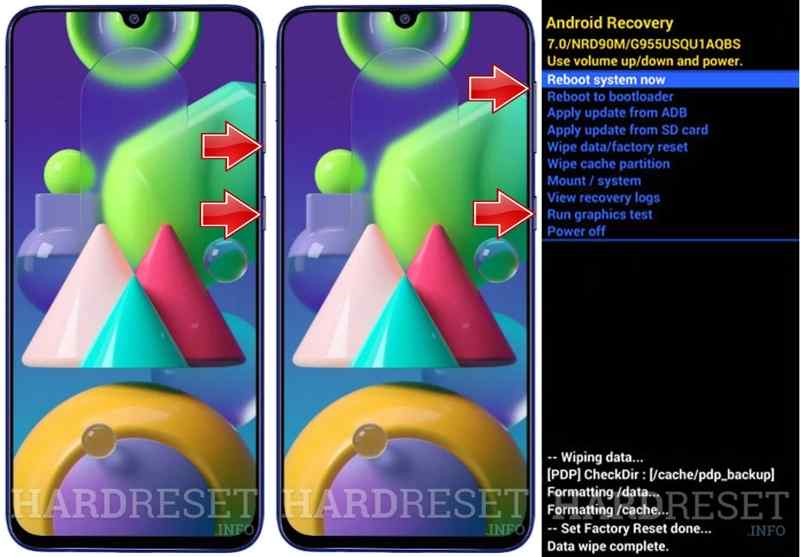
How to Put a Huawei Android Phone in Recovery Mode
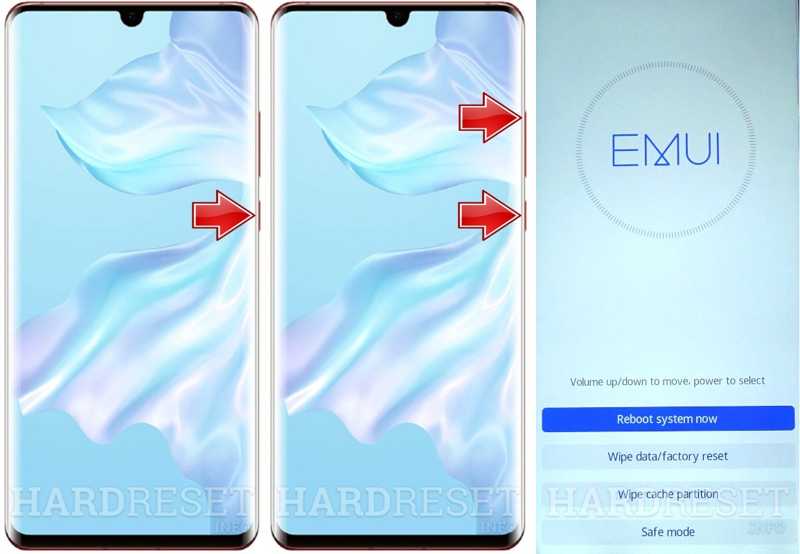
Step 1. Press the Power button and turn your phone off.
Step 2. Hold down the Volume Up + Power buttons at the same time.
Step 3. When you see the Recovery Mode screen, release all buttons.
Step 4. Then, you can use your Volume buttons to highlight Wipe data/factory reset in Android Recovery Mode.
Part 3: Exit Recovery Mode on Android
After troubleshooting, you need to manually get out of Recovery Mode on Android. It means that you can reboot into the standard screen. We demonstrate the workflow of exiting Android Recovery Mode below:

Step 1. Use your Volume keys to highlight the Reboot system now option on the Recovery Mode screen.
Step 2. Next, press the Power button to confirm it.
Step 3. Once your device restarts, it will enter the standard mode.
Further Reading
Part 4: Recover Data After Factory Reset Android in Recovery Mode
Factory resetting Android in Recovery Mode will erase all data and settings on your device. If you don’t have a backup, Apeaksoft Android Data Recovery can help you get back your data and files.
The Easiest Way to Recover Android After Factory Reset in Recovery Mode
- Recover all data from Android after a factory reset.
- Extract your data from a broken or crashed phone.
- Preview lost files for selective recovery.
- Work for photos, videos, contacts, messages, and more.
- Support a wide range of Android brands and models.
Secure Download
Secure Download

How to Recover Android Data After Factory Reset in Recovery Mode
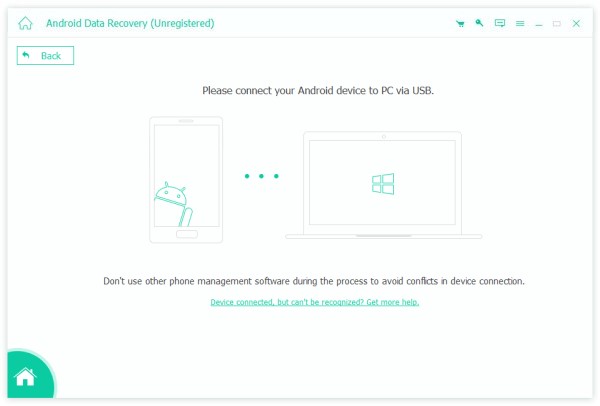
Step 1. Connect to your phone
Open the best Android recovery software after installing it on your computer. Connect your phone to your computer with a USB cable. Make sure to enable USB Debugging mode on your phone and choose Transfer files. The software will detect your phone automatically.
Step 2. Scan your phone
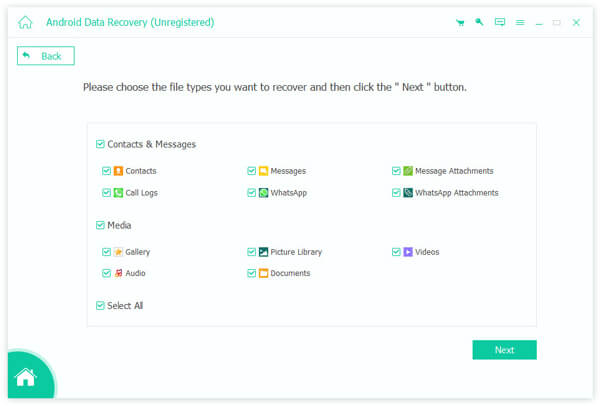
Authorize and permit the software to access your devices. Then, select the data types you want to recover. If you are not sure, check Select All. Click the Next button to begin scanning your phone.
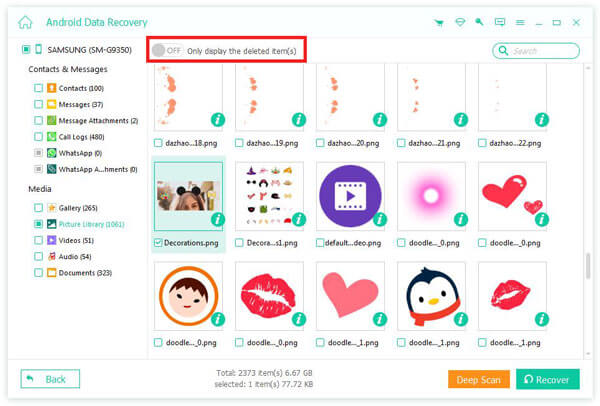
Step 3. Data recovery
After scanning, you can view your data recoverable on your device. Check the desired files and items. If you cannot find the desired files, click Deep Scan. Click the Recover button, set an output folder, and confirm Android recovery. For example, you can recover deleted text messages on your Android.
Conclusion
Now, you should understand what Android System Recovery Mode is. More importantly, we demonstrated how to put your device in Recovery Mode according to your phone brand and model. After troubleshooting, you can quit Recovery Mode and boot into Standard mode. Apeaksoft Android Data Recovery is a simple way to get data recovery after a factory reset.
