Rooting my device is always a hot topic on forums and communities. Today, we cannot live for an hour without different smart devices. It makes sense when you consider that it almost can do everything, from keep in touch with your friends to access social media, from look at videos to listen to your favorite songs, from write down shopping list to track health, etc. Unfortunately, there is something that you cannot do on your device, such as remove pre-installed apps or move your apps to SD card unless you root your mobile device.

If you have an Android device, you may have found that rooting phone is a hot topic on Android forums and communities. Most people just want to know how to root their phone. But according to our research, they do not understand what does it mean and other basic knowledge. To be honest, it is very dangerous if you do not know what your action means and what results the action may lead to. Therefore, we are going to concentrate on sharing everything you should know about rooting an Android device, like what is Android rooting and how to do it correctly.
- Part 1: What does it mean to root a phone?
- Part 2: Is it safe to root your phone
- Part 3: Preparation for rooting phone
- Part 4: How to root your phone without computer
- Part 5: How to root Android phone/tablet with computer
- Part 6: How to root Kindle HD Pro
- Part 7: How to root iPhone/iPad
Part 1: What does it mean to root a phone?
Before rooting your device, let’s talk about what it means to root a phone or other devices. Briefly, just take Android phone as example, rooting an Android phone means obtaining the root access permissions or superuser access. A desktop computer, for example, allows multiple users to access with different accounts. But only the administrator user has some privileges, like install software, change configuration settings, and more. A superuser account on smartphone is much like the administrator account on PC. It permits you to access the operating system. In a word, rooting a phone means that you can get more power as well as more potential for damage.
Part 2: Is it safe to root your phone
Is it safe to root an Android phone, Kindle or iPhone? The answer may be very different depending on who reply this question. Manufacturers and carriers do not encourage customers to root phone, partly because unskilled dealing with superuser permissions can cause disasters, even brick your device.
On the other hand, for experienced users, the risk to damage the phone during rooting is minimal while the potential benefits are more impressive.
Here we list the main risks of rooting:
1. Give up warranty. Once root my phone, I cannot enjoy the warranty anymore.
2. Increase security vulnerability. Getting root access on smartphone may undermine security. Services and apps that share unrestricted root permissions can make the system prone to malware.
3. Data loss and device damage. In case rooting phone goes wrong, your data and device may be destroyed.
Part 3: Preparation for rooting phone
Considering rooting your phone is a dangerous process, we suggest you to make some preparations for it.
1. First of all, charge your phone to at least 80% of battery capacity. This is to prevent the process from being interrupted by power off.
2. Install and update phone drivers. You can download drivers from your manufacturer’s website. If you have installed the drivers, update it.
3. Turn off your antivirus software and firewall.
4. Make sure that you have understood what is Android rooting and pick up a proper method to do it.
5. Backup your phone with Apeaksoft Android Data Extraction before rooting your phone.
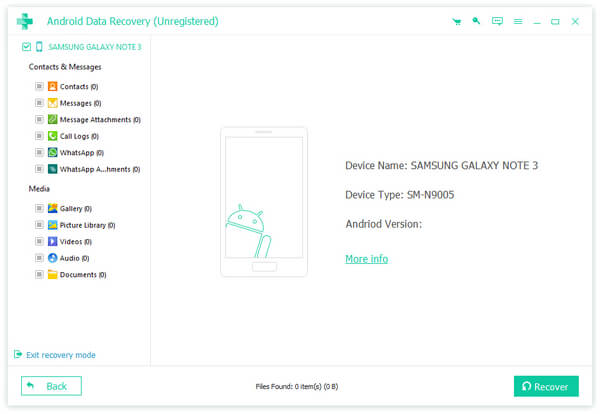
What Android Data Extraction can do?
1. Extract data from your phone to your computer simply.
2. Protect all data and contents in original status and quality.
3. Not destroy current data on your phone while backup.
4. Handle contacts, call history, SMS, MMS, photos, music, videos, documents, app data and more.
5. Work on all smartphones from Samsung, HTC, LG, Google, MOTO, Sony, Huawei, etc.
6. Support Android O/N/M and earlier versions.
7. Available to Windows 10/8/8.1/7/XP and Mac OS.
Part 4: How to root your phone without computer
There are thousands of phone models from different manufacturers. Some of them are easy to root, others have serious security regulations. No phone rooting toolkit is able to root all phones on market.
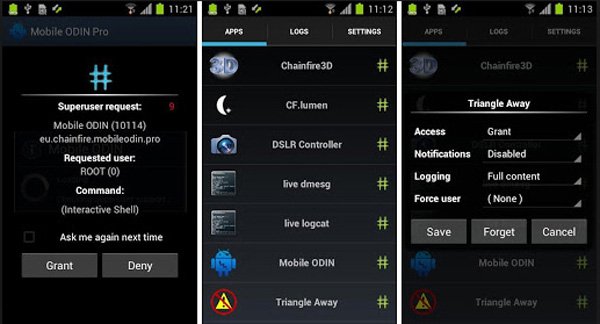
How to root Samsung phone
Step 1: Head to download the latest version of SuperSU for Samsung phone or tablet. SuperSU is available as a ZIP file that flash with TWRP. It grants you root access along with the management features of SuperSU’s Android app.
Step 2: Once you install the program and reboot into TWRP recovery, you will be greeted with the TWRP home screen to install the program. Scroll down and navigate to the SuperSU ZIP file you transferred earlier.
Step 3: Swipe to confirm the flash for the popup screen. It takes a few seconds to flash the SuperSU package before you click the “Wipe cache/Dalvik” button that appears and swipe to confirm.
Step 4: After the process, you can tap the "Reboot System" button to boot into Android phone with ease.
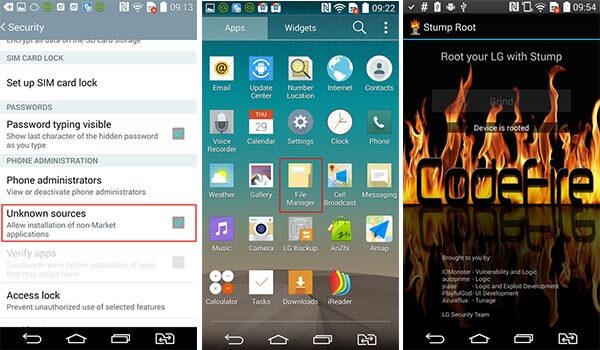
How to root LG phone
Step 1: Put your LG phone online, go to "Settings" > "Security" and enable "Unknown sources". Search for and download Stump Root Tool APK in your mobile browser.
Step 2: Open the LG rooting toolkit after installed, tap Grind button to initiate rooting your phone immediately.
Step 3: Wait for the process to complete and install SuperSU from Google Play Store.
We have introduced more detailed steps and more rooting tools about rooting LG devices.
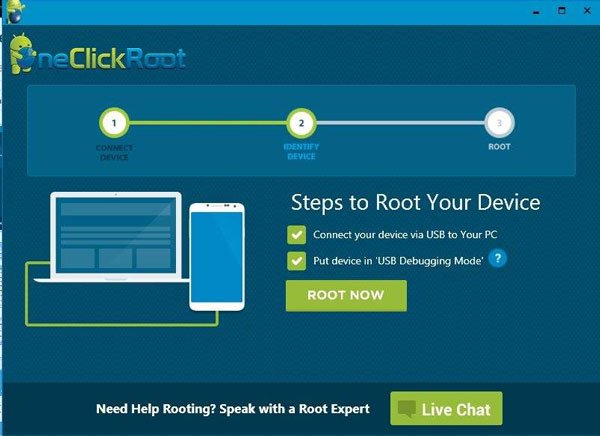
How to root Moto phone
Step 1: Run OneClickRoot after installing it on your computer. Enable USB Debugging mode on your phone and hook up it to your PC.
Step 2: After your phone is detected, click on the "Root Now" button to trigger the phone rooting process. When it is done, disconnect your phone and restart it to obtain root access.
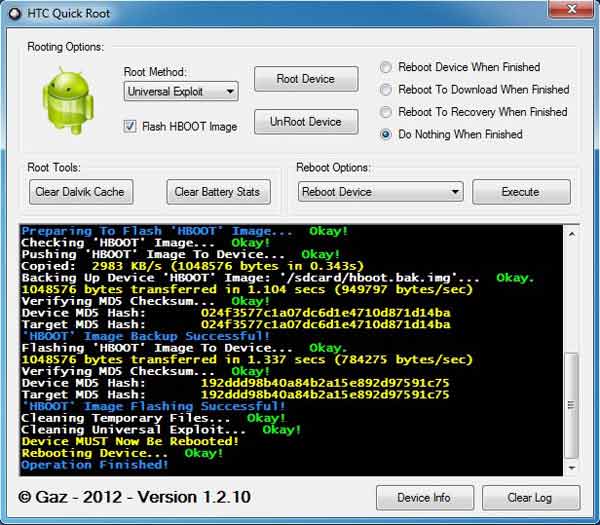
How to root HTC phone
Step 1: Search and download HTC Quick Root on your PC. Next, install it on your computer.
Step 2: Unlock your HTC phone, go to "Settings" > "Power" and turn off "Fastboot", as well as enable "USB Debugging". Plug your phone to your PC.
Step 3: Start the HTC rooting toolkit, select "Insecure Boot" or "Universal Exploit" from the "Root Method" menu, and hit "Root Device" button to get what you want.
Besides the toolkits listed above, there are many ways to root phone, such as KingRoot, Android SDK, Kingo Root, and more. You can go to the developer websites and check if your phone model is supported.
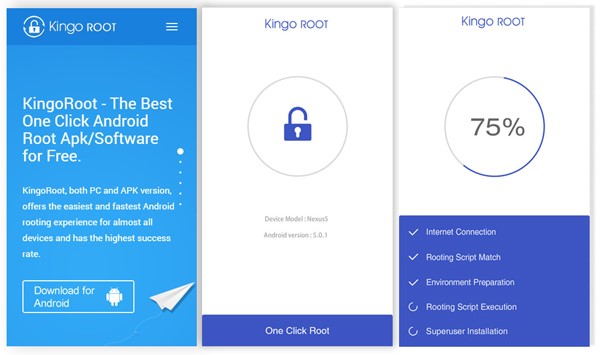
How to root Android device with Kingo Root
Kingo Root is a simple way to root device without PC. It works on Android 4.4 and above.
Step 1: Connect your Android device to a Wi-Fi network, head to "Settings"> "Security" and enable "Unknown sources". This allows you to install APKs from sources other than app stores.
Step 2: Visit Kingo Root website in your mobile browser and get the APK file, next install it on your device.
Step 3: Open the APK from App Drawer, tap on "Once Click Root" to initiate rooting device without PC.
You’d better fully charge your device before rooting it.
Part 5: How to root Android phone/tablet on computer
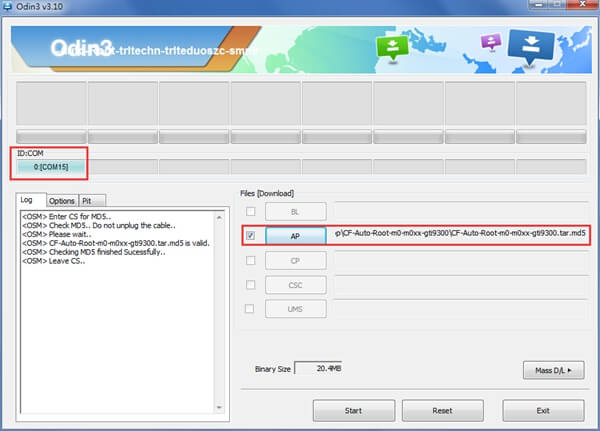
We use CF Auto Root as the example to show you the workflow since it supports a wider range of devices.
Step 1: Firstly, unlock your Android device, head to "Settings" > "About Phone/About Tablet", and remember the value under "Build Number". As well as enable USB Debugging in "Settings" > "Developer options".
Step 2: Turn to your computer, visit the CF Auto Root website, search for the package align with your build number and click "Download" to get it. Then connect your Android device to the computer using a USB cable.
CF Auto Root supports most devices from Samsung, Moto, HTC, LG, Google, etc. If cannot find corresponding package, you’d better switch to other tool.
Step 3: Run Odin3, tick the checkboxes of "Auto Reboot" and "F Reset Time". After your device is detected, you can see the information show up in "Message" area. Hit the "PDA" button on right side, and open the CF Auto Root file that you just downloaded. Keep everything by default, and click on the Start button to begin rooting device immediately.
Part 6: How to root Kindle HD Pro
Kindle HD Pro runs a special operating system, Fire OS, which is based on Android systems. Follow the steps below to use Kindle Fire Utility to root device with Fire OS.
Step 1: Make sure to install Kindle Fire HD drivers on your computer, full charge your Kindle device, navigate to "Settings" > "More" > "Device" and enable "Allow Installation of Applications". Then connect it to the computer using the USB cord came with your device.
Step 2: Create a new folder on the desktop of your computer and drop a name, such as rooting. Visit the XDA Developers website in your browser and decompress the contents to the “rooting” folder.
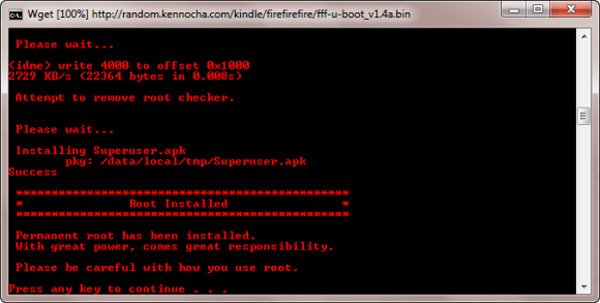
Step 3: Start the "run.bat" file in the rooting folder. If the "ADB Status" shows "Online", it means your Kindle is detected. Then perform the "Install Permanent Root with Superuser" option under the "Bootloader Menu". It takes a while to install and root device.
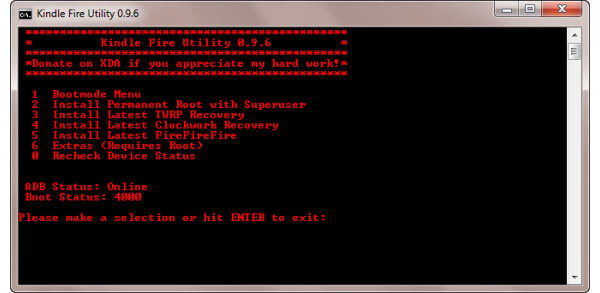
Step 4: When the "Root Installed" message pops up on the screen, it means your device is rooted successfully. Keep your Kindle Fire HD Pro connected to your PC.
Step 5: Run the "run.bat" file again, select "Extras (Requires |Root) under the Bootloader Menu" this time and then "Install Google Apps / Go Launcher EX". Wait for the Play Store to install on your device.
Congratulations! Now, you can use your Kindle Fire HD Pro as other Android tablet device, as well as install apps from Google Play Store.
Part 7: How to root iPhone/iPad
Rooting iPhone, also known as jailbreak iPhone, is a popular method to get full control of iPhone or iPad. But Apple frequently releases updates to prevent users from rooting device running iOS. If you want to root device, like iPhone or iPad, not update it to iOS 11. And the guide below could help you to simplify the process.
Step 1: Download the tools required to root device to your computer. Here we use "Yalu Jailbreak IPA for iOS 10.2" and "Cydia Impactor". Decompress the downloaded Cydia Impactor file and start it.
Step 2: Plug your iPhone or iPad to your computer using the Lightning cable. Cydia Impactor should recognize the device automatically.
If your iPhone is not detected, try to connect the two devices again or use another Lightning cable.
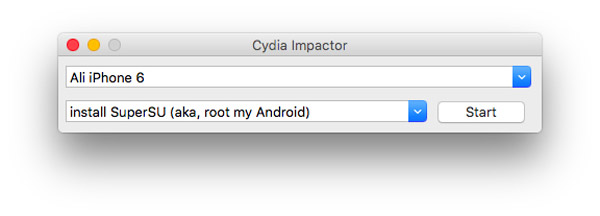
Step 3: Next, open the folder contains "yalu 102_alpha.ipa" file, drag and drop it into the Cydia Impactor app. Click on the "Start" button and hit "OK" when prompted.
Step 4: Enter your Apple ID email address and hit "OK", and then type in your Apple ID password and click "OK" again. Next, Cydia Impactor should install Yalu app on your iOS device.
Step 5: Turn to your iOS device, locate to "Settings" > "General" > "Profiles & Device Management". Touch the profile name and tap "Trust" to continue.
Step 6: Run the "Yalu" app from the home screen of your iPhone, touch "Go" to start rooting device. It takes a while to complete the process. Bear in mind not to touch your device during the process.
Step 7: After your iPhone reboot, Cydia app should appear on your home screen. Open it; you can install any apps as you wish.
Conclusion
In this tutorial, we concentrated on how to root devices running Android, Fire OS and iOS. As you can see, they are totally different operating systems, so you have to use different methods to obtain the root access privilege. For Android devices, there are more options, but you need to pick up the right tool based on your phone models. Kindle Fire Utility is a good choice to root device running Fire OS. And if you want to jailbreak iPhone or iPad, you have to select tools based on your iOS version.