How to Change Your Email for Your Apple ID Account
"I plan to get rid of my iCloud email address at some point. That is the email address I use to log into my Apple ID. How can I change my Apple ID email?" When you activate an Apple product, you are asked to sign up for an Apple ID with your email address. If you stop using the email, you have to change your account username, too. Otherwise, you cannot receive the confirmation emails or other relevant information. This guide tells you the how-to on various devices.
PAGE CONTENT:
Part 1: How to Change Apple ID Email on iPhone/iPad
It is a convenient method to change your email for your Apple ID on your iPhone or iPad. That won’t interrupt your data stored on your memory or iCloud storage. Here are the steps to complete the job:
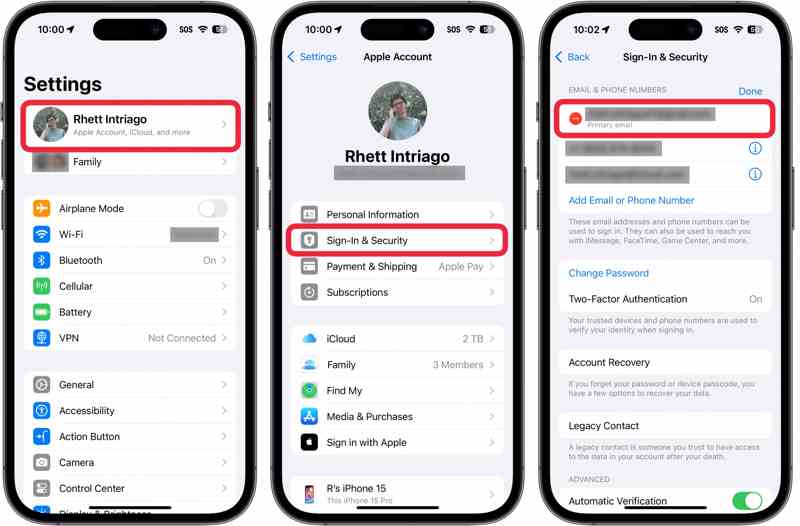
Step 1. Open the Settings app on your iPhone and tap on your profile.
Step 2. Go to Sign-In & Security or Password & Security.
Step 3. Tap your primary email address and tap Remove from Account.
Step 4. Then you can switch your Apple ID email or add a new primary email address.
Step 5. If prompted, enter your iPhone passcode.
Step 6. Enter your new email address and tap Continue.
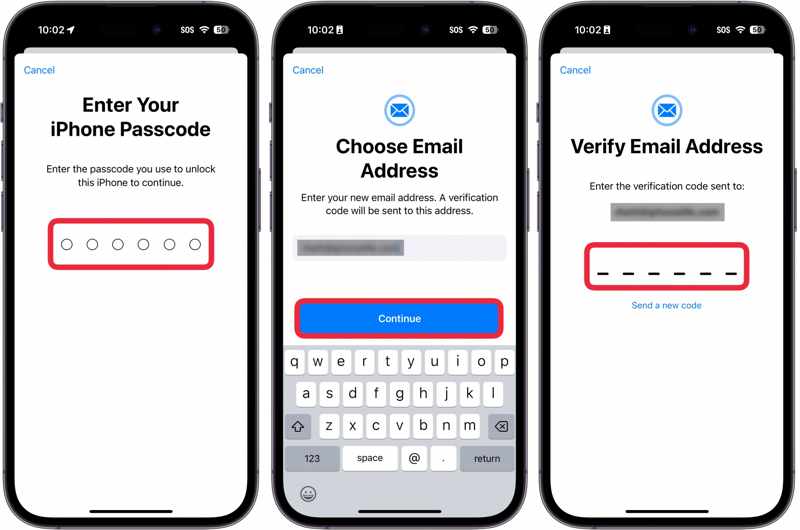
Step 7. Follow the onscreen instructions to verify the new Apple ID email..
Note: If your Apple ID is an iCloud email and you don’t have other associated email addresses, you won’t see the Remove from Account button. Instead, you will see the Change Email Address button. Tap it and change your account.
Part 2: How to Change Apple ID Email Online
Another method to change your email for your Apple ID is Apple’s login website. This method requires your current Apple ID and password. Moreover, if you have turned on Two-factor authentication, you also need to provide the verification code.
Step 1. Go to applied.apple.com in your web browser.

Step 2. Click the Sign In button and enter your Apple ID and password.
Step 3. Go to the Sign-In and Security tab on the sidebar.
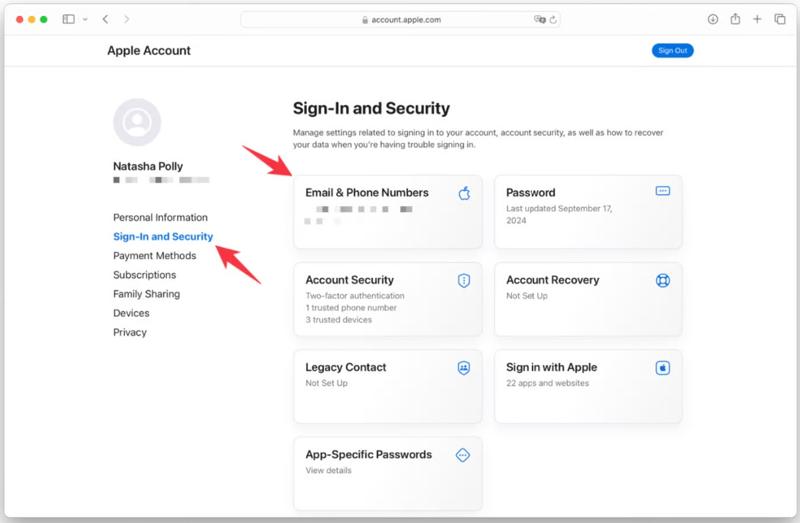
Step 4. Click Email & Phone Numbers.
Step 5. Next, click the Remove button next to the primary email on the pop-up dialog.
Step 6. Then, enter and verify the new email address by following the prompts.
Part 3: What to Do If You Cannot Change Apple ID Email
Situation 1: Email Address Isn’t Available
If you get a message that the email address isn’t available or is already in use, check whether the new email is already used with an Apple account. The solution is using another email address or you can remove the email address. It takes 30 days to use the email address after you remove it from another Apple account.
Situation 2: Cannot Receive Apple Verification Email
If you cannot receive Apple’s verification email, you cannot complete the process of changing your Apple ID email. Here are a few things you can do to find the verification code for Apple ID change:
Step 1. Access the new email address and search in the message in your Inbox or Spam folder.
Step 2. Double-check the email address that you enter.
Step 3. Resend the Apple ID email.
Step 4. If you still cannot receive the verification mail, contact your email provider.
Situation 3: Your Apple ID Is Gray and Cannot Change
If your Apple ID is locked with a few features on your iPhone, you cannot change it. The solution is unlocking your account before you change your Apple ID email on Apple’s login website.
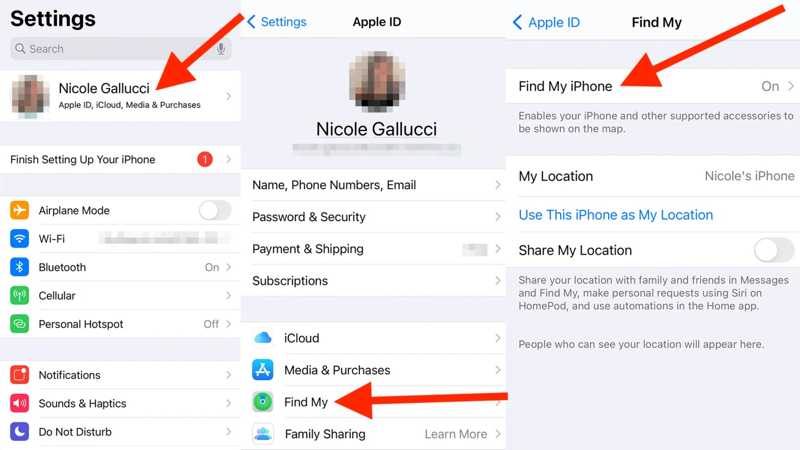
Step 1. Open the Settings app and tap on your profile.
Step 2. Go to the Find My tab.
Step 3. Toggle off Find My iPhone or Find My iPad.
Step 4. Go back to the Settings screen and choose Messages.
Step 5. Tap Send & Receive under iMessage.
Step 6. Choose your Apple ID and hit Sign Out on the box.
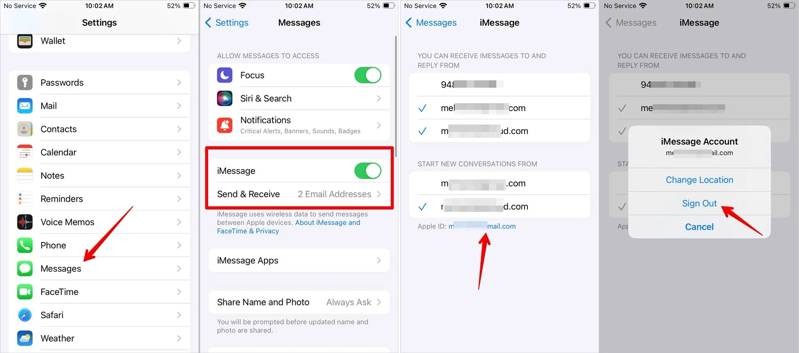
Step 7. Next, sign out your Apple ID for FaceTime and other features.
Step 8. Tap your profile again, scroll down, and hit Sign Out.
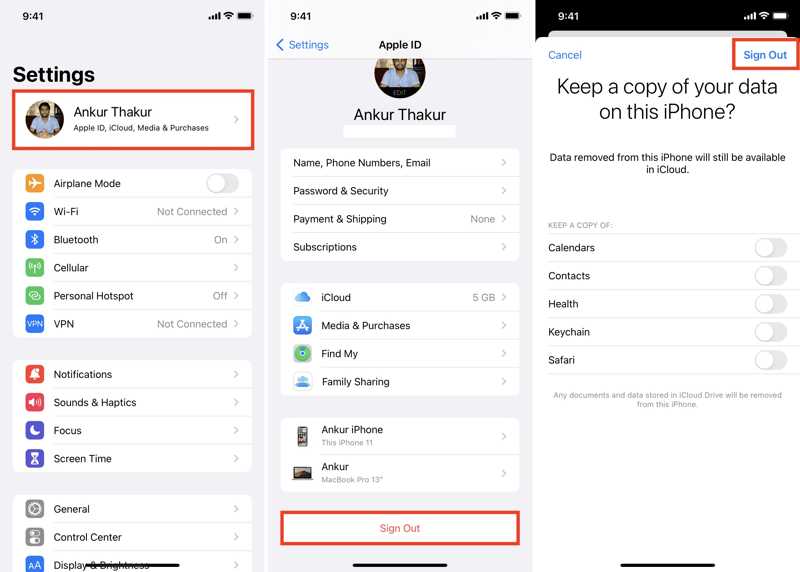
Step 9. Toggle on the data types that you want to keep and tap Sign Out again.
Step 10. Enter your Apple ID password and follow the prompts to sign out your account.Then, you can change your Apple ID email on Apple’s website.
Part 4: How to Reset Email for Apple ID
If you forgot your Apple ID email, it is impossible to change it on the web. Therefore, you need to reset the current email address for your Apple ID. Fortunately, you can complete the job with your information.
Step 1. Access iforgot.apple.com in a browser and click Reset Password.
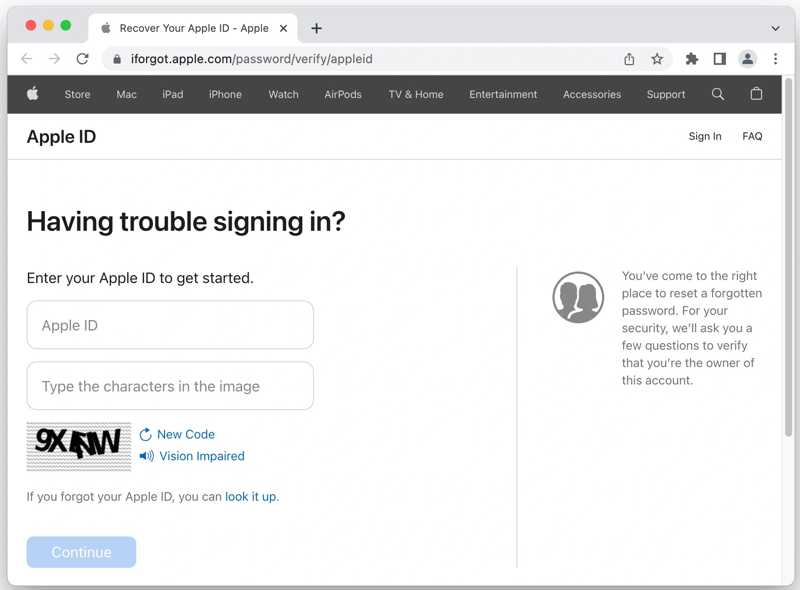
Step 2. Press the look it up link.
Step 3. Enter your first and last name and one of your email addresses. Click the Continue button to proceed.
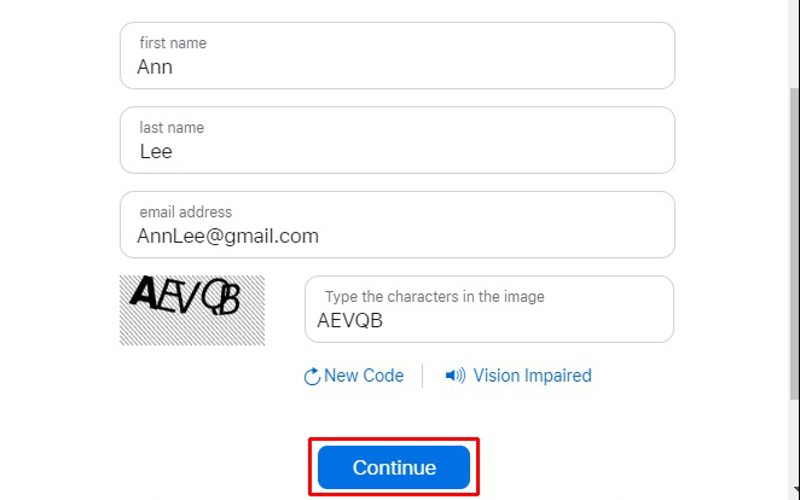
Step 4. If your information is matched with an account, you will see your Apple ID email.
Step 5. Click the Go to Your Account button to check the account.
Step 6. Now, you can change your Apple ID email on your iPhone or web.
Part 5: How to Remove Apple ID Email from iPhone
When changing your Apple ID email, you need to provide your Apple ID password. If you forgot it, you have to reset the password first. Alternatively, you can remove the old Apple ID email from your iOS device with Apeaksoft iOS Unlocker. Then you can sign in with a new Apple ID email directly. Moreover, it simplifies the workflow.
The Best Way to Remove Apple ID Email from Your iPhone Without the Password
- Erase your Apple ID email on your iPhone or iPad.
- Don’t require your Apple ID password or iPhone passcode.
- Available to all situations, including a locked Apple ID.
- Offer bonus tools, like Screen Time bypass.
- Support the latest versions of iOS and iPadOS.
Secure Download
Secure Download

How to Remove Apple ID Email from Your iPhone
Step 1. Link your iPhone to your computer
Download and install the best Apple ID removal software on your PC. There is another version for Mac. Launch the software from your desktop and choose the Remove Apple ID mode. Connect your iPhone or iPad to your PC with a Lightning cable. If prompted, tap the Trust button on your screen to trust your PC. Click the Start Now button after your device is detected.
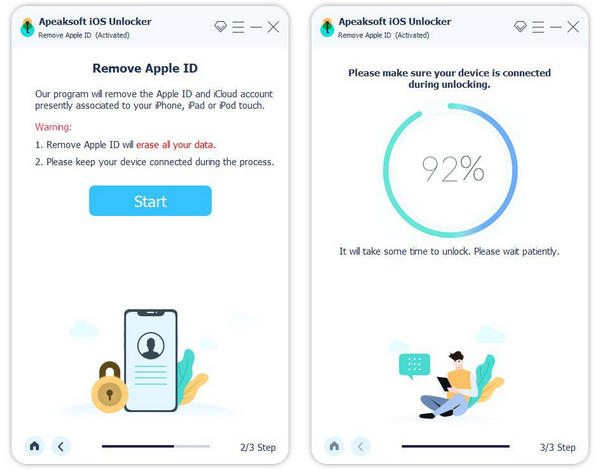
Step 2. Remove your Apple ID
If Find My is disabled, the software will remove the Apple ID email automatically.
You should follow the instructions displayed on the screen to reset your device. Then click OK and press the Confirm Again button to remove your Apple ID. This process will factory reset your device, so it will be better if you have backup files.
Conclusion
This guide explained how to change your Apple ID email on your iPhone, iPad, or the web. You can follow our steps to get rid of useless email addresses. Moreover, we told you what you can do when you cannot modify your account email address. Apeaksoft iOS Unlocker is able to remove the old Apple ID email so that you can sign in to a new Apple ID. Other questions? Please write them down below.
Related Articles
If you wish to access someone's iOS device, you are lucky since this guide tells you three ways to unlock someone's iPhone.
If your iPhone is locked by a specific carrier, learn how to unlock your iOS device through jailbreaking and other methods.
This tutorial demonstrates how to properly unlock an iPhone with the Calculator app when you forgot your iPhone passcode.
If you forgot the restrictions passcode on an iPhone or iPad, you can learn how to remove the Restrictions passcode from our tutorial.
