Fix Erase Assistant Is Not Supported on This Mac Issue
Whether you want to sell your Mac or give it to family or friends, Erase Assistant can help you erase it easily so that the next person can use this Mac, and they won't see your data. However, some users report encountering an error message: Erase Assistant is not supported on this Mac.
This article will analyze why this error occurs and show you how to fix it. We also provide alternative erasing methods.
PAGE CONTENT:
Part 1. Why is Erase Assistant Not Supported on My Mac
Before we dive into the question, there is one thing that should be clear: Erase Assistant can only work with high versions of the computer chip. Only Macs that are compatible with Apple Silicon and Intel, equipped with the T2 chip, support running Erase Assistant.
Moreover, even if your Mac's hardware meets the standard, we should also check the macOS version. If macOS is under macOS 12, Erase Assistant will not be supported.
Let's see how to check your computer chip and macOS version.
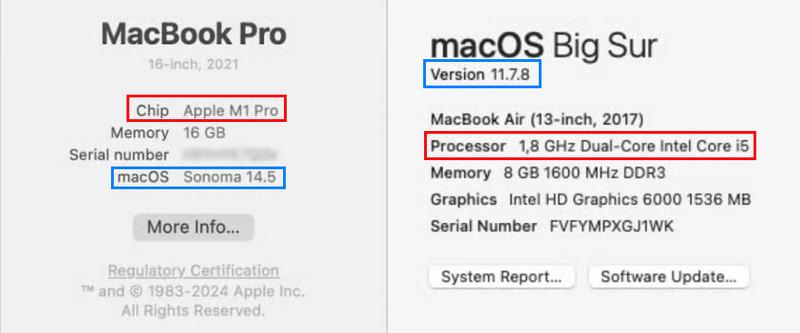
Step 1. Click the Apple menu in the top left corner > About this Mac.
Step 2. If you can see the Chip option, your Mac is equipped with Apple Silicon. Or it is equipped with Intel. Then you need a further check.
Step 3. Open Launchpad > Other (or Utilities) > System Information > Controller (or iBridge). And if you can see the T2 chip, your Mac supports Erase Assistant. You can also get the macOS version on this page.
Therefore, if your Mac is not equipped with Apple Silicon or a T2 chip, or the macOS is older than macOS 12, you can do nothing but manually reboot your Mac under Recovery Mode and use Disk Utility to erase data. We will show you how. If your Mac and its macOS version meet those requirements, skip to Part 3 and see how to use Erase Assistant.
Part 2. How to Erase Mac Manually
The key takeaways are starting Mac from Recovery and using the erasing feature of Disk Utility. If you only want to erase data but don't want to factory reset your Mac, Disk Utility will be the end of erasing.
Start Mac from Recovery:
Step 1. Shut down your Mac.
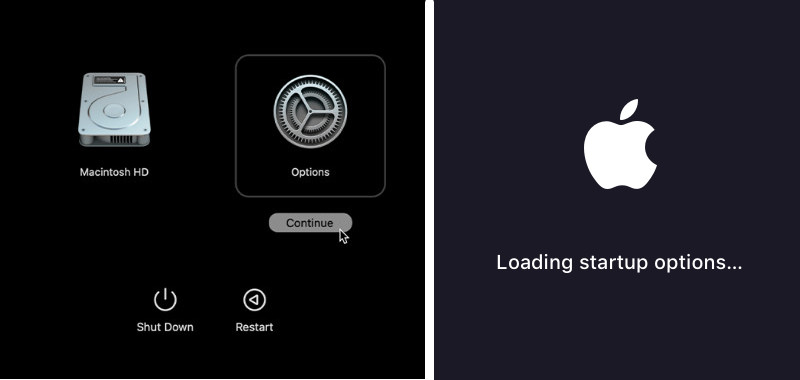
Step 2. Apple Silicon Mac: Press and hold the power button. When you see Loading startup options or Options on the screen, release the button. Click Options > Continue.
Intel Mac: Turn on your Mac, then immediately press and hold Command and R. Keep holding them until you see an Apple logo.
Step 3. You may be asked to input the password or connect to Wi-Fi. Or, you will be asked to select the start disk. Select Macintosh HD, for example, and click Next.
Erase your Mac:
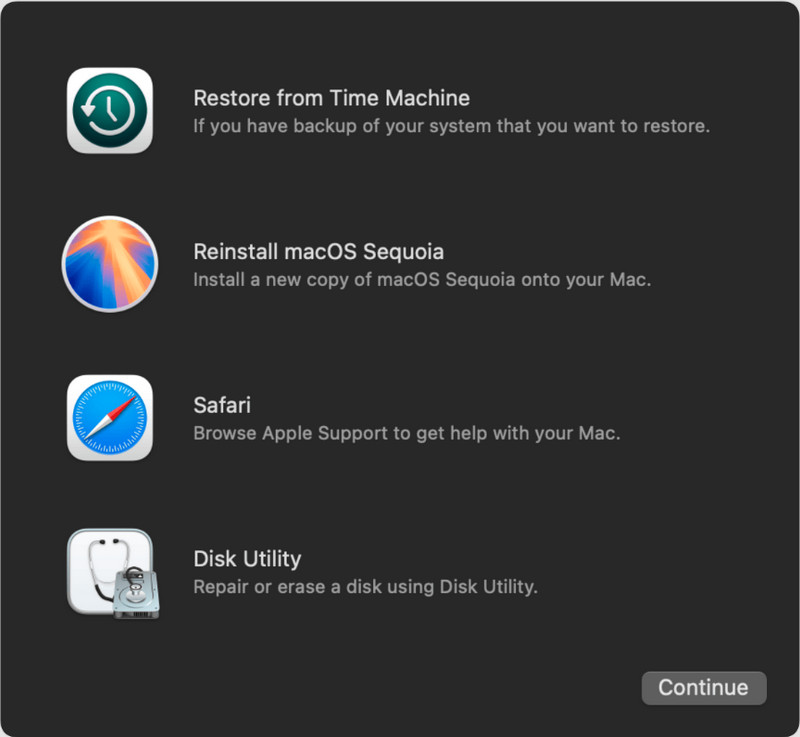
Step 1. After starting from Recovery, you will see the following screen. Choose Disk Utility and Continue.
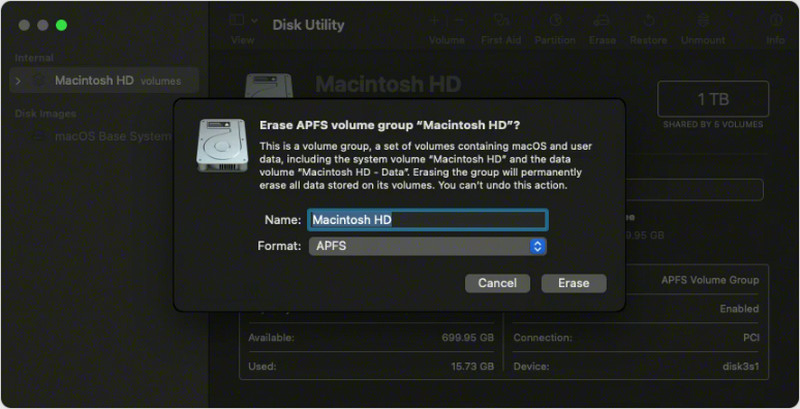
Step 2. Select Macintosh HD in the sidebar and click the Erase tab at the top.
Step 3. Click Erase on the pop-up window and confirm it. You may be asked to enter passwords.
Part 3. How to Use Erase Assistant on Mac
If your Mac is equipped with Apple Silicon or a T2 chip, then the Erase Assistant not supported on this Mac issue is caused by an outdated macOS version. Update it to macOS Sonoma or macOS Sequoia so that you can erase your Mac with Erase Assistant with this guide:
Step 1. Click the Apple menu on the top and choose System Settings.
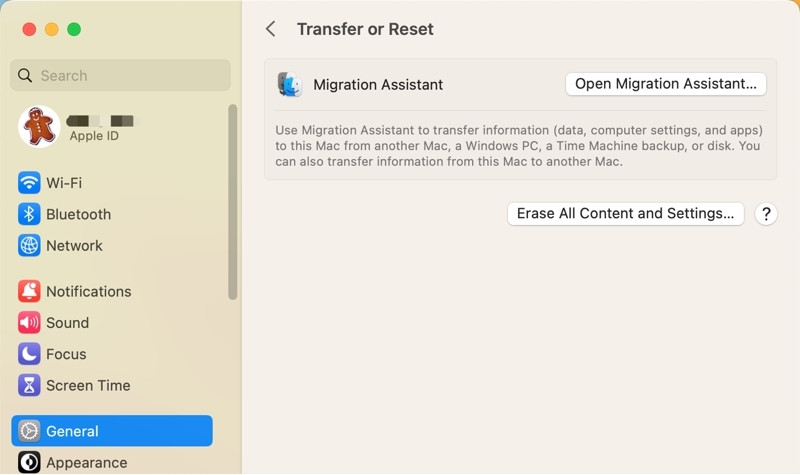
Step 2. Go to General > Transfer or Reset.
Step 3. Click Erase all Content and Settings. Input your Apple ID and password to confirm.
Tips. Can I Restore Files on Mac After Using Erase Assistant
Erasing Mac can't be undone, so you had better back up your Mac data to Time Machine or cloud drives. If you want to find data after using Erase Assistant or factory reset, you can only do that with a reliable third-party program, like Apeaksoft Data Recovery.
Recover Mac Files After Using Erase Assistant
- Recover files on Mac under many scenarios.
- Support recovering files after erasing disk, deleting from Trash bin, etc.
- Compatible with the latest macOS 26/27 Golden Gate Beta.
- Also supports Windows computers, iPhone, and Android.
Secure Download
Secure Download

Conclusion
This article fixes the Erase Assistant not supported on this Mac issue. In short, Erase Assistant only works with a Mac that has Apple Silicon or a T2 chip, and it requires macOS 12 or later. If your Mac doesn't support it, don't worry; we provide the manual method to erase your disk.
