There are always some personal files that you don't want to share with others. Sometimes your computer may be borrowed or used by others. If you make some files and folders disappeared from sight, the possibility of being deleted or modified will decrease a lot. No matter why you want to hide files on Mac, you can get the complete tutorial here.
Mac offers some file hiding features. Be aware that hide files just make the hidden files out of view. There is no password protection. If you want to encrypt your hidden files, you can use the third-party file hiding software instead. Whatever, you can get both two kinds of ways to hide files on Mac here.

- Part 1: How to Hide Files and Folders on Mac with Ease
- Part 2: How to Make Files Invisible on Mac with Terminal
- Part 3: How to Hide Files on Mac with FileVault
- Part 4: How to Show Hidden Files on Mac
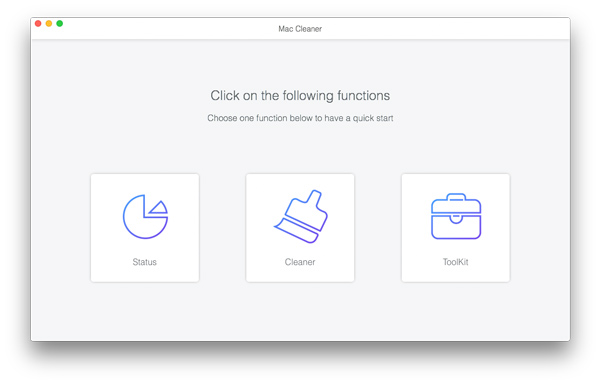
Part 1: How to Hide Files and Folders on Mac with Ease
To quickly hide music, video and other files on Mac, you can turn to Apeaksoft Mac Cleaner for help. It is more than a simple Mac cleaning software. You can also hide and encrypt private data on Mac effortlessly. Well, the program just explores a private space to hide and lock all your personal files. Only the person who enter the right password can access those hidden files. To some degree, it is a tool that can hide all files and folders on Mac.
Moreover, you can clean up cookies, searches, downloads, and visits from all your browsers on Mac in one click. Of course, you can also delete junk files, adjust unnecessary settings, manage files and get more features here. Mac Cleaner can safeguard your privacy and keep your Mac clean and fast all the time.

4,000,000+ Downloads
Hide or encrypt all kinds of files on Mac with password protection.
Unhide and remove any file in one click.
100% safe, clean and easy to use.
Support Mac mini, Mac Pro, iMac, iMac Pro, MacBook Air and MacBook Pro.
How to Hide Files with Mac Cleaner
Step 1 Launch Apeaksoft Mac Cleaner after installing.
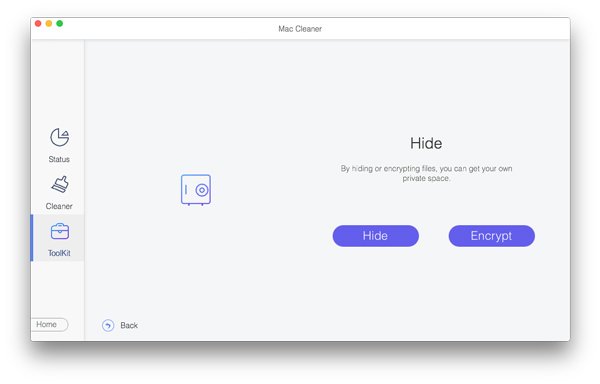
Choose "Toolkit" in the main interface. Later, click "Hide" to access the file hide function.
Step 2 Click "Hide" and enter the password. You need to enter the hide password again to confirm.
Step 3 Click "Add File" to import files to the program. You can drag and drop the files to the "Add File" area directly.
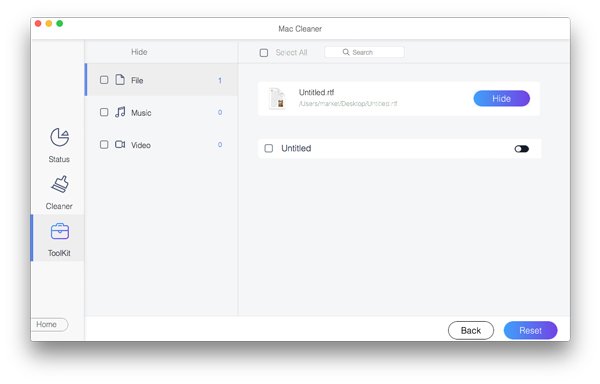
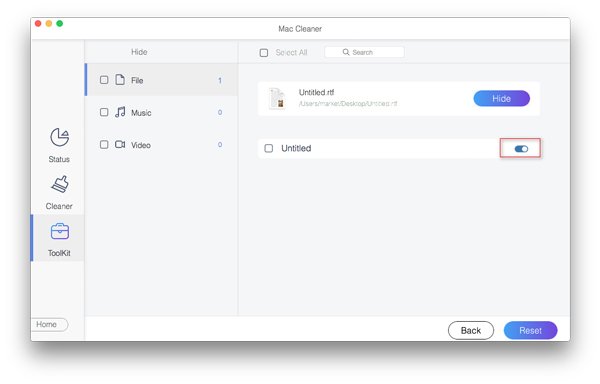
Step 4 Click "Hide" to hide files on Mac. You can trigger on and off the sliding button next to the file to make it visible or invisible.
If your Mac is running slow, you can also use Mac Cleaner to clear cache on Mac.
Part 2: How to Make Files Invisible on Mac with Terminal
You can also use Terminal to hide files on Mac. Just copy and paste the following command lines in the Terminal window. Later, you can hide files and folders on Mac successfully.
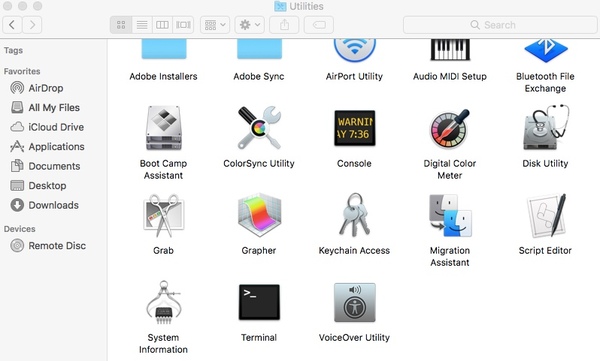
Step 1 Click "Finder" > "Applications" > "Utilities" > "Terminal".
Step 2 Type "chflags hidden" in Terminal.
Step 3 Create a new folder on the desktop. Drag and drop files you want to hide into this folder.
Step 4 Drag and drop this folder into the Terminal window. You can see the path of this folder on the screen.
Step 5 Press "Return" on your keyboard to hide folders on Mac using Terminal.
For people who are running Mac OS X 10.8 or earlier, you need to type "defaults write com.apple.finder AppleShowAllFiles FALSE ; killall Finder" to hide hidden files and folders on Mac instead.
Part 3: How to Hide Files on Mac with FileVault
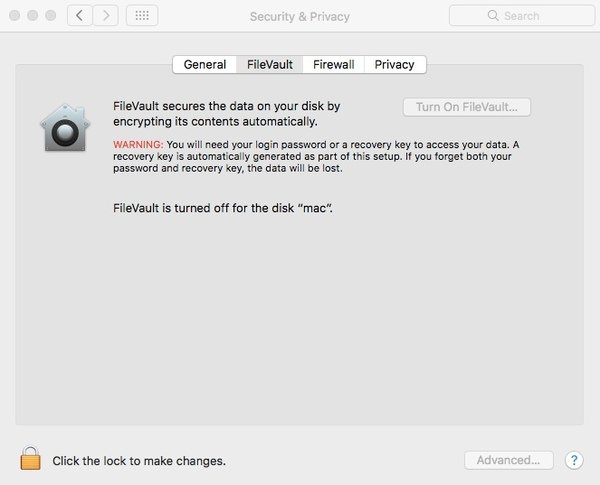
FileVault is capable to hide hard drive in a Fort Knox-like vault on Mac. Only you enter the correct username and password can you unhide the hidden files.
Step 1 Click the "Apple" button on the top left corner of the screen. Choose "System Preferences" from its drop-down list.
Step 2 Choose the "Security & Privacy" option. Navigate to the "FileVault" section. Well, FileVault is turned off by default.
Step 3 Click the "Lock" button on the lower left corner of the window. You will be required to enter the admin account and password to unlock this feature.
Step 4 Click "Turn On FileVault". In the popping-up dialog, you need to allow you iCloud account to reset the password or create a recovery key. Later, click "Continue" to move on the process.
Step 5 At last, click "Continue" again to hide files on Mac Mojave and Sierra.
Part 4: How to Show Hidden Files on Mac
Sometimes when you haven’t accessed hidden files for a long time, you may forget how to find them. In this situation, you can use either Finder or Terminal to show hidden files on Mac. But what if you cannot find these files anywhere? Don’t worry! Apeaksoft Data Recovery for Mac can help you solve hidden files not showing on Mac issue.

4,000,000+ Downloads
Recover hidden files like document, email, image, video, audio, etc. on Mac.
Handle all kinds of data loss including mistaken deletion and hard drive damages.
100% guarantee your privacy safety during the entire recovery process.
Support Mac OS X 10.6 or above (including macOS 15 Sequoia) and Windows 10/8.1/8/7.
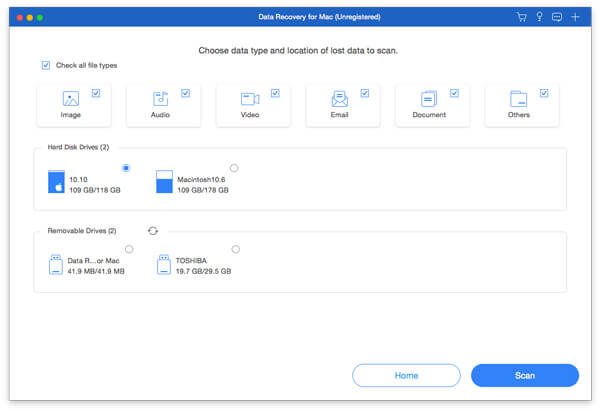
Step 1 Free download and install Apeaksoft Data Recovery for Mac. Then launch this recovery tool on your Mac.

Step 2 Select the data type of the hidden files and the hard disk drive where you save them. For example, you can check boxes behind the Image option and system drive to find your lost photos. Then click on the Scan button.
Step 3 The software will start a quick scan by default. If you want a more thorough scan, please enable Deep Scan on the top.
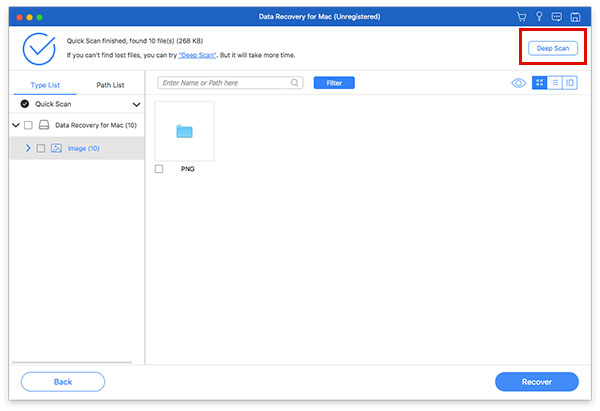
Step 4 Search for the hidden files or folders with Type List or Path List in the left panel. To quickly find your lost files, you can simply type the file name and click the Filter button.
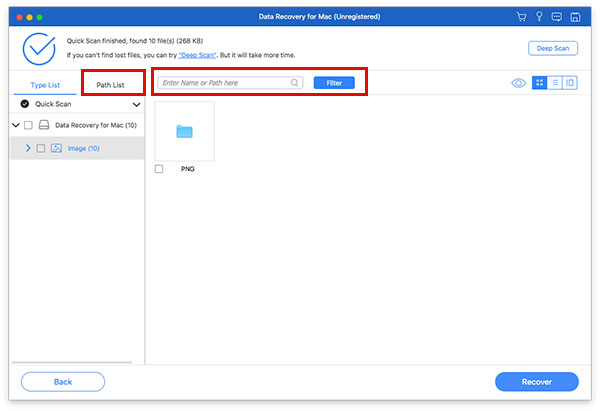
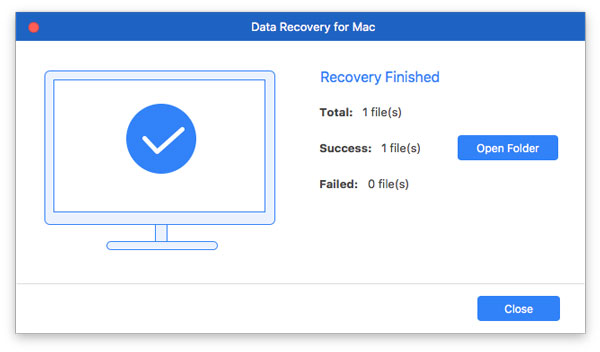
Step 5 Once you find the files you want, please select them all and click Recover to get back hidden files on Mac.
Conclusion
So far, we have shared 3 different ways to hide files on Mac desktop or elsewhere. Terminal and FileVault are the default features to hide Mac files and folders. You need to type the right command lines in Terminal or activate FileVault file hiding with various operations. When you need to hide hidden files on Mac again, you need to complete the required steps. It is inconvenient when you need to hide and unhide files on Mac frequently.
By using Mac Cleaner, you can hide and encrypt files on Mac with easy steps. It is also easy to control whether you want to make the hidden files visible or not. The hidden files will be categorized into "File", "Music" and "Video". With the built-in search engine, you can quickly find the certain hidden file or folder. In a word, the hide files Mac app can help you save a lot of time and effort.
Please share this article if it works. It would be much appreciated if you share your experience or leave questions about hiding files on Mac here.