The Trash and Recycle Bin feature on Android devices serves as a safety net, preventing users from accidentally deleting important files and data permanently. When you delete files, images, or documents on Android, they are moved to the trash folder, where they remain temporarily until you choose to empty the trash. However, keeping unnecessary files in the trash can consume storage space and slow down your device. Now, we will show you how to delete trash on Android devices, highlighting various methods and providing tips to manage your device’s storage effectively.

- Part 1. Benefit from Emptying Android Trash
- Part 2. Empty Trash on Android Phone
- Part 3. Data Loss? Recover Lost Data Securely
- Part 4. FAQs of Clearing Trash on Android
Part 1. Benefit from Emptying Android Trash
Most Android users may wonder where the Trash is on Android. Unlike traditional desktop operating systems, Android does not have a standard Android trash folder or recycle bin icon on the home screen. Instead, the trash feature varies depending on the Android version and manufacturer. Most Android devices have a Trash or Recycle Bin folder in the file manager app, where deleted items are temporarily stored before they are permanently deleted. The purpose of this feature is to allow users to recover accidentally deleted files before they are gone forever.
You can benefit from this after you clear all the cache on your Android devices.
1. Free Up Storage Space: Files in the trash still occupy storage space after you delete files on Android. You can reclaim that space and use it for other purposes by emptying the trash.
2. Improve Device Performance: A cluttered trash folder can slow down your device, as it adds to the load on the storage system. Emptying the trash can help improve device performance.
3. Prevent Unintended Restorations: If you forget that you’ve deleted certain files and later decide to recover them, you may inadvertently restore older versions from the trash, leading to confusion and data loss.
Part 2. Empty Trash on Android Phone
The process of emptying trash on Android devices varies from device to device. Here are the general steps to empty the trash:
Method 1: Using the Local File Manager
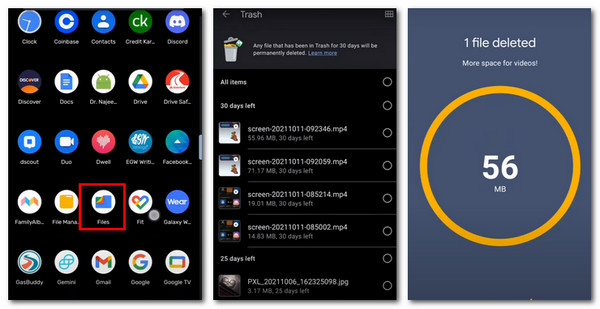
Most Android devices are designated with a built-in file manager or device manager, allowing you to manage files and folders, including the trash. Here’s how to empty the trash using the built-in file manager:
Step 1 Navigate to your device’s app drawer or home screen and locate the File Manager app. If you can’t find it, you may need to download a third-party file manager app from the Google Play Store.
Step 2 In the file manager, look for a folder named Trash or Recycle Bin. The folder location may change with the device’s manufacturer and Android version. Typically, you can find it in the main storage directory.
Step 3 Tap on the Trash or Recycle Bin folder to open it. Here, you will see all the files that you have previously deleted.
Step 4 In the trash folder, you should see an option to Empty or Delete all files. Tap on this option to permanently remove all files from the trash. Confirm the action when prompted.
Method 2: Using a Third-Party File Manager
If your Android device doesn’t come with a built-in file manager or if you prefer additional features and customization, you can use a third-party app to access and manage trash or unwanted text messages freely and easily.
Manage Android Storage Effectively
MobieTrans is the most recommended tool for both mobile and desktop users. This app has pool file managing, data transfer, and backup at one stop. And there is no boundary between Android and iOS devices. All users can keep their internal storage space organized and efficiently.

4,000,000+ Downloads
Import, delete, rename, and manage your photos, messages, and more.
Transfer your Android data to your PC without data loss and delays.
Back up your device data between Android and iOS devices and computers.
One-click to synchronize and transfer all wanted information quickly.
Compatible with the latest iPhone series and Android devices.
Step 1 Install and launch MobieTrans on your computer. Then, connect your Android device to the PC till you see the device information on your desktop.
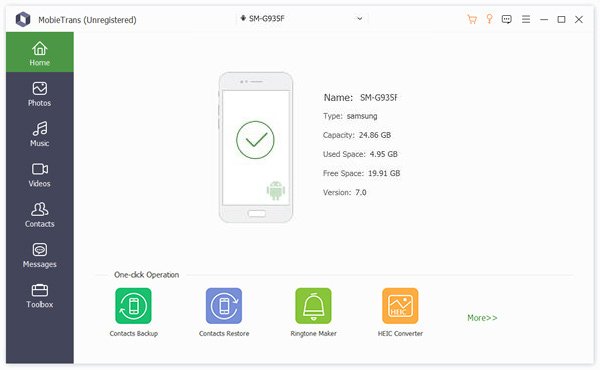
Step 2 Then, you can view all data types in the left list. You can transfer, manage, or back up data between Android and PC/iPhone according to your needs.
Enter the Photos section and tick the target photos for transfer.
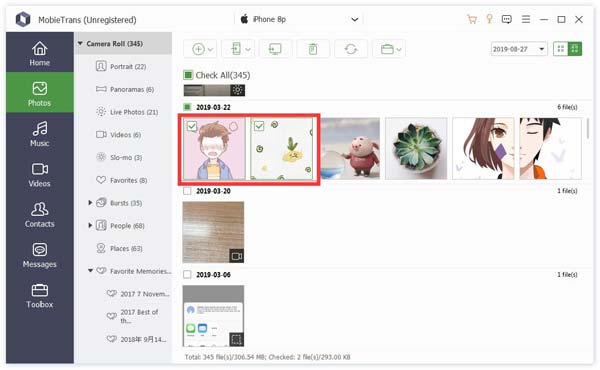
Step 3 Now, you can click the buttons on the top menu to transfer, delete, or back up data, and wait until you see the notification for a successful move.
Manage Android Trash via the Google Photos App
Here are many available apps for Android photo recovery as well. If you use the Google Photos app to manage your photos and videos, it also has a trash feature where deleted media files are temporarily stored. Here’s how to empty the trash using the Google Photos app:
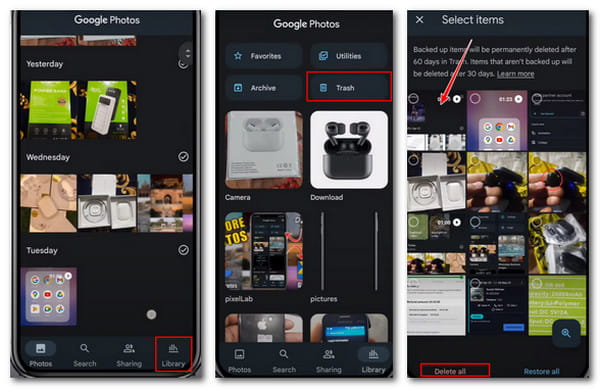
Step 1 Launch the Google Photos app on your Android device and click the Library button at the bottom to access the main menu.
Step 2 In the Library, tap on Trash to view all the photos and videos that you have deleted.
Tap on the three-dot menu (ellipsis) at the top right corner of the screen. From the dropdown menu, select Empty trash. Confirm the action when prompted.
Method 3: Using the Gallery App (Device-Specific)
Some Android devices, like the Samsung series, have a built-in gallery app that allows you to manage photos and videos. If your device has a gallery app, it may also have a trash feature. Here’s how to empty the trash using the gallery app (steps may vary depending on the device):
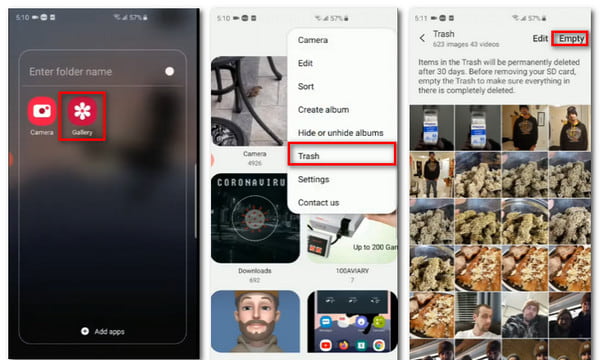
Step 1 Find and open the Gallery app on your Android device. The icon may resemble a square with mountains.
Step 2 Look for an option in the gallery app that says Trash, Recycle Bin, or Recently Deleted. Tap on it to view the deleted photos and videos.
Step 3 In the trash folder, you should see an option to Empty or Delete all photos and videos. Tap on this option to permanently remove all items from the trash. Confirm the action when prompted.
Reminder for Trash Management
To prevent future storage issues and keep your Android device running smoothly, consider the following tips:
1. Regularly Empty Trash: Make it a habit to empty the trash regularly to free up storage space and prevent unnecessary clutter.
2. Backup Important Files: Before emptying the trash, ensure that you have backed up any important files or photos that you may want to recover later.
3. Use Cloud Storage: Utilize cloud storage services like Google Drive, Dropbox, or OneDrive to store files and media, reducing the load on your device’s internal storage.
4. Delete Unused Apps: Remove apps that you no longer use to free up storage space.
5. Clear App Cache: Periodically clear the cache of individual apps to free up storage space.
6. Manage Downloads: Review and delete unnecessary downloads regularly.
7. Transfer Files to External Storage: If your device supports it, consider transferring media files to an external SD card to save internal storage.
Part 3. Data Loss? Recover Lost Data Securely
Have you ever deleted the wrong messages accidentally when you are deleting trash? What can you do in case you lost any crucial or significant Android data? No worries now! Here is another effective tool for you – Apeaksoft Android Data Recovery.
It is a powerful data recovery tool for Android devices of all series. It is compatible with more than 5,000 Android models and enables users to recover deleted and lost data without worrying about viruses or malware. You can also preview your wanted photos, messages or other information on your desktop without paying a penny.
4,000,000+ Downloads
Export important Android data for back-up in case you suffer data loss.
Recover your accidentally deleted/lost data. Including messages, photos, contacts, etc.
Back up any wanted information from your Android photos in one click.
Support all the latest Android phone versions like Samsung, Huawei, Xiaomi and more.
Reboot broken Android devices and manage your data in an organized way.
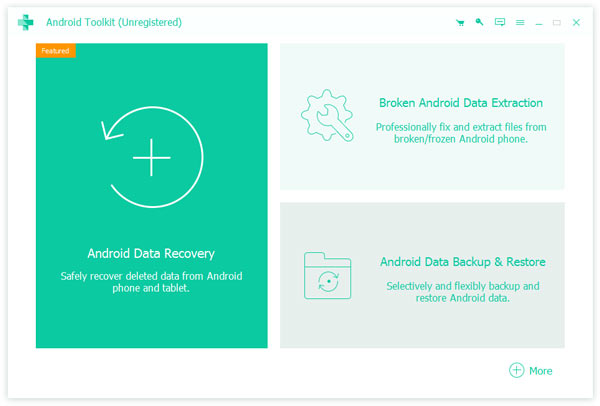
Step 1 Download and run Apeaksoft Android Data Recovery on your personal computer. Then enter the Android Data Recovery mode.
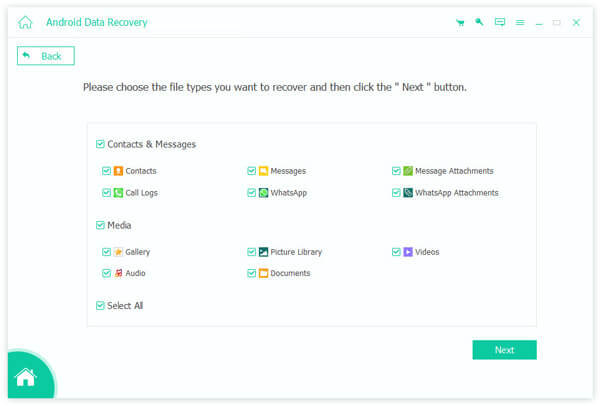
Step 2 Select the data type in the following interface and go on with the Next option. You can back up contacts, messages, media or all according to your needs.
Step 3 Follow the on-screen instructions and authorize the scanning process. Then you will see all scanned in the list. Choose the Deep Scan if you want to get more lost data.

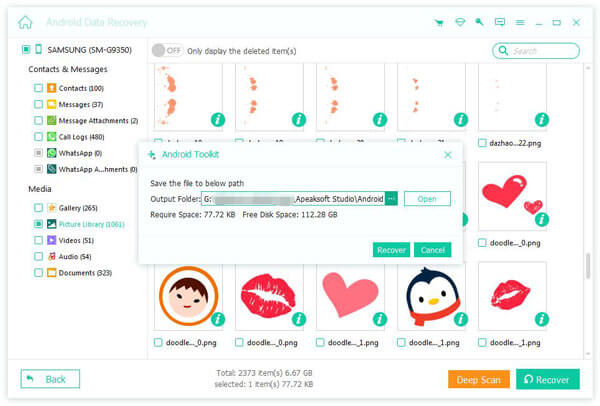
Step 4 Then you can tick the wanted Android files and the Recover button to retrieve the important data.
Part 4. FAQs of Clearing Trash on Android
How to find trash on Android?
You can utilize File Manager app on your phone and locate yourself at Trash/Recycle Bin, or open the Galley feature and find Trash based on your devices.
How do I recover deleted files on my Android phone?
You can retrieve deleted files via backups from Settings or enter Android Data Recovery on Apeaksoft Android Data Recovery to scan wanted data for recovery.
Are deleted files on Android gone forever?
Not exactly. You can check and recover the deleted files on your Android device within 30 days after the deletion. If you want to permanently erase all data, choose to factory reset your device.
Conclusion
Clearing the trash on Android devices is a crucial step in managing storage effectively and maintaining optimal device performance. With this guide, you can easily access trash on Android and free up valuable storage space. Remember to use built-in file managers, third-party file manager apps, or app-specific features to access and empty the trash. Additionally, consider implementing storage management tips to prevent future storage issues and ensure a smooth Android experience. Regularly maintaining your device’s storage will help you make the most of its capabilities while keeping it clutter-free and responsive.