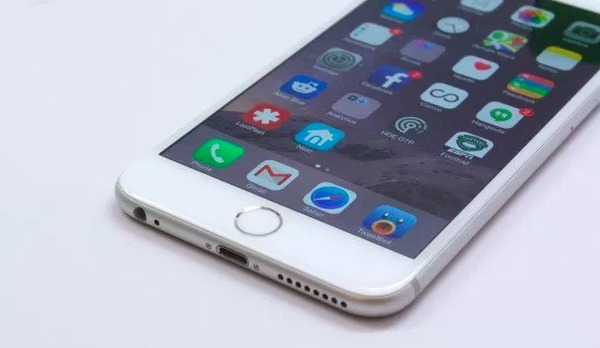
The Home button inserted in your iPhone offers two main functions, which are Touch ID authentication and the return function. For instance, you can press Home button to return to your Home screen immediately. Moreover, you can edit apps and access multitasking directly by tapping Home button. However, what if your iPhone 5S Home button is broken?

It is frustrating if your Home button stops working, especially when your iPhone is dropped on the floor from the high place. To solve the problem effectively, you can operate an iPhone 5S Home button replacement manually by yourself. After all, the iPhone 5S Home button price is much lower than going to the local repair store.
- Part 1: How to Replace the Home Button in Your iPhone
- Part 2: Recommendation: Fix Any iOS Software Issue with iOS System Recovery
Part 1. How to Replace the Home Button in Your iPhone
Before replacing a Home button on your iPhone 5S, you need to prepare the following tools in advance. Actually, you can get iPhone 5S Home button Amazon toolkit online to prepare everything.
Something You Need to Prepare before DIY iPhone 5S Home Button Replacement
You can find the replacing tools if you fail to prepare all those stuff below. Just make sure they can work similar with the original ones.
- Opening tools, suction handle, spudger tool, isclack or razor blade
- 5-point security screwdriver, standard #000 Phillips screwdriver
- iPhone 5S Home button replacement Amazon assembly
Well, be careful to open your iPhone 5S and replace its Home button. Otherwise, you may need another guide to help you fix new busted iPhone parts.
Step by Step Guide of iPhone Home Button Replacement (iPhone 5S)
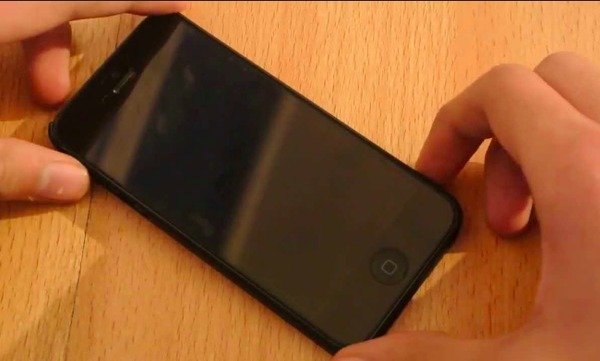
Step 1. Power off your iPhone 5S
Before repairing your iDevice, the first step is always turning it off. Hold and press Power button and move the slider off. Then you can continue to the further iPhone Home button replacement sections.
Step 2. Remove the two security screws
Use your 5-point security screwdriver to remove two security screws on the both sides of the dock connector. Operate this slowly and gently, and put those two screws aside.

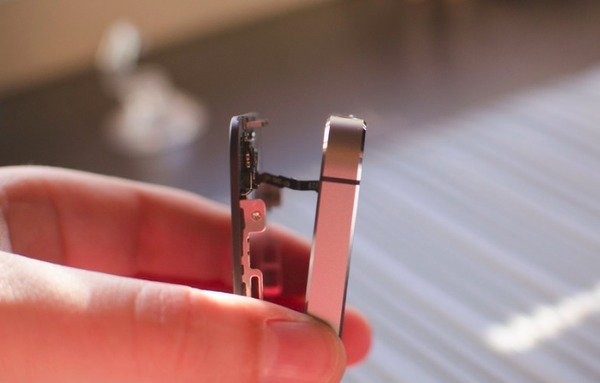
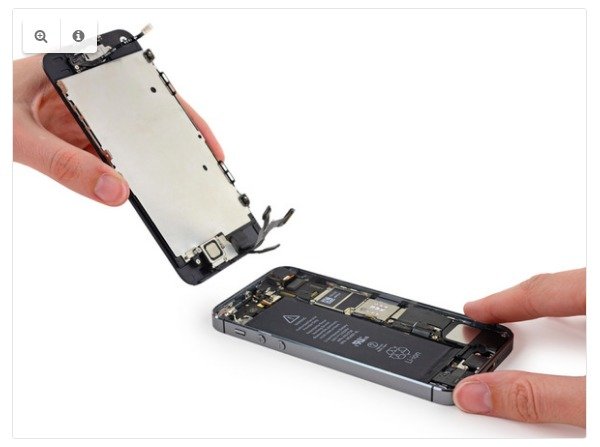
Step 3. Remove the display from your iPhone 5S
Place the suction cup above the Home button slightly. Then hold the iPhone in place with one hand, and pull the suction cup gently. Make sure its Touch ID sensor is still connected.
Use your spudger tool to remove the metal shield, which covers the Touch ID cable. Later, disconnect Touch ID by using the pointed edge of your spudger tool.
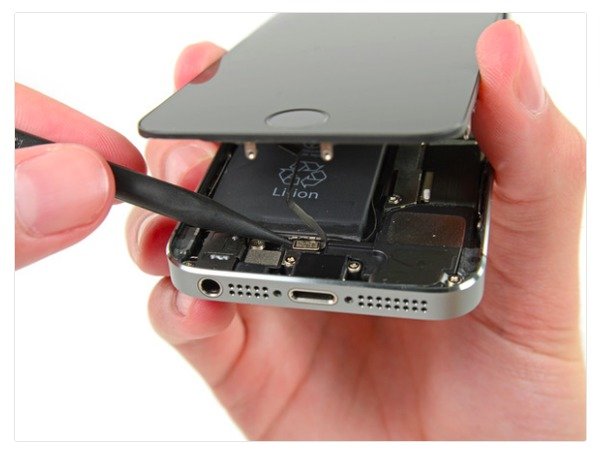
Take your standard #000 Phillips screwdriver to remove the four screws and take out the shield. Be patient and collect those screws in a small box, which are still useful after the iPhone Home button replacement.
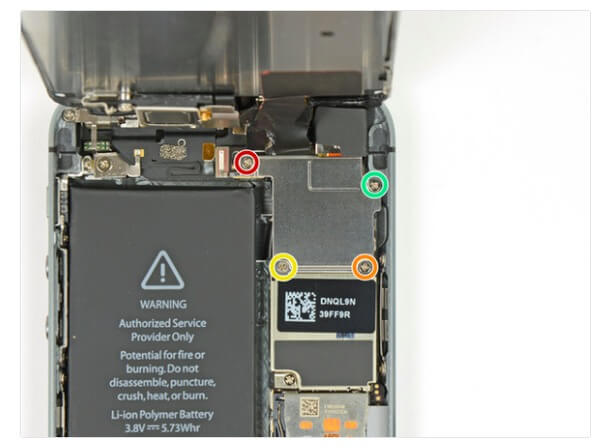
Disconnect the front-facing camera and sensor cable using the flat end of a spudger. Then disconnect the LCD cable connector and digitizer cable connector. At last, you can remove its front panel assembly successfully.
Step 4. Do an iPhone 5S Home button replacement
Unscrew and remove the Home button bracket very carefully with your #000 screwdriver and spudger.
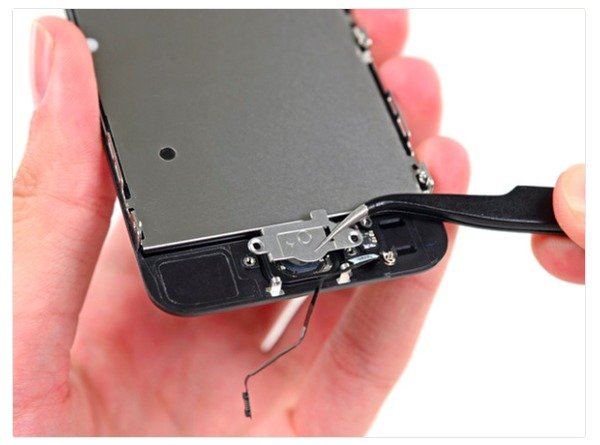
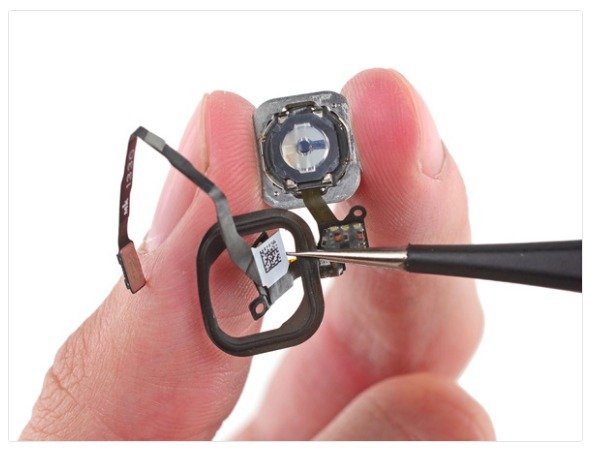
Remove the tap over the cracked front panel. Pry up the entire Home button assembly. Be aware that you should not push the Home button during the process of iPhone Home button replacement Touch ID.
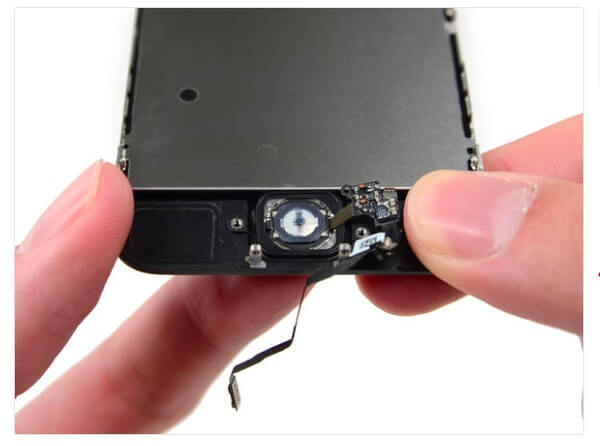
Use a spudger to peel the iPhone 5S Home button gently. After that, you can life it out of the iPhone screen assembly.
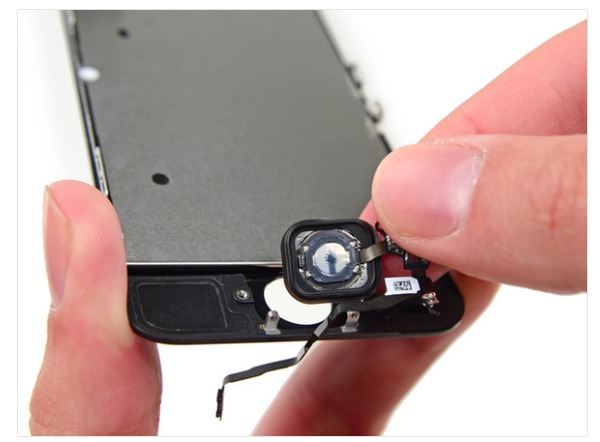
Then you can transfer the Home button gasket to replace iPhone 5S Home button assembly. It is a job that requires people to be patient enough since the gasket is really thin.
Step 5. Replace the display assembly in order
Just follow above steps to reconnect those screwed and removed parts back to their original places. The moment you replace your iPhone 5S Home button on screen successfully, you need to turn on your iPhone and have a test.
Part 2. Recommendation: Fix Any iOS Software Issue with iOS System Recovery
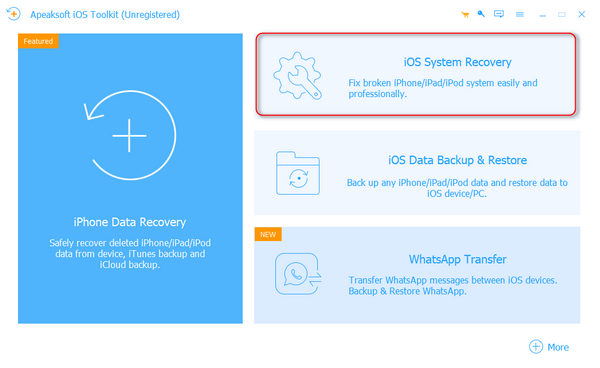
If your iPhone stuck on DFU mode or have other system errors, you can use Apeaksoft iOS System Recovery to fix iOS system errors safely and easily. To be more specific, you can run iOS System Recovery to repair the non-responding screen back to the normal state professionally. The whole interface is easy to use, and you do not need to equip technical skill, since iOS System Recovery can help you solve all problems with ease. In addition, maybe your Home button does not work because of the system error, then you should choose the iPhone system recovery tool instead of making an iPhone home button replacement.

4,000,000+ Downloads
Fix iOS devices from various iOS issues back to normal state on Windows and Mac.
Highly compatible with iOS 26 and all iOS models like iPhone 16/15/14/13/12/11/X, etc.
Offer a safe and simple way to fix iOS system errors without data loss.
Step 1. Run iOS System Recovery
Free download the iPhone system repair software. Launch it and locate the "iOS System Recovery" section.
Step 2. Connect iPhone to PC
Plug in iPhone to your computer with a USB cable, then hit "Start" button to move on.

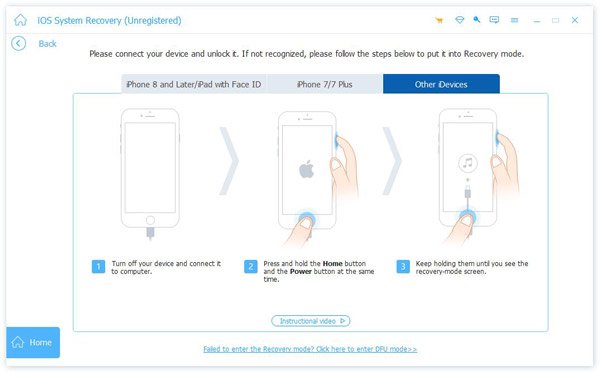
Step 3. Enter into DFU mode
Put your Apple device into DFU mode by using the provided on-screen instruction.
Step 4. Check the detected iPhone information
After iOS System Recovery has detected your iPhone, check its basic information and correct manually if necessary.
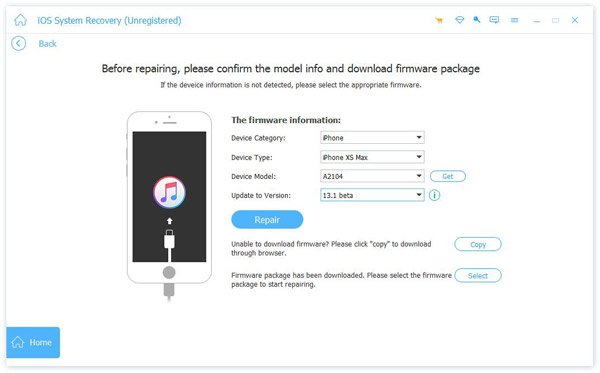
Step 5. FIx iPhone back to normal state
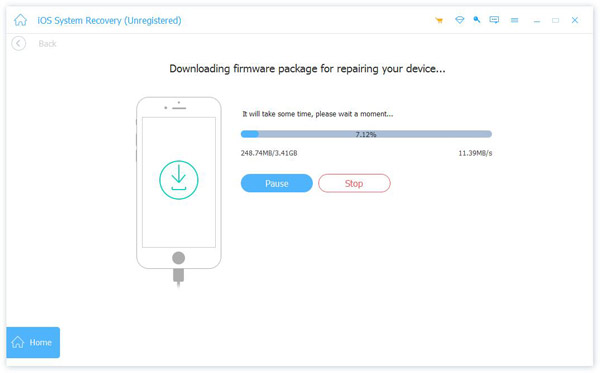
Tap "Repair" button to download plugin and repair your Apple device automatically. So just wait few minutes to complete iOS system recovery.
Once you replace a new Home button with your iPhone 5S, you can double tap and triple tap to ensure whether it can work properly. That's all for the complete guide of iPhone 5S Home button replacement. Contact us if you have any problem during the iPhone home button replacement.