All Mac computers have a finite amount of space. It will be quickly filled up as time goes by. If you need to add more space, you have to partition a hard drive on your Mac computer. That can be a frustrating and daunting task for average people. However, once you understand the procedure, it is possible to achieve it by yourself.

In this tutorial, we are going to talk about how to partition a hard drive on Mac. In addition, you can learn other knowledge related to partition an external or internal hard drive on Mac computers.
- Part 1: Can You Partition a Hard Drive That Already Has Data on It on Mac
- Part 2: How to Add a New Hard Drive Partition in Mac
- Part 3: How to Delete a Hard Drive Partition in Mac OS X/11
- Part 4: How to resize Hard Drive Partition in Mac OS X/11
- Part 5: Set up a Windows Partition on Your Mac
- Part 6: How to Manage your Mac Data
- Part 7: How Recover Lost Files When Partition Mac Hard Drive
Part 1. Can You Partition a Hard Drive That Already Has Data on It on Mac
According to Apple, users are allowed to partition a hard drive with data on Mac. To avoid data loss, you need to update your computer to Mac OS X v10.8.5 or later. If you connect it to an older OS, your data will be unreadable.
Part 2. How to Add a New Hard Drive Partition in Mac
If you connect a new hard drive to Mac, either internal or external hard disk, you have to partition it.
Step 1: Open the Disk Utility application, and locate the new hard drive on the left hand column.
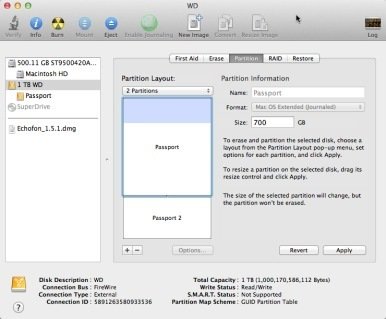
Step 2: Go to the Partition tab from the top of the window, and then click on the Plus button to add a new hard drive partition.
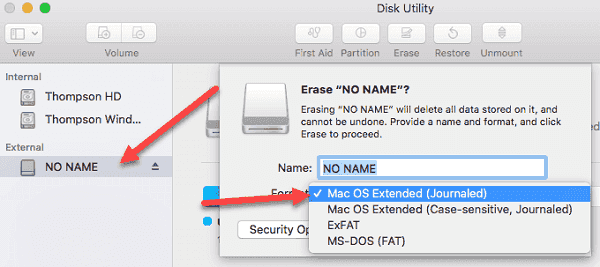
Step 3: There are some options that you need to fill in, such as a name for the new partition, filesystem type and the size of the partition.
Step 4: Finally, click on the Apply button to partition a hard drive on Mac. Now, you can access the new hard drive in the Finder app.
By default, the filesystem is Mac OS Extended Journaled. You can decide the size of the partition manually or simply drag the slider bar. The size can be any number no more than the disk capacity. If there is important data on the new hard drive, we suggest you to clone it before partitioning.
Part 3. How to Delete a Hard Drive Partition in Mac OS X/11
Sometimes, you may need to remove a hard drive partition from your Mac computer. Similar to partition external hard drive on Mac, it is simple to delete any disks.
Step 1: Find and select the hard drive partition that you want to remove in your Disk Utility application.
Step 2: Once click on the Minus button in the Partition tab, the hard drive will be deleted from your Mac computer. Then hit the Apply button to confirm it.
Note: Bear in mind that the data will be erased if you delete the partition. If you accidentally delete the data, just visit this page to get Mac data recovery.
Part 4. How to resize Hard Drive Partition in Mac OS X/11
Even though you have partitioned hard drive on Mac, the volume size is changeable. You can achieve it in the Disk Utility without any third-party applications.
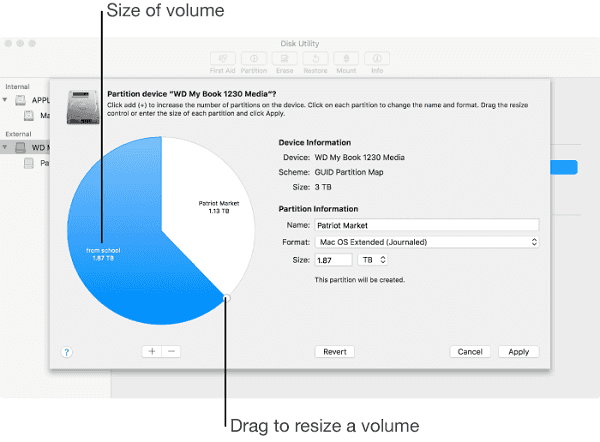
Step 1: Go the Partitions tab in your Disk Utility application, and select the hard drive partition that you want to resize. You will be presented current size of the partition.
Step 2: There are two ways to resize the hard drive. Firstly, you can enter a new value in the Size box. Another way is to drag the slider bar on the partition map until you get the desired value.
Step 3: Finally, click on the Apply button to resize your partition immediately. To take effect of the changes, reboot your computer.
Part 5. Set up a Windows Partition on Your Mac
If you want to run a few Windows applications or Windows 10 on your Mac, you have to set up a Windows partition. There are some requirements for having a Windows partition on your Mac:
1. Intel-based Mac.
2. An ISO file of a 64-bit version of Windows. Windows 10 is supported on Mac computers made in 2012 and later. Windows 8.1 can be run on Mac made between 2010 and 2016.
3. At least 55 GB free space on the startup drive.
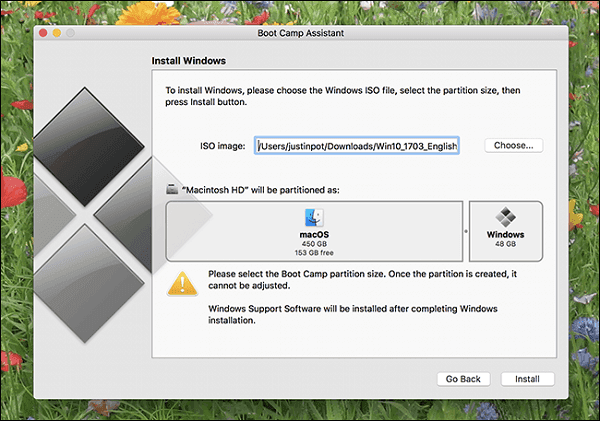
Step 1: Navigate to Applications -> Utilities -> Boot Camp Assistant, and click on Continue on the window.
Step 2: When prompted, select the proper ISO file and the size of your Windows partition. Then click on Install to start downloading Windows support software, which will partition a hard drive on Mac.
Step 3: Copy the downloaded installer to the desired partition and run it.
Step 4: Eventually, your computer will reboot and you will get the standard Windows installer screen. Follow the onscreen instructions to set up a Windows partition on Mac.
Part 6. How to Manage your Mac Data
Want to manage your data to free up space and partition a hard drive on Mac? We recommend you to try Apeaksoft Mac Cleaner. Its key features include:
1. Remove junk files and free up space.
2. Manage your files on your Mac computer simply.
3. Preview files, caches, logs before clean-up.
4. Organize files by name, size, time, etc.
5. Check your CPU, memory and disk automatically.
How to manage data on Mac using Mac Cleaner
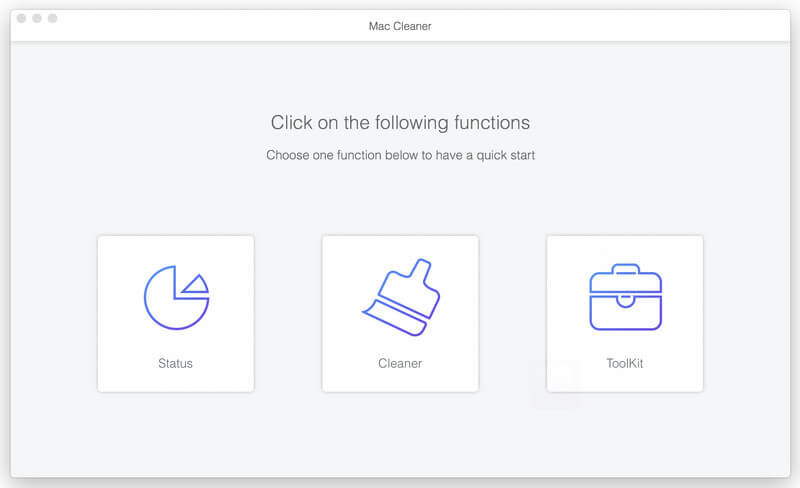
Step 1: Install the best Mac cleaner application
Download and install Mac Cleaner on your computer and launch it. To clean junk files, go to the Junk Files tab on the left sidebar, click the Scan button. If you want to remove large or old files, head to the Large & Old Files tab and hit the Scan button.
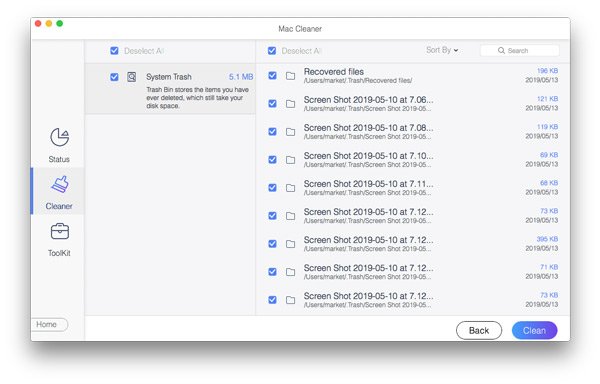
Step 2: Remove unwanted files
When scanning is done, search for unwanted files and select all of them. Click on the Clean button, and then hit Confirm on the popup dialog to remove the files from your computer.
Part 7. How Recover Lost Files When Partition Mac Hard Drive
Sometimes data may get lost during Mac partition process. Once you partition Mac hard drive, all data saved on it will gone forever. That’s why you need a partition recovery tool to recover lost data during partition. Apeaksoft Data Recovery is such a powerful partition recovery program to recover lost images, documents, emails, audio, video due to partition deleted, damaged memory card, overwritten data, unexpected operations, inaccessible drive, virus attack, etc.
4,000,000+ Downloads
Recover lost photos, emails, documents, videos, audio from computer.
Recover from computer, hard drive, flash drive, memory card, digital camera.
Provide Deep Scan and Quick Scan modes for hard drive partition loss.
Compatible with Windows 10/8.1/8/7/Vista/XP, Mac OS 10.6 and above.
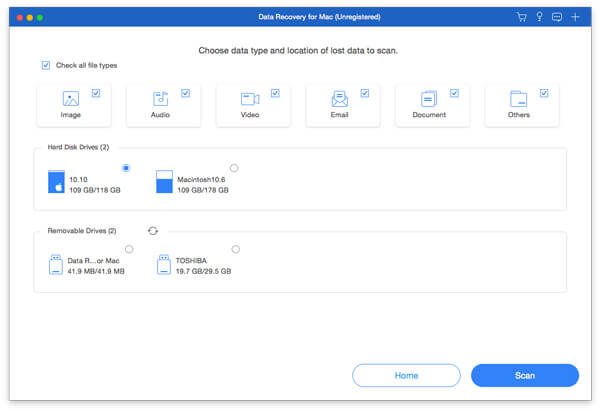
Step 1: Free download Data Recovery, install and launch it on your computer. Click “Mac Data Recovery” to enter the interface of Data Recovery.

Step 2: Check the data type you want to recover and select the hard disk drive you partitioned. Click “Scan” button to scan the lost data during the Mac hard drive partition.
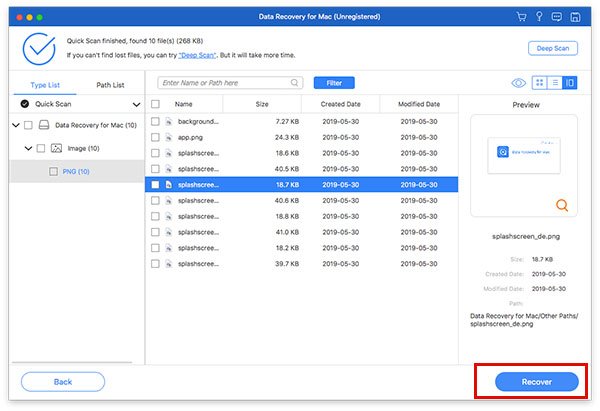
Step 3: After the scan is finished, all the scanned data will be sorted by different folders. You can check the data type folder for further details. If you didn’t find the lost data you want, you can click “Deep Scan” button at the top right of the interface to initiate a through scan.
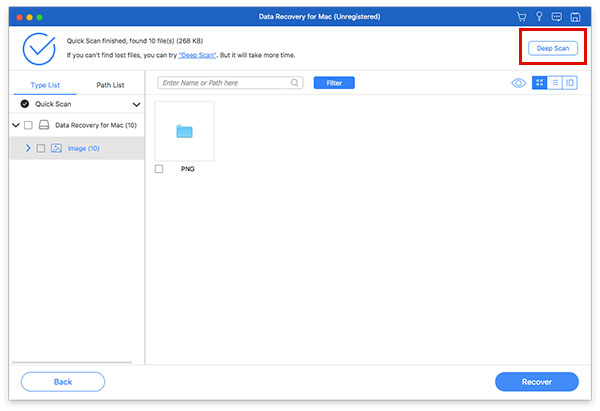
Step 4: You can find the lost data by clicking the “Path List”, or use the Filter to search the file. Then check the lost files you want to recover, and click “Recover” button to retrieve the files to your Mac hard drive.
Conclusion
How to partition a hard drive on Mac? You might grasp the standard process from our tutorial above. Even if you are ordinary people, our step-by-step guides could help you to achieve the task simply. In addition, we also shared how to remove a partition and how to set up a Windows partition on Mac.
If you need an efficient way to manage your files on your computer, Apeaksoft Mac Cleaner is the best option. It is not only easy to use, but also able to help you discover unneeded files quickly.