How to Transfer Pictures from iPhone to Mac Computer
The best way to free up space and protect your memories is to transfer photos from your iPhone to a computer. As Apple keeps improving visual technology on iOS devices, users can take high-quality photos and videos using their handsets. The drawback is that large photo files take up space. Therefore, you need to remove photos and free up space. This tutorial shares multiple ways to import photos from your iPhone to your Mac quickly.
PAGE CONTENT:
- Part 1: Quick Way to Transfer Photos from iPhone to Mac
- Part 2: How to Import Photos from iPhone to Mac with a Cable
- Part 3: How to AirDrop Photos from iPhone to Mac
- Part 4: How to Load iPhone Pictures to Mac via iCloud Photos
- Part 5: How to Share iPhone Photos to Mac on iCloud.com
- Part 6: How to Send Photos from iPhone to Mac Using Email
Part 1: Quick Way to Transfer Photos from iPhone to Mac
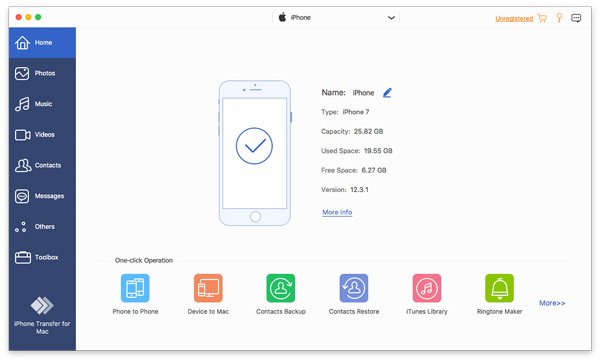
Apeaksoft iPhone Transfer is a quick way to copy photos from iPhone to Mac. It enables you to transfer all photos or specific iPhone photos to your MacBook through a physical connection. More importantly, it is able to protect your photo quality during the process.
A Quick Way to Move Photos from iPhone to Mac
- Move photos from your iPhone to the Mac with a cable.
- Preview iPhone photos on your Mac.
- Include bonus features, like a HEIC converter.
- Keep the photo quality automatically.
- Support the latest versions of iOS and iPadOS.
Secure Download
Secure Download

How to Export Photos from iPhone to Mac
Step 1. Link to your iPhone
Launch the iPhone Transfer software after you install it on your Mac. There is another version for PC. Link your iPhone to your Mac with a Lightning cable. Then, the software will detect your device.
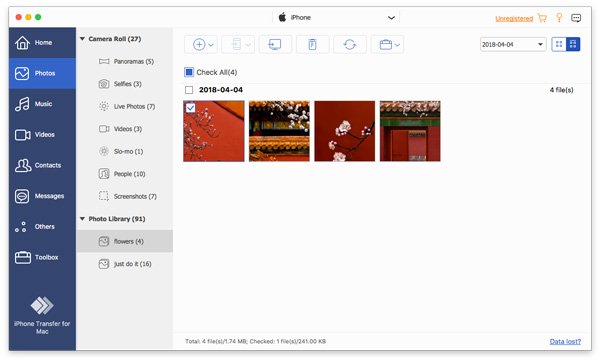
Step 2. Preview iPhone photos
Go to the Photos tab on the sidebar and view photos on your iPhone by album, date, and more.
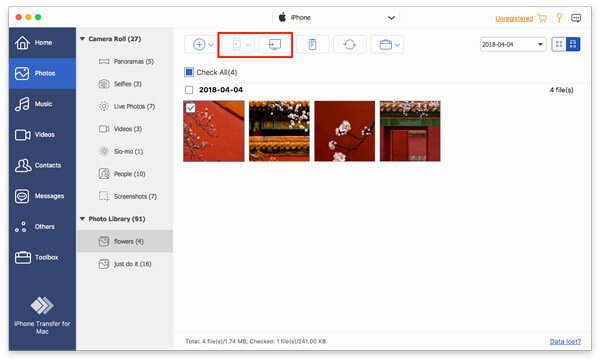
Step 3. Export iPhone photos to Mac
Select all photos that you want to export, click the Computer button on the top ribbon, and choose Export to Mac. Set an output folder and confirm it. You can also sync iPhone messages to Mac with this program.
Part 2: How to Import Photos from iPhone to Mac with a Cable
Using a cable, you can get photos from your iPhone to your Mac directly. The built-in Image Capture app allows you to access iPhone photos on a Mac without an internet connection. This method only needs a compatible cable.
Step 1. Connect your iPhone to your Mac using a USB cable.
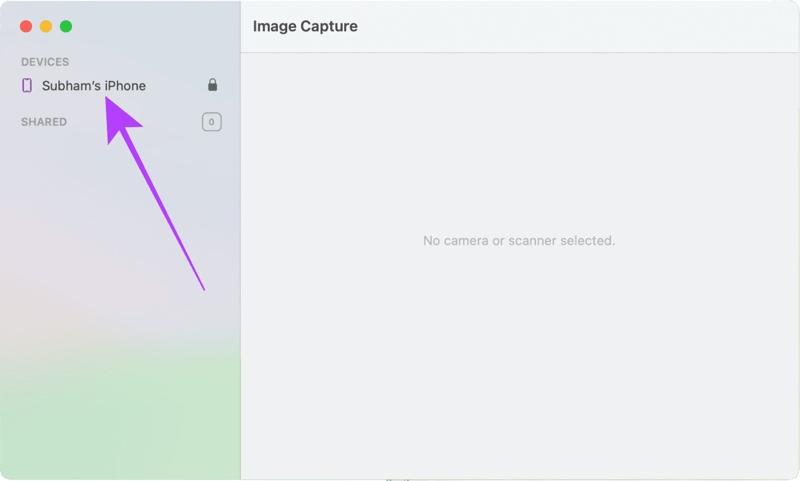
Step 2. Open the Image Capture app and click your iPhone name.
Step 3. Unlock your iPhone to load pictures on your Mac.
Step 4. Click the Import To option and choose the output folder.
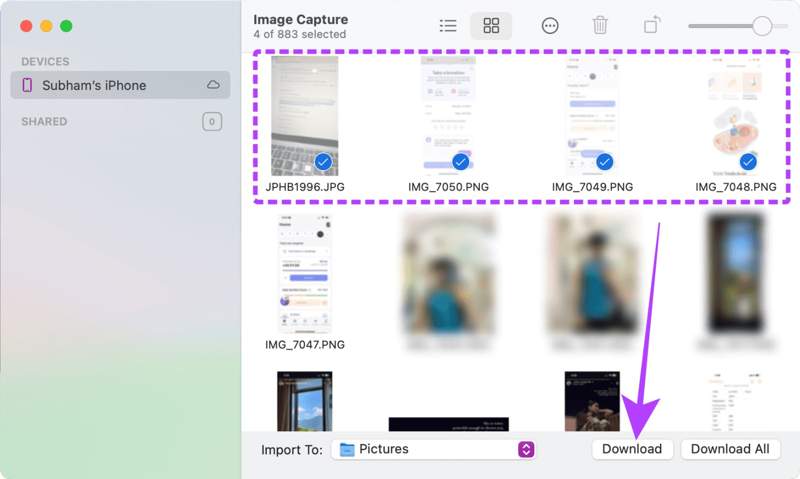
Step 5. Next, select the photos you want to transfer and click the Download button.
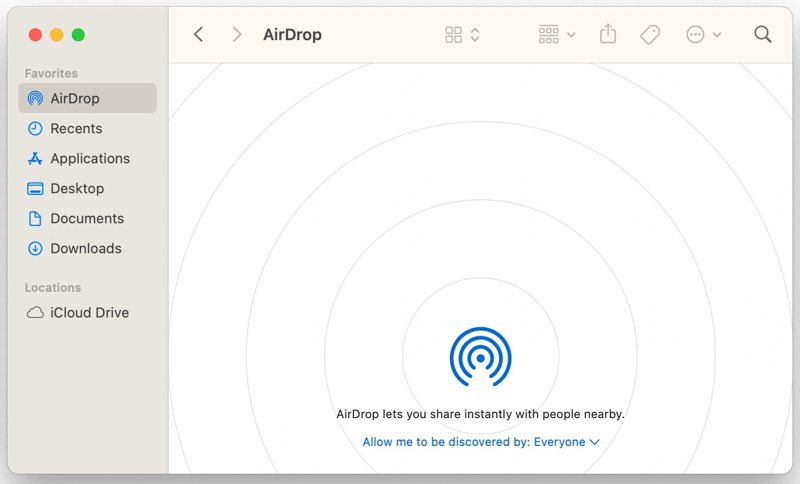
Part 3: How to AirDrop Photos from iPhone to Mac
AirDrop is the wireless connection on Apple devices. It enables you to AirDrop photos from an iPhone to a Mac. It is a simple method to sync photos between Apple devices; however, it is slow if you transfer too many photos.
Step 1. Open the Finder app on your Mac, find and click AirDrop on the sidebar, and choose Everyone from the Allow me to be discovered by option.
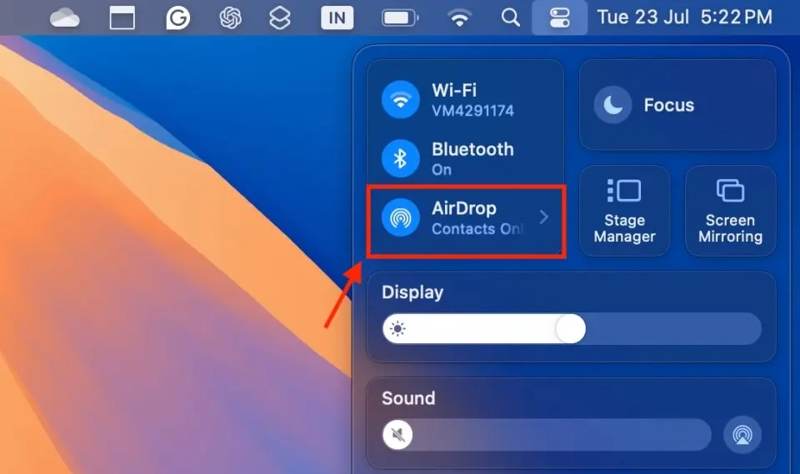
Tips: You can also enable and set AirDrop in your Control Center.
Step 2. Turn on Bluetooth and Wi-Fi, too.
Step 3. Turn to your iPhone and go to the Control Center.
Step 4. Enable Bluetooth and Wi-Fi.
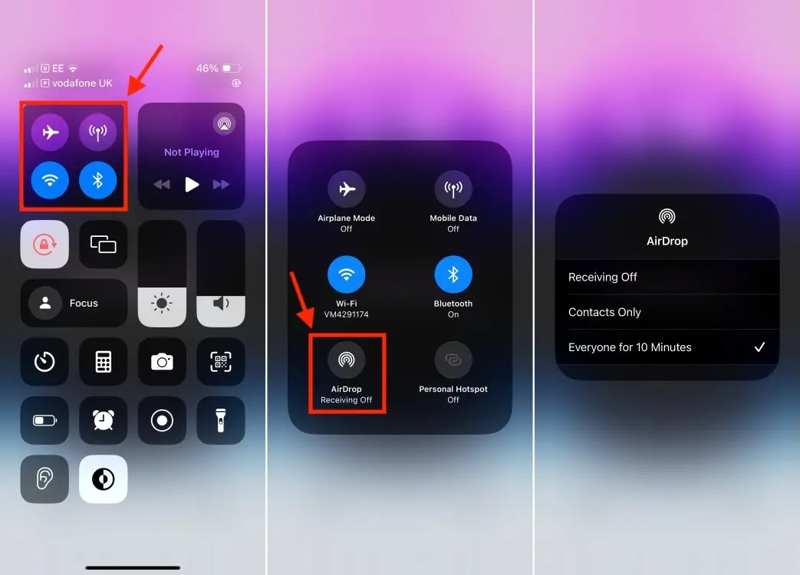
Step 5. Then, long-press the connect pane, tap AirDrop, and choose Everyone for 10 minutes.
Step 6. Run the Photos app on your iPhone, and tap the desired photo.
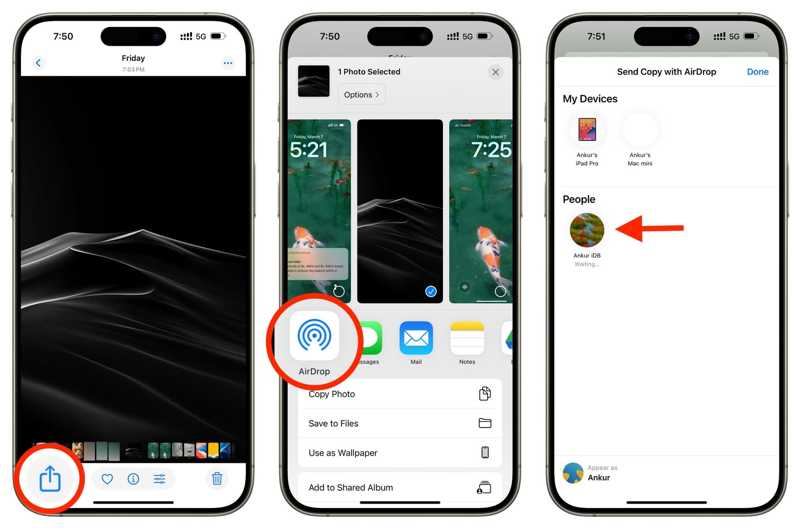
Step 7. Tap the Share button, touch AirDrop, and choose your Mac.
Step 8. Turn to your Mac, and accept the photo.
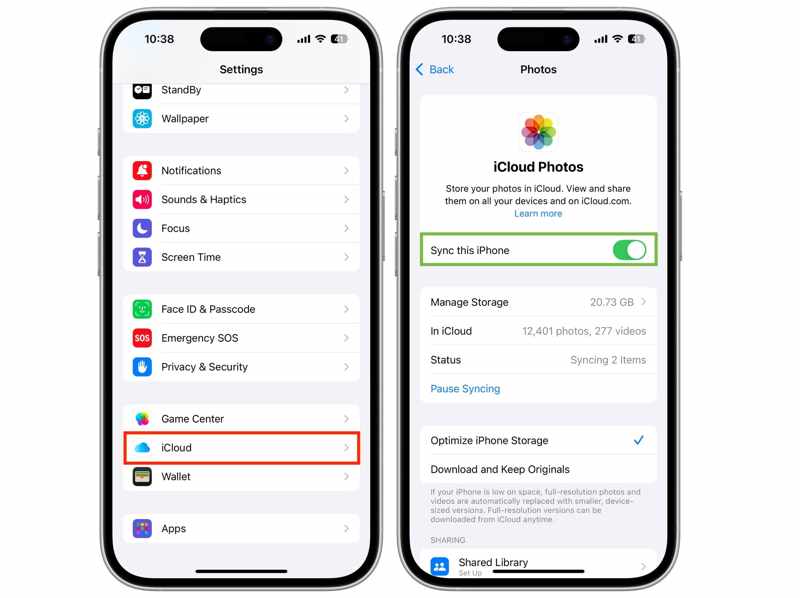
Part 4: How to Load iPhone Pictures to Mac via iCloud Photos
iCloud Photos is a useful feature for accessing your photos across Apple devices as long as you've backed up photos to iCloud. In other words, it allows you to load iPhone pictures on a Mac wirelessly. The prerequisite is that you have signed in with the same Apple ID on both your iPhone and Mac.
Step 1. Run the Settings app on your iPhone.
Step 2. Remember your Apple ID and tap on the profile.
Step 3. Go to iCloud, tap Photos, and toggle on Sync this iPhone.
Step 4. Turn on your Mac.
Step 5. Click the Apple menu and choose System Settings or System Preferences.
Step 6. Hit Apple ID and make sure it is the same as the account associated with your iPhone. If not, click Sign Out and log in to the right account.
Step 7. Open the Photos app on your Mac.
Step 8. Go to the Photos menu, choose Settings, and switch to iCloud.

Step 9. Check iCloud Photos, and select Download Originals to this Mac.
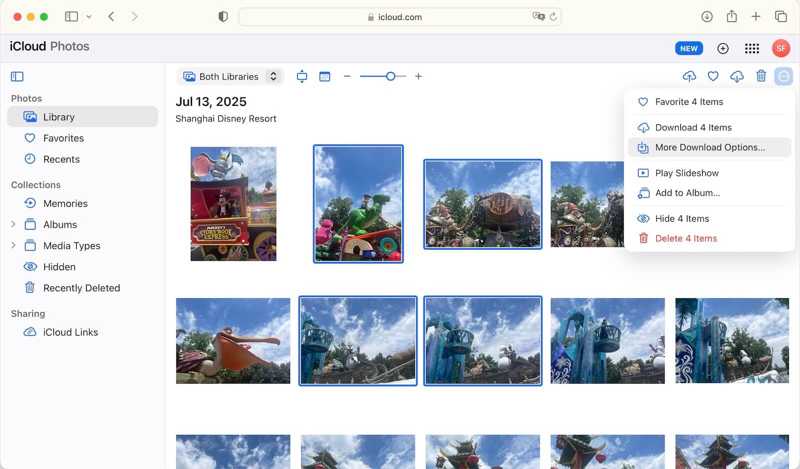
Part 5: How to Share iPhone Photos to Mac on iCloud.com
If iCloud Photos is unavailable on your Mac, you can download photos from your iPhone to your Mac on iCloud.com. The website allows you to access all iPhone photos synced to your iCloud account.
Step 1. Turn on iCloud Photos on your iPhone.
Step 2. Access www.icloud.com/photos in a browser, and sign in with your Apple ID and password.
Step 3. Go to the Library tab and select all desired photos.
Step 4. Click the Download button, and choose Download N Items.
Part 6: How to Send Photos from iPhone to Mac Using Email
Email is another way to send photos from an iPhone to a Mac. This way is a good option for sharing a few pictures on your iPhone with any device. Bear in mind that all email providers have a maximum size.

Step 1. Select the photos you want to share in your Photos app on iPhone.
Step 2. Tap the Share button and choose Mail.
Step 3. Enter your email address in the To field, set the Subject, and tap Send.
Step 4. Next, access your email on your Mac, and pass photos from iPhone to Mac.
Conclusion
This article shared multiple ways to transfer photos from an iPhone to a Mac. iCloud Photos, AirDrop, and emails allow you to move your iPhone photos to another Apple device wirelessly. You can also use a USB cable to back up your iPhone photos to a computer. Apeaksoft iPhone Transfer is the ultimate solution if you care about the photo quality. Now, you can pick an appropriate method according to our sharing and your situation.
Related Articles
Want to know how to transfer videos from your iPhone to your computer without compromising the original quality? Here are the most effective of the six methods.
Reminders don't sync between iPhone and Mac? Read this article and find out how to fix this issue from other iPhone users' experiences.
If you no longer need them, you can follow our concrete tutorial to quickly delete old iPhone backups on your Mac computer.
To mirror iPhone to Mac, you can make use of Apple’s built-in feature, AirPlay, or QuickTime Player. We also introduce a powerful third-party tool.
