How to Transfer Notes from iPhone to PC and Mac Computer
There are a few scenarios when you have to sync notes from an iPhone to a Mac or PC. Even if you lose your iPhone, for example, you can access your note copy on your computer. Moreover, you'd better save your notes to your PC or Mac before freeing up space on your iPhone. The good news is that you have multiple methods to save your notes across devices. This guide shares the workflows.
PAGE CONTENT:
Part 1: A Quick Method to Sync Notes from iPhone to Computer
Apple Notes may save lots of information, from shopping lists to creative ideas, from class notebooks to passwords. Apeaksoft iPhone Transfer is able to back up notes from iPhone to computer without Wi-Fi. More importantly, the intuitive interface makes it a good option for ordinary people.
A Quick Way to Transfer Notes from iPhone to Computer
- Transfer iPhone notes to a computer with a cable.
- Preview iPhone notes and back up specific items.
- Support all notes and attachments.
- Keep the original condition of your notes.
- Compatible with the latest versions of iOS and iPadOS.
Secure Download
Secure Download

How to Transfer Notes from iPhone to PC
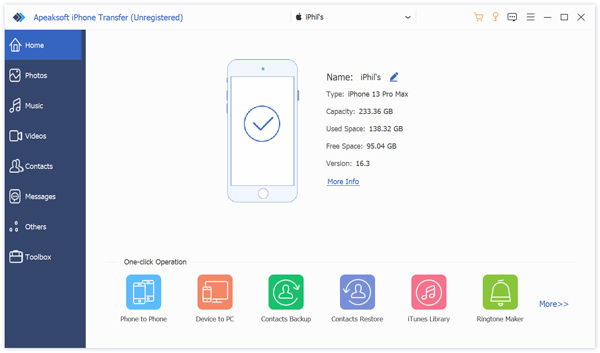
Step 1. Detect your iPhone
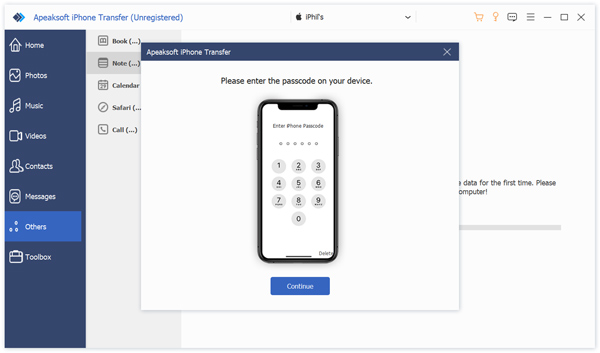
Run the notes transferring software once you install it on your PC. There is another version for notes syncing to Mac. Connect your iPhone to your PC with a Lightning cable. If prompted, tap Trust on your screen to trust this PC. For iOS 13 and above, enter your iPhone passcode to permit the connection.
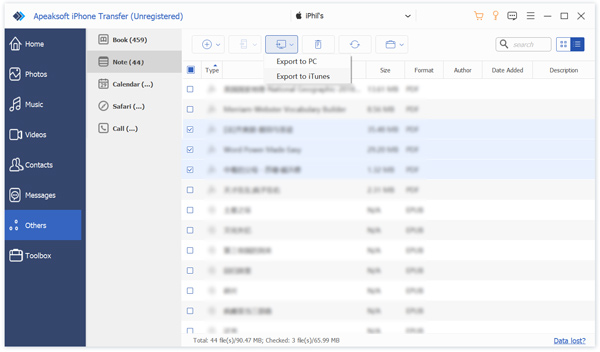
Step 2. Preview iPhone notes
Once your device is detected, go to the Others tab on the sidebar, and choose Notes to preview all notes on your iPhone.
Step 3. Transfer notes
Select the notes and attachments you want to sync. Click the PC button on the top ribbon, and choose Export to PC. Set an output folder and confirm note backup. You can also transfer photos from iPhone to PC with this program.
Tips: During the process, keep your iPhone connected to your computer.
Part 2: How to Sync iPhone Notes to Computer via iCloud
If you don't have a cable, you can sync notes from your iPhone to a MacBook or PC using iCloud wirelessly. With your Apple ID account, you can sync your notes across your devices, including iOS devices, Mac, and PC.
Step 1. Run your Settings app on your iPhone.
Tips: Tip: Make sure to connect your iPhone to an internet connection.
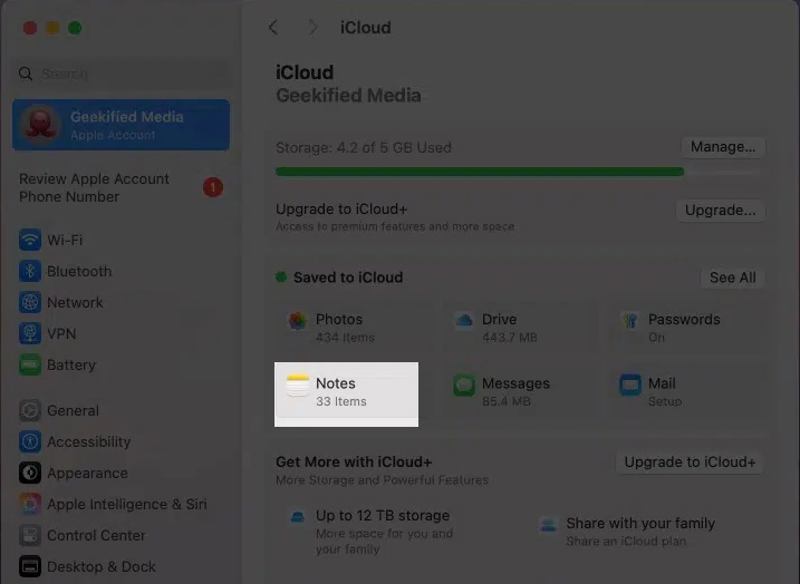
Step 2. Tap on your profile and choose iCloud.
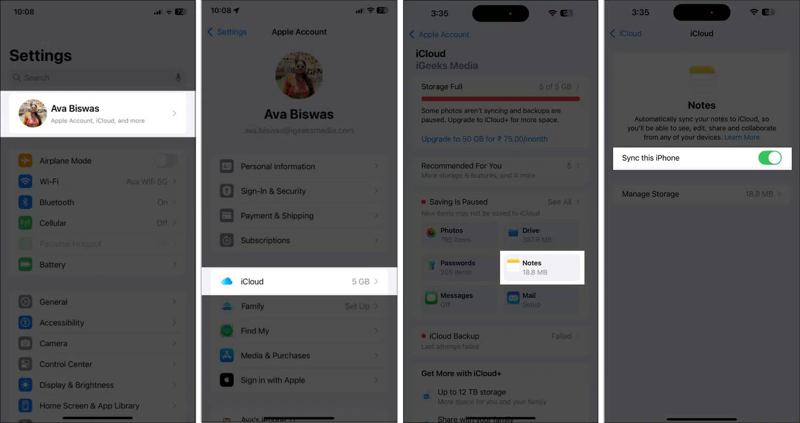
Step 3. Tap Notes under the Saved to iCloud section.
Step 4. Toggle on Sync this iPhone to sync iPhone notes immediately.
Sync Notes from iPhone to MacBook
Step 5. Click the Apple menu and choose System Settings.
Step 6. Click on Apple Account, and choose iCloud.
Step 7. Choose Notes under the Saved to iCloud area.
Step 8. Toggle on the Sync this Mac option, and click Done.
Tips: Note: You must sign in with the same Apple ID account on both your iPhone and MacBook.
Sync Notes from iPhone to PC
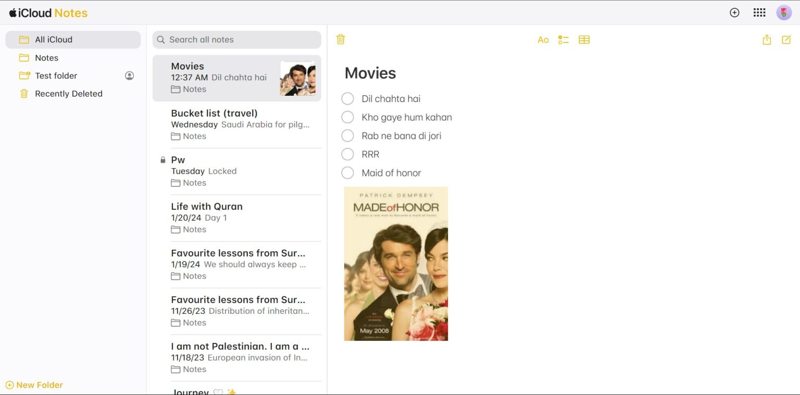
Step 5. Access www.icloud.com in a browser and log in with your Apple ID and password.
Step 6. Choose Notes to enter the iCloud Notes page.
Step 7. Select a note you wish to back up, and copy it, including the attachments.
Step 8. Open a new Word document from your desktop and paste the note.
Part 3: How to Copy Notes from iPhone to Computer via Gmail
Another way to copy notes from your iPhone to a computer is through your Gmail account. In fact, you can sync your iPhone notes to Gmail and access them on any digital device. This method doesn't require extra software or hardware. All you need is a stable internet connection. You can also sync iPhone contacts to Gmail.
Step 1. Run your Settings app on your iPhone.
Step 2. Navigate to Apps, Notes, and Notes Accounts.
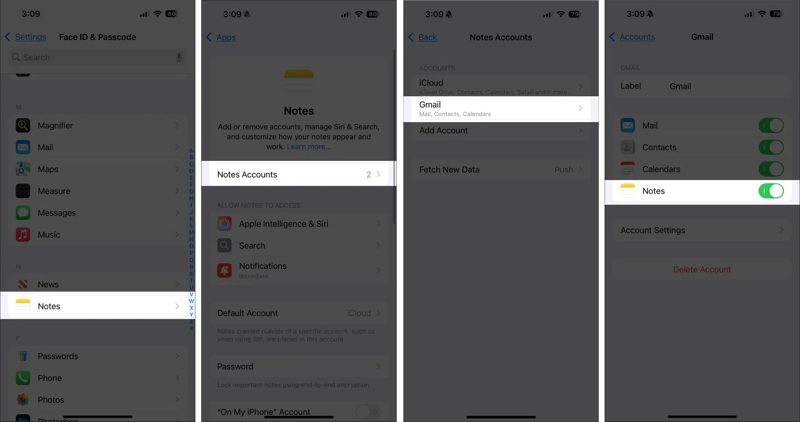
Step 3. Tap Add Account, and choose Google. If you have added your Gmail account for Notes, skip to
Step 4. Sign in with your Gmail account.
Step 5. Next, choose your account on the Notes Accounts screen.
Step 6. Toggle on the Notes option to initiate syncing iPhone notes to Gmail.
Step 7. Turn to your computer and open a web browser.
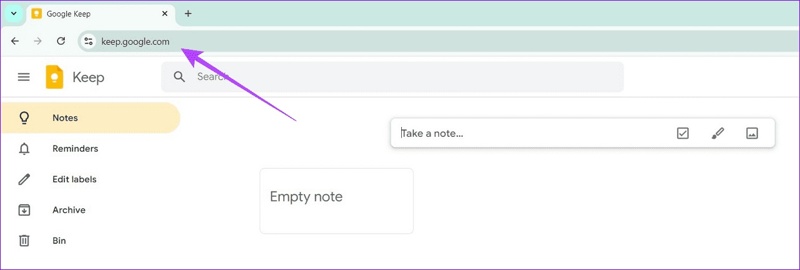
Step 8. Go to keep.google.com and log in to your Gmail account.
Step 9. Choose Notes on the sidebar and copy iPhone notes to your computer.
Tips: You can also access the Google Keep app or extension to download your notes.
Conclusion
Based on our sharing above, you should learn at least three ways to sync notes from iPhone to MacBook or PC. After you sync iPhone notes to iCloud, you can access them on either your Mac or PC with the same Apple account. Plus, Gmail and Outlook let you back up iPhone notes to cloud storage. Apeaksoft iPhone Transfer is an ideal option if you don't have a stable internet connection.
