How to Transfer Photos from Computer to iPad Quickly
Moving photos from the high-resolution screen of your PC to the portable, vibrant display of an iPad is essential for photographers, designers, and casual users alike. Whether you are looking to edit on the go or share a digital album with friends, you should try to maintain the original image quality. This article will tell you how to transfer photos from computer to iPad precisely without losing quality.
Also, image format compatibility is a key factor. Your PC can open many types of images, but your iPad may not. Therefore, this article will also help you fix this problem when you transfer photos from your computer to your iPad.
PAGE CONTENT:
- Part 1: How to Transfer Photos from Computer to iPad Quickly
- Part 2: How to Transfer Photos from Computer to iPad via iTunes
- Part 3: How to Transfer Photos from Computer to iPad with iCloud
- Pro Tips: Convert Photos to iPad Supported Formats Before Transferring
- Part 4: FAQs of Transferring Photos from Computer to iPad
Part 1: How to Transfer Photos from Computer to iPad Quickly
Transferring photos from a Windows PC to an iPad is not convenient. There is no fast and reliable bridge between Windows and iOS to quickly transfer photos directly to the Photos app in your iPad. But don't worry; Apeaksoft iPhone Transfer can help you do this task immediately. This program lets you select your desired photos on your PC and send them to your iPad Photos without an internet connection or long time waiting. Try this file transfer if you urgently need to send photos.
Transfer Photos from PC to iPad Seamlessly
- Connect your iPad to PC via USB to perform smooth transferring.
- Support drag-and-drop photo transfer.
- Keep the original photo quality and metadata.
- Support batch transferring and selective transferring.
Secure Download
Secure Download

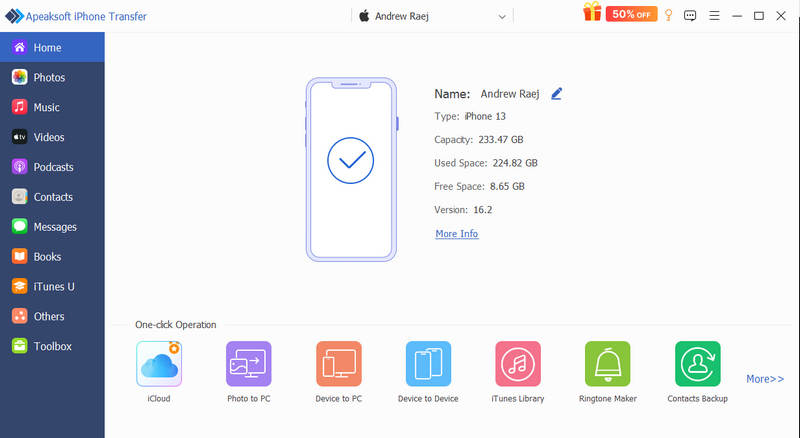
Step 1. Connect the iPad to Your PC
Download, install, and launch Apeaksoft iPhone Transfer on your PC. You'll see your iPad info on the program interface.
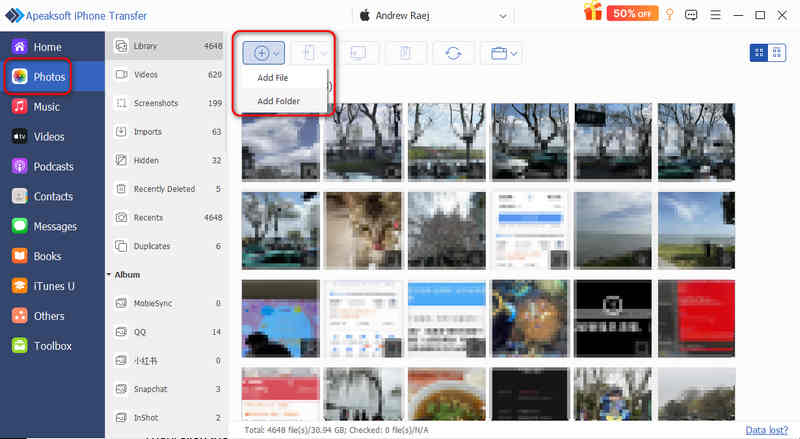
Step 2. Transfer Photos from PC to iPad Photos App
Click the Photos button in the left bar. It will automatically locate Library, which is also your Photos app.
Then, click the Add button at the top, and select Add File or Add Folder to transfer photos from PC to your iPad. It will directly put photos in the Photos app.
Further Reading
Part 2: How to Transfer Photos from Computer to iPad via iTunes
If you prefer a wired connection for stability and speed, using Apple’s official desktop software is also a standard approach to sync photos from computer to iPad. iTunes allows you to directly send a photo folder to the Photos app on your iPad. The process doesn't rely on an internet connection and is very fast.
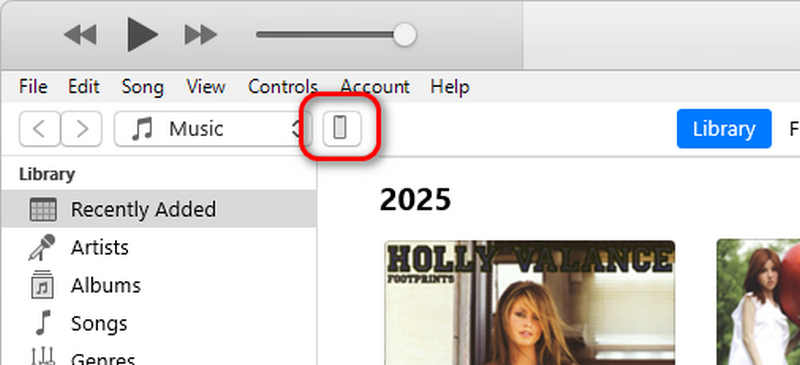
Step 1. Use a USB cable to connect your iPad to your PC. Launch iTunes on your Windows computer.
Step 2. Click the Device button in the top-left corner of the window.
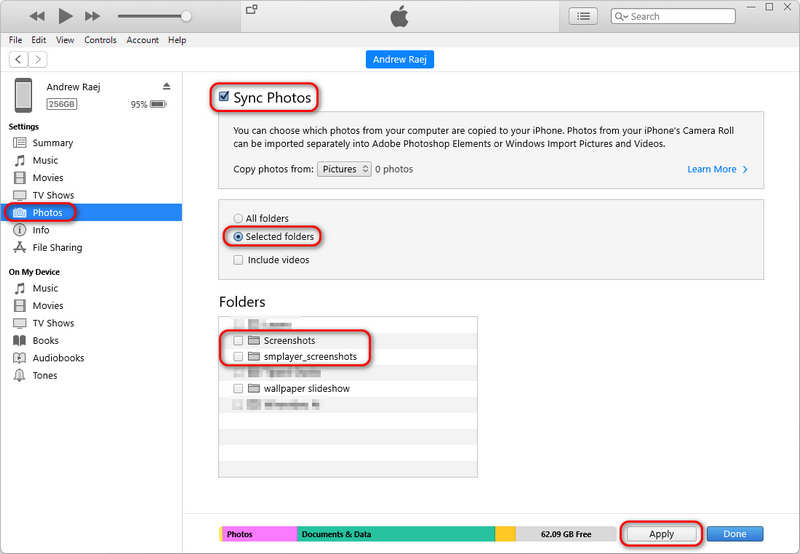
Step 3. Click on the Photos tab in the sidebar. Then, select Sync Photos and choose the specific folder on your PC where your images are stored.
Step 4. Click Apply or Sync in the bottom right corner to transfer photos from your computer to your iPad.
Tips: When you sync photos to iPad via iTunes, you cannot delete those photos directly on the iPad; they must be managed through the PC. Therefore, if you want to select photos to transfer, Apeaksoft iPhone Transfer is your best resort.
Part 3: How to Transfer Photos from Computer to iPad with iCloud
For those wondering, 'how do I sync photos from computer to iPad without cables?', iCloud is the most seamless answer. It keeps your library updated across all devices automatically. It can also sync your files and folders in Windows PC, that's why it can send photos from PC to iPad.
Step 1. Enable iCloud on iPad
Go to Settings > Your Profile > iCloud > Photos and toggle on iCloud Photos.
Step 2. Upload Photos from PC to iCloud
- Via Web: Go to iCloud.com, sign in, and select Photos. Click the Upload button to select images from your PC.
- Via iCloud App: Download iCloud for Windows. Check Photos, click Options, and enable iCloud Photos. Move your photos into the designated upload folder on your PC.

Pro Tips: Convert Photos to iPad Supported Formats Before Transferring
Although you've learned how to transfer photos from computer to iPad, you should ensure that your photo formats are supported by the iPad, or you cannot view the photos. iPad supports HEIC/HEIF, JPEG, PNG, GIF, and TIFF formats. Ensure that your photos are in those formats.
HEIC/HEIF is the most compatible photo format for Apple devices, so you can convert your photos to this format before transferring.
Part 4: FAQs of Transferring Photos from Computer to iPad
Can I transfer photos from PC to iPad without iTunes?
Yes, you can. You can use Phone Link (in Windows 11) and iCloud to transfer or sync photos from your computer to iPad or iPhone.
How do I transfer files from laptop to iPad with USB?
When you connect your iPad to your laptop, you can open the iPad storage on your laptop, and then directly put your photos into a folder
Does photo transfer from computer to iPad reduce quality?
It depends. If you transfer photos via iTunes or Appear iPhone Transfer, there's no photo quality loss. But if you sync photos via iCloud, the quality may get lost due to uploading.
Conclusion
This article tells you how to transfer photos from PC to iPad via three methods. iTunes can keep the original image quality, but you can only transfer photo folders. If you want to make the transfer more flexibly, Apeaksoft iPhone Transfer is your best choice. It allows you to quickly connect, select, and transfer desired photos from PC to your iPad or iPhone.
