Creating a photo slideshow on Mac can liven up memories and bring you to the wonderful moment when you took these photos. Plus, you can add your favorite theme, music and even text to make your slideshow even more personalized. If you are using a MacBook Pro, iMac or other Mac computers, the good news is that you can do it without installing any software. This article displays you how to make a photo slideshow with music using pre-installed apps on Mac.

- Part 1. How to Make a Slideshow on Mac with Photos App
- Part 2. How to Create a Slideshow on Mac in Preview
- Part 3. The Easiest Way to Make a Slideshow on PCs
- Part 4. FAQs of Making a Slideshow on Mac
Part 1. How to Make a Slideshow on Mac with Photos App
Now, Apple has replaced the iPhoto with the Photos app on Mac. So, you can sync photos crossing Apple devices and manage them on your computer. It also allows you to add music to your photo slideshow.
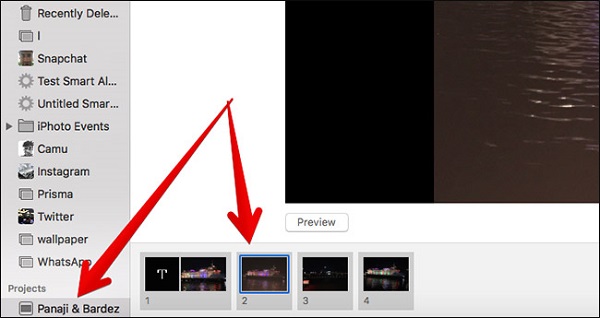
Step 1 Open your Photos app, go to Photos album and select the photos that you want to use in the slideshow.
Step 2 Next, click the Plus button at the upper right side and select Slideshow. On the pop-up dialog, select New Slideshow from the drop-down, drop a name and click OK to confirm it.

Step 3 Now, all selected photos are placed on the timeline. If you want to adjust the order, simply drag and drop the photos to the right position. In order to add text to a photo, select it and click the Plus button at the bottom right corner. Select Add Text and type what you want to say in the text box.
Step 4 Head to the right side and click the Themes button. Then you will see several built-in themes, which usually include title and transitions. Pick up your favorite one for your photo slideshow.
Step 5 To make a slideshow with music on Mac, click the Music button. Here you can add the theme music or your own music from iTunes library. Click the Clock button and you can set duration, transition and other options.
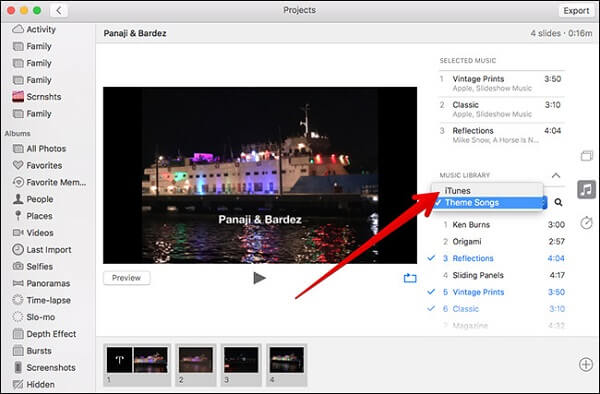
Step 6 Finally, play the slideshow made on Mac in the Preview panel, and you can find it in the Projects folder in Photos app. If you are satisfied, click the Export button, fill out the form and click Save to save the slideshow on iPhone.
Note: The Photos app is not a dedicated slideshow maker app, so it does not provide rich themes, transitions and other tools. Plus, the process is a bit complex.
Part 2. How to Create a Slideshow on Mac in Preview
Preview is another utility pre-installed on Mac. Similar to the Photos app, Preview is able to edit your photos simply. When it comes to create a photo slideshow, Preview works pretty different to Photos. Firstly, it can only make an instant slideshow. Moreover, it cannot add background music to your slideshow.
Step 1 Open the Finder app, find the desired photos and select all of them. Right-click on one selected photo, and select Open. Then they will be opened in Preview app.

Step 2 Click the View menu and select Slideshow to start playing the photo slideshow.
Step 3 You can see four buttons on the playback toolbar. The first one takes you to the first photo, the second one is used to pause the slide, and the third button takes you to the latest photo. If you click the last button, the slide will be closed.

Part 3. The Easiest Way to Make a Slideshow on PCs
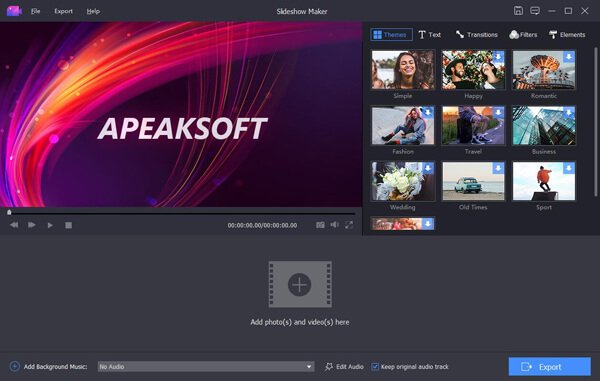
Apeaksoft Slideshow Maker is an easy-to-use slideshow maker application. It does not only provide extensive useful tools, but also simplify the workflow of photo slideshow making with music.
- Create a slideshow with photos, videos and music.
- Include extensive themes, transitions, elements and songs.
- Optimize photo quality while making slideshows.
- Simplify the slideshow creating within three steps.
In briefly, it is the easiest way to make a photo slideshow with music on your computer.
Download for WinHow to Make a Slideshow with Music
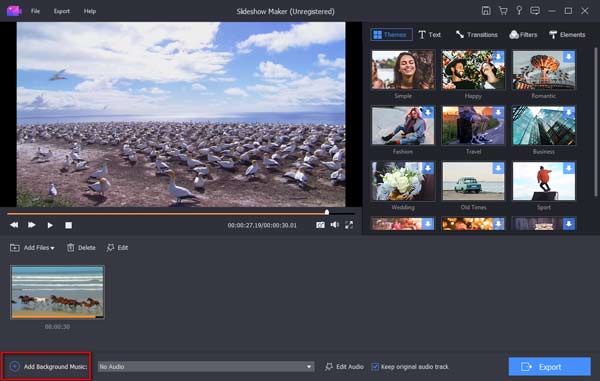
Step 1 Add photos into the slideshow maker app
Launch the slideshow maker after you installed it on your computer. Then click the big Plus button at the bottom to import the photos materials from your hard drive.
Step 2 Make a slideshow with music
Rearrange the photos based on your wish by drag-and-drop. Then select a background audio track from the drop-down list at the bottom. To set your own music, click the Plus button next to Add Background Music. Plus, you can change the duration and playback by hitting the Edit Audio menu. To use theme, text, filter and sticker, you can find them on the right side quickly.
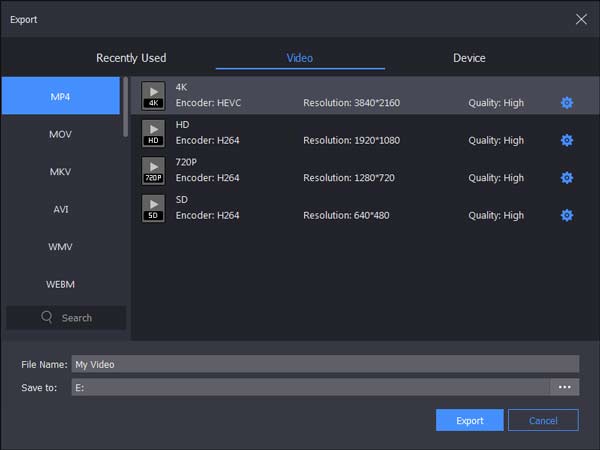
Step 3 Export the photo slideshow
When everything is done, click the Export button. Then select a proper video format, set the filename and destination, and click Export. Now, you can find play or share the slideshow.
Part 4: FAQs of Making a Slideshow on Mac
How do you make an iTunes slideshow on a Mac?
The Photos app allows you to add iTunes music as the background music of your slideshow. You can set it in the Music tab when creating a photo slideshow on Mac.
How to make Mac Preview slideshow settings?
Unfortunately, Preview can only make an instant slideshow. You cannot change the photo order or other settings.
What is the best program to make a slideshow on Mac?
The answer may be different depending on your need. To make a photo slideshow with music on Mac, the Photos app is a simple option. You can make an instant photo slideshow with Preview app. iMovie is the best free video slideshow maker for Mac.
Conclusion
This article has discussed how to make a slideshow on Mac in various situations. It is well-known that Apple introduced a lot of utilities into macOS 11. The Photos app, for example, is not only a photo manager, but also a slideshow maker for Mac. If you need more features, we suggest you to try Apeaksoft Slideshow Maker. For more questions, please write them down below this article.