How to Efficiently Save a Slideshow on Your iPhone
A slideshow is a presentation of a series of still or dynamic images on a project screen or digital display device in a prearranged sequence. That is a convenient way to view and organize photos. In the Photos app on iOS devices, you can create a slideshow to view a selection of photos and videos. This guide explains how to create and save a slideshow on your iPhone to organize your media files easily.
PAGE CONTENT:
Part 1: How to Save a Slideshow on iPhone in Photos
As mentioned previously, the slideshow feature in the Photos app is an ideal way to quickly show off your photos and videos. As long as you make a slideshow, it automatically saves as a Memory. Here are the steps to save an iPhone slideshow.
Step 1. Run the Photos app from your home screen.
Step 2. Go to the album in the Albums tab where the desired media files are. To select items across albums, go to the Library tab.
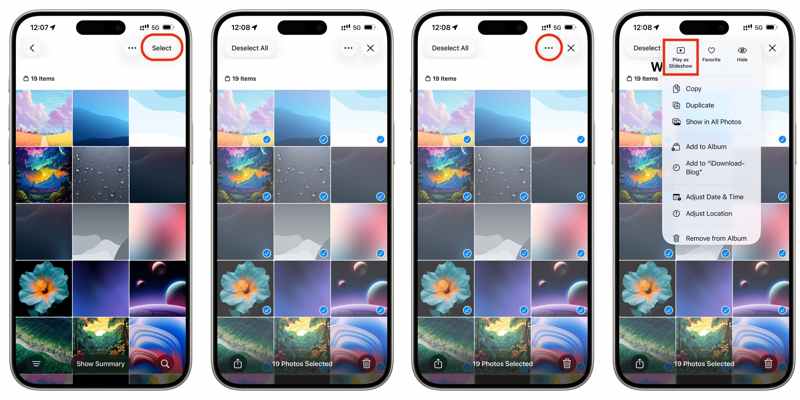
Step 3. Tap the Select button at the top right corner, and press each photo and video you want to use.
Step 4. Next, tap the More button with a three-dot icon and choose Play as Slideshow.
Step 5. Then, you will be taken to the preview screen.
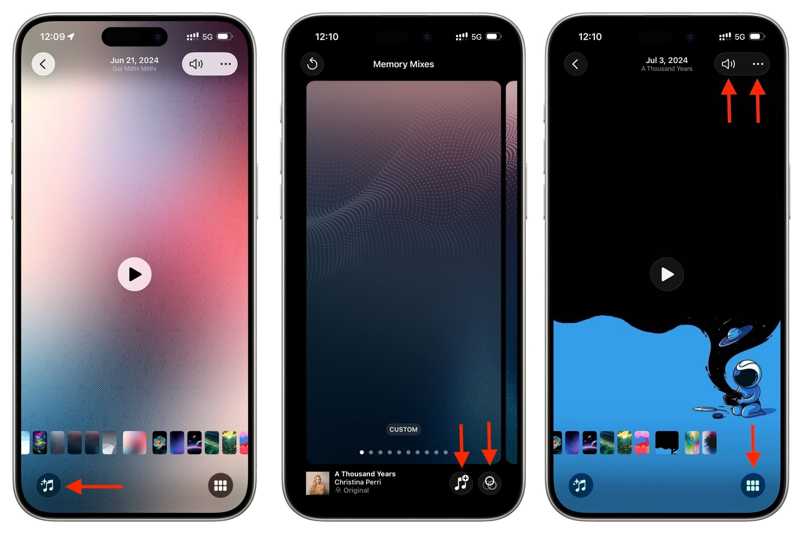
Step 6. Tap the Music button, choose Theme, and select an appearance to customize the slideshow's look.
Step 7. Then, tap the Music button, choose Music, and pick a track.
Step 8. Preview the work and tap Done if you are satisfied.
Step 9. Optionally, if you want to add or remove photos, tap the Slideshow button with a six-rectangle icon. Then, tap the Plus button to select or unselect the photos.
Step 10. If you wish to get other editing tools, tap the More button with a three-dot icon. Then edit the title, loop, and more.
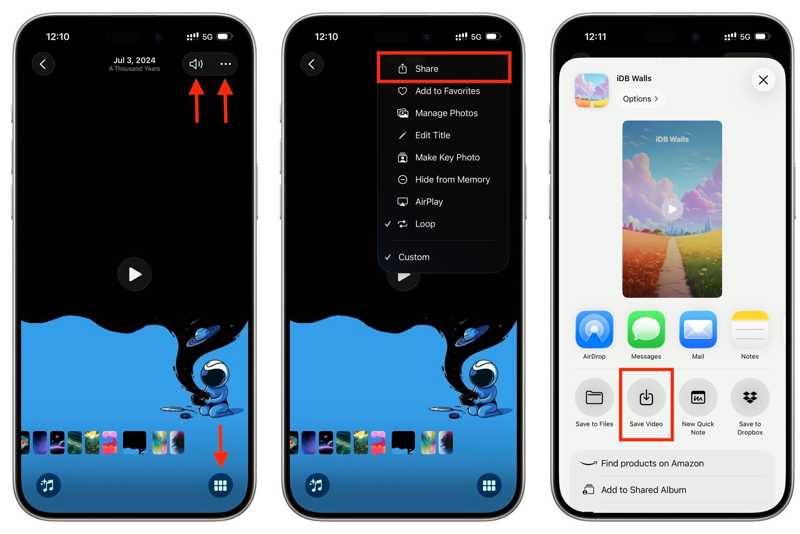
Step 11. To save the iPhone slideshow, choose Share from the More menu.
Step 12. Pick Save Video from the toolbox.
Note: If the slideshow includes a copyrighted song, you cannot save it.
Part 2: How to Save a Slideshow on iPhone with iMovie
The Slideshow feature in Photos is a simple way to save a slideshow on iPhone. However, it lacks functionalities, like transitions. Fortunately, iMovie offers more features for saving photos in a slideshow.
Step 1. Open the iMovie app on your iPhone.
Step 2. Tap Create Project and choose Movie.
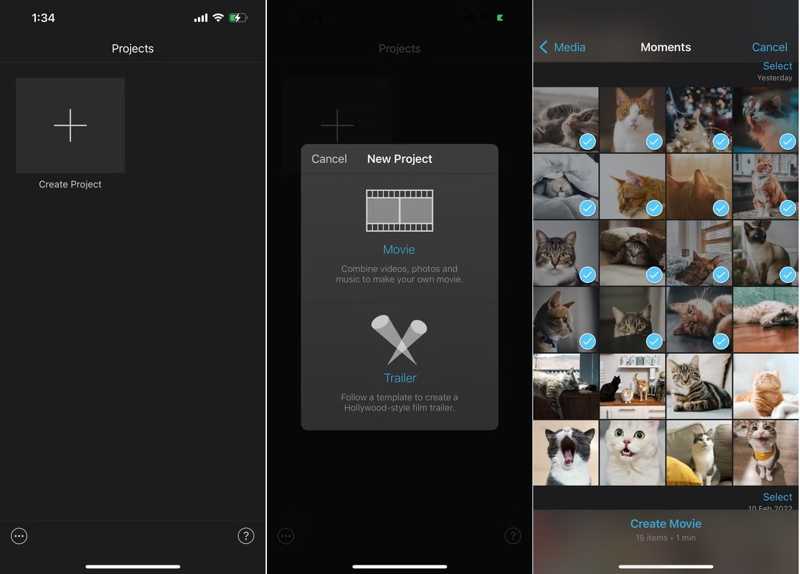
Step 3. Choose the desired images from your Camera Roll.
Step 4. Once selected, tap Create Movie.
Step 5. If you want to add a new photo, move the playhead to the right position, tap Add, select the item, and hit Add.
Step 6. To change a photo duration, tap it on the timeline. Move the yellow handles.
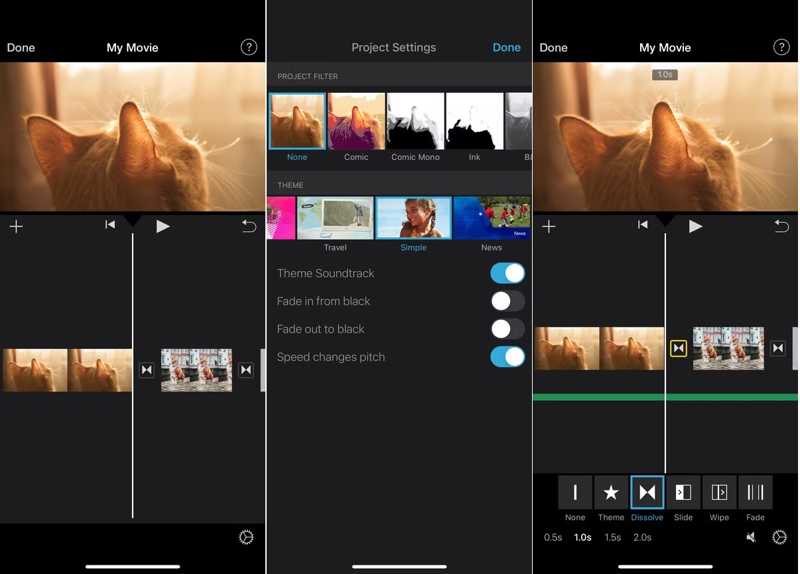
Step 7. Touch the background and tap the Settings button.
Step 8. Set the filter, theme, and audio track.
Step 9. Move the playhead between two photos, and select a transition effect.
Step 10. Once editing is done, tap Done.
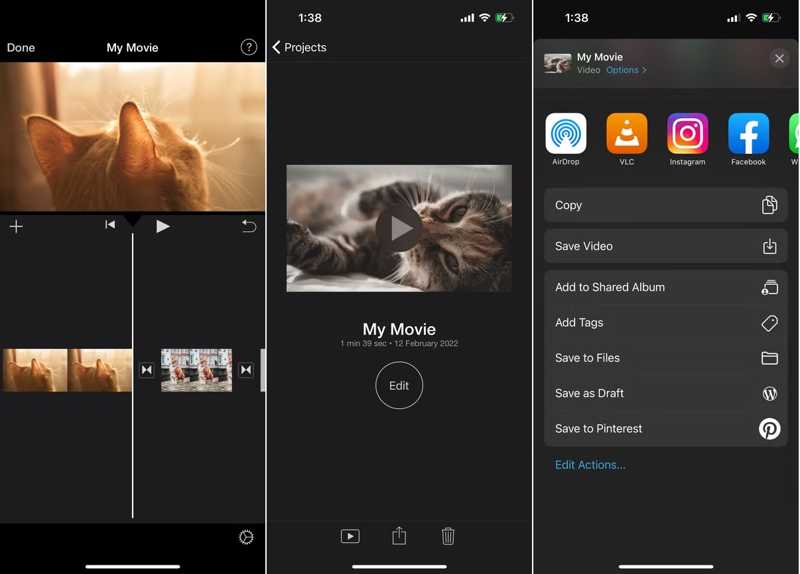
Step 11. Tap the Share button and choose Save Video to save the iPhone slideshow.
Further Reading
Part 3: Bonus Tip: How to Save an iPhone Slideshow to a Computer
Once you save a slideshow on an iPhone, it will create a new video file. It means that you create a copy of the selected photos. To free up space, you can save iPhone slideshows to your computer using Apeaksoft iPhone Transfer.

Downloaded by over 1,000,000 users
- Save slideshows from iPhone to computer with a cable.
- Preview iPhone slideshows for selective backup.
- Offer bonus features, like a photo converter.
- Support the latest editions of iOS and iPadOS.
Secure Download
Secure Download

How to Save iPhone Slideshows to a Computer
Step 1. Install iPhone Transfer
Download and install the iPhone slideshow transferring software on your PC or Mac. Launch it when you want to save iPhone slideshows. Connect your iPhone to your PC with a Lightning cable. If prompted, trust this PC.

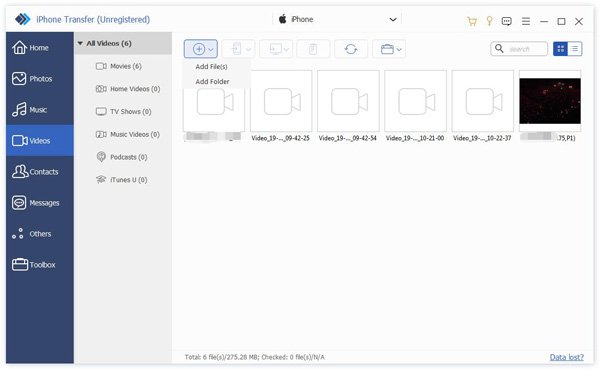
Step 2. Preview slideshows
Once your device is detected, go to the Photos or Videos tab, depending on your situation. View all slideshows on your iPhone.
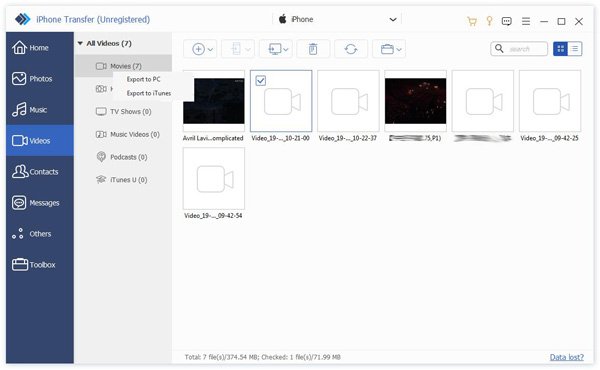
Step 3. Save iPhone slideshows
Select the iPhone slideshows. Click the PC button on the top menu bar and choose Export to PC. Navigate to the destination folder and save the iPhone slideshows. During the process, keep your iPhone connected to your computer.
Conclusion
This guide explained how to save iPhone slideshows. The built-in Photos app allows you to create a slideshow and save it as a video. If you want to get more editing tools and items, use the iMovie app to turn your photos and videos into a slideshow. If you find that your iPhone is insufficient for storing more photos and slideshows, Apeaksoft iPhone Transfer can help you move slideshows to your computer.
Transfer iOS data among iOS devices, computer and iTunes.
Secure Download
Secure Download
