Step into the captivating world of Photo Booth on Mac, where creativity finds its digital canvas. Developed by Apple for macOS, Photo Booth transforms your Mac into a dynamic photo and video capturing hub, boasting a myriad of effects and filters for an immersive experience. However, even in the sleek Mac environment, occasional technical hiccups may occur, necessitating troubleshooting to ensure a seamless Photo Booth experience. Understanding troubleshooting tips is vital to address camera issues, resolve software conflicts, or optimize performance. Join us as we explore the nuances of resolving Photo Booth video not working on Mac.

- Part 1. Why is My Photo Booth Video Not Working?
- Part 2. Why Photo Booth Won’t Record Video
- Part 3. FAQs about Photo Booth
Part 1. Why is My Photo Booth Video Not Working?
- • Insufficient disk space: Photo Booth needs enough disk space to save the recorded videos. If you need more free space on your computer, Photo Booth may be able to save the videos properly.
- • Camera permissions: Photo Booth needs access to your camera and microphone to record videos. Ensure you have granted these permissions in the System Preferences app.
- • Software conflicts: Other apps running on your computer may interfere with Photo Booth. Try closing all other apps before recording a video in a Photo Booth.
- • Outdated software: Ensure you use the latest macOS and Photo Booth versions. Apple regularly releases updates to repair bugs and enhance performance.
- • Hardware problems: If you have tried all of the above troubleshooting steps and your Photo Booth videos are still not working, there may be a problem with your camera or microphone hardware. Contact Apple Support for further assistance.
Bonus: Fix Video Not Working with Apeaksoft Video Fixer
Apeaksoft Video Fixer is a high-rated software designed to resolve various video issues efficiently. It specializes in repairing corrupted, damaged, or malfunctioning video files from diverse sources, including Photo Booth recordings. A user-friendly interface offers multiple repair options to address video problems such as playback errors, freezing, or incomplete recordings. This tool supports various video formats and employs advanced algorithms to restore video quality while retaining the original content. Apeaksoft Video Fixer ensures a hassle-free experience in repairing and salvaging precious video footage, making it a go-to solution for video troubleshooting needs. Follow these steps to fix the issue:
Step 1 Download and Install Apeaksoft Video Fixer
Begin by downloading Apeaksoft Video Fixer from the official website. Follow the instructions to set up the software on your computer.
Step 2 Launch Apeaksoft Video Fixer
Once installed, locate the Apeaksoft Video Fixer application in your programs or applications folder and open it. Explore it so you can quickly follow the steps below.
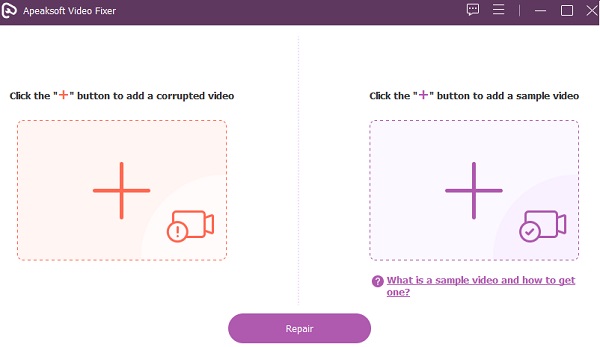
Step 3 Add the Problematic Video
Within the Apeaksoft Video Fixer interface, click on the + button. Select the specific Photo Booth video file encountering issues and import it into the software.
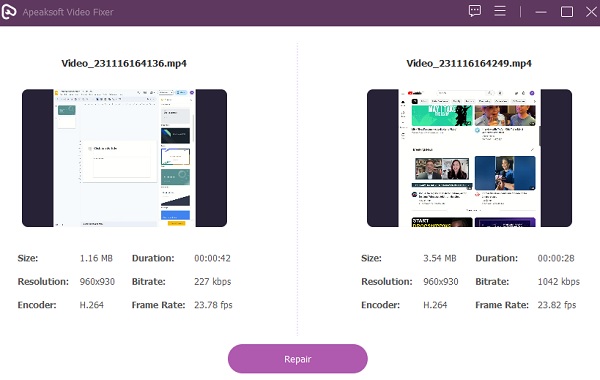
Step 4 Choose Repair Option
Depending on the nature of your video’s issue, Apeaksoft Video Fixer offers various repair options. Choose the Repair button and allow the software to process the video file.
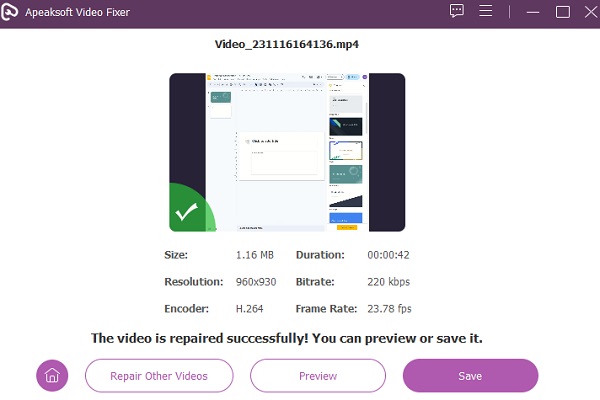
Step 5 Preview and Save
Once the repair process is completed, the software will display a preview of the fixed video. Take a moment to preview it. If satisfied with the repairs, save the video to your preferred location on your computer.
Part 2. Why Photo Booth Won’t Record Video
Several factors can contribute to Photo Booths not recording video. Here are some common reasons and troubleshooting steps to address the issue:
- • Camera Permissions: Ensure the Photo Booth can access your computer’s camera. Go to System Preferences > Security & Privacy > Camera, and make sure Photo Booth is listed and enabled.
- • Outdated Software: Check if your macOS and Photo Booth are up to date. Outdated software can lead to compatibility issues. Update your operating system and the Photo Booth app to the latest versions.
- • Storage Space: Insufficient storage space on your Mac can prevent video recording. Check your available storage and free up space if necessary. Once you have enough space, you can also do a photo recovery process.
- • Camera Connection: If using an external camera, ensure it’s properly connected to your computer. For built-in cameras, restart your Mac and try again.
- • Reset Photo Booth Preferences: Quit Photo Booth and open the Terminal (you can find it in Applications > Utilities). Enter the following command and press Enter: defaults delete com.apple.PhotoBooth. This will reset Photo Booth preferences. Restart the app and attempt to record again.
- • Reinstall Photo Booth: If the problem persists, consider reinstalling the Photo Booth. Move the Photo Booth app to the Trash, clear the Trash, and then reinstall the app from the Mac App Store.
- • Hardware Issues: If none of the above steps resolve the issue, there may be a problem with your camera or hardware. Test the camera with other applications to determine if it’s a broader issue.
Bonus: Recording with Apeaksoft Screen Recorder
If troubleshooting Photo Booth doesn’t resolve your video recording issues, consider using Apeaksoft Screen Recorder as an alternative. It stands as a versatile and user-friendly application designed to capture and record various on-screen activities on your computer. This software offers seamless recording capabilities, whether gaming sessions, online tutorials, video conferences, or any other on-screen content. It allows users to select specific screen areas for recording and enables audio capture from system sound or external sources like microphones. It also provides options for real-time editing during recording and facilitates the saving of recorded videos in various formats. Apeaksoft Screen Recorder emerges as a reliable tool, offering a comprehensive solution for all screen capturing needs with precision and ease.
Step 1 Download and Install Apeaksoft Screen Recorder
Begin by downloading Apeaksoft Screen Recorder from the Free Download button below. Follow the instructions to set up the software on your computer seamlessly.
Step 2 Launch Apeaksoft Screen Recorder
Once installed, open the application and navigate to the Screen Recorder mode from the main interface. Familiarize yourself with it for reference, then hit Video Recorder.

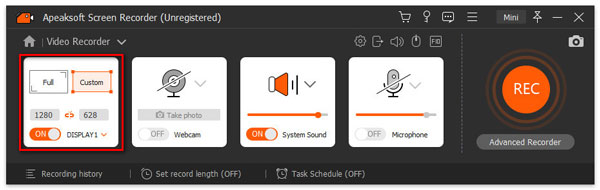
Step 3 Select Recording Area
Within the Video Recorder mode, click Select Region to define the specific area of your screen that you want to capture. Drag the cursor to encompass the desired recording area.
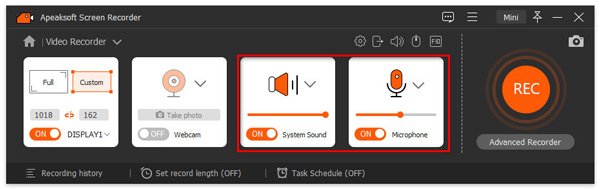
Step 4 Enable Audio and Start Recording
If you intend to capture audio along with your video, ensure that the Audio Recorder switch is activated within the application’s settings. The tool is one of the best audio recorder in the market. Afterward, start recording by clicking on the REC button.
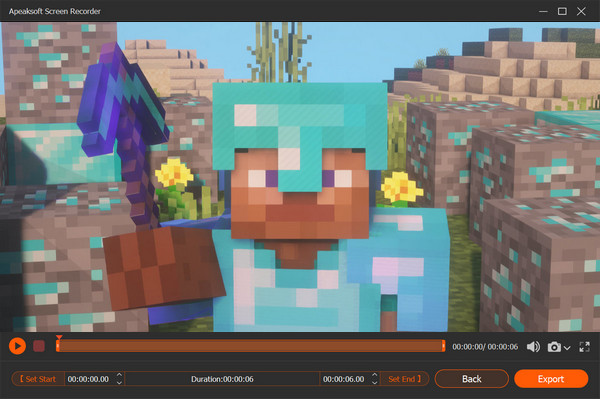
Step 5 Stop and Save
Once you’ve finished recording, click the Stop button from the floating toolbar. Before saving, take advantage of the preview option to review the video. Edit as needed, then hit Export to save the recorded video to your selected location on your computer.
Part 3. FAQs about Photo Booth
Why does Photo Booth stop syncing my videos?
Photo Booth may stop syncing videos due to unstable internet, low storage, incorrect app settings, outdated software, or temporary glitches. Ensure a stable connection, sufficient storage, and up-to-date software. Review and adjust app settings, restart Photo Booth or the device if needed, and check for network restrictions.
Do new MacBook models still have Photo Booth?
Yes, all new MacBook models come with Photo Booth pre-installed. Photo Booth is a popular app that permits users to take photos and videos with their computer’s built-in camera. It also includes a variety of effects and filters that can be used for photos and videos.
Is there a recently deleted album for Photo Booth on Mac?
Yes, there is a recently deleted album for Photo Booth on Mac. This album contains all the photos and videos you deleted from Photo Booth in the past 30 days. To access the recently deleted album, open Photo Booth and click the Recently Deleted tab in the sidebar.
Conclusion
In conclusion, troubleshooting the Photo Booth video greyed out issue is crucial for maintaining an enjoyable experience in capturing and sharing memorable moments. Whether addressing syncing challenges, video recording issues, or other technical glitches, understanding problem-solving nuances is essential. From checking internet connections and updating software to reviewing app settings and others, a proactive approach ensures that Photo Booth continues to serve as a reliable tool for visual storytelling. Embracing these troubleshooting strategies empowers users to overcome hurdles. This helps them to focus on creating and cherishing moments captured through the lens of this versatile application.