Recording audio on iPhone has become a popular thing in recent years. Some users choose to record audio on an iPhone to save or record important information. A part of users like to memorize some interesting things or record their lives by recording audio on iPhone. The aims of recording audio may be various for different people, but the ways you can use it are similar. If you are searching for a good way to record audio on an iPhone, you can read this article and get the best methods to record your audio.
What should be the best method to record audio on an iPhone? The article lists 5 methods you can get audio files. Whether you need to get the audio from your iPhone directly or even record audio files from your iPhone on Windows or Mac, you can find a suitable solution from the article.

- Part 1: How to Record Audio on iPhone with Native Screen Recorder
- Part 2: Ultimate Solution to Record iPhone Audio with Apeaksoft
- Part 3: How to Record Audio of iPhone with Voice Memos
- Part 4: How to Record Phone Calls with Google Voice
- Part 5: How to Record Music of iPhone with GarageBand
- Part 6: FAQs of Recording Audio on iPhone
Part 1: How to Record Audio on iPhone with Native Screen Recorder
Before iOS 11, iPhone users need to record audio on iPhone with the help of computer and other software. If you want to record audio on iPhone without an external device, there are some unofficial apps you could download and use, like Airshou. But these apps required complicated installations. Now, in iOS 11 and later, Apple has developed an official, native screen recording tool for you to record what you want. With this native screen recorder, you can not only record a video of your iPhone's screen, but you can also record audio and voiceovers. And the recorded videos will be saved on your Photos app. It can be said the easiest way to record your iPhone screen and audio. But this native screen record doesn't have an app, it only has a control option in the control center. And you need to enable it before you start recording. If you want to how to record audio on iPhone with native screen recorder, you can follow the next steps.
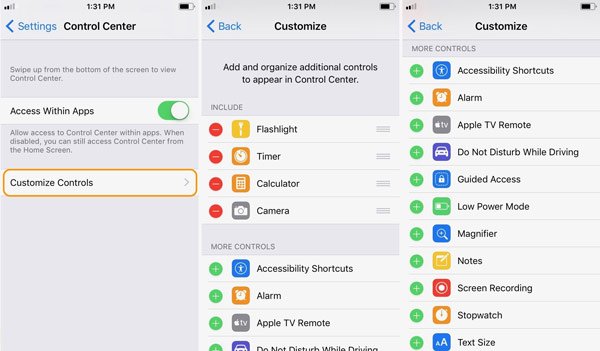
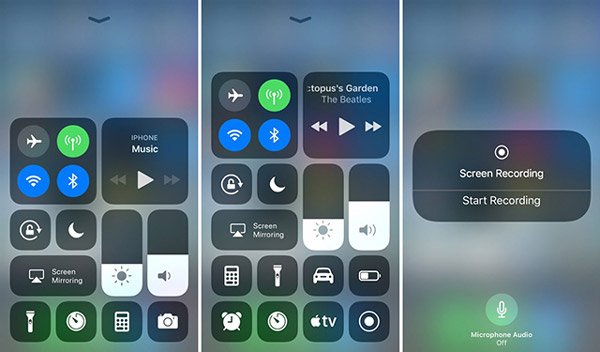
Step 1 Add Screen Recording shortcut
Go to Settings app and then scroll down to tap Control Center. Next tap onCustomize Controls from there. When you are in Customize page, scroll down to find Screen Recording and then tap on the green plus button, which is next to it to add Screen Recording to the Control Center.
Step 2 Start recording audio on iPhone
Once you have added this native screen recorder to control center, you can see the Screen Recording toggle that you can tap on easily after you open control center. When you want to record, just swipe up from the bottom of your screen to access control center and then tap on Screen Recording. After three seconds, the screen recording will begin.
Note: By default, screen recordings will also record any in-app music and sounds while the recording process begins. If you want to change the audio resource, such as recording your voice, you can simply perform a long press or 3D Touch on Screen Recording and set it as you want.
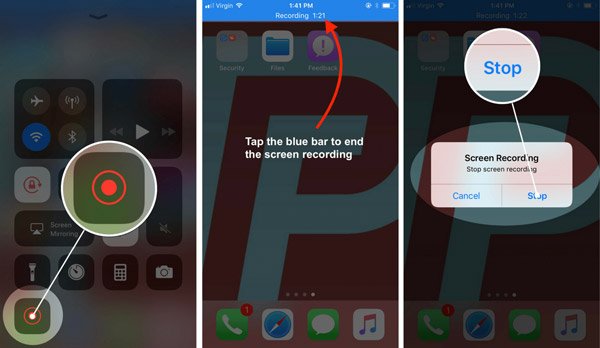
Step 3 Stop your audio recording on iPhone
When you want to stop this recording, you can access control center again and tap on the Screen Recording to stop it. Or you can long press or 3D Touch on it and then tap Stop Recording. In another way, you can simply tap the red recording indicator which is in the status bar, and then tap on Stop. And then this video will be saved in your Photos. You can also edit the audio filesas you want by clicking Edit button.
Don't Miss: How to Fix AirPlay Not Working
Part 2: Ultimate Solution to Record iPhone Audio with Apeaksoft
The best method we want to introduce to you is using Apeaksoft Screen Recorder to record audio on an iPhone. Apeaksoft Screen Recorder is a recorder software you can use to record your screen, as well as the audio and other sounds. It is one of the most professional software that provides you with the easiest way to mirror and record your iOS device on the computer. You can see your iOS screen on the computer in real-time and even record it with only one click. It is also a comprehensive app that fully supports all models of iOS devices, including iPhone, iPad, and iPod Touch.
What's more, it is compatible with the latest version of iOS. Moreover, Apeaksoft Screen Recorder supports you in customizing the recording settings according to your needs. After you finish your recording, you are able to output HD videos in MP4 format with high quality. You can also share what you record easily on websites. To know how to record audio on an iPhone, just read the next detailed steps.
Step 1 Download Apeaksoft Screen Recorder
Firstly, download Apeaksoft Screen Recorder from Apeaksoft official website to your computer. And then finish the installation according to the guides it gives you. When it is installed, you are able to launch it.
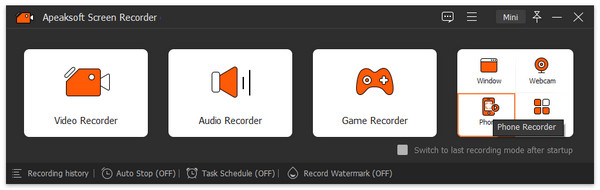
Step 2 Select Phone Recorder
Choose Phone Recorder on the interface.
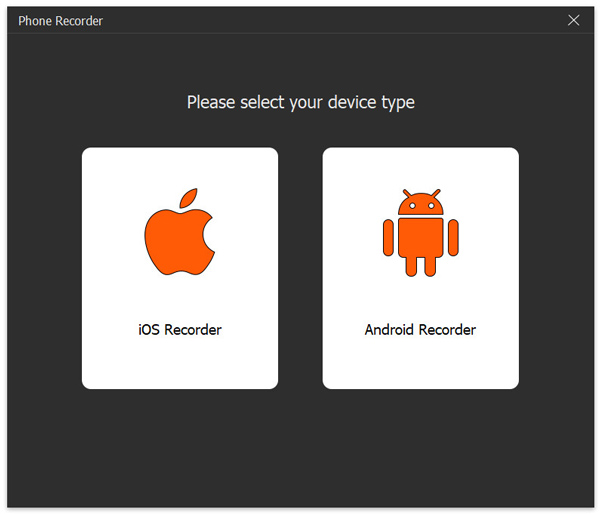
Step 3 Choose the type of your device
Select iOS Recorder on the new window.
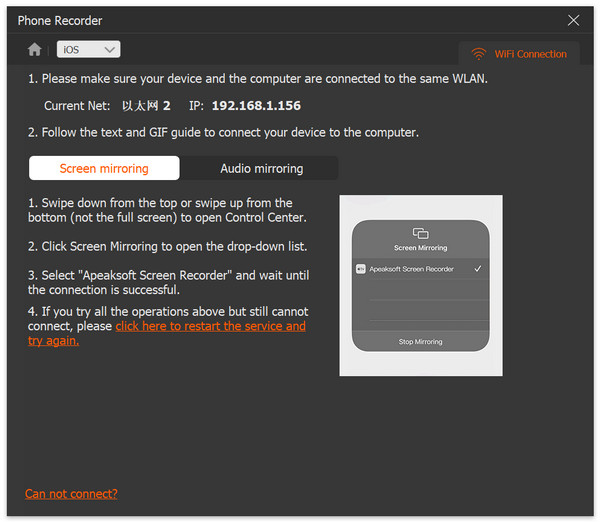
Step 4 Connect with the same Wi-Fi
The precondition for successfully recording an iPhone from the computer is that the two devices are connected to the same network. So check whether your iPhone and computer are located in the same network connection or not.
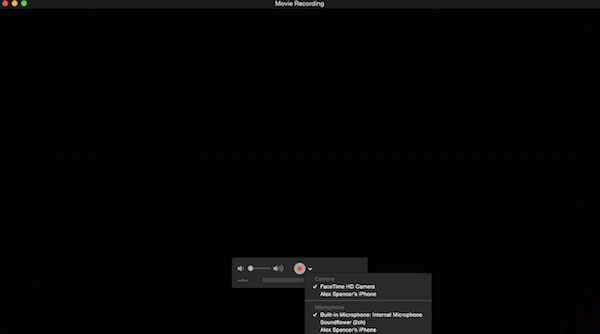
Step 5 Choose Audio mirroring. Then, connect your iPhone to the computer following the on-screen guide. Learn more about how to screen record on iOS 11 or above.
Part 3: How to Record Audio of iPhone with Voice Memos
If you haven't updated your iPhone to iOS 11/12/13/14/15/16/17/18/26, or you only want to record audio without any screen recording, you can use Voice Memos to record audio of your iPhone. But this way can't help you record any in-app music or sounds. You can only create voice memos with your device's built-in microphone, a wired or Bluetooth headset, or a compatible microphone. Voice Memos offers, by far, the simplest way to record audio on an iPhone from the iPhone microphone. And in what follows are the steps you can use Voice Memos to record audio of iPhone.
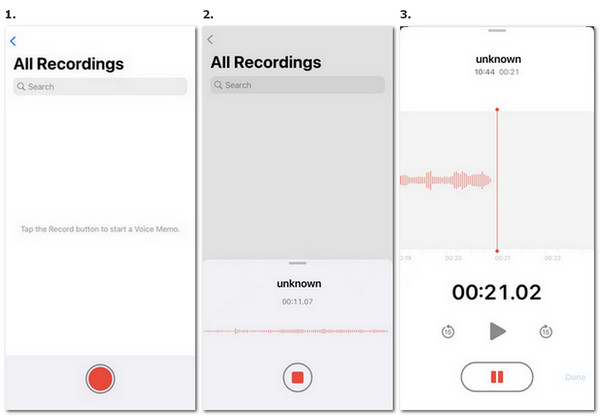
Step 1 Find and open the Voice Memos app in Extras. Or you can ask Siri to open the program on your iPhone.
Step 2 When you see the interface, you can tap the red record button to start recording the audio on your iPhone. When you want to finish, tap it again to stop it.

Step 3 If you are satisfied with the recording, just click the Done button.
Step 4 Now, you can give your audio a name and tap the Save option to save this voice recording.
Note: You can also share it by tapping the send button, edit it as you like by tapping Edit, as well as delete it.
Part 4: How to Record Phone Calls with Google Voice
If you want to record audio on an iPhone during a phone call, you can use Google Voice to accomplish this recording. Google Voice has a function to allow you to record phone calls after you set it up. If you want to learn the way to record phone calls, you can follow the next steps.
Step 1 Launch Google Voice
Launch the Google Voice app first. If you are having some trouble finding Voice, you can simply direct search for www.google.com/voice with your Internet browser.
Step 2 Go to Settings
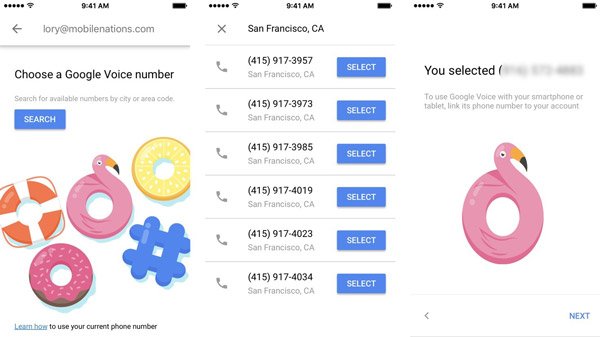
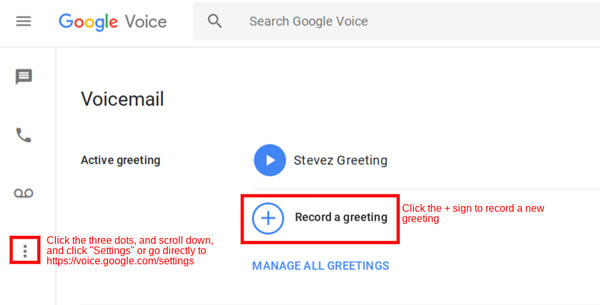
If you are the first time to use Google Voice, you will be asked to agree to Google's terms and conditions, and then you need to set up a new phone number. After you do these things, you can click the gear button, which is in the upper right-hand corner of the page. Then click the Settings menu.
Step 3 Record phone calls
On the Setting page, you need to select the Calls tab and then check the box which is next to Call Options. And now you are able to record phone calls with Google Voice. Just press the 4 key on your keypad when you want to record audio on your iPhone.
Note: As Google warns Voice users, different laws in different states prohibit or regulate phone call recording in different ways. So, before you record audio on your iPhone during a phone call, check the laws of your state or make sure the person you are calling with agree your recording. Once you have recorded a phone call successfully, it will be saved in your inbox. But Google Voice doesn't allow you to record outgoing calls.
Part 5: How to Record Music of iPhone with GarageBand
It is easy to use Screen Recording and Voice Memos to record audio on iPhone, but the two apps only offer you the basic functions, and you will not be able to find more advanced features from them. Except for recording audio with Screen Recording and Voice Memos, you can also download GarageBand on your iPhone to record music. GarageBand is a wonderful software developed by Apple, so it is very easy to get. With it you can create your music and edit it. You can also use such a great app to record audio on your iPhone. It provides you with more advanced features to record better music. You can follow the next steps to record music on your iPhone with GarageBand.
Step 1 Download and launch GarageBand.
Download GarageBand from the App Store and then launch it on your iPhone. Then My Songs page will open automatically. You can just tap the + button to create a new song in GarageBand.
Step 2 Choose Audio Recorder
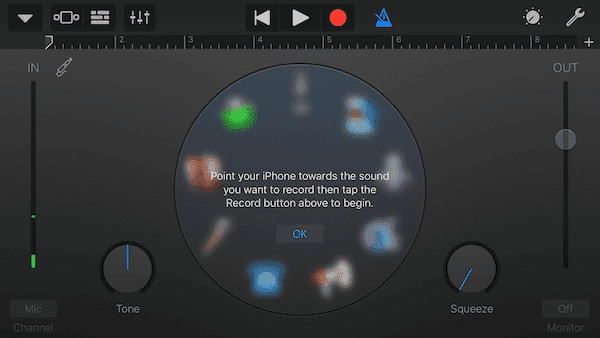
You can open the instruments browser, where you can slide to pick up your wanted instrument to record sounds or play music with GarageBand. You need to choose an Audio Recorder from these instruments.
Step 3 Record audio on iPhone.
Touch the Record button at the top control bar to record audio using the Audio Recorder. When you finish recording, just tap the Play button. Then, you can tap the button again to play the recorded audio.
Step 4 Edit your music
You can also pick up a preset audio effect to your recorded sounds with the Audio Recorder. And you can edit your audio tracks and recordings as you want.
Part 6: FAQs of Recording Audio on iPhone
How long can you record audio on an iPhone?
The maximum length for recording audio on an iPhone depends on various factors, such as available storage space, battery life, and the recording app you are using. By default, the Voice Memos app on an iPhone allows you to record audio for as long as there is sufficient storage space available.
Why is there no sound when I screen record on my iPhone?
If there is no sound during screen recording on your iPhone, you should check the sound settings. Go to the Control Center by swiping down from the top-right corner and tap Sound to make sure the volume is turned up. When you start screen recording, check if the microphone button is highlighted or toggled on. If not, tap on it to enable audio recording.
Is the iPhone good for audio recording?
Yes, the iPhone is considered to be good for audio recording. Apple puts a lot of emphasis on the quality of their devices' audio capabilities. The iPhone is equipped with high-quality microphones that can capture clear and detailed audio. The built-in Voice Memos app also allows you to record audio with ease.
Does recording audio reduce quality?
Recording audio can potentially reduce its quality, depending on various factors. If the source has low quality, such as background noise, it can impact the recorded audio. The environment in which you record can affect the quality. When saving recorded audio, compression and file format settings can impact the quality. Lossy compression formats like MP3 can reduce the audio quality.
Are iPhone voice memos good quality?
Yes, the Voice Memos app on an iPhone generally provides good audio quality for everyday use. The Voice Memos app allows you to record audio with ease, providing a convenient and straightforward interface. The recorded audio generally sounds intelligible, making it suitable for most general recording needs.
Check this post to get more iPhone screen recorder apps.
Conclusion
In what we mentioned above, we list 5 ways for you to help you record audio on your iPhone. You can record it easily only with your iPhone device. You can also record your audio with some professional software. If you like this article, just share these useful ways with your friends.