How to Effectively Resolve Unallocated Hard Drive Issue
"My Windows displays a drive as having unallocated space and prompts for the drive to be initialized. What exactly does unallocated mean, and how to resolve it?" When a hard drive suddenly shows as unallocated on Windows, you are facing two challenges. First, you have to fix the drive until it is usable again. Second, you need to recover all important files since the error could be a sign of partition corruption. This tutorial walks through the processes.
PAGE CONTENT:
Part 1: What an Unallocated Hard Drive Means
To store files on a hard drive, you need to allocate space. Allocating a hard drive means making the drive ready for data storage. In other words, you cannot write, read, or store data on a hard disk showing unallocated because it lacks a valid file system structure. The main causes of a drive becoming unallocated include:
1. Incorrect use of the disk partitioning.
2. File system or partition table corrupted due to sudden power failures, improper shutdowns, and more.
3. Mailware.
Part 2: How to Fix an Unallocated Hard Drive
Solution 1: Create a New Partition
One easy way to fix an unallocated space on a hard drive is to create a new partition. This solution will distribute a partition on the unallocated drive and build a file system using Disk Management.
Step 1. Right-click on the Start menu and choose Disk Management.
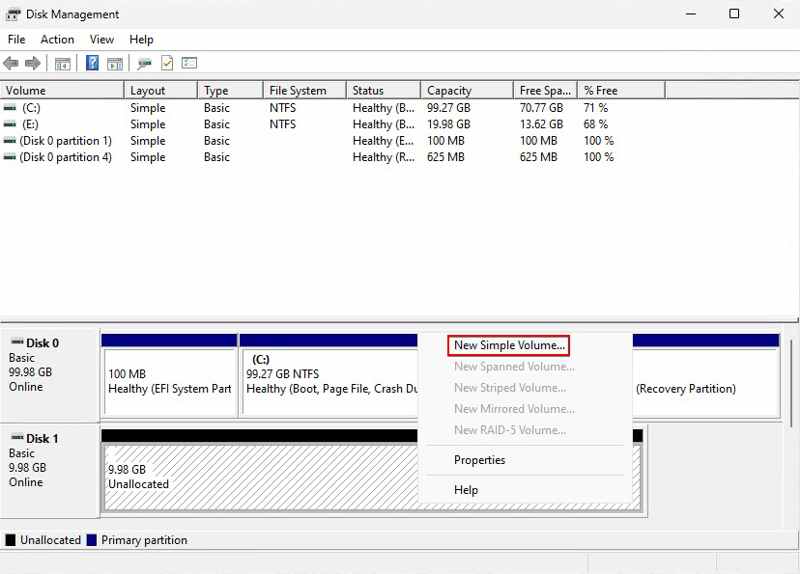
Step 2. Right-click the unallocated space and choose New Simple Volume.
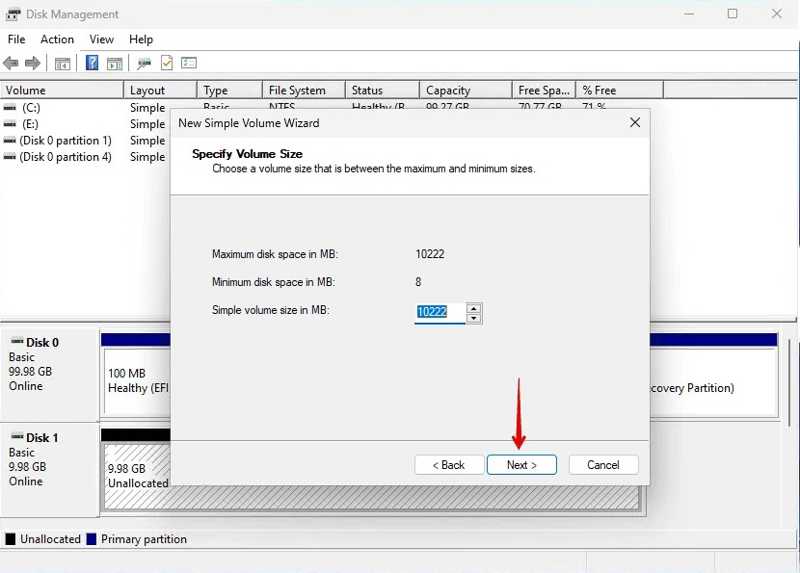
Step 3. Click Next on the New Simple Volume Wizard dialog.
Step 4. Set the volume size and click Next.
Step 5. Assign a drive letter and hit Next.
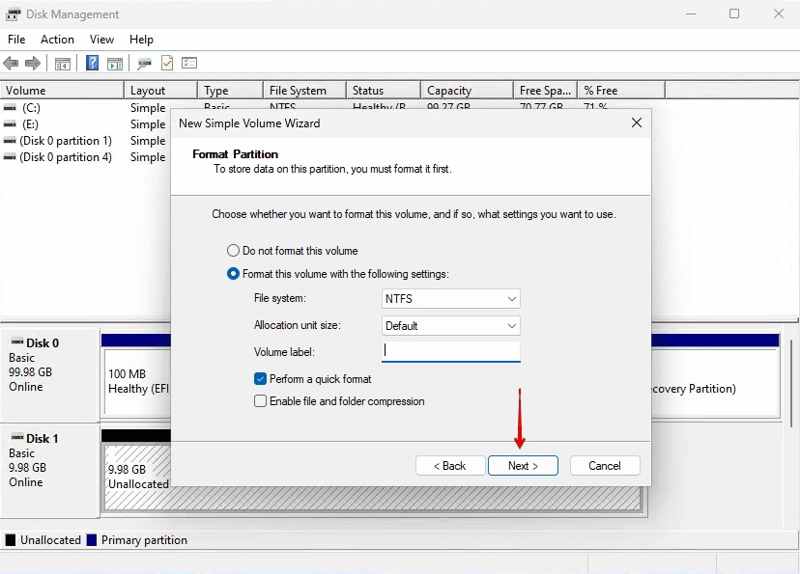
Step 6. Select Perform a quick format and pick NTFS as the file system.
Step 7. Finally, click Finish.
Note: If you create a partition on an SSD, leave about 10% of unallocated space on the hard drive.
Solution 2: Add Space to an Existing Partition
If you don’t wish to create a new partition, you can also fix an unallocated hard drive by adding it to an existing partition. This solution also completes in the Disk Management program on your PC.
Step 1. Open the Disk Management window.
Step 2. Right-click an existing partition you want to expand and choose Extend Volume.
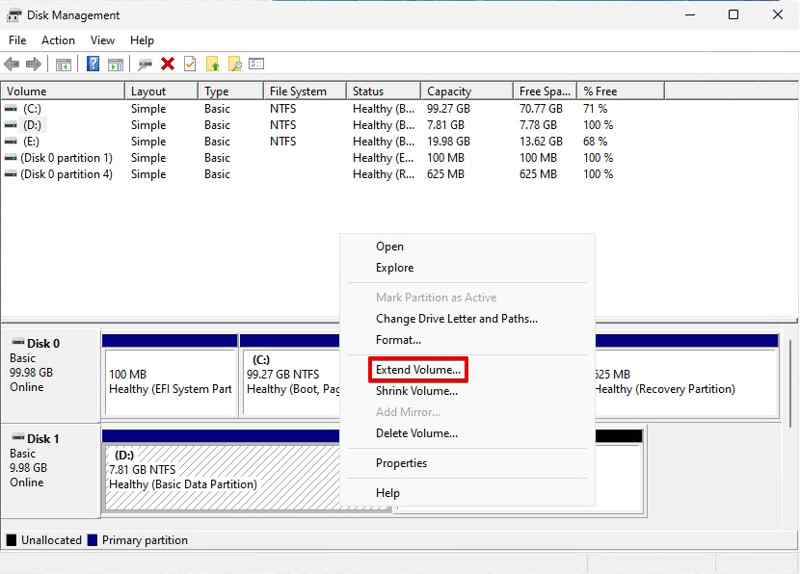
Step 3. Hit Next on the Extend Volume Wizard dialog.
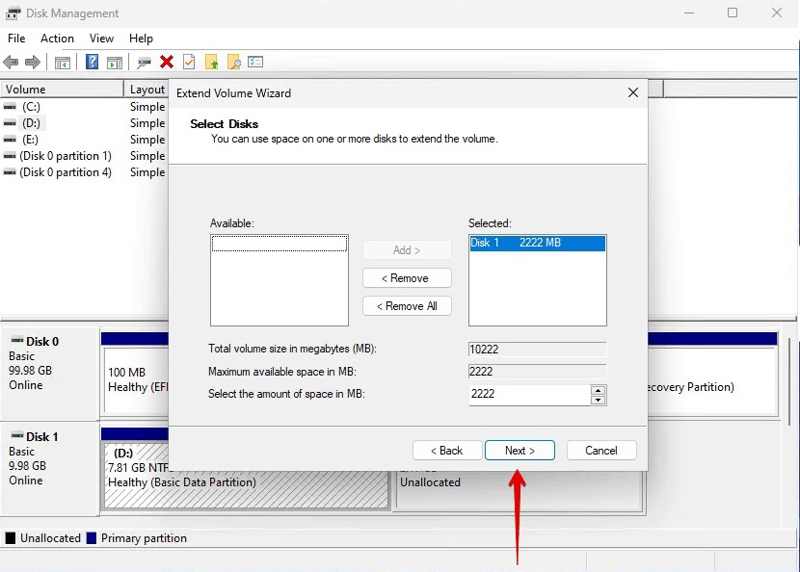
Step 4. Check the unallocated drive under the Selected pane and click Next.
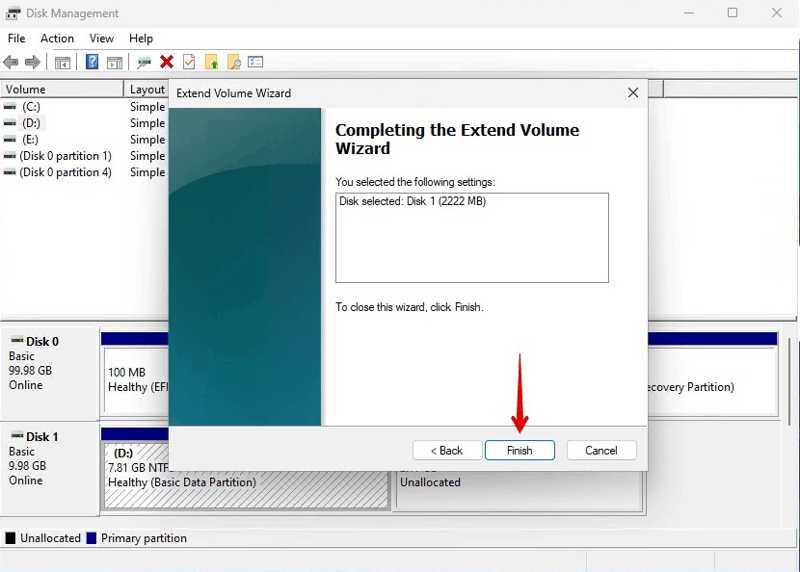
Step 5. At last, click the Finish button to confirm the action.
Solution 3: Try TestDisk
TestDisk is an open-source tool for fixing HDD unallocated drive. The downside is that the tool is command-based and doesn’t have a graphical user interface. Plus, it requires somewhat technical skills.
Step 1. Download TestDisk on your PC.
Step 2. Right-click the textdisk_win.exe and choose Run as administrator.
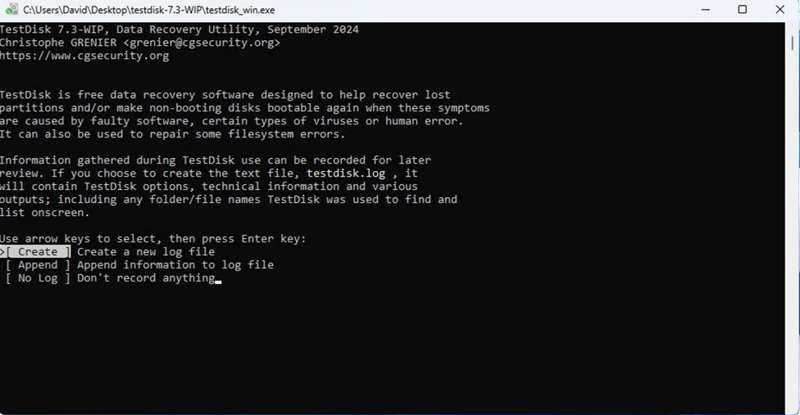
Step 3. Select Create with the arrow buttons and hit Enter.
Step 4. Then, select the unallocated drive on the list.
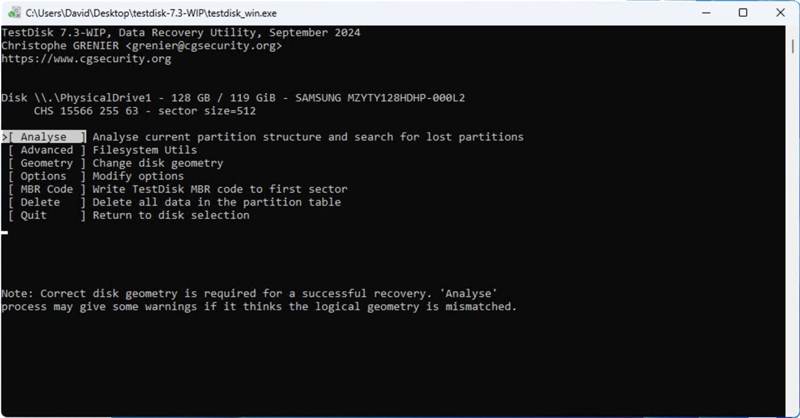
Step 5. Select Analyse and press Enter.
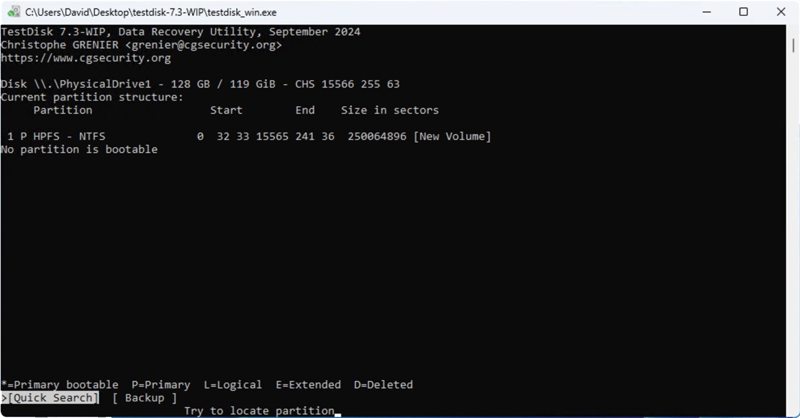
Step 6. Next, select Quick Search and let TestDisk scan your drive.
Step 7. Select the partition to recover and hit Enter.
Step 8. Select Write and press Enter to confirm it.
Part 3: How to Recover Data from an Unallocated Hard Drive
Apeaksoft Data Recovery is the easiest option to recover deleted data from an unallocated drive. The user-friendly design makes it a good option for average people. The built-in advanced technology can discover as much data as possible.
The Best Option to Recover Data from an Unallocated Drive
- Recover any file types from the unallocated drive.
- Available to various situations, including corrupted files.
- Protect the file quality during data recovery.
- Compatible with Windows 11 and macOS 10.7 or above.
Secure Download
Secure Download

How to Recover Data from an Unallocated Drive
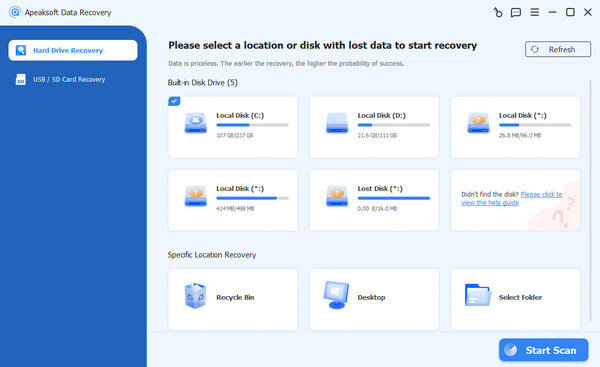
Step 1. Scan your drive
Run the best data recovery tool for an unallocated drive after installing it on your computer. Go to the Hard Drive Recovery tab and choose the unallocated drive. Click the Start Scan button to begin scanning your drive.
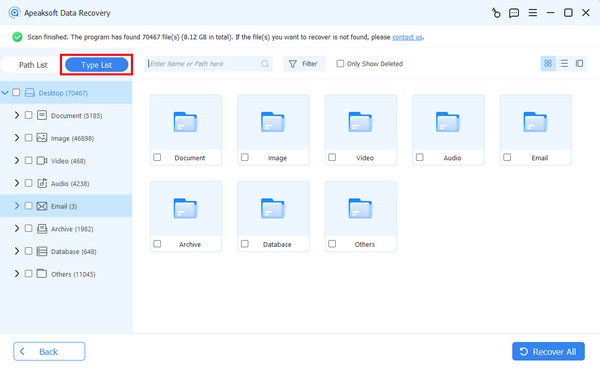
Step 2. Preview lost files
When data scanning finishes, you can preview the recoverable files by type and location. For example, go to the Type List tab, select the desired file types, and preview your files. You can quickly locate specific files with the Filter and Search features.
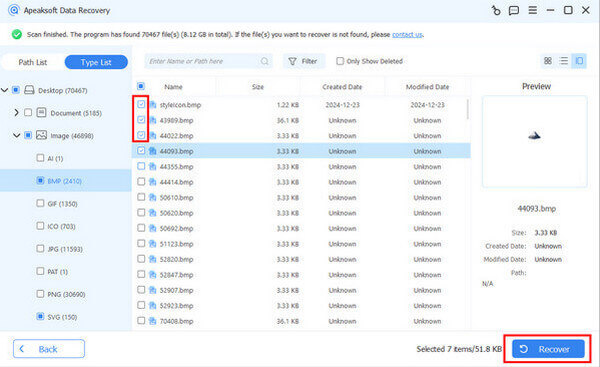
Step 3. Recover lost files
Finally, select all files you want to recover from the unallocated drive and click the Recover button. Set another location and confirm file recovery. For example, this program can help you recover deleted emails, videos, songs, and more.
Conclusion
This tutorial explained how to fix a hard disk showing unallocated and recover your files from the drive. You can pick an appropriate solution according to your needs and get rid of the problem quickly. Apeaksoft Data Recovery is the best option for data recovery from an unallocated drive. If you have other questions about this problem, please feel free to write them down below this post.
Related Articles
RAID drives are harder to recover because of their complex writing methods. But this article will offer specialized RAID data recovery software and services.
If your SSD disk suffers from data loss or is damages, you should recover lost files right now. Check some methods to recovery SSD data easily.
How can you deal with data loss on a small thumb drive? Check how to recover deleted files from a flash drive or a corrupted USB.
Cannot find your screenshots on the desktop? Don't worry! This post will show you where screenshots will go and how to retrieve deleted screenshots with ease!
