A Comprehensive NTDS Undelete Guide for Secure Recovery
NTFS undelete techniques can help recover your lost data effectively if an NTFS partition or file was deleted accidentally. Although this issue can be ascribed to many factors, there are multiple ways to bring your files back. This post will explain what this technique means, provide the best free NTFS undelete tools for safe recovery, and guide you through reliable manual solutions like Command Prompt and system backup restoration.
PAGE CONTENT:
Part 1: What Does NTFS Undelete Mean?
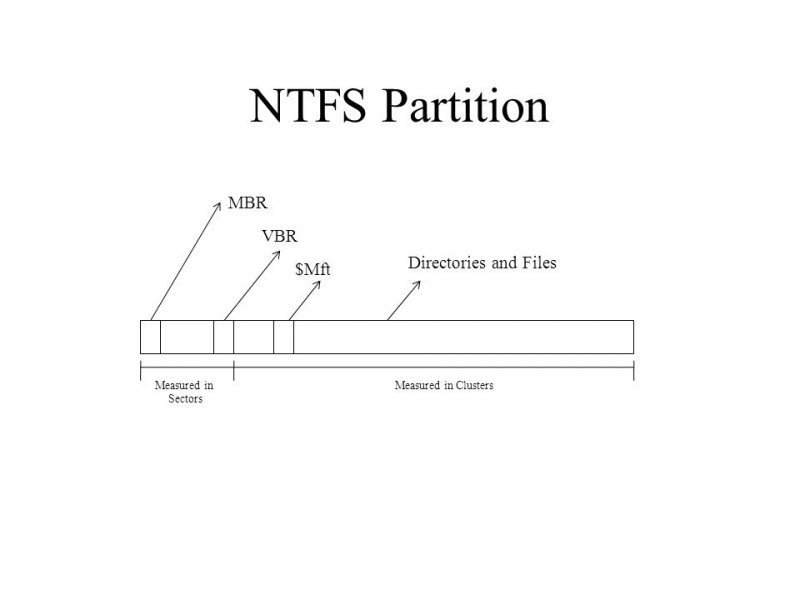
NTFS undelete refers to restoring files or partitions that have been deleted, lost, or formatted on an NTFS file system. Since the NTFS structure marks deleted data as available space rather than instantly erasing it, specialized tools can scan and recover the information. If there's no new data that overwrites the old sectors, then the process of recovering data from NTFS partition will be capable of being performed, ensuring that you can retrieve crucial documents, photos, or programs even after accidental deletion.
As a process of restoring these lost or deleted files before new data overwrites them, this recovery can be done using professional data recovery software or built-in system tools. Whether the data loss was caused by accidental deletion, formatting, or corruption, recovering NTFS partition helps retrieve essential files safely from NTFS-formatted drives.
Part 2: One-Click NTFS Undelete Safely
When it comes to undeleting NTFS files, a professional recovery tool can ensure the safest and most effective process. Therefore, if you want to make sure all the essential data remains unaffected, a professional tool is required. Among all choices, Apeaksoft Data Recovery stands out as the best one to provide a one-click NTFS undelete solution.
Designed for both beginners and professionals, Apeaksoft Data Recovery makes the process of recovering the NTFS partition simple for those who want to recover data quickly. This makes it easy to restore exactly what you need while ensuring data integrity and file quality remain intact without risking overwriting or further corruption. To undelete NTFS partition easily and quickly, you can follow the detailed steps below:
Step 1. Download the installation package of Apeaksoft Data Recovery from the official website. Once finished, install it to proceed.
Secure Download
Secure Download
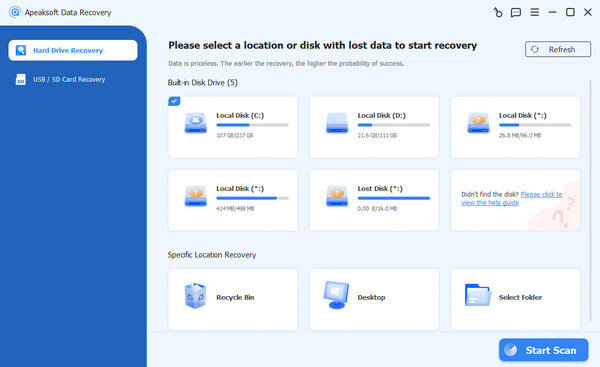
Step 2. Launch Apeaksoft Data Recovery and click Start Scan on the main interface to deep scan your computer and disk drives.
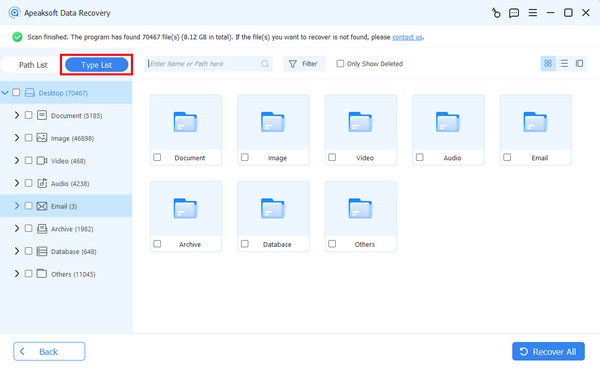
Step 3. Under the Type List tab, choose your desired data type and check all data and folders within your NTFS.
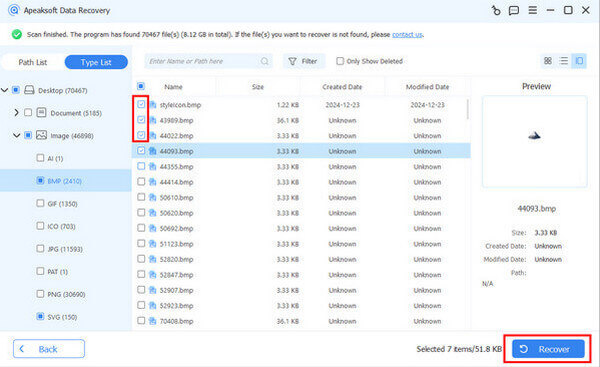
Step 4. Click to select the desired data and folders. Or you can click the check box of Local Disk (C:) in the left panel to select all. Once finished, click Recover to recover data from NTFS partition on your computer.
Part 3: NTFS Undelete via Command Prompt
If you want to deal with the problem with the default tool provided by Windows, it's actually feasible. For those who prefer manual recovery methods, Command Prompt (CMD) provides a built-in way to serve as a Windows recovery tool. By using commands like chkdsk, you can attempt to locate and restore hidden or corrupted files from your drive. Although this method doesn't guarantee full recovery, it helps handle minor errors or quick fixes without additional software.
Step 1. Press Win + R to summon the Run window. Type cmd to open the Administrator Command Prompt.
Step 2. In Administrator Command Prompt, type winfr source-drive: destination-drive: /regular/n\filename.ext to start undelete NTFS files.
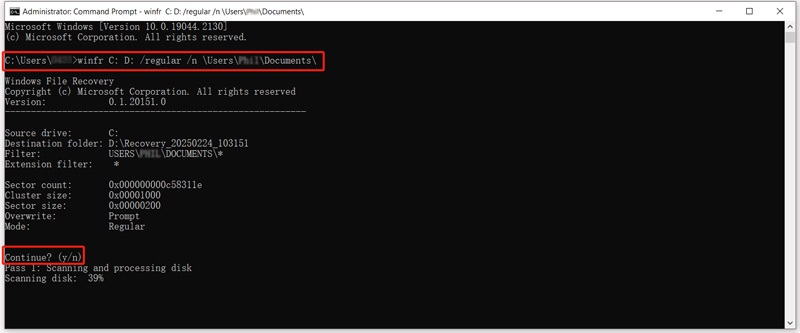
Step 3. You will receive Continue? (y/n) for the confirmation. Type y to recover lost NTFS partition.
Part 4: Backup and Restore for NTFS Undelete
Windows Backup and Restore also offers a reliable path for recovering deleted NTFS files without searching for professional data recovery services. If system backup was enabled previously, the process of NTFS undelete might be even simpler. This approach works best for restoring documents, media files, and configurations lost due to accidental deletion or system malfunction.
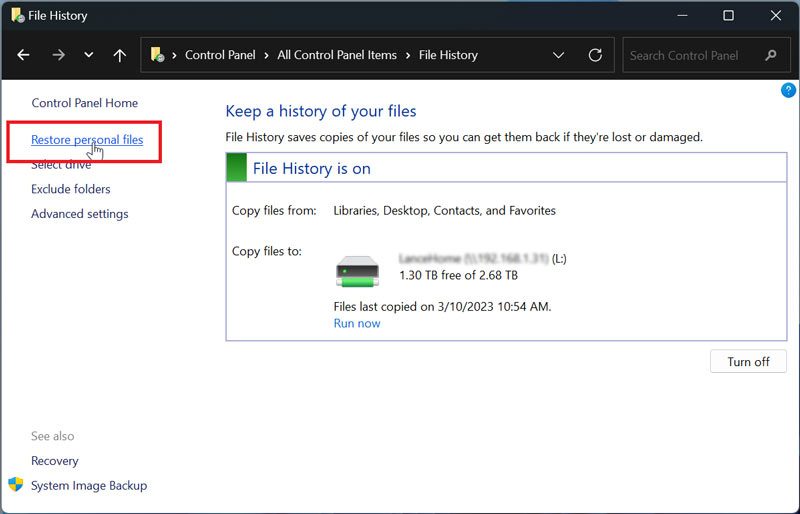
Step: Navigate to Restore personal files under the Control Panel Home tab, simply click Run now to perform NTFS undelete on your computer with the previous backup.
Conclusion
Recovering data from NTFS doesn't have to be complicated after reading this article. While Windows itself provides various built-in solutions to the process, it's recommended to use a professional tool to ensure the safety of your data stored in the NTFS partition. Apeaksoft Data Recovery is considered a trustworthy option for a safe and quick process of recovering lost NTFS partition. In addition, to avoid future data loss, create regular backups and stop using the affected drive immediately after deletion for the best recovery results.
